mybatisplus学习之入门案例(二)
目录
1、开发环境
2、创建数据库及表
a>创建表
b>添加数据
3.创建Spring Boot工程
a>创建工程
b>引入依赖
c>idea中安装lombok插件
4、编写代码
a>配置application.yml
b>启动类
c>创建实体
d>添加mapper
e>测试
f>添加日志
1、开发环境
2、创建数据库及表
a>创建表
CREATE DATABASE `mybatis_plus` /*!40100 DEFAULT CHARACTER SET utf8mb4 */;
use `mybatis_plus`;
CREATE TABLE `user` ( `id` bigint(20) NOT NULL COMMENT '主键ID',
`name` varchar(30) DEFAULT NULL COMMENT '姓名',
`age` int(11) DEFAULT NULL COMMENT '年龄',
`email` varchar(50) DEFAULT NULL COMMENT '邮箱',
 PRIMARY KEY (`id`) ) ENGINE=InnoDB DEFAULT CHARSET=utf8;
至于为什么id使用的时bigint这个后面会说到的。
b>添加数据
INSERT INTO user (id, name, age, email) VALUES (1, 'Jone', 18, '[email protected]'), (2, 'Jack', 20, '[email protected]'), (3, 'Tom', 28, '[email protected]'), (4, 'Sandy', 21, '[email protected]'), (5, 'Billie', 24, '[email protected]');3.创建Spring Boot工程
a>创建工程
我们这里以springboot工程为例,为什么呢,因为mybatisplus官网就是建议使用springboot,当然了如果没有使用过springboot的也是可以使用Spring来进行整合的。我这里就以springboot为例。
这是mybatisplus官网的建议
具体步骤我就不演示了,相信大家应该是知道如何创建springboot工程的,我的版本是2.6.6。创建完工程后我的目录是这样的
b>引入依赖
在springboot的pom文件中加入以下依赖
            com.baomidou
            mybatis-plus-boot-starter
            3.5.1


            org.projectlombok
            lombok
            true


            mysql
            mysql-connector-java
            runtime
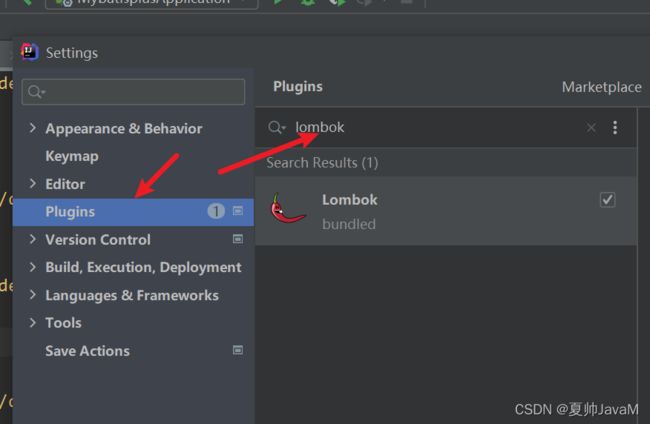
c>idea中安装lombok插件
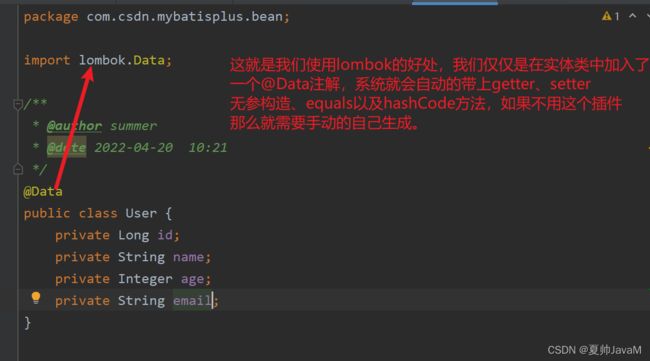
上步中我们引入了lombok的依赖,如果你不想用也是可以删除的,那么你在实体类中可以手动的添加getter、setter、构造器、equlas和hashCode。
如果你添加了lombok的话,那么也需要在idea工具中安装这个插件。
在setting--plugins然后搜索安装即可
4、编写代码
a>配置application.yml
当我们创建了springboot工程后生成的是properties配置文件,我个人比较习惯使用yml。所以我就在yml中进行配置了,这个看个人习惯没必要非得保持一致。
spring:
  datasource:
#    数据源
    type: com.zaxxer.hikari.HikariDataSource
#    驱动类
    driver-class-name: com.mysql.cj.jdbc.Driver
    url: jdbc:mysql://localhost:3306/mybatis_plus?serverTimezone=GMT%2B8&characterEncoding=utf-8&useSSL=false
    username: root
    password: 1230
注意:
1、驱动类driver-class-name
spring boot 2.0(内置jdbc5驱动),驱动类使用:
driver-class-name: com.mysql.jdbc.Driver
spring boot 2.1及以上(内置jdbc8驱动),驱动类使用:
driver-class-name: com.mysql.cj.jdbc.Driver
连接地址url
MySQL5.7版本的url:
jdbc:mysql://localhost:3306/mybatis_plus?characterEncoding=utf-8&useSSL=false
MySQL8.0版本的url:
jdbc:mysql://localhost:3306/mybatis_plus?
serverTimezone=GMT%2B8&characterEncoding=utf-8&useSSL=falseb>启动类
在Spring Boot启动类中添加@MapperScan注解,扫描mapper包 (也可理解为,扫描指定包下的mapper接口)
我这里把mapper放入的包为“com.csdn.mybatisplus.mapper” 因此我先创建这个包然后再在启动类中加入注解
c>创建实体
d>添加mapper
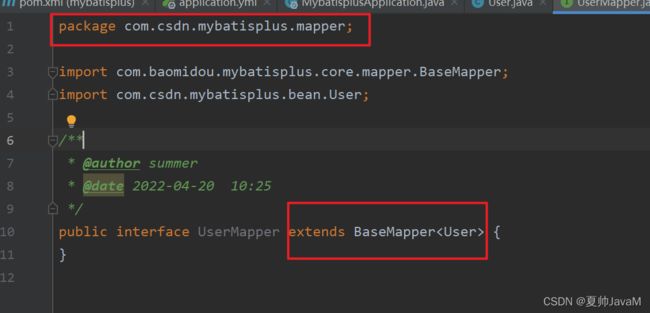
BaseMapper是MyBatis-Plus提供的模板mapper,其中包含了基本的CRUD方法,泛型为操作的
实体类型。我们只需要创建我们自己的mapper然后继承BaseMapper即可。
在刚才创建的mapper包下创建我们的UserMapper
e>测试
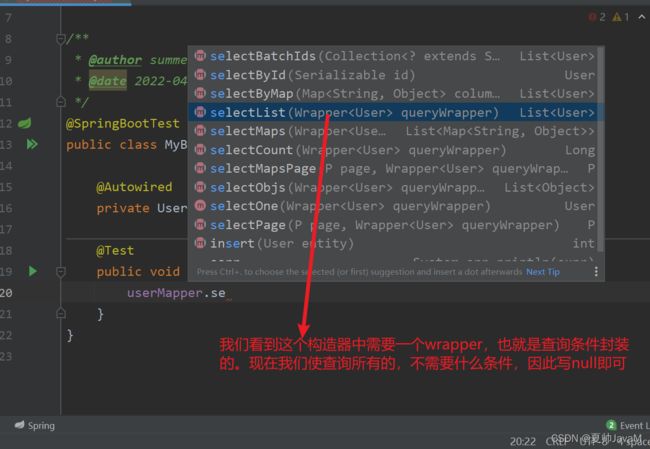
在我们的测试(test)下测试
package com.csdn.mybatisplus;

import com.csdn.mybatisplus.bean.User;
import com.csdn.mybatisplus.mapper.UserMapper;
import org.junit.jupiter.api.Test;
import org.springframework.beans.factory.annotation.Autowired;
import org.springframework.boot.test.context.SpringBootTest;

import java.util.List;

/**
 * @author summer
 * @date 2022-04-20  10:27
 */
@SpringBootTest
public class MyBatisPlusTest {

    @Autowired
    private UserMapper userMapper;

    @Test
    public void testSelectList(){
        List userList = userMapper.selectList(null);
//       这个地方的输出是使用的Java8新特性的方法引用,如果想学习Java8新特性的可以看我前面
//        介绍的有关Java8新特性的介绍
        userList.forEach(System.out::println);
    }
}
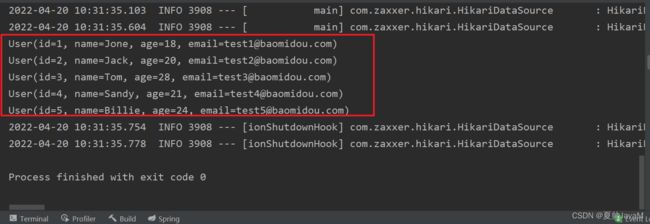
结果如下
但是我们看不到sql语句咋办呢?这就需要下一步了。
f>添加日志
mybatis-plus:
    configuration:
        log-impl: org.apache.ibatis.logging.stdout.StdOutImpl
然后再运行测试方法,我们同样可以看到结果,同时上面也会打印我们需要的sql语句


