分享一个2022年火遍全网的Python框架
最近Python圈子当中出来一个非常火爆的框架PyScript,该框架可以在浏览器中运行Python程序,只需要在HTML程序中添加一些Python代码即可实现。该项目出来之后便引起了轰动,马上蹿升到了Github趋势榜榜首,短短20天已经有10K+的star了。既然如此,小编今天就带大家来看看该框架是如何使用的。
HelloWorld
我们先来看一下简单的例子,代码如下:
print('Hello, World!')
其中Python代码被包裹在了py-script标签里面,然后我们在浏览器中查看出来的结果,如下所示:
要不来画个图
下面这一个例子当中,我们尝试将matplotlib绘制图表的代码放置到HTML代码当中去,以实现绘制出一张直方图的操作。首先是matplotlib代码部分,
import matplotlib.pyplot as plt
import numpy as np

np.random.seed(42)
## 随机生成满足正态分布的随机数据
rv = np.random.standard_normal(1000)

fig, ax = plt.subplots()
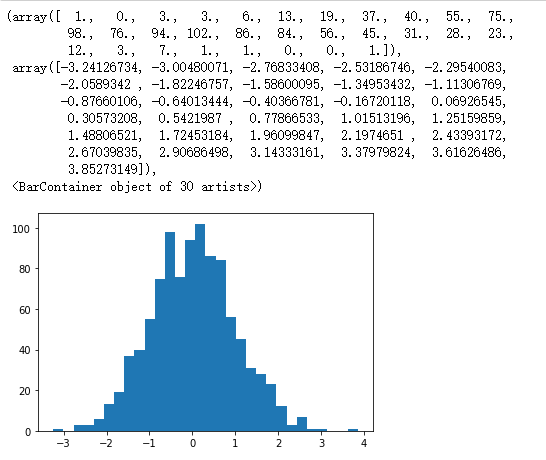
ax.hist(rv, bins=30)
output:
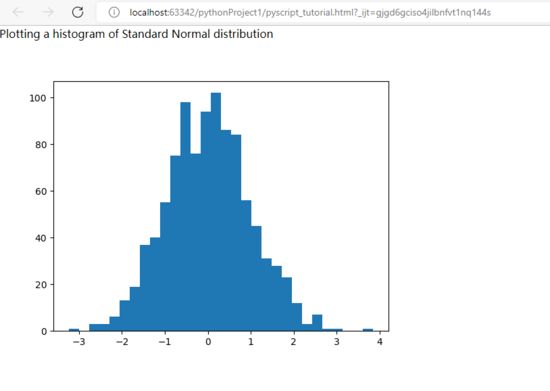
然后我们将上面的代码放置到HTML代码当中去,代码如下:
        - numpy
        - matplotlib


Plotting a histogram of Standard Normal distribution


    import matplotlib.pyplot as plt
    import numpy as np
    np.random.seed(42)
    rv = np.random.standard_normal(1000)
    fig, ax = plt.subplots()
    ax.hist(rv, bins=30)
    fig
output:
由于我们后面需要用到numpy和matplotlib两个库,因此我们通过py-env标签来引进它们,另外
再画个折线图
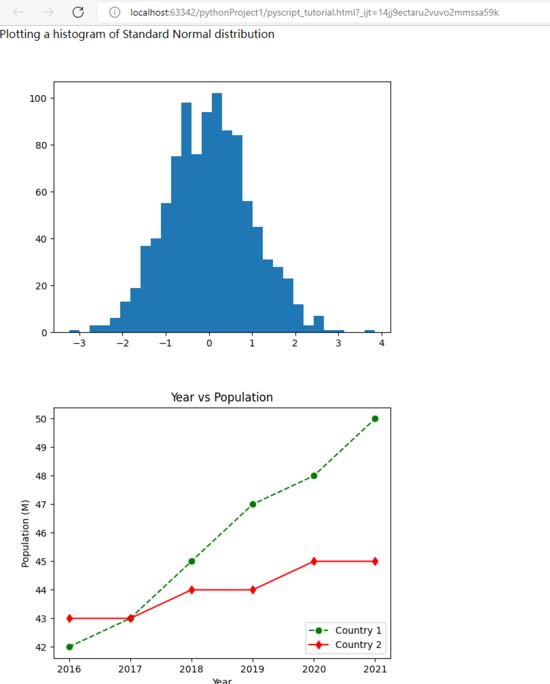
我们在上面的基础之上,再来绘制一张折线图,首先我们再创建一个div标签,里面的id是lineplot,代码如下:
同样地在py-script标签中放置绘制折线图的代码,output对应div标签中的id值:
.........
绘制折线图的代码如下:
import matplotlib.pyplot as plt
fig, ax = plt.subplots()

year1 = [2016, 2017, 2018, 2019, 2020]
population1 = [30, 46, 45, 55, 48]
year2 = [2016, 2017, 2018, 2019, 2020]
population2 = [43, 48, 44, 75, 45]

plt.plot(year1, population1, marker='o', linestyle='--', color='g', label='Countr_1')
plt.plot(year2, population2, marker='d', linestyle='-', color='r', label='Country_2')

plt.xlabel('Year')
plt.ylabel('Population (M)')
plt.title('Year vs Population')
plt.legend(loc='lower right')
fig
output:
现阶段运行带有Pyscript的页面加载速度并不会特别地快,该框架刚刚推出,仍然处于测试的阶段,后面肯定会不断地优化。要是遇到加载速度慢地问题,读者朋友看一下是不是可以通过更换浏览器得以解决。


