vue nodejs mysql_Nodejs+vue(express + Element-ui + mySQL)全栈——实现简单的博客文章管理后台...
刚开始学习前端的时候,总觉得全栈离自己很远,梦想着有一天我也能自己写完整个项目。经过这段时间的学习,从慢慢接触到一点点深入,我发现在我眼里的全栈开发其实并没有那么复杂。这次我使用一个简单的demo作为例子,向大家简单介绍一下如何独自完成前端和后端。
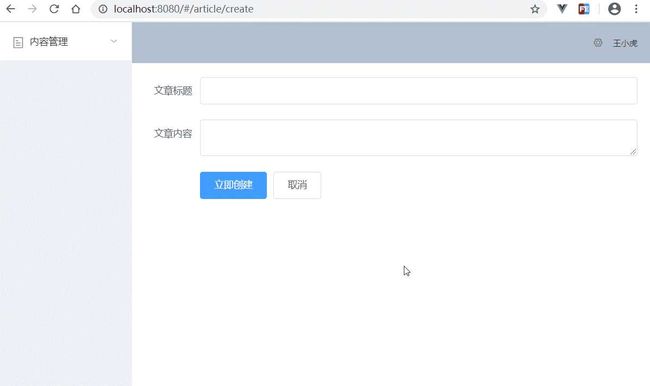
简单的博客文章管理后台:文章的增删改查,这里我们把 新建文章 作为一个 view (相当于一个页面),删除和修改放到一个 view,文章列表作为一个 view,总共三个view。
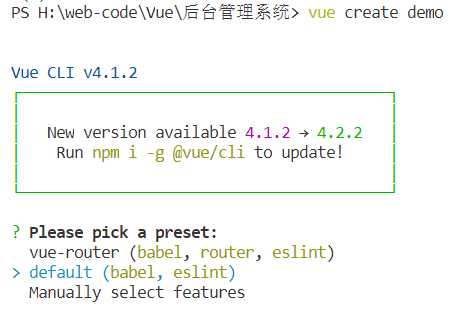
第一步:打开终端,创建一个vue项目,demo是自己命名的文件名,配置直接default默认的就好。
1 vue create demo
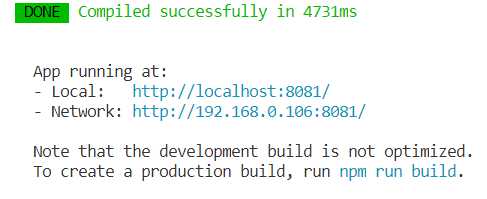
第二步:项目创建好之后按照提示进入项目文件夹,并运行它。
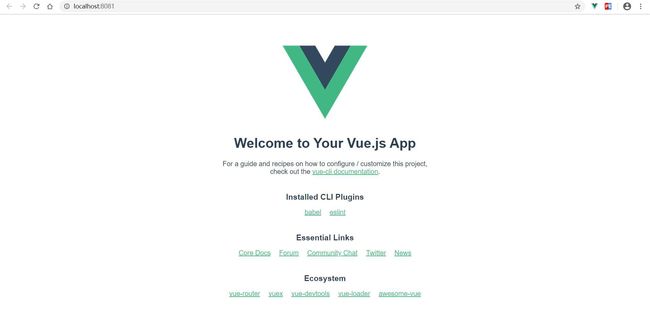
这时我们打开上面的任意一个地址(ctrl + 单击),会跳转到这个页面
这个页面对应到项目文件就是 src 下面的 App.vue ,相当于 vue 的根组件,里面包含了一个子组件HelloWorld,可以在 components 文件夹找到。
因为我们要写一个简单的文章管理后台,基本都是表单内容,用不到能复用的子组件,所以我们将子组件HelloWorld删除。
第三步:在项目文件打开终端,安装 Element-ui 和 router
在 src 下创建一个 plugins 文件夹,里面创建一个 element.js 文件,写入以下代码:
1 import Vue from ‘vue‘
2 import Element from ‘element-ui‘
3 import ‘element-ui/lib/theme-chalk/index.css‘
4
5 Vue.use(Element)
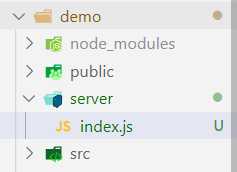
第四步:到这里我们先写后端,在项目根目录下新建 server 文件夹,在里面新建一个 index.js文件
写入以下代码
1 const express = require(‘express‘) //引入 express
2 const app = express() //实例一个 express 对象
3
4 app.use(require(‘cors‘)()) //解决跨域
5 app.use(express.json()) //express处理json数据
6
7
8
9 const mysql = require(‘mysql‘); //调用 MySQL模块
10
11 //创建连接
12 var db =mysql.createConnection({13 host: ‘localhost‘,14 user: ‘root‘, //用户名
15 password: ‘123456‘, //密码
16 database: ‘Article‘,//数据库名
17 port: 3306 //端口号
18 })19 db.connect( (err) =>{20 if(err) throwerr;21 console.log(‘连接成功‘);22 })23
24
25 app.get(‘/‘, (req, res) =>{26 res.send(‘index‘)27 })28
29 //新增文章
30 app.post(‘/api/article‘, (req, res) =>{31 let data =req.body;32 let sql = "INSERT INTO posts SET ?";33 db.query(sql, data, (err, result) =>{34 if(err) {35 console.log(err);36 } else{37 console.log(result);38 res.send(result)39 }40 })41 })42
43 //获取文章列表
44 app.get(‘/api/article‘, (req, res) =>{45 let sql = "SELECT * FROM posts";46 db.query(sql, (err, result) =>{47 if(err) {48 console.log(err);49 } else{50 console.log(result);51 res.json(result);52 }53 })54 })55
56 //删除文章
57 app.delete(‘/api/article/:id‘, (req, res) =>{58 let sql = `DELETE FROM posts WHERE id=${req.params.id}`;59 db.query(sql, (err, result) =>{60 if(err) {61 console.log(err);62 } else{63 console.log(result);64 res.json(result);65 }66 })67 })68
69 //获取文章详情
70 app.get(‘/api/article/:id‘, (req, res) =>{71 let sql = `SELECT * FROM posts WHERE id=${req.params.id}`72 db.query(sql, (err, result) =>{73 if(err) {74 console.log(err);75 } else{76 res.json(result)77 }78 })79 })80
81 //修改文章
82 app.put(‘/api/article/:id‘, (req, res) =>{83 let newTitle =req.body.title;84 let newBody =req.body.body;85 let sql = `UPDATE posts SET title = ‘${newTitle}‘,body = ‘${newBody}‘ WHERE ID =${req.params.id}`86 db.query(sql, (err, result) =>{87 if(err) {88 console.log(err);89 } else{90 res.json(result)91 }92 })93 })94
95 //监听端口3000
96 app.listen(3000, () =>{97 console.log(‘http://localhost:3000/‘)98 })
第五步:创建三个view,分别命名为CreateArticle,EditArticle,ListArticle.
写入以下代码:
CreateArticle.vue
1
2
3
4
5
6
7
8
9
10
11 立即创建
12 取消
13
14
15
16
17 exportdefault{18 data() {19 return{20 article: {21 title:"",22 body:""
23 }24 };25 },26 methods: {27 saveArticle() {28 this.$http.post(‘/article‘,this.article).then(res=>{29 console.log(res.config.data)30 this.$message({31 message:‘文章创建成功‘,32 type:‘success‘
33 });34 this.$router.push(‘/article/index‘)35 })36 }37 }38 };39
EditArticle.vue
1
2
3
4
5
6
7
8
9
10
11 保存
12 取消
13
14
15
16
17 exportdefault{18 data() {19 return{20 article: {21 title:"",22 body:""
23 }24 };25 },26 methods: {27 saveArticle() {28 this.$http.put(`/article/${this.$route.params.id}`,this.article).then(res=>{29 console.log(res.config.data)30 this.$message({31 message:‘文章更新成功‘,32 type:‘success‘
33 });34 this.$router.push(‘/article/index‘)35 })36 },37 fetch() {38 this.$http.get(`/article/${this.$route.params.id}`).then(res=>{39
40 this.article=res.data[0]41 })42 }43 },44 created() {45 this.fetch()46 }47 };48
ListArticle.vue
1
2
3
4
5
6
7
8 编辑
9 删除
10
11
12
13
14
15
16
17 exportdefault{18 data() {19 return{20 articles: []21 };22 },23 methods: {24 fetch() {25 this.$http.get("/article").then(res=>{26 this.articles=res.data27 })28 },29 edit(id) {30 this.$router.push(`/article/${id}/edit`)
31 },32 remove(id) {33 this.$http.delete(`/article/${id}`).then(res=>{34 console.log(res.data)35 this.$message({36 message:‘文章删除成功‘,37 type:‘success‘
38 });39 })40 this.fetch()41 }42 },43 created() {44 this.fetch()45 }46 };47
修改 App.vue
1
2
3
4
5
6
7 内容管理8
9 文章列表
10 新建文章
11
12
13
14
15
16
17
18
19
20 查看
21 新增
22 删除
23
24
25 王小虎
26
27
28
29
30
31
32
33
34
35
36 html,37 body{
38 padding:0;
39 margin:0;
40 }
41 .el-header{
42 background-color:#b3c0d1;
43 color:#333;
44 line-height:60px;
45 }
46
47 .el-aside{
48 color:#333;
49 }
50
51
52
53 exportdefault{54 data() {55 const item={56 date:"2016-05-02",57 name:"王小虎",58 address:"上海市普陀区金沙江路 1518 弄"
59 };60 return{61 tableData: Array(20).fill(item)62 };63 }64 };65
修改 main.js
1 import Vue from ‘vue‘
2 import App from ‘./App.vue‘
3
4 import router from ‘./router‘ //引入 router文件夹下的 index.js
5 import ‘./plugins/element.js‘ //引入 element-ui
6
7 Vue.config.productionTip = false
8
9 import axios from ‘axios‘ //引入 axios
10 Vue.prototype.$http = axios.create({ //将 axios方法定义到vue的原型上
11 baseURL: ‘http://127.0.0.1:3000/api‘ //基础url,前端发起请求要先拼接上这个地址
12 })13
14 newVue({15 router,16 render: h =>h(App)17 }).$mount(‘#app‘)
修改 router 文件夹下方的 index.js
import Vue from ‘vue‘import VueRouter from‘vue-router‘
//分别引入三个 view
import ListArticle from ‘../views/ListArticle.vue‘import CreateArticle from‘../views/CreateArticle.vue‘import EditArticle from‘../views/EditArticle.vue‘Vue.use(VueRouter)
const routes=[
{
path:‘/‘,
name:‘Home‘,
redirect:‘/article/index‘ //访问根路径,重定向到 /article/index
},
{
path:‘/article/index‘,
name:‘List-article‘,
component: ListArticle
},
{
path:‘/article/create‘,
name:‘create-article‘,
component: CreateArticle
},
{
path:‘/article/:id/edit‘,
name:‘edit-article‘,
component: EditArticle
}
]
const router= newVueRouter({
routes
})
exportdefault router
到此所有的配置完毕
最后在项目目录打开终端执行
1 npm run serve
在server文件夹目录打开终端执行
1 node server
最终效果
数据库中也能找到录入的数据。
结语:阴郁的日子总会过去,黎明就在前方,武汉加油!
原文:https://www.cnblogs.com/feng-fengfeng/p/12315561.html
