SpringBoot 集成 ES
Springboot 集成 ElasticSearch
我自己的源码已上传到码云,进入之后的springboot-es-api就是es的源码
源码地址
压缩包提取地址
压缩包提取码:zhes
说明:我的压缩包以及源码用的都是 7.12.1 版本,比博客版本高一点,但是没有其他影响,可以直接将压缩包和源码下载直接使用
ElasticSearch 和 Lucene 的关系:
Lucene 是一套信息检索工具包! jar包! 不包含搜索引擎系统!
包含的: 索引结构!读写索引的工具!排序,排序规则。。。工具类!
ElasticSearch 是基于 Lucene做了一些封装和增强。
ElasticSearch 安装
下载
Windows 下安装!
1.解压就可以使用 2.熟悉目录
bin    启动文件
config 配置文件
	log4j2  日志配置文件
	jvm     java虚拟机相关配置
	elasticsearch  elasticsearch的配置文件
lib    相关jar包
logs    日志
modules  功能模块
plugins  插件 比如ik
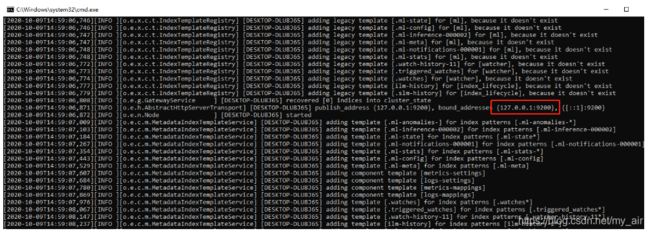
3.启动
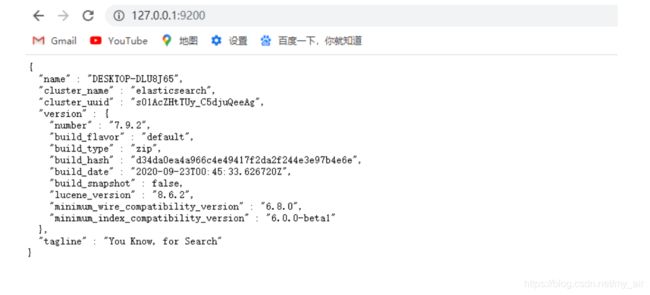
4. 访问9200
安装可视化界面 es head
npm install
npm run start
连接测试发现,存在跨域问题:
修改elasticsearch 下config的 elasticsearch.yml 配置文件
# 开启跨越支持
http.cors.enabled: true
http.cors.allow-origin: "*"
安装Kibana
Kibana官网
Kibana 版本要和es一致
启动测试
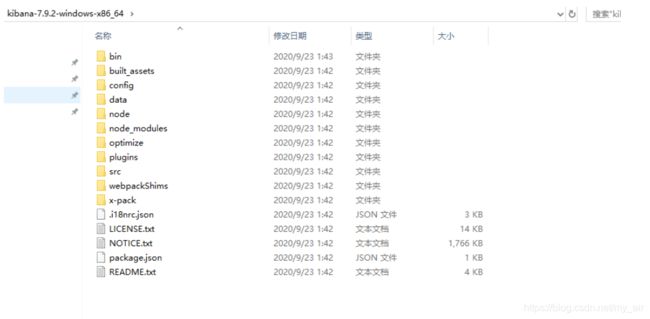
1.解压后目录
2. 启动
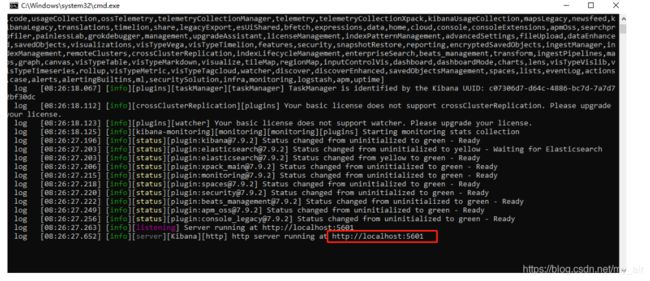
3.访问测试

http://localhost:5601/app/dev_tools#/console
什么是IK分词器?
分词: 即吧一段中文或者别的划分成一个个的关键字,我们在搜索时候会把自己的信息进行分词,会把数据库中或者索引库中的数据进行分词,然后进行一个匹配操作,默认的中文分词试讲每一个字看成一个词,比如 “我爱中国” 会被分为 “我”,“爱”,“中”,“国”,这显然是不符合要求的,所以我们需要安装中文分词器ik来解决这个问题。
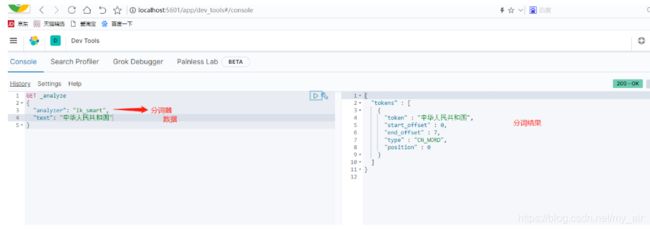
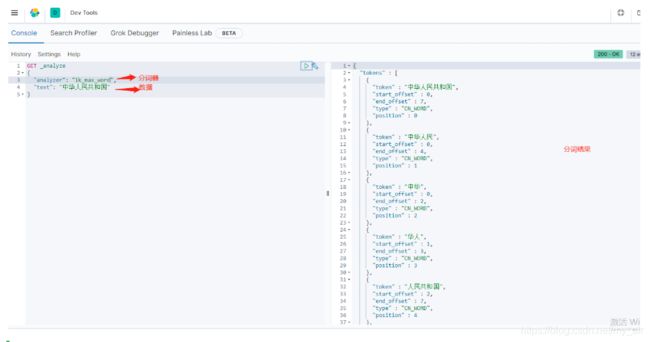
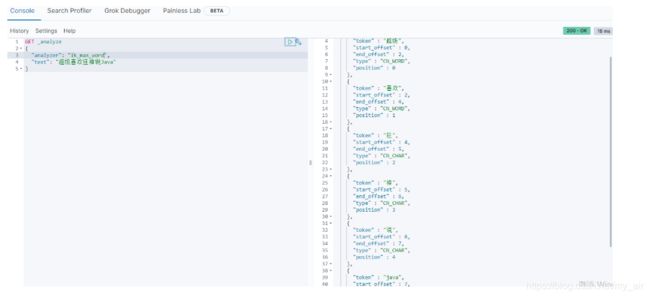
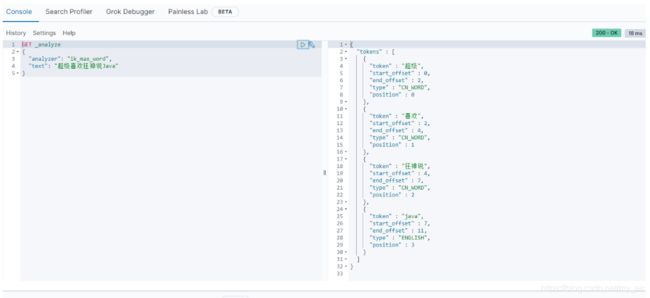
IK提供了两个分词算法: ik_smart 和 ik_max_word , 其中ik_smart为最少切分, ik_max_word 为最细粒度划分!
官网
1.下载 ik

2.解压放入到elasticsearch 下的 plugins 文件夹下(可以在 plugins 文件夹下新建一个ik的文件夹),
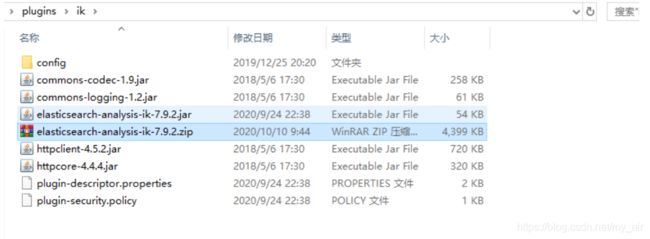
3. 重启观察es

可以通过 elasticsearch-plugin 这个命令查看加载进来的插件

4.使用kibana测试
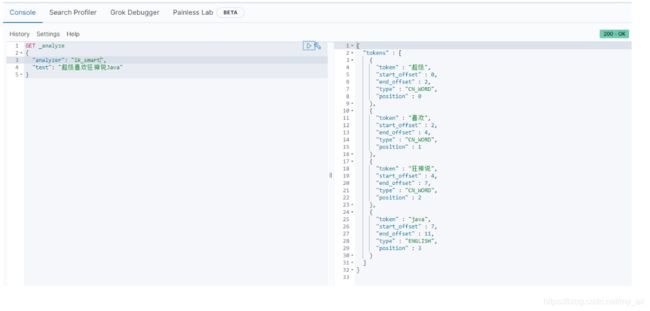
ik_smart为最少切分
ik_max_word 为最细粒度划分
输入:超级喜欢狂神说Java
这种自己需要的词,需要自己加到我们的分词器的字典中!
ik分词器增加自己的配置
创建新的文档,并在文档中添加自己的关键词
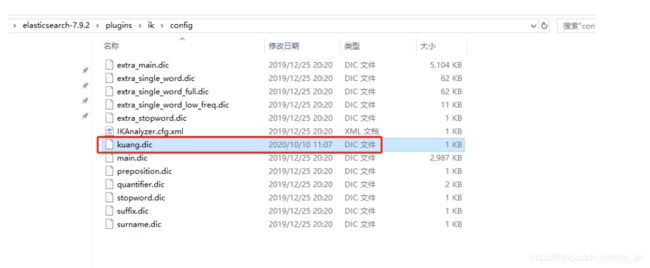
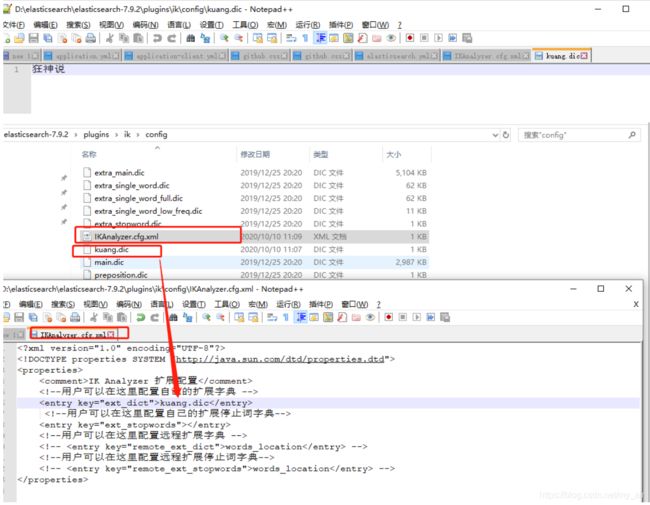
重启es 和 kibana测试


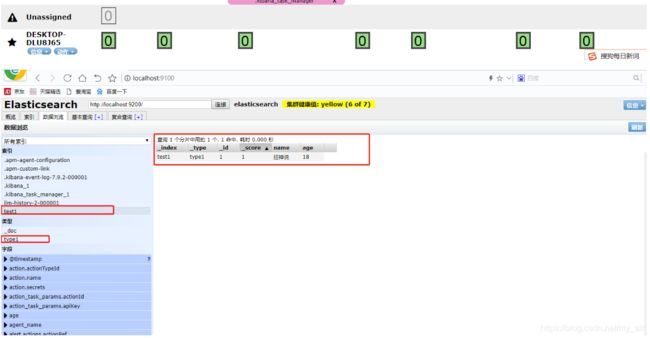
创建一个索引
PUT /索引名/~类型名~/文档id
{请求体}

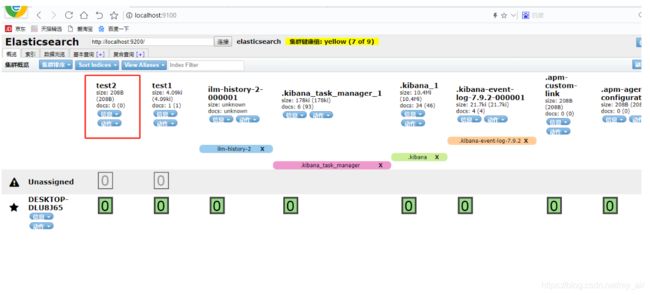
在head中查看,完成了自动增加了索引!数据也成功的添加了,他的结构像数据库一样!
![]()
那么name这个字段用不用指定类型那,毕竟关系型数据库 是需要指定类型的
官方文档:https://www.elastic.co/guide/en/elasticsearch/reference/current/keyword.html
- 字符串类型
text, keyword - 数值类型
long,integer, short,byte,double,float, half float, scaled float - 日期类型
date - 布尔值类型
boolean - 二进制类型
binary - 等等。。。
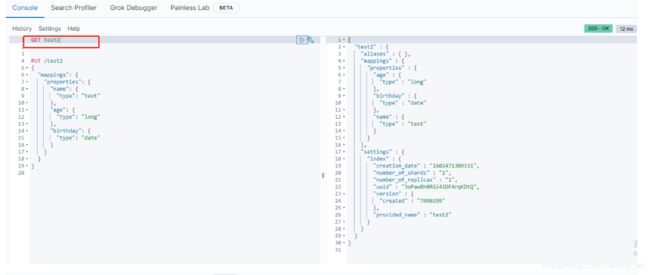
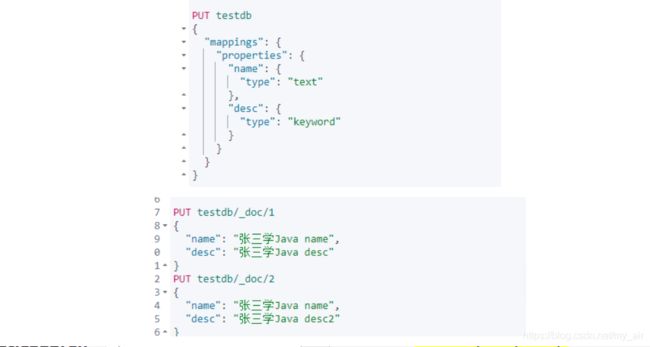
指定字段的类型(创建索引规则)
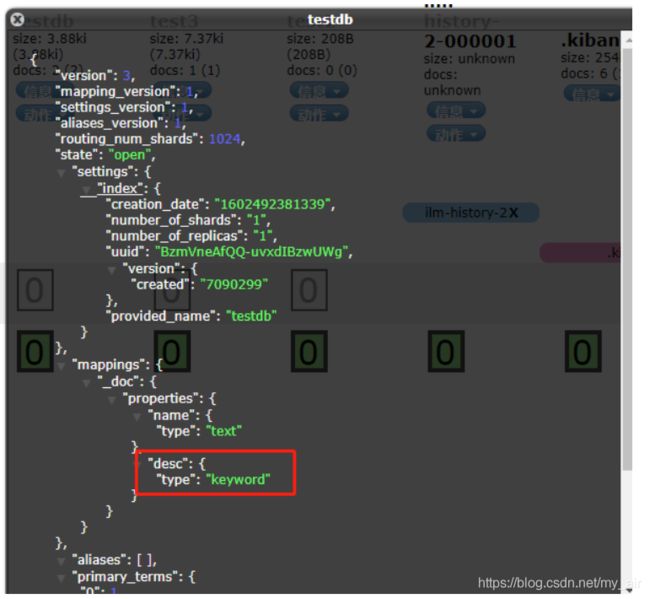
获得规则信息
type类型 使用_doc 代表默认类型


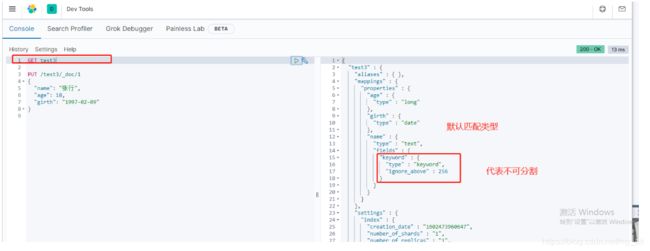
如果自己的文档字段没有指定,那么es就会给我们默认匹配字段类型!
修改规则信息
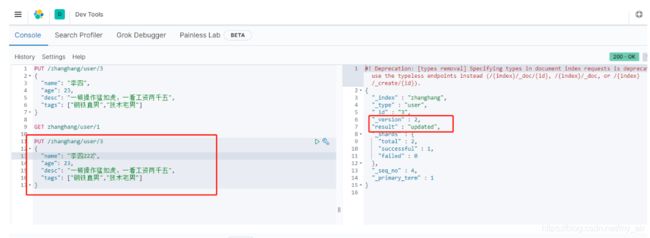
修改 提交使用PUT即可!
曾经的方法(弊端:当修改的值,比如birth为空时,修改后会将原来的值变成空)

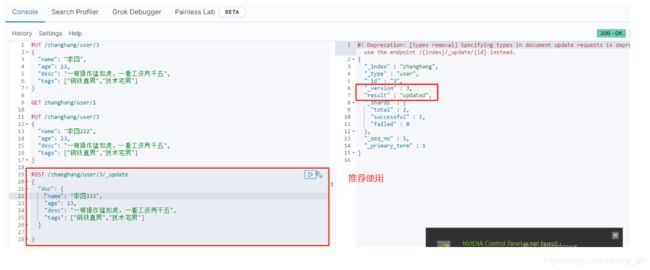
新方法(只修改传入的值),使用POST提交,路径后加_update,值使用doc 包裹一层

删除索引
DELETE
关于文档的基本操作
基本操作
PUT添加数据

获取数据:GET
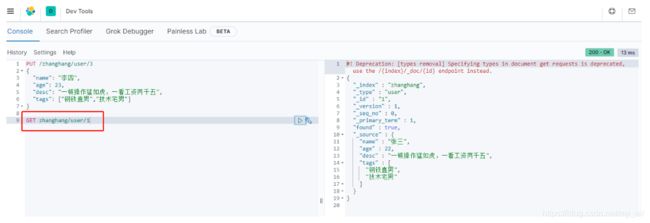
修改数据: PUT 或者 POST
简单的搜索
通过文档id进行简单的搜索
GET zhanghang/user/1
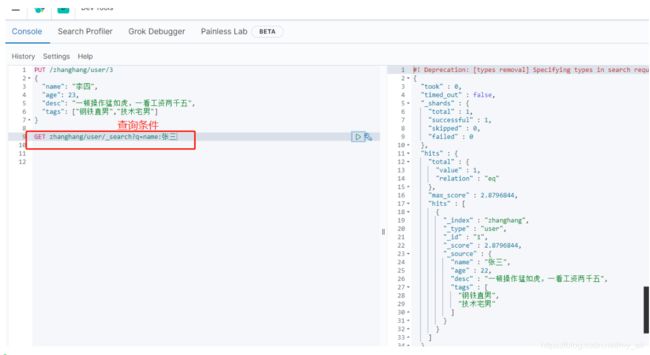
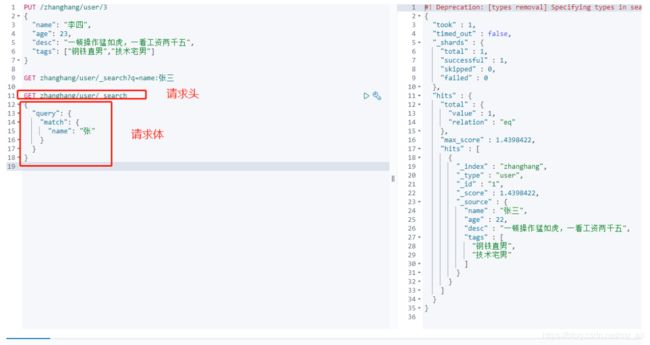
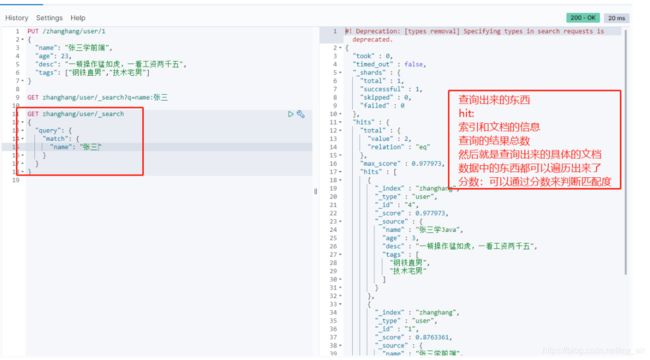
简单的条件查询,可以根据默认的映射规则,产生基本的查询
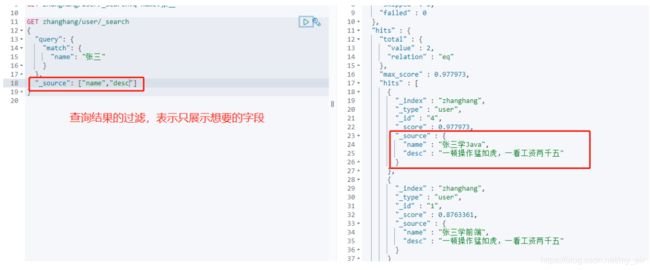
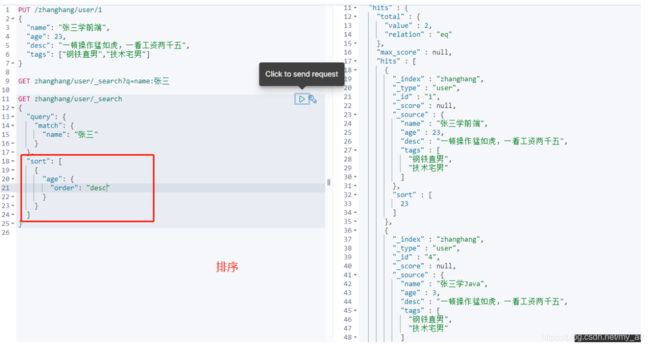
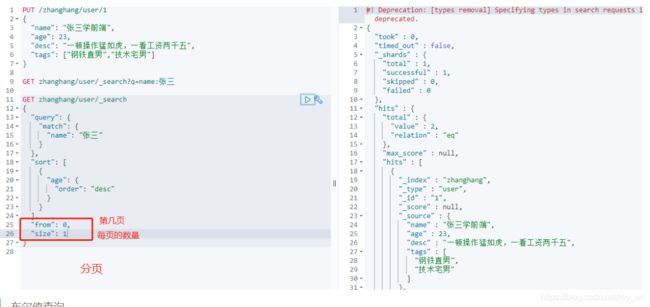
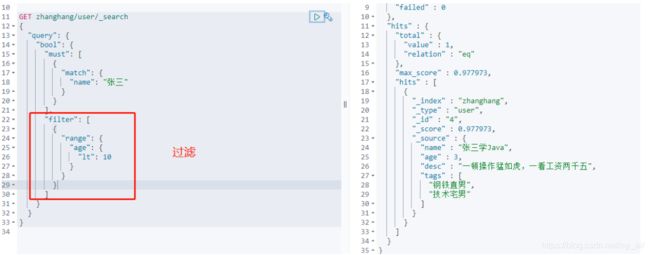
复杂操作(排序,分页,高亮,模糊查询,精准查询)
排序
分页
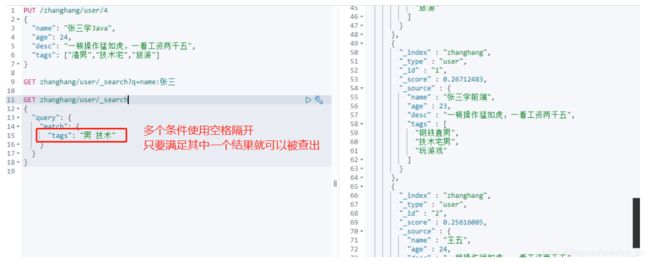
布尔值查询
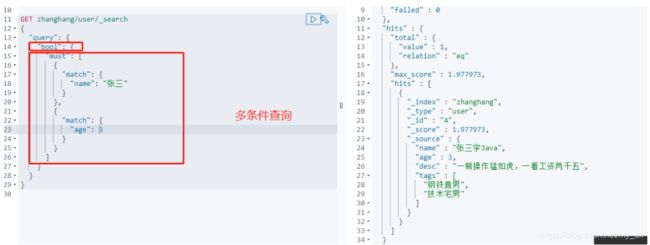
must 相当于 mysql中的 and ,所有的条件都要符合
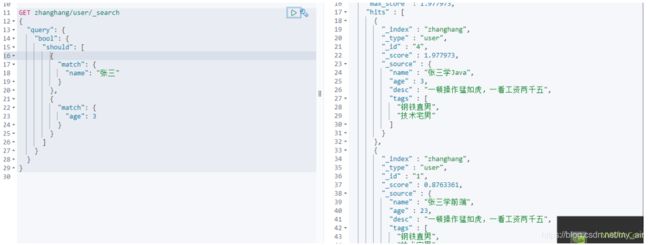
should 相当于mysql中的 or, 只要符合其中一个
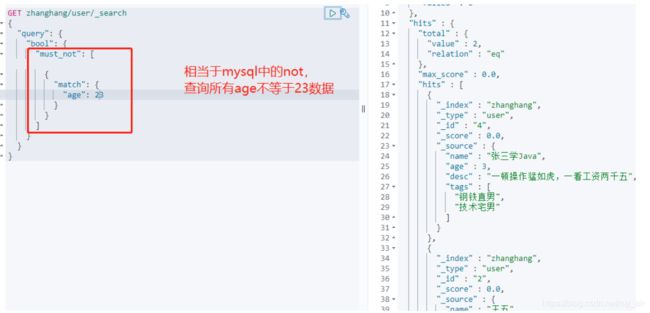
must_not 相当于mysql中的not
filter过滤
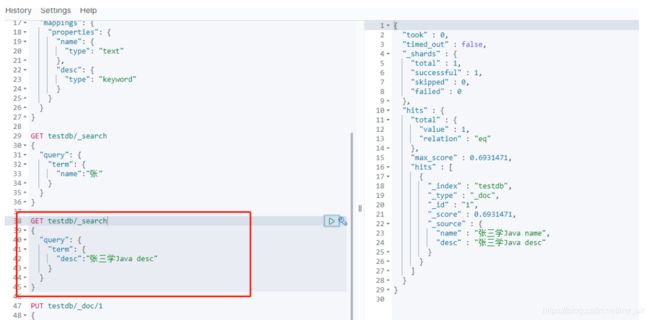
精确查询
term 查询是直接通过倒排索引指定的词条进行精确的查找的
关于分词:
- term: 直接查询精确的
- match: 会使用分词器解析!(先分析文档,然后在通过分析的文档进行查询)
关于分词规则:text 和 keyword
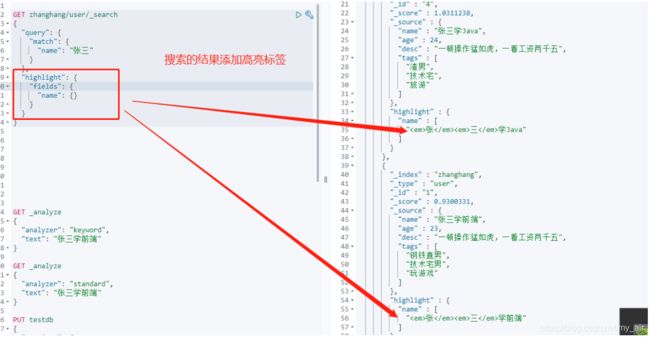
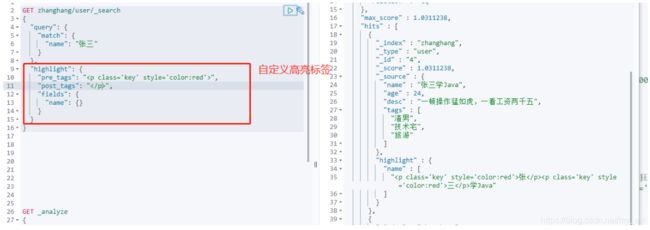
高亮查询
集成SpringBoot
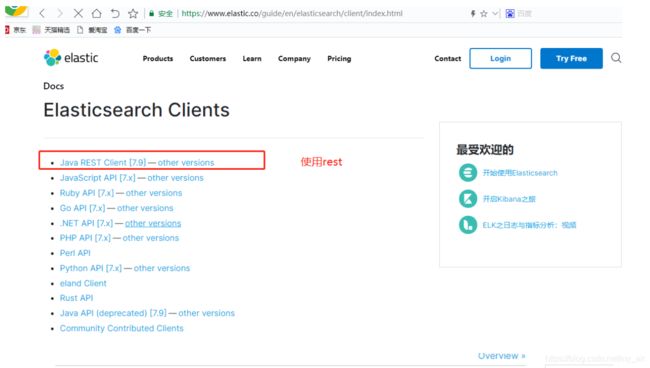
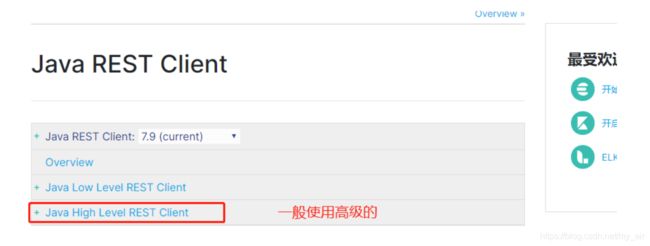
官方文档
配置基本的项目
<project xmlns="http://maven.apache.org/POM/4.0.0" xmlns:xsi="http://www.w3.org/2001/XMLSchema-instance"
	xsi:schemaLocation="http://maven.apache.org/POM/4.0.0 https://maven.apache.org/xsd/maven-4.0.0.xsd">
	<modelVersion>4.0.0modelVersion>
	<parent>
		<groupId>org.springframework.bootgroupId>
		<artifactId>spring-boot-starter-parentartifactId>
		<version>2.3.4.RELEASEversion>
		<relativePath/>
	parent>
	<groupId>com.zhgroupId>
	<artifactId>zhanghang_es_apiartifactId>
	<version>0.0.1-SNAPSHOTversion>
	<name>zhanghang_es_apiname>
	<description>Demo project for Spring Bootdescription>

	<properties>
		<java.version>1.8java.version>

	properties>

	<dependencies>

		<dependency>
			<groupId>org.springframework.bootgroupId>
			<artifactId>spring-boot-starter-data-elasticsearchartifactId>
		dependency>
		<dependency>
			<groupId>org.springframework.bootgroupId>
			<artifactId>spring-boot-starter-webartifactId>
		dependency>

		<dependency>
			<groupId>org.springframework.bootgroupId>
			<artifactId>spring-boot-devtoolsartifactId>
			<scope>runtimescope>
			<optional>trueoptional>
		dependency>
		<dependency>
			<groupId>org.springframework.bootgroupId>
			<artifactId>spring-boot-configuration-processorartifactId>
			<optional>trueoptional>
		dependency>
		<dependency>
			<groupId>org.projectlombokgroupId>
			<artifactId>lombokartifactId>
			<optional>trueoptional>
		dependency>
		<dependency>
			<groupId>org.springframework.bootgroupId>
			<artifactId>spring-boot-starter-testartifactId>
			<scope>testscope>
			<exclusions>
				<exclusion>
					<groupId>org.junit.vintagegroupId>
					<artifactId>junit-vintage-engineartifactId>
				exclusion>
			exclusions>
		dependency>
	dependencies>

	<build>
		<plugins>
			<plugin>
				<groupId>org.springframework.bootgroupId>
				<artifactId>spring-boot-maven-pluginartifactId>
			plugin>
		plugins>
	build>

project>
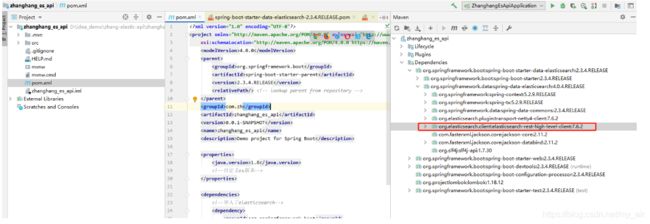
自定义es版本
<properties>
	<java.version>1.8java.version>

	<elasticsearch.version>7.9.2elasticsearch.version>
properties>
创建索引
/**
 * es7.9.2  高级客户端测试 API
 */
@SpringBootTest
class ZhanghangEsApiApplicationTests {

	@Autowired
	@Qualifier("createRestHighLevelClient")
	private RestHighLevelClient client;

	/**
	 * 测试索引的创建
	 */
	@Test
	void testCreateIndex() throws IOException {
		// 1. 创建索引请求
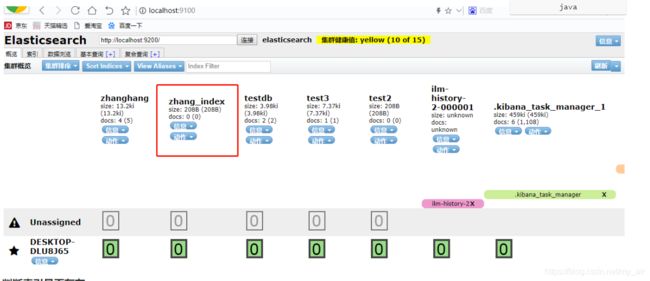
		CreateIndexRequest request = new CreateIndexRequest("zhang_index");
		// 2. 客户端执行请求, 请求后获得响应
		CreateIndexResponse createIndexResponse = client.indices().create(request, RequestOptions.DEFAULT);

		System.out.println(createIndexResponse);
	}

}
判断索引是否存在
//判断索引是否存在
	@Test
	void testExisIndex() throws IOException {
		// 1. 创建索引请求
		GetIndexRequest request = new GetIndexRequest("zhang_index");

		// 2. 客户端执行请求
		boolean exists = client.indices().exists(request, RequestOptions.DEFAULT);
		System.out.println(exists);
	}
删除索引
//测试删除索引
	@Test
	void testDeleteIndex() throws IOException {
		// 1。 创建删除索引请求
		DeleteIndexRequest request = new DeleteIndexRequest("zhang_index");

		// 2. 客户端执行请求
		AcknowledgedResponse delete = client.indices().delete(request, RequestOptions.DEFAULT);

		System.out.println(JSON.toJSONString(delete));
	}
添加文档
//测试添加文档
	@Test
	void testAddDocument() throws IOException {
		// 创建对象
		User user = new User("狂神说", 18);

		// 创建请求
		IndexRequest request = new IndexRequest("zhang_index");

		// 设置规则
		request.id("1"); //设置文档id
		request.timeout(TimeValue.timeValueSeconds(1)); //设置超时时间

		// 将我们的数据放入请求 使用json
		request.source(JSON.toJSONString(user), XContentType.JSON);

		// 客户端发送请求
		IndexResponse indexResponse = client.index(request, RequestOptions.DEFAULT);

		System.out.println(JSON.toJSONString(indexResponse));
	}
获取文档,判断是否存在
// 获取文档,判断是否存在
	void testIsExists() throws IOException {
		GetRequest request = new GetRequest("zhang_index","1");
		// 不获取返回的 _source 的上下文了
		request.fetchSourceContext(new FetchSourceContext(false));

		//判断是否存在
		boolean exists = client.exists(request, RequestOptions.DEFAULT);

		System.out.println(exists);
	}
获取文档的信息
// 获取文档 的信息
	@Test
	void testGetDocument() throws IOException {
		GetRequest request = new GetRequest("zhang_index","1");
		// 不获取返回的 _source 的上下文了
//		request.fetchSourceContext(new FetchSourceContext(false));

		GetResponse getResponse = client.get(request, RequestOptions.DEFAULT);

		System.out.println(JSON.toJSONString(getResponse));
		System.out.println(getResponse.getSourceAsString());
	}
更新文档操作
//更新文档操作
	@Test
	void updateRequest() throws IOException {
		// 创建修改文档请求
		UpdateRequest updateRequest = new UpdateRequest("zhang_index","1");

		// 设置请求超时时间
		updateRequest.timeout("1s");

		//创建要更新的数据
		User user = new User();
//		user.setName("张行123");
		user.setAge(20);
		// 将修改的数据放入到请求当中, XContentType.JSON: 代表请求数据为json格式
		updateRequest.doc(JSON.toJSONString(user), XContentType.JSON);

		//客户端发送请求
		UpdateResponse updateResponse = client.update(updateRequest, RequestOptions.DEFAULT);

		System.out.println(JSON.toJSONString(updateResponse));
		System.out.println(updateResponse.status());
	}
删除文档
//删除文档
	@Test
	void testDeleteRequest() throws IOException {
		DeleteRequest deleteRequest = new DeleteRequest("zhang_index","5");
		deleteRequest.timeout("1s");

		DeleteResponse delete = client.delete(deleteRequest, RequestOptions.DEFAULT);
		System.out.println(delete.status());
	}
特殊的,批量处理数据
// 特殊的, 批量插入数据
	@Test
	void testBigAddRequest() throws IOException {
		// 批量处理
		BulkRequest bulkRequest = new BulkRequest("zhang_index");
		bulkRequest.timeout("10s");

		List<User> userList = new ArrayList<>();
		userList.add(new User("zhanghang1",18));
		userList.add(new User("zhanghang2",19));
		userList.add(new User("zhanghang3",20));
		userList.add(new User("zhanghang4",21));
		userList.add(new User("zhanghang5",22));

		// 批量处理请求
		for (int i = 0; i < userList.size(); i++) {
			// 批量添加,批量更新,批量删除都是在这里操作
			bulkRequest.add(new IndexRequest("zhang_index")
					.id(""+(i+1))  // 设置文档主键
					.source(JSON.toJSONString(userList.get(i)), XContentType.JSON)); //放入文档资源
		}

		BulkResponse bulkResponses = client.bulk(bulkRequest, RequestOptions.DEFAULT);
		System.out.println(bulkResponses.status());
		System.out.println(bulkResponses.hasFailures()); // 是否失败, 成功返回false, 失败返回true
		System.out.println(JSON.toJSONString(bulkResponses));
	}
多功能查询
// 查询
	// SearchRequest  搜索请求
	// SearchSourceBuilder  条件构造
	// 		TermQueryBuilder  精确查询
	//   	BoolQueryBuilder  boolean 查询
	//  ......
	@Test
	void testSearch() throws IOException {
		// 创建 查询请求
		SearchRequest searchResult = new SearchRequest("zhang_index");
		// 构建搜索条件
		SearchSourceBuilder searchSourceBuilder = new SearchSourceBuilder();
		//查询条件,我们可以使用QueryBuilders 工具类来实现
//		QueryBuilder queryBuilder = new QueryBuilder();
//		BoolQueryBuilder boolQueryBuilder = QueryBuilders.boolQuery(); // boolean 值查询
		TermQueryBuilder termQueryBuilder = QueryBuilders.termQuery("name","zhanghang1"); // 精确匹配查询
		searchSourceBuilder.query(termQueryBuilder);
		searchSourceBuilder.from(); //分页
		searchSourceBuilder.size(); // 分页
		searchSourceBuilder.timeout(new TimeValue(60,TimeUnit.SECONDS)); //设置超时时间

		searchResult.source(searchSourceBuilder);

		SearchResponse searchResponse = client.search(searchResult, RequestOptions.DEFAULT);

		System.out.println(JSON.toJSONString(searchResponse.getHits()));
		System.out.println("============================");
		for (SearchHit hit : searchResponse.getHits().getHits()) {
			System.out.println(hit.getSourceAsMap());
		}
	}


