linux运维14
linux运维篇14
- 一、简述CGI与FASTCGI区别
- 二、 编译安装基于fastcgi模式的多虚拟主机的wordpress和discuz的LAMP架构
- 三、通过loganalyzer展示数据库中的日志(cgi模式)
一、简述CGI与FASTCGI区别
- CGI模式:当用户访问网站的动态资源时,httpd服务会生成一个子进程处理php语言,处理后再返回内容给用户,在这个过程中,php语言的解释依赖于httpd服务,属于临时进程,php不是单独以守护进程方式运行。
- FASTCGI模式:当用户访问网站的动态资源时,httpd服务会把php语言转发给php守护进程,php进程解释完成后再返回httpd进程,2个进程之间相互独立,互不影响。
二、 编译安装基于fastcgi模式的多虚拟主机的wordpress和discuz的LAMP架构
下载链接:
httpd:httpd下载
apr和apr-utils:apr和apr-tuils下载
mysql:mysql下载
php:php下载
wordpress:wordpress下载
doscuz:discuz下载
- centos 7最小版初始环境配置:
yum install -y wget
systemctl stop firewalld
systemctl disable firewalld  关闭防火墙
setenforce 0
sed -i 's/SELINUX=enforcing$/SELINUX=disabled/g' /etc/selinux/config  关闭selinux
- httpd编译安装:
yum install -y gcc expat-devel   安装依赖包
cd /root  在目录下载文件
wget http://archive.apache.org/dist/httpd/httpd-2.4.46.tar.gz --no-check-certificate
wget https://dlcdn.apache.org/apr/apr-util-1.6.1.tar.gz --no-check-certificate
wget https://dlcdn.apache.org/apr/apr-1.7.0.tar.gz --no-check-certificate
mkdir /httpd   创建安装目录
#编译apr
cd /root   切回目录
tar xf apr-1.7.0.tar.gz
cd apr-1.7.0
sed -ri 's@\$RM "\$cfgfile"@\# \$RM "\$cfgfile"@g' configure
./configure --prefix=/httpd/apr

make && make install

#编译apr-tuils
cd /root   切回目录
tar xf apr-util-1.6.1.tar.gz
cd apr-util-1.6.1
./configure --prefix=/httpd/apr-util --with-apr=/httpd/apr/

make && make install

#编译httpd
cd /root   切回目录
tar xf httpd-2.4.46.tar.gz
cd httpd-2.4.46
./configure --prefix=/httpd \
--enable-so \
--enable-ssl \
--enable-cgi \
--enable-rewrite \
--with-zlib \
--with-pcre \
--with-apr=/httpd/apr/ \
--with-apr-util=/httpd/apr-util/ \
--enable-modules=most \
--enable-mpms-shared=all \
--with-mpm=event

make && make install

#配置httpd
useradd -s /sbin/nologin -r apache   创建账户
cd /httpd/conf/
sed -ri -e 's/User daemon/User apache/g'  -e 's/Group daemon/Group apache/g' httpd.conf   修改运行账户
echo "PATH=/httpd/bin:$PATH" >/etc/profile.d/httpd.sh  创建变量
source /etc/profile.d/httpd.sh

vi /usr/lib/systemd/system/httpd.service  创建httpd的service
[Unit]
Description=The Apache HTTP Server
After=network.target remote-fs.target nss-lookup.target
Documentation=man:httpd(8)
Documentation=man:apachectl(8)
[Service]
Type=forking
ExecStart=/httpd/bin/apachectl start
ExecReload=/httpd/bin/apachectl graceful
ExecStop=/httpd/bin/apachectl stop
KillSignal=SIGCONT
PrivateTmp=true
[Install]
WantedBy=multi-user.target

systemctl daemon-reload
chown apache.apache -R /httpd/
systemctl start httpd
systemctl enable httpd
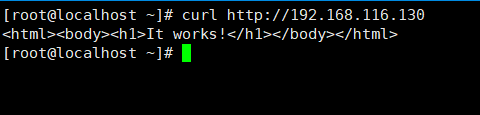
查看httpd是否安装成功,直接访问对应的网页
curl http://192.168.116.130
- mysql编译安装:
yum  -y install libaio numactl-libs
groupadd mysql
useradd -r -g mysql -s /bin/false mysql
cd /root
wget https://cdn.mysql.com/archives/mysql-8.0/mysql-8.0.23-linux-glibc2.12-x86_64.tar.xz
xz -d mysql-8.0.23-linux-glibc2.12-x86_64.tar.xz
tar xf mysql-8.0.23-linux-glibc2.12-x86_64.tar -C /usr/local/

cd /usr/local/
ln -s mysql-8.0.23-linux-glibc2.12-x86_64/ mysql
echo 'PATH=/usr/local/mysql/bin:$PATH' > /etc/profile.d/mysql.sh
source /etc/profile.d/mysql.sh
cp /etc/my.cnf{,.bak}

vi /etc/my.cnf   把文件内容删除,替换为下面
[mysqld]
datadir=/data/mysql
skip_name_resolve=1
socket=/data/mysql/mysql.sock
log-error=/data/mysql/mysql.log
pid-file=/data/mysql/mysql.pid
[client]
socket=/data/mysql/mysql.sock
!includedir /etc/my.cnf.d/

mkdir /data/mysql -p  创建数据库目录
mysqld --initialize-insecure --user=mysql --datadir=/data/mysql   初始化数据
chown -R mysql.mysql /data/mysql/
cp /usr/local/mysql/support-files/mysql.server /etc/init.d/mysqld

service mysqld start                   启动mysql
chkconfig --add mysqld                 设置开机启动
mysql                                  确认版本

- 编译安装php
安装阿里yum源,要不然有些依赖包安装不了
cd /etc/yum.repos.d/
wget http://mirrors.aliyun.com/repo/Centos-7.repo
wget http://mirrors.aliyun.com/repo/epel-7.repo

yum -y install gcc libxml2-devel bzip2-devel libmcrypt-devel sqlite-devel oniguruma-devel
cd /root
wget https://www.php.net/distributions/php-7.4.19.tar.gz
tar xf php-7.4.19.tar.gz -C /usr/local/
cd /usr/local/php-7.4.19/

./configure \
--prefix=/php74 \
--enable-mysqlnd \
--with-mysqli=mysqlnd \
--with-pdo-mysql=mysqlnd \
--with-openssl   \
--with-zlib \
--with-config-file-path=/etc \
--with-config-file-scan-dir=/etc/php.d \
--enable-mbstring \
--enable-xml \
--enable-sockets \
--enable-fpm \
--enable-maintainer-zts \
--disable-fileinfo

make  && make install
在安装目录/usr/local/php-7.4.19/下,不要切回/root
cp php.ini-production /etc/php.ini
cp sapi/fpm/php-fpm.service /usr/lib/systemd/system/  复制service
echo 'PATH=/php74/bin:$PATH' >/etc/profile.d/php.sh
source /etc/profile.d/php.sh
mv /php74/etc/php-fpm.conf.default /php74/etc/php-fpm.conf
mv /php74/etc/php-fpm.d/www.conf.default /php74/etc/php-fpm.d/www.conf

vi /php74/etc/php-fpm.d/www.conf   修改启动用户,把nobody改为apache
user = apache
group = apache

mkdir /etc/php.d  创建php模块目录,启动php-opcache加速模块
vi /etc/php.d/opcache.ini
[opcache]
zend_extension=opcache.so
opcache.enable=1

chown apache.apache -R /php74/
systemctl daemon-reload
systemctl start php-fpm
ss -tnl         确认端口运行
httpd   80
mysql   3306,33060
php     9000

- httpd配置php连接
mkdir /httpd/conf.d
vi /httpd/conf/httpd.conf  修改配置文件

<IfModule dir_module>
    DirectoryIndex index.php
</IfModule>
ServerName 127.0.0.1:80
#把#删了,开启模块支持
LoadModule proxy_module modules/mod_proxy.so
LoadModule proxy_fcgi_module modules/mod_proxy_fcgi.so
#文件底部添加
AddType application/x-httpd-php .php
ProxyRequests Off
IncludeOptional /httpd/conf.d/*.conf

systemctl restart httpd
httpd -M |grep proxy   确认模块开启

wordpress搭建:
数据库配置:
mysql

CREATE DATABASE wordpress;
create user wordpress@'%' identified by 'wordpress';
grant all on wordpress.* to wordpress@'%';
FLUSH PRIVILEGES;
exit

下载wordpress
mkdir /httpd/html
cd /root
wget https://cn.wordpress.org/wordpress-5.7.1-zh_CN.tar.gz
tar xf wordpress-5.7.1-zh_CN.tar.gz -C /httpd/html/
chown apache.apache -R /httpd/html/

httpd配置文件配置
vi /httpd/conf.d/wordpress.conf

<virtualhost *:80>
documentroot /httpd/html
<directory /httpd/html>
require all granted
</directory>
ProxyPassMatch ^/(.*\.php)$ fcgi://127.0.0.1:9000/httpd/html/$1
CustomLog "/httpd/logs/access_wordpress_log" common
</virtualhost>

systemctl restart httpd  重启配置
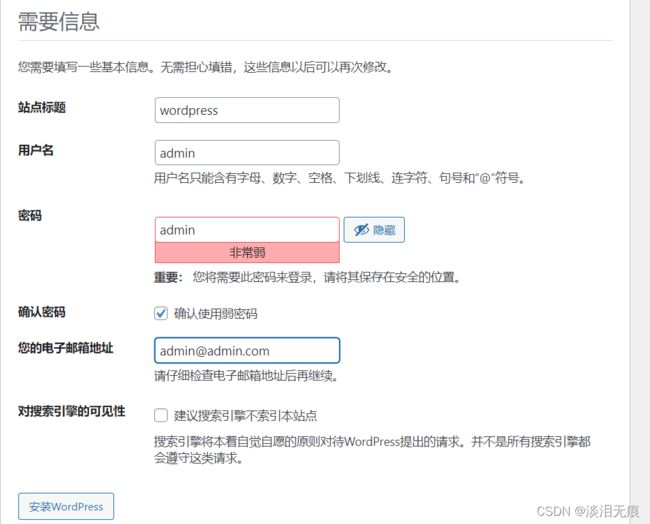
开始安装wordpress
http://192.168.116.130/wordpress/wp-admin/setup-config.php 访问网页


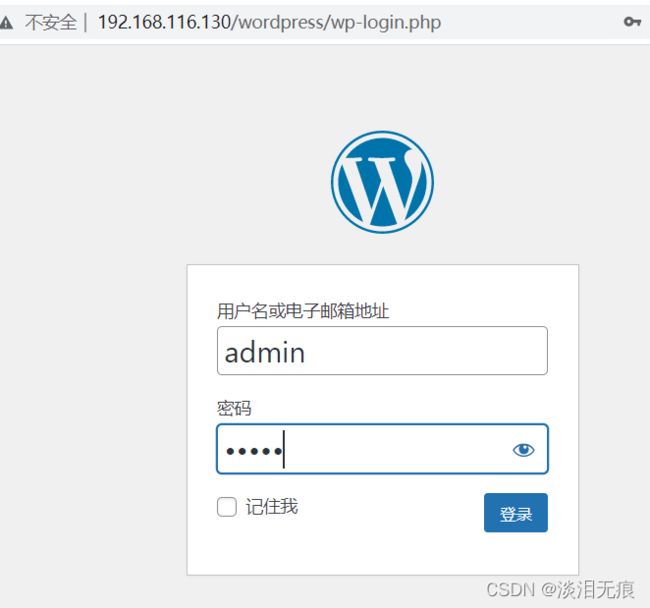
登录后台
http://192.168.116.130/wordpress/wp-login.php
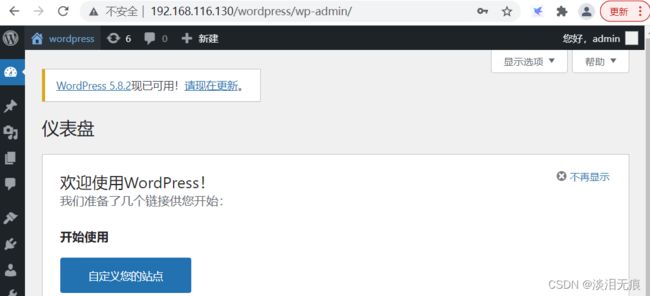
发布文章,测试网站是否能工作

discuz搭建:
数据库配置:
mysql

CREATE DATABASE discuz;
create user discuz@'%' identified by 'discuz';
grant all on discuz.* to discuz@'%';
FLUSH PRIVILEGES;
exit

下载discuz:
cd /root
wget https://www.dismall.com/forum.php?mod=attachment&aid=MTA0fDA3MzUyYzNlfDE2Mzk2MjI1MDZ8MHw3Mw%3D%3D
yum install -y unzip
unzip Discuz_X3.4_SC_UTF8_20211124.zip
mkdir /httpd/html/discuz
cp -ar /root/upload/* /httpd/html/discuz/
chown apache.apache -R /httpd/html/discuz/

discuz的httpd文件配置:
vi /httpd/conf.d/discuz.conf

<virtualhost *:80>
documentroot /httpd/html
<directory /httpd/html>
require all granted
</directory>
ProxyPassMatch ^/(.*\.php)$ fcgi://127.0.0.1:9000/httpd/html/$1
CustomLog "/httpd/logs/access_wordpress_log" common
</virtualhost>

systemctl restart httpd
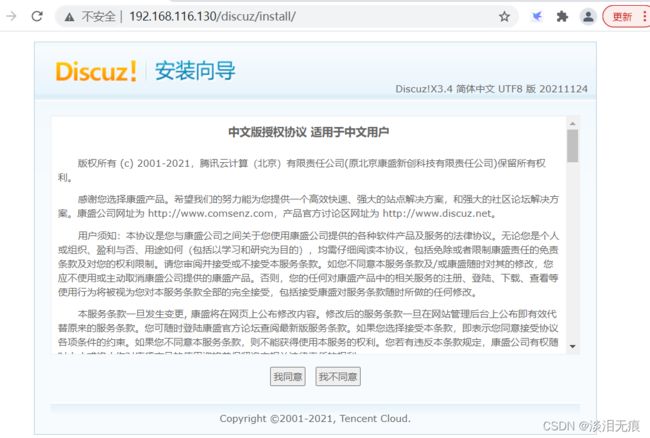
开始安装discuz
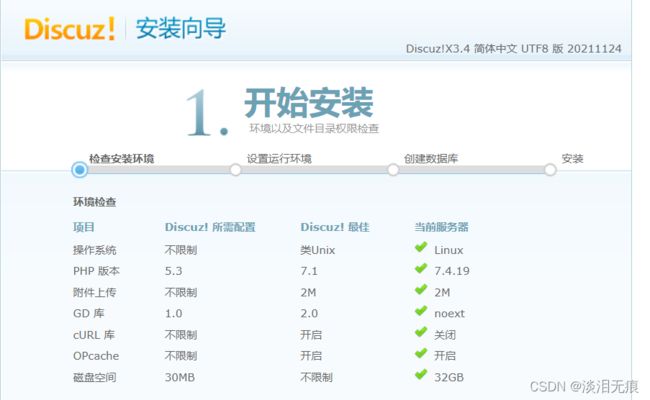
http://192.168.116.130/discuz/install/ 访问网站
确认环境都是显示绿色


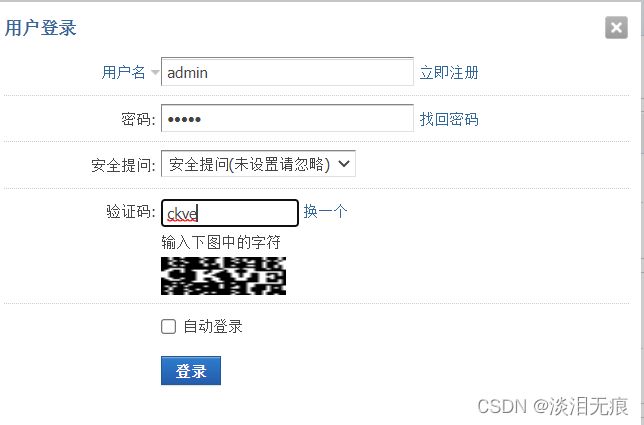
后台登录点这里


三、通过loganalyzer展示数据库中的日志(cgi模式)
yum -y install httpd php php-mysqlnd php-gd mariadb-server rsyslog-mysql
cat /usr/share/doc/rsyslog-8.24.0/mysql-createDB.sql >rsyslog.sql
cat rsyslog.sql   这里定义了rsyslog日志数据库生成方式
systemctl start mariadb  数据库版本要8.0以下,太高不支持

mysql <rsyslog.sql   导入刚才生成的sql语句
mysql  创建账户
create user rsyslog@'%' identified by 'rsyslog';
grant all on Syslog.* to rsyslog@'%';
exit
开启rsyslog日志写入数据库
vi /etc/rsyslog.conf   按照位置添加配置

#### MODULES ####
$ModLoad ommysql

#### RULES ####
*.info;mail.none;authpriv.none;cron.none                :ommysql:192.168.116.130,Syslog,rsyslog,rsyslog

systemctl restart rsyslog  重启服务

安装loganalyzer
cd /root
wget https://download.adiscon.com/loganalyzer/loganalyzer-4.1.12.tar.gz  --no-check-certificate
tar xf loganalyzer-4.1.12.tar.gz
mv loganalyzer-4.1.12/src/ /var/www/html/log
touch /var/www/html/log/config.php
chmod 666 /var/www/html/log/config.php
chown apache.apache -R /var/www/html/log/

systemctl start httpd   启动服务
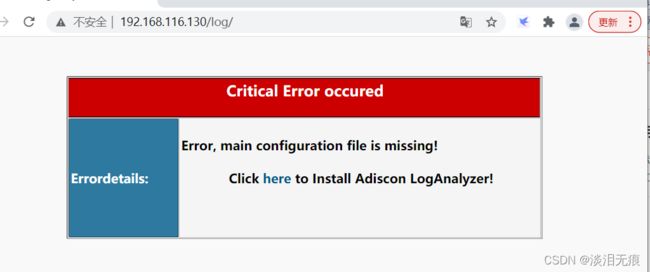
http://192.168.116.130/log/ 开始安装,最好用google或兼容IE的浏览器
点击here


输入数据库名Syslog
输入数据库表SystemEvents
输入数据库账户rsyslog
输入数据库密码rsyslog


点击这里查看图形化日志

最后记得修改文件权限,这个会导致重新初始化
chown 644 /var/www/html/log/config.php