C++function,future,packaged_task
1.function和bind
这两个函数需要包含头文件#inlude
std::function是一种封装函数的工具或者说方法。std::function封装包普通函数、Lambda表达式、函数指针、以及其它函数对象等。std::function功能比函数指针更多,也更安全。
下面是function的使用示例:
#include
#include
#include

int func1(int& a,int b)
{
    return a + b;
}

int main()
{
    int a = 3;
    int b = 1;
    std::function f;
    f = func1;
    std::cout << f(a,b) << '\n';
    return 0;
}
上面展示了function是如何包装函数的。除此之外它还可以和bind结合绑定参数,如下:
#include
#include
#include

int func1(int& a,int b)
{
    return a + b;
}

int main()
{
    int a = 3;
    int b = 1;
    //bind将a,b绑定到了func1里,因此f是int()而非(int(int&,int))
    std::function f;
    f = std::bind(func1, std::ref(a), b);
    std::cout << f() << '\n';
    return 0;
}
bind相当于将参数提前绑定到函数里,此后调用无需参数。f可以理解成下面那个样子:
int func1(int& a,int b)
{
    return a + b;
}

std::function f;
f = std::bind(func1, std::ref(a), b);

此时的f可以看成下面那样
int f()
{
    int& a1=a;
    int b1=b;
    return a1+b1;
}
我们可以采取这种方式提前将函数参数传入,这种方式可以更方便的回调,如下面伪代码
int func1(int& a,int b) {}
int func2(int a,int b,int c) {}

void func(std::function f)
{
    f();
}

std::function f1;
std::function f2;
f1 = std::bind(func1, std::ref(a), b);
f2 = std::bind(func1, a, b, c);
可以看出这种方式封装的函数作回调函数时无需传递参数,使得需要调用该回调函数的func无需考虑到多种情况设置参数。
2.async和future
使用这两个函数需要包含头文件#include
2.1 async和future的简单用法:
async会返回一个future类型的数据,future的作用是获得异步操作的结果,无需使用全局变量。先看看使用方法:
#include
#include
#include
#include
#include

int func1(int& a,int b)
{
    return a + b;
}

void func2(int& a)
{
    for (int i = 0; i < 10; i++)
    {
        a++;
        usleep(500 * 1000);
    }
}

int main()
{
    int a = 3;
    int b = 1;

    std::future f1 = std::async(func2, std::ref(a));
    f1.wait();
    std::cout << a << '\n';

    std::future f = std::async(func1, std::ref(a), b);
    std::cout << f.get() << '\n';

    return 0;
}
如上代码执行结果如下:

可以看到主函数第一部分并没有直接输出处于for循环时的a的中间值,而是等for循环结束才输出a的值。可以看出f1.wait()函数等到f1结束才进行后面代码。在主函数第二部分我们也发现我们可以直接输出func1的返回值。
2.2 async的参数:
从2.1的示例程序看async的参数比较好理解,后面跟随的时函数名和参数。但实际上我们看一下async此时的源码:
template
    inline future<__async_result_of<_Fn, _Args...>>
    async(_Fn&& __fn, _Args&&... __args)
    {
      return std::async(launch::async|launch::deferred,
			std::forward<_Fn>(__fn),
			std::forward<_Args>(__args)...);
    }
可以看出它返回的async有一个参数“launch::async|launch::deferred”。实际上async在函数名和参数之前还有一个参数,该参数可选为std::launch::async或std::launch::deferred。
std::launch::async相当于开辟一个新的线程执行函数,如下代码:
#include
#include
#include
#include
#include

void func(int& a)
{
    for (int i = 0; i < 10; i++)
    {
        a++;
        std::cout << i << ' ';
    }
}

int main()
{
    int a = 3;

    std::future f1 = std::async(std::launch::async, func, std::ref(a));
    usleep(1000 * 1000);
    std::cout << std::endl << "ok" << std::endl;
    f1.wait();
    return 0;
}
输出结果如下:
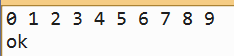
可以看出主线程在usleep过程中func已经执行完毕,因此可以猜测确实开启了一个新线程。我们再采取打出线程号的方式:
#include
#include
#include
#include
#include

void func(int& a)
{
    for (int i = 0; i < 10; i++)
    {
        a++;
        /*std::cout << i << ' ';*/
    }
    std::cout << std::this_thread::get_id() << '\n';
}

int main()
{
    int a = 3;
    int b = 1;
    std::cout< f1 = std::async(std::launch::async,func, std::ref(a));
    usleep(1000 * 1000);
    //std::cout << std::endl << "ok" << std::endl;
    f1.wait();
    return 0;
}
结果如下:
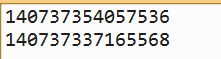
可以发现线程号并不一样,到此可以判断是开启了一个新的线程。
第一个参数为std::launch::deferred时系统不会开启一个新的线程,而是会在调用f1.wait()或f1.get()时在本线程调用,代码如下:
#include
#include
#include
#include
#include

void func(int& a)
{
    for (int i = 0; i < 10; i++)
    {
        a++;
        /*std::cout << i << ' ';*/
    }
    std::cout << std::this_thread::get_id() << '\n';
}

int main()
{
    int a = 3;
    std::cout< f1 = std::async(std::launch::deferred,func, std::ref(a));
    usleep(1000 * 1000);
    //std::cout << std::endl << "ok" << std::endl;
    f1.wait();
    return 0;
}
结果如下:
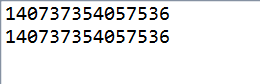
可以看出此时并未开启新的线程。
如果不加参数那么等效于第一个参数为launch::async|launch::deferred,此时是否开辟新的线程决于系统的负载,我们无法控制。
3.packaged_task
pacakaged_task需要包含头文件#include
3.1 packaged_task用法:
packaged_task也是一种封装函数的方式,用法的伪代码如下:
void func(int& a) {}

int a(0);
std::packaged_task < void(int&) > p1(func);
p1(a);

std::packaged_task < void() > p2(std::bind(func, std::ref(a)));
p2();
可以看出packaged_task可以封装函数,而且也支持提前传入参数。但是packaged_task封装的函数无法获得返回值,即便封装的是int或者其它有返回值类型函数。我们看一下packaged_task的operator()源码:
// Execution
      void
      operator()(_ArgTypes... __args)
      {
	__future_base::_State_base::_S_check(_M_state);
	_M_state->_M_run(std::forward<_ArgTypes>(__args)...);
      }
无论封装的函数是什么类型,调用operator()时都是void类型,因此我们无法像普通函数和std::function一样直接得到返回值。那可能有人要问有了function为什么还要无法直接获得返回值的packaged_task ?实际上当使用pacakaged_task绑定一个函数时,为这个函数建立了一个future类型,我们可以拿到future类型来得到返回值,伪代码如下:
std::packaged_task < int() > p1(std::bind(func, std::ref(a)));
p1();
std::cout << p1.get_future().get();
这样可以获得返回值。
从它可以返回一个future可以看出pacakaged_task封装的对象可以实现异步。
3.2 packaged_task在多线程:
我们先看下列代码:
#include
#include
#include
#include
#include

int func(int& a)
{
    for (int i = 0; i < 10; i++)
    {
        a++;
        /*std::cout << i << ' ';*/
    }
    std::cout << std::this_thread::get_id() << '\n';
    return 0;
}

int main()
{
    int a = 3;
    std::cout< p1(std::bind(func, std::ref(a)));

    auto f1 = p1.get_future();
    std::thread t1(std::move(p1));
    usleep(1000 * 1000);
    f1.wait();

    return 0;
}
结果如下:
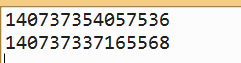
可以发现p1可以用在其它线程,并且可以通过get_future得到返回值或者调用wait实现线程同步。
和std::function相比packaged_task可以在多线程中使用并且异步获得返回值。
与std::async相比我们发现async绑定函数(launch::async方式)后会立即执行,而此种方式绑定的函数我们可以自由选择执行的时机,使得我们使用时可以更灵活。