手把手教你搭建SpringCloudAlibaba之Nacos服务注册中心
SpringCloud Alibaba全集文章目录:
一、手把手教你搭建SpringCloud Alibaba之生产者与消费者
二、手把手教你搭建SpringCloudAlibaba之Nacos服务注册中心
三、手把手教你搭建SpringCloudAlibaba之Nacos服务配置中心
四、手把手教你搭建SpringCloudAlibaba之Nacos服务集群配置
五、手把手教你搭建SpringCloudAlibaba之Nacos服务持久化配置
六、手把手教你搭建SpringCloudAlibaba之Sentinel实现流量控制
七、手把手教你搭建SpringCloudAlibaba之Sentinel服务降级
八、手把手教你搭建SpringCloudAlibaba之Sentinel热点key限流
九、手把手教你搭建SpringCloudAlibaba之Sentinel系统保护规则
十、手把手教你搭建SpringCloudAlibaba之Sentinel服务熔断
十一、手把手教你搭建SpringCloudAlibaba之Sentinel规则持久化
十二、手把手教你搭建SpringCloudAlibaba之Seata分布式事务
1、什么是Nacos?
Nacos就是注册中心+配置中心的组合
Nacos = Eureka(替代Eureka做服务注册中心)+ Config(替代Config做服务配置中心)
2、为什么叫Nacos?
Nacos:Dynamic Naming and Configuration Service,翻译为动态命名和配置服务。
前四个字母分别为Naming和Configuration的前两个字母,最后的s为Service
3、去哪里学习?
官网:https://nacos.io/zh-cn/index.html
Spring Cloud阿里巴巴参考文档 :Spring Cloud Alibaba Reference Documentation
4、与其他注册中心对比

5、怎么下载?
https://github.com/alibaba/nacos/releases/tag/1.1.4
6、如何将服务注册到Nacos当中?
1)如何将生产者cloud-provide-payment服务注册到nacos当中,在application.yml中加入

2)在pom.xml文件中加入nacos服务发现的jar包
com.alibaba.cloud

spring-cloud-starter-alibaba-nacos-discovery
3)在启动类上加上注解@EnableDiscoveryClient
package com.buba.payment;


import org.springframework.boot.SpringApplication;
import org.springframework.boot.autoconfigure.SpringBootApplication;
import org.springframework.cloud.client.discovery.EnableDiscoveryClient;

@SpringBootApplication
@EnableDiscoveryClient
public class PayMentMain {
    public static void main(String[] args) {
        SpringApplication.run(PayMentMain.class,args);
    }
}
@EnableDiscoveryClient 的作用都是能够让注册中心发现、并扫描到该服务。
Eureka使用@EnableEurekaClient注解,只对Eureka起作用,@EnableDiscoveryClient 对 Eureka、Zookeeper、Consul 等注册中心都有效。
从 SpringCloud Edgware 版本开始, @EnableEurekaClient 和 @EnableDiscoveryClient 注解都可以省略了,只需要在 pom.xml 中引入依赖、在application.yml 上进行相关配置,就可以将微服务注册到注册中心上。但是为了起标识作用,最好还是加上 @EnableDiscoveryClient 注解。
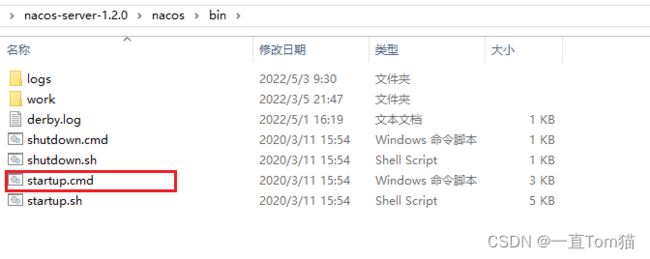
4)我们先启动Nacos服务,将下载下来的zip包,在windos上在bin文件下点击startup.cmd启动Nacos。
如下图,说明启动成功。

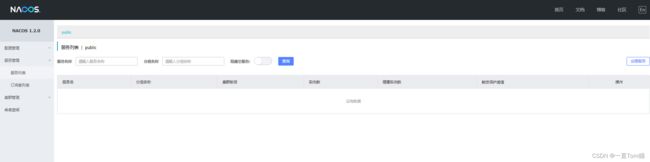
我们访问http://localhost:8848/nacos/ ,用户名和密码都是Nacos。登录成功界面如下:
5)启动生产者服务,查看是否注册到Nacos当中。可以看到成功注册到nacos当中,其中服务名就是在application.yml当中配置的mcroservice-payment 服务名。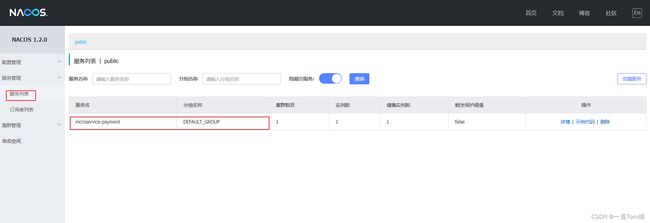
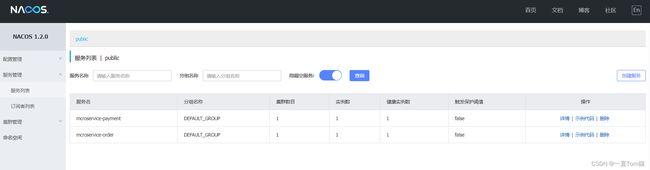
6)用同样的方法修改消费者的服务,启动消费者的服务。 其中服务名就是cloud-consumer-order服务中application.yml中配置的mcroservice-order。
7)在ApplicationContextConfig文件上加上注解@LoadBalanced,原因是我们配置了以服务名的方式访问,但不能确定是哪一个服务。所以我们需要给restTemplate开启负载均衡,默认是轮循。只需要在restTemplate配置类中加上这个注解,该注解就是开启负载均衡的。
package com.buba.consumer.config;


import org.springframework.cloud.client.loadbalancer.LoadBalanced;
import org.springframework.context.annotation.Bean;
import org.springframework.context.annotation.Configuration;
import org.springframework.web.client.RestTemplate;

@Configuration
public class ApplicationContextConfig {
    @Bean
    @LoadBalanced
    public RestTemplate getRestTemplate(){
        return new RestTemplate();
    }
}
8)将之前的调用的ip+端口的方式改为以服务名的方式访问http://mcroservice-payment,如下图:
package com.buba.consumer.controller;


import com.buba.springcloud.pojo.CommonResult;
import com.buba.springcloud.pojo.Payment;
import lombok.extern.slf4j.Slf4j;
import org.springframework.beans.factory.annotation.Autowired;
import org.springframework.web.bind.annotation.GetMapping;
import org.springframework.web.bind.annotation.PathVariable;
import org.springframework.web.bind.annotation.RestController;
import org.springframework.web.client.RestTemplate;

@RestController
@Slf4j
public class OrderController {
    //调用支付订单服务端的ip+端口号
    public static final  String PAYMENT_URL = "http://mcroservice-payment";

    @Autowired
    private RestTemplate restTemplate;
    //创建支付订单的接口
    @GetMapping("/consumer/payment/create")
    public CommonResult create(Payment payment){
        return restTemplate.postForObject(PAYMENT_URL+"/payment/create",payment, CommonResult.class);
    }
    //获取id获取支付订单
    @GetMapping("/consumer/payment/get/{id}")
    public CommonResult getPayment(@PathVariable("id") Long id) {
        return restTemplate.getForObject(PAYMENT_URL + "/payment/get/" + id, CommonResult.class);

    }
}
9)然后我们访问http://localhost/consumer/payment/get/1 可以成功访问到接口,说明已经成功调用到我们注册到nacos中的mcroservice-payment生产者服务。如下图:

到这里我们已经成功的将生产者和消费者注册到Nacos当中,服务之间也可以相互访问。
下一篇我们搭建生产者集群版搭建并且实现负载均衡!