pytorch-yolov5训练自定义数据集,转caffe转ncnn推理(系列文章一)
pytorch-yolov5训练自定义数据集,转caffe转ncnn推理(系列文章一)
- 一、测试环境
- 二、数据集准备
- 三、提取person类别
- 四、VOC格式(XML格式)转YOLO格式标签
- 五、划分训练集和测试集
- 六、修改yaml文件
- 七、训练
写个帖子备忘,方便以后使用。
首先给出yolov5 github地址 https://github.com/ultralytics/yolov5
一、测试环境
根据文档配置好环境后,测试是否能正常训练(coco128仅包含128张图片作为训练集)
python train.py --img 640 --batch 8 --epochs 5 --data coco128.yaml --weights yolov5s.pt
128张图片,5个epoch很快,无报错,则开始正题。
二、数据集准备
在这里将voc数据集中的所有含person的图片作为我们的训练集和测试集
三、提取person类别
extract_person.py 将voc数据集中含person的图片和标签拷贝到指定文件夹
import os
import shutil
'''
将voc中xml文件中有person类别的图片及xml拷贝到aim文件夹
'''
source_ann = "/home/hjs/yolov5/VOCdevkit/VOC2007/Annotations/"
source_img = "/home/hjs/yolov5/VOCdevkit/VOC2007/JPEGImages/"
aim_ann = "/home/hjs/yolov5/VOC_person/Annotations/"
aim_img = "/home/hjs/yolov5/VOC_person/imgs_total/"
names = locals()
label = ['person']
for file in os.listdir(source_ann):
print("extract from %s to %s" % (source_ann,aim_ann))
with open(source_ann+file) as fs: #默认方式r 只读
with open (aim_ann+file,'w') as fa: #w只写,若存在则覆盖,若不存在,则创建
lines=fs.readlines()#list
ind_start = []
ind_end = []
lines_id_start = lines[:]
lines_id_end = lines[:]
class1 = '\t\tperson \n'
while "\t in lines_id_start: #记录object开始位置,存到ind_start
a = lines_id_start.index("\t)
ind_start.append(a)
lines_id_start[a] = "delete"
while "\t\n" in lines_id_end: #记录object结束位置,存到ind_end
b = lines_id_end.index("\t\n")
ind_end.append(b)
lines_id_end[b] = "delete"
#names存放person类别的
i = 0
for k in range(0, len(ind_start)):
names['block%d' % k] = []
if label[0] in lines[ind_start[i] + 1]:
a = ind_start[i]
for o in range(ind_end[i] - ind_start[i] + 1):
names['block%d' % k].append(lines[a + o])
i += 1
# xml头
string_start = lines[0:ind_start[0]]
# xml尾
string_end = [lines[len(lines) - 1]]
a = 0
for k in range(0, len(ind_start)):
if class1 in names['block%d' % k]:
a += 1
string_start += names['block%d' % k]
string_start += string_end #所需xml文件的最终结果
for c in range(0, len(string_start)):
fa.write(string_start[c])
#如果当前没有所需类别,则删除aim_xml,若有,则拷贝图片
if a == 0:
os.remove(aim_ann + file)
else:
name_img = source_img + os.path.splitext(file)[0] + ".jpg"
shutil.copy(name_img, aim_img)#源文件路径,目的文件或文件夹路径
四、VOC格式(XML格式)转YOLO格式标签
xml2yolo.py 将前后得到的person标签转为yolo格式标签
import os.path
import xml.etree.ElementTree as ET


class_names = ['person']
xmlpath = '/home/hjs/yolov5/VOC_person/Annotations/'  # 原xml路径
txtpath = '/home/hjs/yolov5/VOC_person/labels/'  # 转换后txt文件存放路径
files = []

for root, dirs, files in os.walk(xmlpath): #根目录 文件夹 文件
    None

number = len(files)
print("一共%d xml文件" % number)
i = 0
while i < number:
    name = files[i][0:-4]
    xml_name = name + ".xml"
    txt_name = name + ".txt"
    xml_file_name = xmlpath + xml_name
    txt_file_name = txtpath + txt_name

    xml_file = open(xml_file_name)
    tree = ET.parse(xml_file)
    root = tree.getroot()

    #filename = root.find('filename').text
    #image_name = root.find('filename').text

    w = int(root.find('size').find('width').text)
    h = int(root.find('size').find('height').text)

    f_txt = open(txt_file_name, 'w+')
    content = ""

    first = True

    for obj in root.iter('object'):

        name = obj.find('name').text
        class_num = class_names.index(name)

        xmlbox = obj.find('bndbox')

        x1 = int(xmlbox.find('xmin').text)
        x2 = int(xmlbox.find('xmax').text)
        y1 = int(xmlbox.find('ymin').text)
        y2 = int(xmlbox.find('ymax').text)

        #yolo格式坐标是归一化后的结果
        if first:
            content += str(class_num) + " " + \
                       str((x1 + x2) / 2 / w) + " " + str((y1 + y2) / 2 / h) + " " + \
                       str((x2 - x1) / w) + " " + str((y2 - y1) / h)
            first = False
        else:
            content += "\n" + \
                       str(class_num) + " " + \
                       str((x1 + x2) / 2 / w) + " " + str((y1 + y2) / 2 / h) + " " + \
                       str((x2 - x1) / w) + " " + str((y2 - y1) / h)

    # print(str(i / (number - 1) * 100) + "%\n")
    #print(content)
    f_txt.write(content)
    f_txt.close()
    xml_file.close()
    i += 1
print("done!")
五、划分训练集和测试集
divide_train_test.py 将imgs_total共4192张 按7:1划分为训练和测试
import os.path
import shutil
'''
将imgs_total共4192张  按7:1划分为训练和测试
'''
img_total = '/home/hjs/yolov5/VOC_person/imgs_total/'
img_train = '/home/hjs/yolov5/VOC_person/imgs/train/'
img_test = '/home/hjs/yolov5/VOC_person/imgs/test/'

files = []
for root, dirs, files in os.walk(img_total): #根目录 文件夹 文件
    None
print("total picture %d 张" % len(files))
print("准备划分训练集和测试集------------------------------------")
list=[]
for file in files:
    list.append(file)
list.sort()

number=1
for file in list:
    if number%8 == 0: #测试集
        shutil.copy(img_total+file, img_test)  # 源文件路径,目的文件或文件夹路径
    else: #训练集
        shutil.copy(img_total + file, img_train)
    number += 1

print("划分完成-----------------------------------------")

for root, dirs, files in os.walk(img_train):
    None
print("训练集 %d 张" % len(files))

for root, dirs, files in os.walk(img_test):
    None
print("测试集 %d 张" % len(files))

#开始划分label----------------------------------------------

all_label = '/home/hjs/yolov5/VOC_person/labels/all_labels/'
train_label = '/home/hjs/yolov5/VOC_person/labels/train/'
test_label = '/home/hjs/yolov5/VOC_person/labels/test/'

files = []
for root, dirs, files in os.walk(all_label): #根目录 文件夹 文件
    None
print("total label %d 张" % len(files))
print("准备划分label------------------------------------")
list=[]
for file in files:
    list.append(file)
list.sort()

number=1
for file in list:
    if number%8 == 0: #测试集
        shutil.copy(all_label + file, test_label)  # 源文件路径,目的文件或文件夹路径
    else: #训练集
        shutil.copy(all_label + file, train_label)
    number += 1
六、修改yaml文件
将最开始测试环境用到的coco128.yaml文件拷贝,重命名为voc_person.yaml,并更改为如下
train: ./VOC_person/images/train/
val: ./VOC_person/images/test/

# number of classes
nc: 1

# class names
names: ['person']
七、训练
当前训练集文件夹下文件名必须和coco128文件夹下一致,即images和labels,否则训练会报错

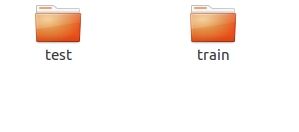
images和labels文件夹下都包括train和test

开始训练,这里仅训练100个epoch,且未调整超参
python train.py --img 640 --batch 8 --epochs 100 --data voc_person.yaml --weights yolov5s.pt
下一篇文章解释一下yolov5s的网络结构,待更
下一篇文章解释一下yolov5s的网络结构,待更
下一篇文章解释一下yolov5s的网络结构,待更