Springboot1.5升级Springboot2.x总结
Springboot1.5升级Springboot2.x总结
文章目录
-
- Springboot1.5升级Springboot2.x总结
-
-
- 背景
- 一、选择对应的springboot和springcloud版本
- 二、升级前的注意事项
- 三、修改pom.xml依赖
-
- 3.1 修改parent标签内容,将项目父工程设定为springboot-2.x:
- 3.2 修改properties标签内容,设定一些基本属性值,如springcloud版本:
- 3.3 新增dependencyManagement标签内容,新增springcloud依赖:
- 3.4 可以在pom.xml中增加如下内容,无需修改settings.xml的mirror镜像源即可使用阿里仓库进行jar包的下载。
- 四、maven依赖升级
-
- 4.1 eureka-client-artifactId的改变:
- 4.2 eureka-server-artifactId的改变:
- 4.3 feign-artifactId的改变:
- 4.5 ActiveMQ若使用线程池,在springboot-2.1.x中与springboot-2.0.x及以下的依赖有所不同,关于springboot-2.1.x整合ActiveMQ见参考资料:[SpringBoot2.* 整合ActiveMQ时版本引起的问题简录](https://www.jianshu.com/p/bb396bf573bd),pom.xml如下:
- 4.6 springboot-2.x中使用quartz定时任务时,依赖更为简单,pom.xml如下:
- 五、配置文件升级
-
- 5.1 web部分
- 5.2 actuator部分,更多actuator详情见参考资料:[Spring Boot 2.0官方文档之 Actuator](https://blog.csdn.net/alinyua/article/details/80009435?depth_1-utm_source=distribute.pc_relevant.none-task&utm_source=distribute.pc_relevant.none-task)
- 5.3 security部分
- 5.4 redis部分
- 5.5 datasource部分
- 5.6 eureka部分
- 5.7 activemq部分
- 六、代码层的修改
-
- 6.1 类所属的包名的改变
- 6.2 废弃google guava替换为caffeine
- 6.3 RedisCacheManager配置
- 6.4 自定义actuator的endpoint
- 6.5 由devtools引发的类转换异常
- 6.6 前端request请求404
- 6.7 前端request请求406
-
背景
由于公司需要对现有技术架构进行升级,需要将springboot版本升级为2.x以上,与之对应的Springcloud版本也需升级。下面对升级的过程和问题做一个总结。
一、选择对应的springboot和springcloud版本
Springboot和Springcloud版本存在对应关系,可以参考官方链接:springboot和springcloud版本对应关系,本文以Springboot-2.1.9以及Springcloud-Greenwich.SR2作为实例进行版本升级的演示。
SpringCloud版本 SpringBoot版本 2021.0.1-SNAPSHOT Spring Boot >=2.6.4-SNAPSHOT and <2.7.0-M1 2021.0.0 Spring Boot >=2.6.1 and <2.6.4-SNAPSHOT 2021.0.0-RC1 Spring Boot >=2.6.0-RC1 and <2.6.1 2021.0.0-M3 Spring Boot >=2.6.0-M3 and <2.6.0-RC1 2021.0.0-M1 Spring Boot >=2.6.0-M1 and <2.6.0-M3 2020.0.5 Spring Boot >=2.4.0.M1 and <2.6.0-M1 Hoxton.SR12 Spring Boot >=2.2.0.RELEASE and <2.4.0.M1 Hoxton.BUILD-SNAPSHOT Spring Boot >=2.2.0.BUILD-SNAPSHOT Hoxton.M2 Spring Boot >=2.2.0.M4 and <=2.2.0.M5 Greenwich.BUILD-SNAPSHO Spring Boot >=2.1.9.BUILD-SNAPSHOT and <2.2.0.M4 Greenwich.SR2 Spring Boot >=2.1.0.RELEASE and <2.1.9.BUILD-SNAPSHOT Greenwich.M1 Spring Boot >=2.1.0.M3 and <2.1.0.RELEASE Finchley.BUILD-SNAPSHOT Spring Boot >=2.0.999.BUILD-SNAPSHOT and <2.1.0.M3 Finchley.SR4 Spring Boot >=2.0.3.RELEASE and <2.0.999.BUILD-SNAPSHOT Finchley.RC2 Spring Boot >=2.0.2.RELEASE and <2.0.3.RELEASE Finchley.RC1 Spring Boot >=2.0.1.RELEASE and <2.0.2.RELEASE Finchley.M9 Spring Boot >=2.0.0.RELEASE and <=2.0.0.RELEASE Finchley.M7 Spring Boot >=2.0.0.RC2 and <=2.0.0.RC2 Finchley.M6 Spring Boot >=2.0.0.RC1 and <=2.0.0.RC1 Finchley.M5 Spring Boot >=2.0.0.M7 and <=2.0.0.M7 Finchley.M4 Spring Boot >=2.0.0.M6 and <=2.0.0.M6 Finchley.M3 Spring Boot >=2.0.0.M5 and <=2.0.0.M5 Finchley.M2 Spring Boot >=2.0.0.M3 and <2.0.0.M5 Edgware.SR5 1.5.20.RELEASE Edgware.SR5 1.5.16.RELEASE Edgware.RELEASE 1.5.9.RELEASE Dalston.RC1 1.5.2.RELEASE
二、升级前的注意事项
注意: springboot-2.x依赖于JDK8及以上,并且支持JDK9的新特性。所以要确认项目的JDK版本。
注意: springboot-2.x对一些第三方类库进行了版本升级,其中最重要的例如:Spring Framework 5+以及Tomcat 8.5+。因此对于Spring 4所集成的在新版本中可能会被废弃,例如:guava cache
三、修改pom.xml依赖
所示过程都以springboot项目开发规范进行,例如将parent定义为父工程,然后将Springcloud以依赖的形式引入。pom.xml文件的修改分为如下三个步骤:
3.1 修改parent标签内容,将项目父工程设定为springboot-2.x:
<parent>
   <groupId>org.springframework.bootgroupId>
   <artifactId>spring-boot-starter-parentartifactId>
   <version>2.1.9.RELEASEversion>
   <relativePath/>
parent>
3.2 修改properties标签内容,设定一些基本属性值,如springcloud版本:
<properties>
   <project.build.sourceEncoding>UTF-8project.build.sourceEncoding>
   <java.version>1.8java.version>
   <spring-cloud.version>Greenwich.SR2spring-cloud.version>
properties>
3.3 新增dependencyManagement标签内容,新增springcloud依赖:
<dependencyManagement>
   <dependencies>
       <dependency>
           <groupId>org.springframework.cloudgroupId>
           <artifactId>spring-cloud-dependenciesartifactId>
           <version>${spring-cloud.version}version>
           <type>pomtype>
           <scope>importscope>
       dependency>
   dependencies>
dependencyManagement>
3.4 可以在pom.xml中增加如下内容,无需修改settings.xml的mirror镜像源即可使用阿里仓库进行jar包的下载。
<repositories>
   <repository>
       <id>maven-aliid>
       <url>http://maven.aliyun.com/nexus/content/groups/public//url>
       <releases>
           <enabled>trueenabled>
       releases>
       <snapshots>
           <enabled>trueenabled>
           <updatePolicy>alwaysupdatePolicy>
           <checksumPolicy>failchecksumPolicy>
       snapshots>
   repository>
repositories>
等待jar包下载完毕之后,升级的第一步已经完成,接下来进行jar包的管理。
四、maven依赖升级
升级版本之后,会导致很多jar包和配置文件的不兼容,因此,现在要开始修改依赖和配置文件的内容。注意:期望开发人员开始使用IDEA作为开发工具进行项目的升级,本文中的软件截图皆来自于IDEA,并期望借助IDEA完成项目的升级改造。
你可以在IDEA右侧,maven视图中看到,哪些依赖的版本失效,如图所示,版本号为"unknown"的即需要进行修改,以eureka为例,在新版本中eureka所属的artifactId发生了变化,修改为正确的artifactId即可。

4.1 eureka-client-artifactId的改变:
1.5.7的版本中,eureka依赖:
<dependency>
  <groupId>org.springframework.cloudgroupId>
  <artifactId>spring-cloud-starter-eurekaartifactId>
dependency>

2.x以上的版本,eureka依赖:
<dependency>
  <groupId>org.springframework.cloudgroupId>
  <artifactId>spring-cloud-starter-netflix-eureka-clientartifactId>
dependency>
4.2 eureka-server-artifactId的改变:
1.5.7的版本中,eureka依赖:
<dependency>
   <groupId>org.springframework.cloudgroupId>
   <artifactId>spring-cloud-starter-eureka-serverartifactId>
dependency>

2.x以上的版本,eureka依赖:
<dependency>
   <groupId>org.springframework.cloudgroupId>
   <artifactId>spring-cloud-starter-netflix-eureka-serverartifactId>
dependency>
4.3 feign-artifactId的改变:
1.5.7的版本中,feign依赖:
<dependency>
   <groupId>org.springframework.cloudgroupId>
   <artifactId>spring-cloud-starter-feignartifactId>
dependency>

2.x以上的版本,feign依赖:
<dependency>
   <groupId>org.springframework.cloudgroupId>
   <artifactId>spring-cloud-starter-openfeignartifactId>
dependency>
4.4 mybatis依赖升级,有关mybatis-spring-boot-stater版本与spring-boot版本的对应关系,见参考资料mybatis-springboot-starter官方文档
<dependency>
   <groupId>org.mybatis.spring.bootgroupId>
   <artifactId>mybatis-spring-boot-starterartifactId>
   <version>2.1.1version>
dependency>
4.5 ActiveMQ若使用线程池,在springboot-2.1.x中与springboot-2.0.x及以下的依赖有所不同,关于springboot-2.1.x整合ActiveMQ见参考资料:SpringBoot2.* 整合ActiveMQ时版本引起的问题简录,pom.xml如下:
<dependency>
	<groupId>org.apache.activemqgroupId>
	<artifactId>activemq-poolartifactId>
dependency>

<dependency>
    <groupId>org.messaginghubgroupId>
    <artifactId>pooled-jmsartifactId>
dependency>
4.6 springboot-2.x中使用quartz定时任务时,依赖更为简单,pom.xml如下:
<dependency>
   <groupId>org.quartz-schedulergroupId>
   <artifactId>quartzartifactId>
   <version>1.8.6version>
dependency>

<dependency>
   <groupId>org.springframework.bootgroupId>
   <artifactId>spring-boot-starter-quartzartifactId>
dependency>
修改完之后,IDEA的maven->dependencies视图中,原本为"unknown"版本的包将显示为正确的版本。
五、配置文件升级
接下来进行配置文件的修改,springboot-2.x废弃了很多原有的配置,当你用IDEA打开配置文件的时候,就会发现若干配置出现红波浪线如图所示,您可以通过IDEA快速修复功能(快捷键Alt+Enter)进行修正,这也是再次推荐使用IDEA的原因。或者您可以根据本文总结的配置对照表进行修改,但并不一定全。
5.1 web部分
| old property | new property | remark |
|---|---|---|
| server.context-path | server.servlet.context-path | 项目访问路径 |
| server.context-parameters.* | server.servlet.context-parameters.* | ServletContext初始化参数 |
| spring.http.multipart.maxFileSize | spring.servlet.multipart.max-file-size | 限定单个文件上传大小的上限 |
| spring.http.multipart.maxRequestSize | spring.servlet.multipart.max-request-size | 限定单次请求文件大小的上限 |
5.2 actuator部分,更多actuator详情见参考资料:Spring Boot 2.0官方文档之 Actuator
| old property | new property | remark |
|---|---|---|
| management.context-path | management.endpoints.web.base-path | actuator暴露接口的前缀 |
| management.security.enabled | actuator是否需要安全保证 | |
| management.port | management.server.port | actuator暴露的端口 |
| endpoints.{配制的endpoint}.enabled | management.endpoint.{配制的endpoint}.enabled | 配置指定actuatorEndpoint |
| management.endpoints.web.exposure.include=* | 暴露所有端点 | |
| endpoints.health.sensitive | (你可以使用上面这行的配置,include=health, info, env) | health端口默认开启默认暴露 |
5.3 security部分
| old property | new property | remark |
|---|---|---|
| security.user.name | spring.security.user.name | username |
| security.user.password | spring.security.user.password | password |
| security.basic.path | (通过代码配置) | |
| security.basic.enabled | (通过代码配置) |
5.4 redis部分
| old property | new property | remark |
|---|---|---|
| spring.redis.pool.max-active | spring.redis.jedis.pool.max-active | 最大活动连接数量 |
| spring.redis.pool.max-wait | spring.redis.jedis.pool.max-wait | 最大阻塞等待时间 |
| spring.redis.pool.max-idle | spring.redis.jedis.pool.max-idle | 最大空闲连接数量 |
| spring.redis.pool.min-idle | spring.redis.jedis.pool.min-idle | 最小空闲连接数量 |
5.5 datasource部分
| old property | new property | remark |
|---|---|---|
| spring.datasource.driverClassName | spring.datasource.driver-class-name | |
| spring.datasource.url | spring.datasource.jdbc-url | 多数据源 |
| spring.datasource.url | spring.datasource.url | 单数据源 |
注意: 在新版本中,MySQL的驱动类名也变了,启动一个带有数据源的项目后,您将在控制台中看到如下日志信息:
Loading class ‘com.mysql.jdbc.Driver’. This is deprecated. The new driver class is `com.mysql.cj.jdbc.Driver’. The driver is automatically registered via the SPI and manual loading of the driver class is generally unnecessary.
5.6 eureka部分
| old property | new property | remark |
|---|---|---|
| spring.cloud.client.ipAddress | spring.cloud.client.ip-address | eureka客户端的ip地址 |
5.7 activemq部分
| old property | new property | remark |
|---|---|---|
| spring.activemq.pool.create-connection-on-startup | 是否在启动时创建连接 |
@RestController 注解默认使用 jackson 将对象转为 json 返回,在 springboot-2.x 以上的版本中,jackson 对 Date 类型的序列化有所改变。在之前的版本中是将 Date 转为时间戳返回,而新版本中将 Date 类型转为 datetime 返回,例如:2020-08-20T23:32:52.000+00:00。这可能造成显示的时间与实际时间不符。增加以下配置设置 jackson 的时区。
spring.jackson.time-zone=GMT+8
配置部分详情请见参考资料 springboot-2.x官方文档中文翻译版
六、代码层的修改
6.1 类所属的包名的改变
新版本中有一些类的包名更改了,例如DataSourceBuilder类:该类原有的包路径为
// 1.5.7版本中的路径
import org.springframework.boot.autoconfigure.jdbc.DataSourceBuilder;
// 2.x版本中的路径
import org.springframework.boot.jdbc.DataSourceBuilder;
对于此类问题有很多,修改起来也比较简单,您可以使用IDEA自动修复工具进行包的改变,您只需要删除错误的import语句,IDEA会为您自动导包。
6.2 废弃google guava替换为caffeine
接下来将解决一个比较棘手的问题:在本人升级的项目中使用了Spring4.x具有的guava cache,但是该组件在Spring 5中废除,取而代之的是caffeine。这意味着程序将不能再使用guava cache,尝试降低spring-context-support.jar的版本也是不行的。项目启动报错如图:
对使用guava cache的工程进行代码修改,将缓存策略修改为caffeine。原有的guava缓存策略代码如下:
public GuavaCacheManager guavaCacheManager() {
   GuavaCacheManager cacheManager = new GuavaCacheManager();
   //规定了缓存在1小时没有使用的情况下进行回收
   //规定了缓存的最大容量
   cacheManager.setCacheBuilder(CacheBuilder.newBuilder().expireAfterWrite(1, TimeUnit.HOURS).maximumSize(100000));
   ArrayList<String> cacheNames = new ArrayList<>();
   cacheNames.add("common-cache-guava-caching");
   cacheManager.setCacheNames(cacheNames);

   return cacheManager;
}
在使用springboot-caffeine前,需要导包,pom.xml依赖如下:
<dependency>
   <groupId>org.springframework.bootgroupId>
   <artifactId>spring-boot-starter-cacheartifactId>
dependency>

<dependency>
   <groupId>com.github.ben-manes.caffeinegroupId>
   <artifactId>caffeineartifactId>
dependency>
使用springboot-caffeine的代码如下,配置与使用guava cache是等同的。有关于caffeine更多的配置或详细信息,请参考caffeine官方文档
public CaffeineCacheManager guavaCacheManager() {
   CaffeineCacheManager cacheManager = new CaffeineCacheManager();
   Caffeine caffeine = Caffeine.newBuilder()
       .initialCapacity(100)
       .maximumSize(100000)
       .expireAfterWrite(1, TimeUnit.HOURS);
   cacheManager.setCaffeine(caffeine);
   ArrayList<String> cacheNames = new ArrayList<>();
   cacheNames.add("common-cache-guava-caching");
   cacheManager.setCacheNames(cacheNames);
   return cacheManager;
}

6.3 RedisCacheManager配置
springboot-2.x中redis的相关代码也需要修改,原有的代码如下:
public RedisCacheManager cacheManager(RedisTemplate redisTemplate) {
   RedisCacheManager redisCacheManager = new RedisCacheManager(redisTemplate);
   //过期时间单位毫秒
   redisCacheManager.setDefaultExpiration(72000);
   redisCacheManager.setUsePrefix(true);
   redisCacheManager.setCachePrefix(new DefaultRedisCachePrefix());
   ArrayList<String> cacheNames = new ArrayList<>();
   cacheNames.add("common-cache-redis-caching");
}
升级后的
RedisCacheManager删除了这个构造方法,修改代码如下所示,有关redis的最新使用方法请参考官方文档:Spring Data Redis官方文档public RedisCacheManager redisCacheManager(RedisTemplate redisTemplate) { RedisCacheConfiguration config = RedisCacheConfiguration.defaultCacheConfig(); config.entryTtl(Duration.ofMillis(72000)); Set<String> cacheNames = new HashSet<>(); cacheNames.add("common-cache-redis-caching"); Map<String, RedisCacheConfiguration> configMap = new HashMap<>(); configMap.put("common-cache-redis-caching", config); RedisCacheManager cacheManager = RedisCacheManager.builder(redisTemplate.getConnectionFactory()) .initialCacheNames(cacheNames) .withInitialCacheConfigurations(configMap) .build(); return cacheManager; }
6.4 自定义actuator的endpoint
actuator支持自定义endpoint,在springboot-1.5的版本中,自定义endpoint的代码如下:
// 自定义endpoint,继承AbstractEndpoint复写public T invoke()方法
public class MyEndpoint extends AbstractEndpoint<Map<String,Object>>{

	// 构造方法传入endpoint的id,访问路径为:/actuator/{id}
	public MyEndpoint(String id) {
       super(id,false); //默认不敏感的端点
   }
   @Override
   public HashMap<String, Object> invoke() {
       HashMap<String, Object> resultMap = new HashMap<>();
       resultMap.put("key", "value");
       return resultMap;
   }
}
// 可以在启动类中给定endpoint的id初始化它并加入spring容器中
@SpringBootApplication
public class Application {
	public static void main(String[] args) {
		SpringApplication.run(Application.class, args);
	}
   @Bean
   public static Endpoint<Map<String, Object>> initEndpoint() {
       return new MyEndpoint("test");// 访问路径/actuator/test
   }
}
在springboot-2.x的版本中,不再提供AbstractEndpoint类,取而代之的是@Endpoint注解,代码如下,更多详情见参考文档:springboot-2.x官方文档中文翻译版
@Configuration
@Endpoint(id = "test")
public class MyEndpoint{
   @ReadOperation //代表get请求
   public String invoke() {
       return "SUCCESS!";
   }
}
自定义端点后,需要配置开启您的端点,如上例代码所示,配置为management.endpoints.web.exposure.include=test或者management.endpoints.web.exposure.include=*,然后即可/actuator/test访问
6.5 由devtools引发的类转换异常
在解决了代码编译问题之后,启动项目在运行时发现报错,大致归为ClassCastException: A cannot be cast to A的问题,明明是同一个类,但是在A aa = (A) obj;的时候发生异常。
在百度和查阅文档之后,发现是因为devtools造成的。devtools重新启动功能通过使用两个类加载器来实现,默认情况下,IDE加载的文件以 “restart” classloader加载,而任何以.jar结尾的文件将以“base” classloader加载。本人涂着省事的目的直接禁用了devtools依赖。以下是官方文档的说明已经解决问题的办法,您可以在META-INF/spring-devtools.properties文件中加入一些内容。更多详情参见spring-boot-devtools官方文档

6.6 前端request请求404
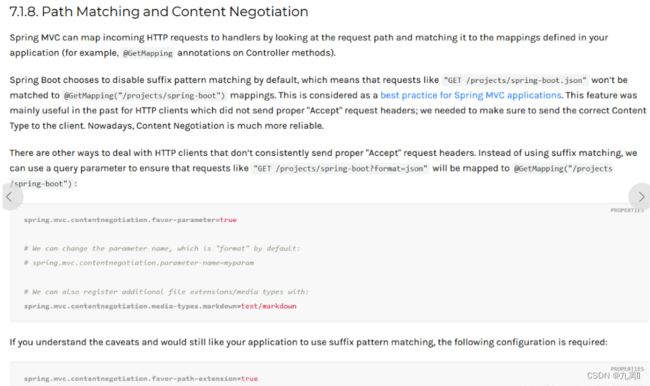
再次启动项目后,发现前端请求后台的接口有很多都是404,进一步发现这些请求都是xxx.do的方式,您可以进行如下配置:spring.mvc.pathmatch.use-suffix-pattern=true,建议新创建的项目不要使用.do或.action结尾的请求。具体原因[参考springboot官方文档](Spring Boot Features)
6.7 前端request请求406
再次启动项目后,发现前端请求后台的接口存在部分406,另外在控制台中有Could not find acceptable representation报错。请您修改application启动类代码,继承WebMvcConfigurationSupport,并重新配置消息转化类和新增ResourceHandler,代码如下:
@SpringBootApplication
@EnableDiscoveryClient
@EnableFeignClients
public class MmsOperateApplication extends WebMvcConfigurationSupport {

   public static void main(String[] args) {
       SpringApplication.run (MmsOperateApplication.class, args);
   }

   @Override
   public void configureMessageConverters(List<HttpMessageConverter<?>> converters) {
       //1、定义一个convert转换消息的对象
       FastJsonHttpMessageConverter fastConverter = new FastJsonHttpMessageConverter();
       //2、添加fastjson的配置信息
       FastJsonConfig fastJsonConfig = new FastJsonConfig();
       fastJsonConfig.setSerializerFeatures(SerializerFeature.PrettyFormat);
       //3、在convert中添加配置信息
       fastConverter.setFastJsonConfig(fastJsonConfig);
       //4、将convert添加到converters中
       converters.add(fastConverter);
       //5、追加默认转换器
       super.addDefaultHttpMessageConverters(converters);
   }

   @Override
   protected void addResourceHandlers(ResourceHandlerRegistry registry) {
       registry.addResourceHandler("/index.html")
               .addResourceLocations("classpath:static/index.html");
       registry.addResourceHandler("/**")
               .addResourceLocations("classpath:/static/");
   }
}