10分钟构建前后端分离后台管理系统(renren-fast、renren-vue)
文章目录
- 前言
- 学前食用
- 一、下载代码
- 二、导入后端代码
-
- 更改配置文件,连接测试
- 三、导入前端代码
- 四、生成所有模块基本CRUD代码
-
- 代码生成器注意点
-
- controller模板
- 自定义类的返回路径
- product模块
- coupon模块
- member模块
- order模块
- ware模块
- Bug记录
-
- npm install失败
- 导入项目后的pom问题
- 插件下载失败
前言
谷粒商城专栏:https://blog.csdn.net/qq_45714272/category_11939728.html
Github地址:https://github.com/YuyanCai/mall-study
引入开源项目,renren-fast、renren-vue项目。进行简单的修改即可快速构建平台
我们能把注意力集中在做项目难点上,不在把精力用在简单的重复的逻辑上,所以快来学吧!!!
代码地址如下:
学前食用
谷粒商城–环境部署篇
一、下载代码
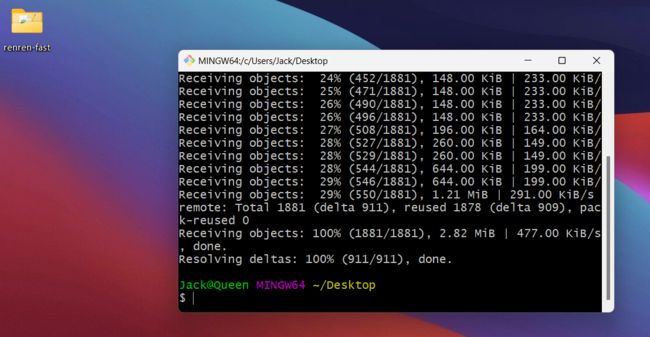
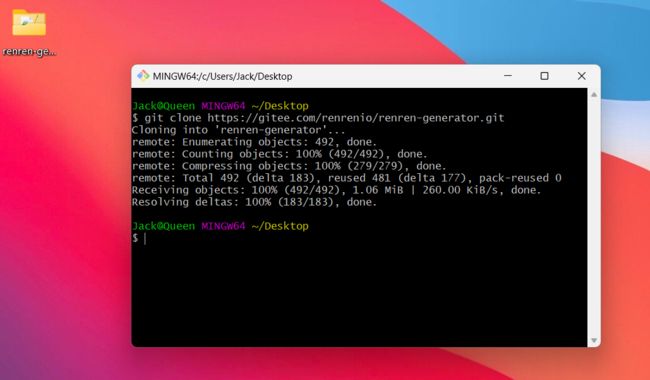
- 通过git clone
- 这里通过git clone下载的代码我们可以直接下载桌面,然后分别导入之后直接删除即可
- 在gitee直接下载
- 用IDM下载还是比较快的!

二、导入后端代码
1.创建基础架构
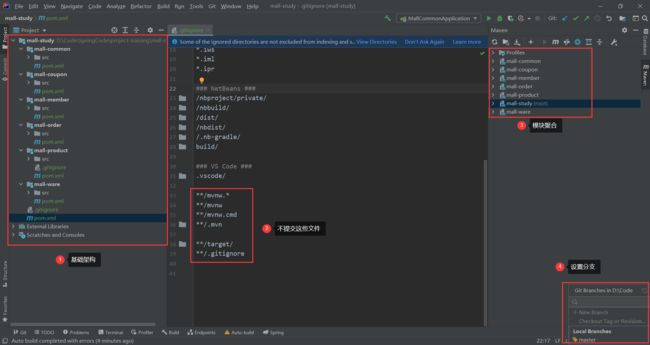
2.引入外部模块
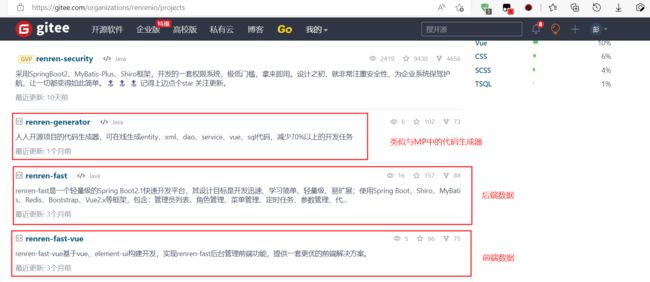
https://gitee.com/renrenio/renren-fast.git
https://gitee.com/renrenio/renren-fast-vue.git
https://gitee.com/renrenio/renren-generator.git
以上分别是:
- 后端代码
- 前端代码
- 代码生成器
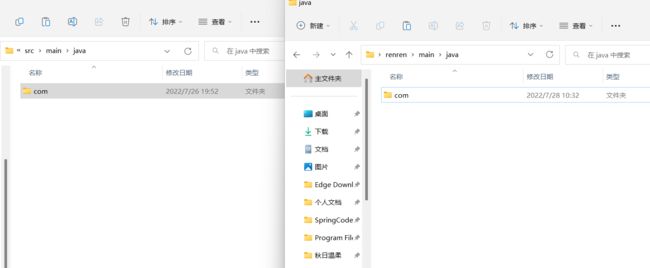
git克隆到桌面,拷贝文件夹到项目文件夹,删除桌面文件
3.导入数据,修改配置文件
这里的数据库都是Docker启动的Mysql
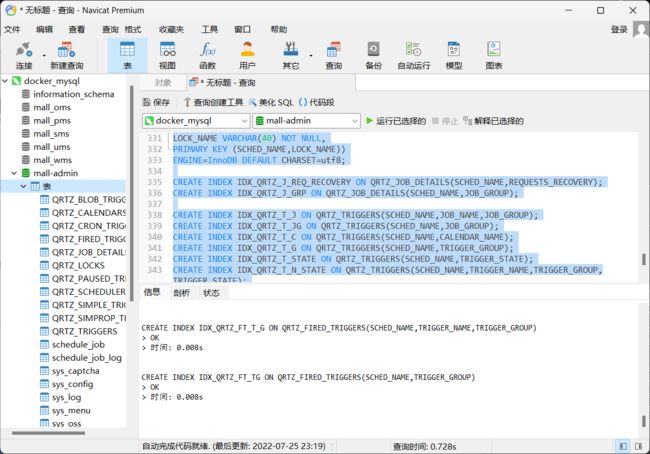
4.修改配置文件
改成 自己的mysql容器地址,还要指定数据库名
url: jdbc:mysql://192.168.1.12:3306/mall-admin?useUnicode=true&characterEncoding=UTF-8&serverTimezone=Asia/Shanghai
5.启动测试

更改配置文件,连接测试
url: jdbc:mysql://192.168.1.12:3306/mall-admin?useUnicode=true&characterEncoding=UTF-8&serverTimezone=Asia/Shanghai
username: root
password: root
........
启动“renren-admin”,然后访问“http://localhost:8080/renren-fast/”
测试成功如下

三、导入前端代码
npm config set registry http://registry.npm.taobao.org/
npm install #在下载的前端项目根目录下
npm run dev #启动前端项目
如果上面不行可以采用
npm install -g cnpm --registry=https://registry.npm.taobao.org
cnpm install node-sass --save
npm run dev #启动前端项目
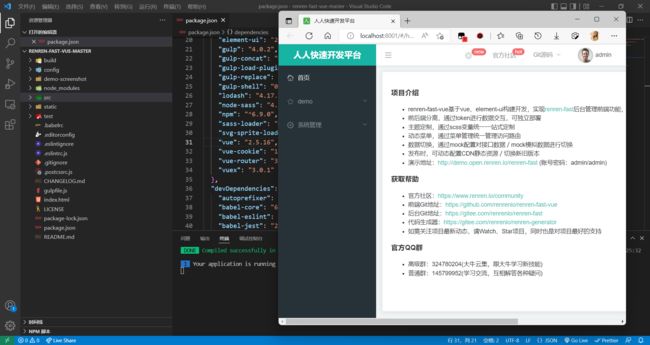
安装成功出现如下提示:
DONE  Compiled successfully in 14998ms                 9:25:32

 I  Your application is running here: http://localhost:8001
启动测试:
至此,简单的后台管理系统搭建完成…
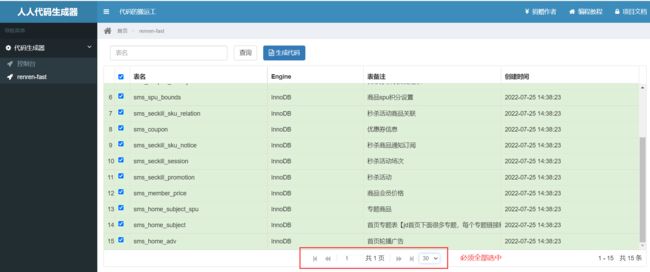
四、生成所有模块基本CRUD代码
代码生成器注意点
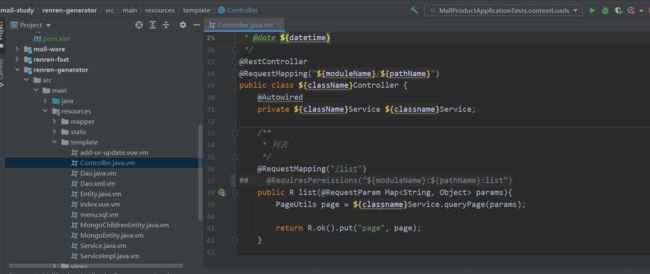
controller模板
自动生成的controller包中代码带有安全框架shiro,这个我们不需要所以直接注释掉
修改自动生成的模板,注释掉全部的
- 注解:@RequiresPermissions
- 包:import org.apache.shiro.authz.annotation.RequiresPermissions;
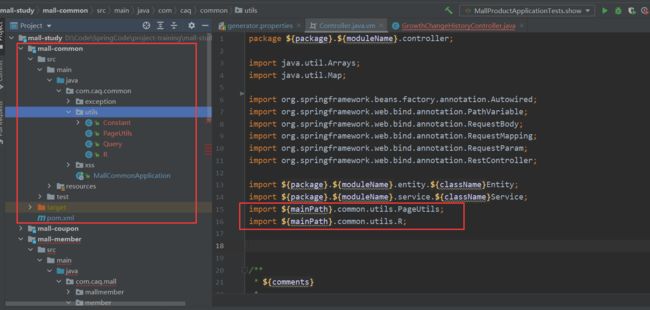
自定义类的返回路径
因为我们把一些通用返回类异常等都放到了mall-common模块,所以mall-common包的定义要根据代码生成器这个包的路径来写;
比如:同一返回类我们要在写在主路径.common.utils包下;
不然全部的controller都会报包的位置错误!
mainpath就是代码生成器模块配置文件指定的
 1、git clone克隆到桌面
2、修改配置
这里拿product模块做示范
mainPath=com.caq
#\u5305\u540D
package=com.caq.mall
moduleName=product
#\u4F5C\u8005
author=xiaocai
#Email
[email protected]
#\u8868\u524D\u7F00(\u7C7B\u540D\u4E0D\u4F1A\u5305\u542B\u8868\u524D\u7F00)
tablePrefix=pms_
application.yml
spring:
  datasource:
    type: com.alibaba.druid.pool.DruidDataSource
    #MySQL配置
    driverClassName: com.mysql.cj.jdbc.Driver
    url: jdbc:mysql://192.168.1.12:3306/mall_pms?useUnicode=true&characterEncoding=UTF-8&useSSL=false&serverTimezone=Asia/Shanghai
    username: root
    password: root
3、运行模块
访问:http://localhost:80/

4、新建common模块
因为自动生成的代码,需要有同一返回类、统一异常处理…
这些代码都在renren-fast模块,我们直接拷贝到mall-common模块即可
各模块所需代码如下:

依赖如下:
父pom中引入新家的common模块
<modules>
    <module>mall-productmodule>
    <module>mall-couponmodule>
    <module>mall-membermodule>
    <module>mall-ordermodule>
    <module>mall-waremodule>
    <module>renren-fastmodule>
    <module>renren-generatormodule>
    <module>mall-commonmodule>
modules>

common引入如下依赖
<dependencies>
        <dependency>
            <groupId>org.projectlombokgroupId>
            <artifactId>lombokartifactId>
            <version>1.18.22version>
        dependency>
        <dependency>
            <groupId>com.baomidougroupId>
            <artifactId>mybatis-plus-boot-starterartifactId>
            <version>3.4.1version>
        dependency>
        <dependency>
            <groupId>org.apache.httpcomponentsgroupId>
            <artifactId>httpcoreartifactId>
            <version>4.4.13version>
        dependency>
        <dependency>
            <groupId>commons-langgroupId>
            <artifactId>commons-langartifactId>
            <version>2.6version>
        dependency>
        <dependency>
            <groupId>javax.servletgroupId>
            <artifactId>servlet-apiartifactId>
            <version>2.5version>
            <scope>providedscope>
        dependency>
        <dependency>
            <groupId>mysqlgroupId>
            <artifactId>mysql-connector-javaartifactId>
            <version>8.0.17version>
        dependency>
    dependencies>
5、拷贝代码注意点
打开模块所在文件夹进行拷贝
product模块
1、引入common模块
生成的代码都要引入common模块,因为自定义的一些类都指定在了mall-common模块
2、配置文件
application.yml
spring:
  datasource:
    username: root
    password: root
    url: jdbc:mysql://192.168.1.12:3306/mall_pms?useUnicode=true&characterEncoding=UTF-8&serverTimezone=Asia/Shanghai
    driver-class-name: com.mysql.cj.jdbc.Driver

mybatis-plus:
  global-config:
    db-config:
      id-type: auto
  mapper-locations: classpath:/mapper/**/*.xml
  configuration:
    log-impl: org.apache.ibatis.logging.stdout.StdOutImpl
application.properties
用来配置端口和服务名称
# 应用名称
spring.application.name=mall-product
# 应用服务 WEB 访问端口
server.port=9999
3、启动类增加mappersan注解
这里强调下:
代码自动生成器生成的代码中,Mapper文件都加了@Mapper注解,所以我们不用加@MapperScan
如果你自己写的话,MapperScan是个更好的选择
@MapperScan("com.caq.mall.product.dao")
4、测试
package com.caq.mall;

import com.caq.mall.product.entity.BrandEntity;
import com.caq.mall.product.service.BrandService;
import org.junit.jupiter.api.Test;
import org.springframework.beans.factory.annotation.Autowired;
import org.springframework.boot.test.context.SpringBootTest;

@SpringBootTest
class MallProductApplicationTests {

    @Autowired
    private BrandService brandService;

    @Test
    void contextLoads() {
        BrandEntity brandEntity = new BrandEntity();
        brandEntity.setName("苹果");
        brandService.save(brandEntity);
    }

}

JDBC Connection [HikariProxyConnection@1371953731 wrapping com.mysql.cj.jdbc.ConnectionImpl@740dcae3] will not be managed by Spring
==>  Preparing: INSERT INTO pms_brand ( name ) VALUES ( ? )
==> Parameters: 苹果(String)
<==    Updates: 1
5、上传代码到github
上传失败可搜索我的文章,今天刚更新的
Java初学者必看,这篇文章

coupon模块
1、修改代码生成器配置文件
mainPath=com.caq
#\u5305\u540D
package=com.caq.mall
moduleName=coupon
#\u4F5C\u8005
author=xiaocai
#Email
[email protected]
#\u8868\u524D\u7F00(\u7C7B\u540D\u4E0D\u4F1A\u5305\u542B\u8868\u524D\u7F00)
tablePrefix=sms_
yml文件
server:
  port: 80

# mysql
spring:
  datasource:
    type: com.alibaba.druid.pool.DruidDataSource
    #MySQL配置
    driverClassName: com.mysql.cj.jdbc.Driver
    url: jdbc:mysql://192.168.1.12:3306/mall_sms?useUnicode=true&characterEncoding=UTF-8&useSSL=false&serverTimezone=Asia/Shanghai
    username: root
    password: root
2、重启服务,重新生成代码文件
3、拷贝代码,建立coupon配置文件
因为我们是通过SpringInit初始化的模块,所以每个模块都有自带的配置文件applicaiton.properties
改端口的话我们可以修改applicaiton.properties文件
spring:
  datasource:
    username: root
    password: root
    url: jdbc:mysql://192.168.1.12:3306/mall_sms?useUnicode=true&characterEncoding=UTF-8&serverTimezone=Asia/Shanghai
    driver-class-name: com.mysql.cj.jdbc.Driver

mybatis-plus:
  mapper-locations: classpath:/mapper/**/*.xml
  global-config:
    db-config:
      id-type: auto
4、运行,测试
http://localhost:7000/coupon/coupon/list
{"msg":"success","code":0,"page":{"totalCount":0,"pageSize":10,"totalPage":0,"currPage":1,"list":[]}}
member模块
重复上述操作,改代码生成器配置文件,运行生成代码,拷贝代码到模块
拷贝后的代码,建立配置文件,改端口,运行
测试,没问题即可

order模块
重复上述操作,改代码生成器配置文件(模块名,数据库名),运行生成代码,拷贝代码到模块
重复上述操作,拷贝后的代码,建立配置文件,改端口,运行
ware模块
重复上述操作,改代码生成器配置文件(模块名,数据库名),运行生成代码,拷贝代码到模块
重复上述操作,拷贝后的代码,建立配置文件,改端口,运行
Bug记录
npm install失败
开启v2ray等你懂得的软件,没有的话通过
清理缓存:npm rebuild node-sass
npm uninstall node-sass
重新下载:npm i node-sass --sass_binary_site=https://npm.taobao.org/mirrors/node-sass/
再次npm install 直到成功
还是失败?
删除node_moudle模块删除重新npm install
快速完成
导入项目后的pom问题
这个作用是不依赖本地parent pom,直接从reposity拉取不继承父类,相当于用自己的
<parent>
   <groupId>org.springframework.bootgroupId>
   <artifactId>spring-boot-starter-parentartifactId>
   <version>2.6.6version>
   <relativePath>relativePath>
parent>

在父pom文件,引入新加进来的模块
    <modules>
        <module>mall-productmodule>
        <module>mall-couponmodule>
        <module>mall-membermodule>
        <module>mall-ordermodule>
        <module>mall-waremodule>
        <module>mall-commonmodule>
        <module>renren-fastmodule>
    modules>
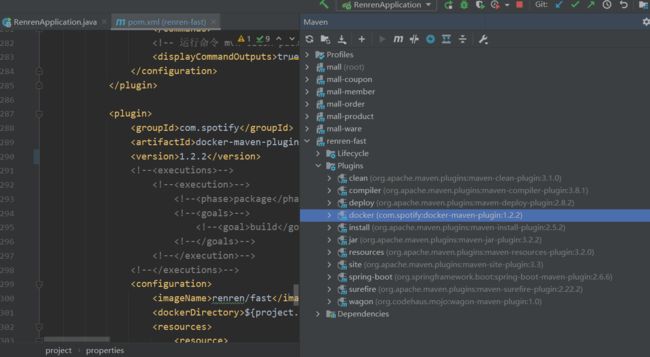
插件下载失败
其中docker的插件版本选择1.2.2可下载
有以下几种方式调试:
- 设置多maven地址
- 设置maven自动导入,删除本地这个包让他重新下载
- 每次更改都要刷新、重启IDEA
- 删除项目,重新克隆到本地