Fabric-blockchain-explorer-区块浏览器
区块浏览器 hyperledger-blockchain-explorer
下载配置文件
# 来到官网
https://github.com/hyperledger/blockchain-explorer
# 根据官网来部署
# 在项目目录创建文件夹
# org1部署区块浏览器
mkdir explorer
cd explorer
# 下载配置文件
wget https://raw.githubusercontent.com/hyperledger/blockchain-explorer/main/examples/net1/config.json
wget https://raw.githubusercontent.com/hyperledger/blockchain-explorer/main/examples/net1/connection-profile/test-network.json -P connection-profile
wget https://raw.githubusercontent.com/hyperledger/blockchain-explorer/main/docker-compose.yaml

# 如果下载不下来,点击三个配置文件,自己创建相对应名称,复制并保存
1.创建docker-compose.yaml
# 可以下载就不用创建这三个文件,不可以下载,粘进去
vim docker-compose.yaml
# SPDX-License-Identifier: Apache-2.0
version: '2.1'

volumes:
  pgdata:
  walletstore:

networks:
  mynetwork.com:
    external:
      名字: fabric_test

services:

  explorerdb.mynetwork.com:
    image: hyperledger/explorer-db:latest
    container_name: explorerdb.mynetwork.com
    hostname: explorerdb.mynetwork.com
    environment:
      - DATABASE_DATABASE=fabricexplorer
      - DATABASE_USERNAME=hppoc
      - DATABASE_PASSWORD=password
    healthcheck:
      test: "pg_isready -h localhost -p 5432 -q -U postgres"
      interval: 30s
      timeout: 10s
      retries: 5
    volumes:
      - pgdata:/var/lib/postgresql/data
    networks:
      - mynetwork.com

  explorer.mynetwork.com:
    image: hyperledger/explorer:latest
    container_name: explorer.mynetwork.com
    hostname: explorer.mynetwork.com
    environment:
      - DATABASE_HOST=explorerdb.mynetwork.com
      - DATABASE_DATABASE=fabricexplorer
      - DATABASE_USERNAME=hppoc
      - DATABASE_PASSWD=password
      - LOG_LEVEL_APP=info
      - LOG_LEVEL_DB=info
      - LOG_LEVEL_CONSOLE=debug
      - LOG_CONSOLE_STDOUT=true
      - DISCOVERY_AS_LOCALHOST=false
    volumes:
      - ${EXPLORER_CONFIG_FILE_PATH}:/opt/explorer/app/platform/fabric/config.json
      - ${EXPLORER_PROFILE_DIR_PATH}:/opt/explorer/app/platform/fabric/connection-profile
      - ${FABRIC_CRYPTO_PATH}:/tmp/crypto
      - walletstore:/opt/explorer/wallet
    ports:
      - 8080:8080
    depends_on:
      explorerdb.mynetwork.com:
        condition: service_healthy
    networks:
      - mynetwork.com
2.创建test-network.json
# 创建connection-profile
mkdir connection-profile
vim connection-profile/test-network.json
# 填入以下配置,原配置,后面需要修改配置
{
	"name": "test-network",
	"version": "1.0.0",
	"client": {
		"tlsEnable": true,
		"adminCredential": {
			"id": "exploreradmin",
			"password": "exploreradminpw"
		},
		"enableAuthentication": true,
		"organization": "Org1MSP",
		"connection": {
			"timeout": {
				"peer": {
					"endorser": "300"
				},
				"orderer": "300"
			}
		}
	},
	"channels": {
		"mychannel": {
			"peers": {
				"peer0.org1.example.com": {}
			}
		}
	},
	"organizations": {
		"Org1MSP": {
			"mspid": "Org1MSP",
			"adminPrivateKey": {
				"path": "/tmp/crypto/peerOrganizations/org1.example.com/users/[email protected]/msp/keystore/priv_sk"
			},
			"peers": ["peer0.org1.example.com"],
			"signedCert": {
				"path": "/tmp/crypto/peerOrganizations/org1.example.com/users/[email protected]/msp/signcerts/[email protected]"
			}
		}
	},
	"peers": {
		"peer0.org1.example.com": {
			"tlsCACerts": {
				"path": "/tmp/crypto/peerOrganizations/org1.example.com/peers/peer0.org1.example.com/tls/ca.crt"
			},
			"url": "grpcs://peer0.org1.example.com:7051"
		}
	}
}
3.创建config.json
vim config.json
# 填入以下配置,原配置,后面需要修改配置
{
	"network-configs": {
		"test-network": {
			"name": "Test Network",
			"profile": "./connection-profile/test-network.json"
		}
	},
	"license": "Apache-2.0"
}
文件准备好之后,拷贝证书,或者挂载原证书目录
4.拷贝证书目录
mkdir organizations
cp -r ../crypto-config/* organizations
cd explorer
# 目录结构
tree -L 3
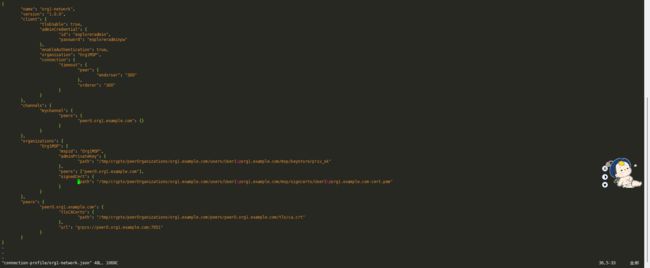
5.修改test-network.json
# 由于咱们是两个节点,而只有一个节点的配置文件
# 所以新创建一个节点的配置文件
# 先修改test-network.json文件为org1-network.json
mv test-network.json org1-network.json
# 进入修改org1-network.json中对应参数
vim org1-network.json
# 修改证书连接文件
# 将用户的证书替换为连接配置文件 (test-network.json) 中的管理员证书和机密(私钥)。需要在资源管理器容器上指定绝对路径。
修改前
"adminPrivateKey": {
    "path": "/tmp/crypto/peerOrganizations/org1.example.com/users/[email protected]/msp/keystore/priv_sk"
}
修改后
"adminPrivateKey": {
    "path": "/tmp/crypto/peerOrganizations/org1.example.com/users/[email protected]/msp/keystore/priv_sk"
}
# 修改完毕保存退出
# 拷贝一份并命名为org2-network.json
cp org1-network.json org2-network.json
# 修改org2-network.json中对应参数
vim org2-network.json
Org1MSP -----> Org2MSP
org1 -----> org2
# 修改完毕保存退出
#或者使用sed
sed -i "s/org1/org2/g" org2-network.json
sed -i "s/Org1/Org2/g" org2-network.json
6.修改config.json
# config.json文件内只配置了一个组织的网络,所以需要添加第二个组织网络
vim config.json
# 修改为以下配置
{
        "network-configs": {
                "org1-network": {		// 需要和org1-network.json中的名称对应
                        "name": "org1-network",
                        "profile": "./connection-profile/org1-network.json"		// 对应配置文件
                },
                "org2-network": {		// 需要和org2-network.json中的名称对应
                        "name": "org2-network",
                        "profile": "./connection-profile/org2-network.json"		// 对应配置文件
                }
        },
        "license": "Apache-2.0"
}
# 修改完毕后退出
7.修改docker-compose
# 找到docker网络
docker network ls
NETWORK ID          NAME                          DRIVER              SCOPE
315b17b2b56c        bridge                        bridge              local
abfdd43e07a4        host                          host                local
48f04abb23eb        multinodes_default            bridge              local		# fabric使用的此网络
e2312b8650e6        multiple-deployment_default   bridge              local

# 修改后
vim docker-compose.yaml
# SPDX-License-Identifier: Apache-2.0
version: '2.1'

volumes:
  pgdata:
  walletstore:

networks:
  mynetwork.com:
    external:
      name: multinodes_default    # fabric网络

services:

  explorerdb.mynetwork.com:
    image: hyperledger/explorer-db:latest
    container_name: explorerdb.mynetwork.com
    hostname: explorerdb.mynetwork.com
    ports:     # 暴露端口
      - 5432:5432
    restart: always    # 增加重启参数
    environment:
      - DATABASE_DATABASE=fabricexplorer  # db 库
      - DATABASE_USERNAME=exploreradmin   # db 账户
      - DATABASE_PASSWORD=exploreradminpw  # db 密码
    healthcheck:
      test: "pg_isready -h localhost -p 5432 -q -U postgres"
      interval: 30s
      timeout: 10s
      retries: 5
    volumes:
      - pgdata:/var/lib/postgresql/data
      - /usr/share/zoneinfo/Asia/Shanghai:/etc/localtime    # 与本机时间保持一致
      - /etc/hosts:/etc/hosts    # 映射hosts文件,否则会连接不了其它节点,或者添加extra_hosts参数
    networks:
      - mynetwork.com

  explorer.mynetwork.com:
    image: hyperledger/explorer:latest
    container_name: explorer.mynetwork.com
    hostname: explorer.mynetwork.com
    environment:
      - DATABASE_HOST=explorerdb.mynetwork.com
      - DATABASE_DATABASE=fabricexplorer  # 与上方保持一致
      - DATABASE_USERNAME=exploreradmin
      - DATABASE_PASSWD=exploreradminpw
      - LOG_LEVEL_APP=info
      - LOG_LEVEL_DB=info
      - LOG_LEVEL_CONSOLE=debug
      - LOG_CONSOLE_STDOUT=true
      - DISCOVERY_AS_LOCALHOST=false
    volumes:
      - ./config.json:/opt/explorer/app/platform/fabric/config.json
      - ./connection-profile:/opt/explorer/app/platform/fabric/connection-profile
      - ../crypto-config:/tmp/crypto  # 映射证书目录
      - /usr/share/zoneinfo/Asia/Shanghai:/etc/localtime
      - /etc/hosts:/etc/hosts
      - walletstore:/opt/explorer/wallet
    ports:
      - 8080:8080
    restart: always
    depends_on:
      explorerdb.mynetwork.com:
        condition: service_healthy
    networks:
      - mynetwork.com
8. 启动区块链浏览器
# 启动之前要保证网络是正常启动的
docker-compose -f docker-compose.yaml up -d
WARN[0000] network mynetwork.com: network.external.name is deprecated in favor of network.name
[+] Running 4/4
 ⠿ Volume "explorer_walletstore"       Created                                   0.0s
 ⠿ Volume "explorer_pgdata"            Created                                   0.0s
 ⠿ Container explorerdb.mynetwork.com  Started                                   2.0s
 ⠿ Container explorer.mynetwork.com    Started                                   34.6s
# 如果是第一次启动,他会自动拉取浏览器镜像
# 内网的话需要提前在外网拉取好,然后导入到相应虚机
docker pull hyperledger/explorer-db:latest
docker pull hyperledger/explorer:latest
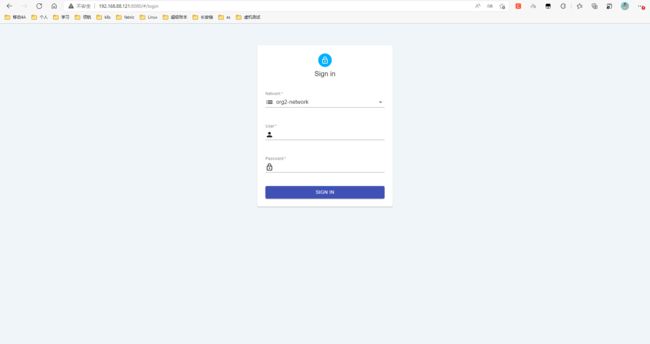
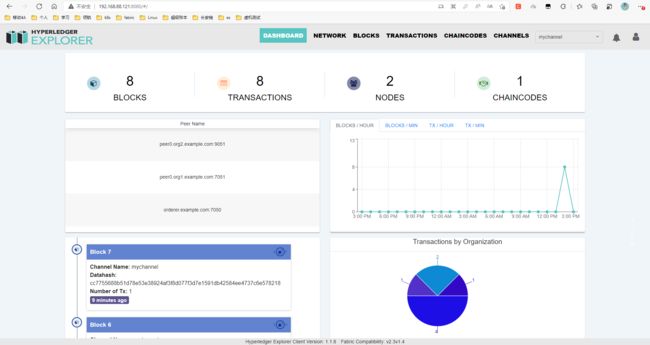
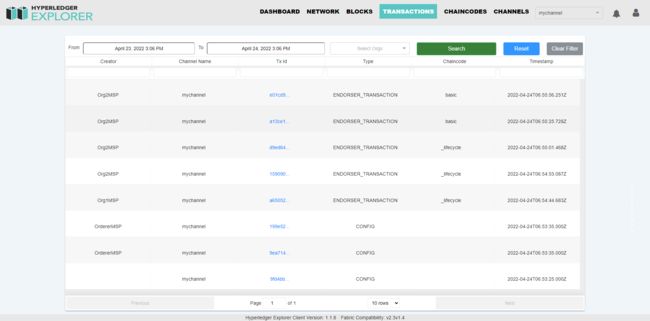
9. 访问区块链浏览器
docker ps
CONTAINER ID   IMAGE                              COMMAND                  CREATED          STATUS                    PORTS                                       NAMES
72d7227b1306   hyperledger/explorer:latest        "docker-entrypoint.s…"   39 seconds ago   Up 3 seconds              0.0.0.0:8080->8080/tcp, :::8080->8080/tcp   explorer.mynetwork.com
5ac9b1f927cb   hyperledger/explorer-db:latest     "docker-entrypoint.s…"   39 seconds ago   Up 36 seconds (healthy)   5432/tcp                                    explorerdb.mynetwork.com
6735ebc7baf2   hyperledger/fabric-orderer:2.4.2   "orderer"                22 hours ago     Up 48 minutes             0.0.0.0:7050->7050/tcp, :::7050->7050/tcp   orderer.example.com


# 192.168.88.121:8080

# 默认账号密码
user:exploreradmin
password:exploreradminpw   # 登录浏览器的密码
完成!


