晋升全栈之路 —— 原生 nodejs 使用 http 模块搭建网络服务器
服务器端基本概念
在使用浏览器对网站进行访问可以使用 http://baidu.com 进行访问,Node.js 可以搭建一个本地的服务器,Node.js 所搭建的本地服务器所使用的通信协议使用的 localhost 协议,例如使用 Node.js 监听 3000 端口,那么在浏览器中可以输入 localhost:3000 来访问这个服务器。
使用 Node.js 创建 web 服务器
需要使用内置模块 http,如下代码所示:
const http = require('http')
// 调用 createServer 方法创建一个服务器对象,将创建之后的对象保存到变量中
let app = http.createServer()
// 监听该服务器的 request 事件
// 回调函数中 req 代表请求信息,res 代表响应信息
app.on('request', (req,res)=>{
// 向html 中写入内容
res.write(`hello world
`)
// 调用 end 方法结束响应,如果没有end 方法,则页面会造成假死现象
res.end()
})
// 监听3000端口
app.listen(3000)
上述代码第 4 行创建了服务器对象,将对象保存到 app 变量中;
由于 Node.js 是基与事件驱动的,所以第 8 行代码使用 on() 方法监听 request 事件,所有有关客户端的事放到了回调函数中的第一个参数 req 中,所有有关服务端的事放到了回调函数中的第二个参数 res 中。
需要注意的是,14 行代码调用了 end 方法,必须调用一次 end 方法,否则访问页面时页面会一直呈刷新状态。
最后监听了 3000 端口。
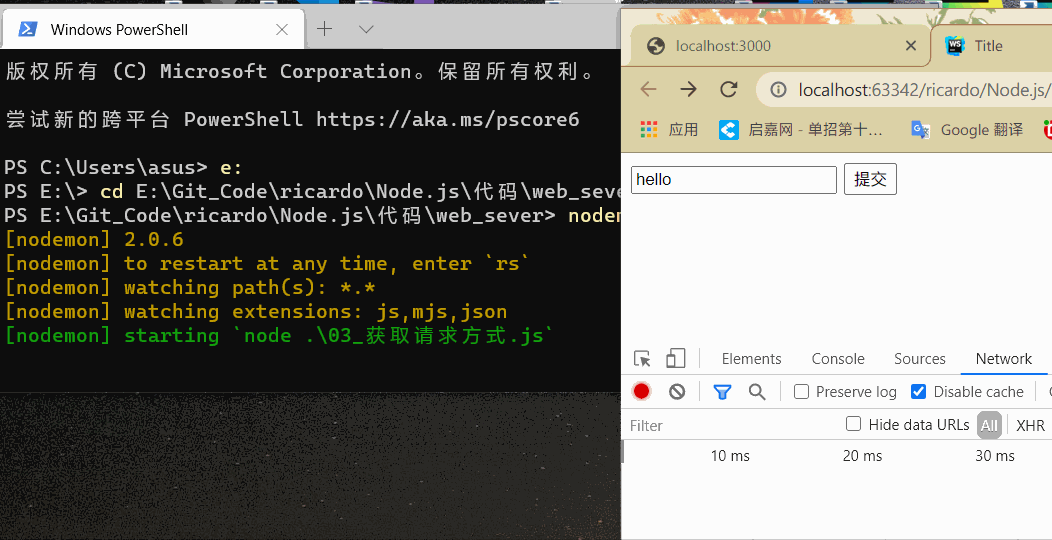
在终端中输入 nodemon 02_sever.js 运行,然后在浏览器中输入 localhost:3000 可以访问生成的页面。
页面中安静的躺着十个大字 “hello world”。
http
获取请求方式
需要使用请求对象的 method 属性,可以获得客户端向服务端发送的请求。如下代码所示:
const http = require('http')
let app = http.createServer()
app.on('request', (req,res) =>{
res.write(`hello
`)
console.log(req.method)
res.end()
})
app.listen(3000)
在浏览器地址栏中输入 localhost:3000 ,终端中输入结果如下:
GET
GET
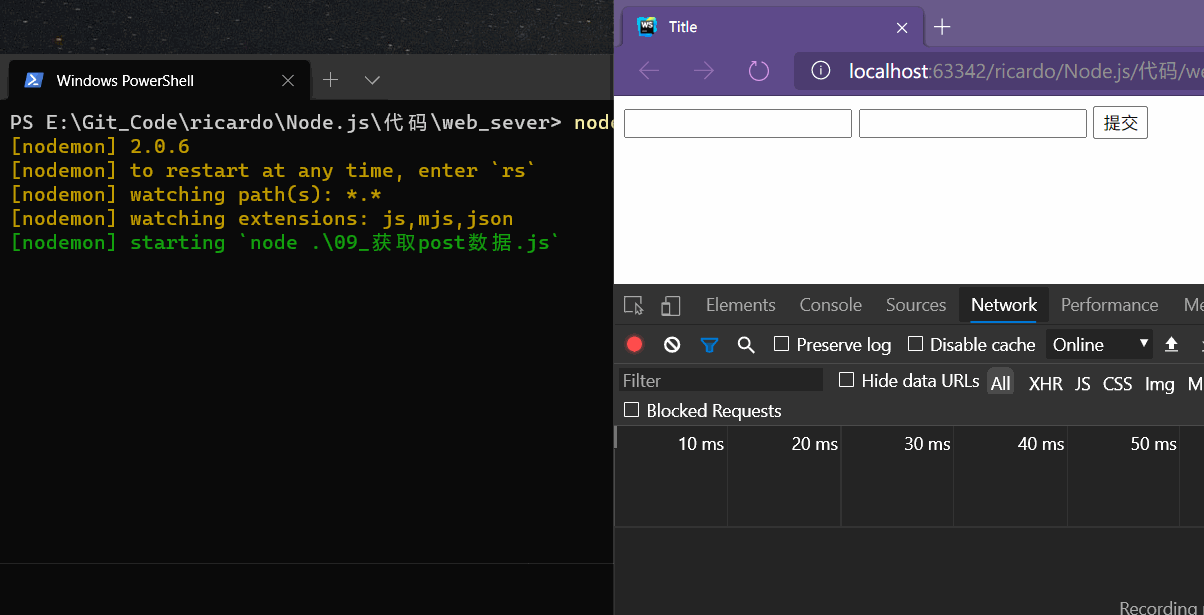
接下来模拟 ajax 向服务端提交数据:
客户端页面:
<body>
<form action="http://localhost:3000/" method="post">
    <input type="text">
    <input type="submit">
form>
body>
Node.js 服务端:
const http = require('http')
let app = http.createServer()
app.on('request', (req,res) =>{
res.write(`hello
`)
console.log(req.method)
res.end()
})
app.listen(3000)
结果:
有了请求方式后,nodejs 可以根据请求方式从而做出不同的响应,如下代码所示:
const http = require('http')
let app = http.createServer()
app.on('request', (req,res) =>{
res.write(`hello
`)
if (req.method === 'POST'){
res.write('post')
// code...
}else if (req.method === 'GET'){
res.write('get ')
// code...
}
res.end()
})
app.listen(3000)
获取请求地址
回调函数中请求对象的 url 属性可以获得客户端的请求地址,如下代码所示:
const http = require('http')
let app = http.createServer()

app.on('request', (req,res)=>{
    console.log(req.url)
    res.end()
})

app.listen(3000)
在浏览器中输入 localhost:3000 后跟其他请求地址,结果如下:
可以根据这个属性来根据请求地址响应不同的页面。
获取请求报文
回调函数中第一个参数(req)中的 headers 可以获取客户端的请求报文,如下代码所示:
const http = require('http')
let app = http.createServer()

app.on('request', (req,res)=>{
    console.log(req.headers)
    res.end()
})

app.listen(3000)
在浏览器中刷新,终端中得到如下结果:
{
  host: 'localhost:3000',
  connection: 'keep-alive',
  pragma: 'no-cache',
  'cache-control': 'no-cache',
  'upgrade-insecure-requests': '1',
  'user-agent': 'Mozilla/5.0 (Windows NT 10.0; Win64; x64) AppleWebKit/537.36 (KHTML, like Gecko) Chrome/87.0.4280.88 Safari/537.36',
  accept: 'text/html,application/xhtml+xml,application/xml;q=0.9,image/avif,image/webp,image/apng,*/*;q=0.8,application/signed-exchange;v=b3;q=0.9',
  'sec-fetch-site': 'none',
  'sec-fetch-mode': 'navigate',
  'sec-fetch-user': '?1',
  'sec-fetch-dest': 'document',
  'accept-encoding': 'gzip, deflate, br',
  'accept-language': 'zh-CN,zh-TW;q=0.9,zh;q=0.8,en;q=0.7',
  cookie: 'Webstorm-a0388fa3=192a0c78-c203-4bde-8ffc-33654fc02443'
}
{
  host: 'localhost:3000',
  connection: 'keep-alive',
  pragma: 'no-cache',
  'cache-control': 'no-cache',
  'user-agent': 'Mozilla/5.0 (Windows NT 10.0; Win64; x64) AppleWebKit/537.36 (KHTML, like Gecko) Chrome/87.0.4280.88 Safari/537.36',
  accept: 'image/avif,image/webp,image/apng,image/*,*/*;q=0.8',
  'sec-fetch-site': 'same-origin',
  'sec-fetch-mode': 'no-cors',
  'sec-fetch-dest': 'image',
  referer: 'http://localhost:3000/',
  'accept-encoding': 'gzip, deflate, br',
  'accept-language': 'zh-CN,zh-TW;q=0.9,zh;q=0.8,en;q=0.7',
  cookie: 'Webstorm-a0388fa3=192a0c78-c203-4bde-8ffc-33654fc02443'
}
请求报文返回的是一个 json 对象,可以通过这些键获取其中指定某一项的报文信息。
响应报文
http 状态码
可以使用 res.writeHead() 来对客户端请求的响应信息中 Status Code 进行设置
需要注意,writeHead() 方法一定要写在 write() 方法之前,这个问题让我整个下午都是荒废的。
- 200:请求成功
- 404:资源没找到
- 500:服务端错误
- 400:客户端请求有语法错误
const http = require('http')
let app = http.createServer()
app.on('request', (req,res)=>{
res.writeHead(500)
res.write(`hello
`)
res.end()
})
app.listen(3000)
内容类型
res.writeHead() 方法还可以接受第二个参数,该参数的类型是一个对象,对象中有各项响应头信息的设置,例如 Content-Type 和字符编码。
如下代码所示:
const http = require('http')
let app = http.createServer()
app.on('request', (req,res)=>{
res.writeHead(200,{
'Content-Type': 'text/plain; charset=utf8'
})
res.write(`你好
`)
res.end()
})
app.listen(3000)
第 5 行代码,设置响应的内容类型为纯文本,字符集为 utf8
设置响应类型为纯文本之后,第 7 行代码向页面写入了一个 h2 标签,这时不能正常解析。
如果将第 5 行代码改为 'Content-Type': 'text/html; charset=utf8' 页面中正常解析出了 html 标签。
HTTP 请求和响应处理
GET 参数获取
get 方法传递的参数通常放到了浏览器的地址栏中,所以对于 get 方式携带的参数,可以使用 req.url 进行获取。
const http = require('http')
let app = http.createServer()

app.on('request', (req,res)=>{
    console.log(req.url)
    res.end()
})

app.listen(3000)
在浏览器地址栏输入:localhost:3000?msg=hello&name=xiaoming ,终端中输出结果如下:
/?msg=hello&name=xiaoming
可以通过字符串截取,取出 ? 后面的数据,封装成 json 或者字符串格式。
Node.js 提供了另一种内置模块 url 模块,该模块提供了 parse() 方法解析一个地址,该方法接受两个参数,第一个参数为要解析的字符串,第二个参数如果为 true 则代表解析为 对象的形式,并将解析后的地址放到一个对象中,如下 js 代码:
const http = require('http')
const url = require('url')

let app = http.createServer()

app.on('request', (req,res)=>{

    // 解析 get 请求方法的参数
    console.log(url.parse(req.url, true))
    res.end()
})

app.listen(3000)
在浏览器地址栏输入:localhost:3000?msg=hello&name=xiaoming ,终端中输出结果如下:
Url {
  protocol: null,
  slashes: null,
  auth: null,
  host: null,
  port: null,
  hostname: null,
  hash: null,
  search: '?msg=hello&name=xiaoming',
  query: [Object: null prototype] { msg: 'hello', name: 'xiaoming' },
  pathname: '/',
  path: '/?msg=hello&name=xiaoming',
  href: '/?msg=hello&name=xiaoming'
}
由输出可见只需要调用返回对象的 query 属性,就是 get 请求方式传递的参数:
url.parse(req.url, true).query
结果:
[Object: null prototype] { msg: 'hello', name: 'xiaoming' }
POST 参数获取
获取 POST 请求的参数需要使用请求对象监听 data 和 end 事件,由于 post,如下代码所示:
HTML:
<body>
<form action="http://localhost:3000/" method="post">
    <input class="one" type="text" name="username">
    <input class="two" type="password" name="password">

    <input type="submit" value="提交">
form>
body>
JavaScript:
const http = require('http')
let app = http.createServer()

app.on('request', (req,res)=>{
    var user_data = ''

    req.on('data', params =>{
        user_data += params;
    })

    req.on('end', ()=>{
        console.log(`输入了:${user_data}`)
    });

    res.end()
});
app.listen(3000)
结果:
在终端的输出中发现服务端获取的请求格式为字符串格式,如果要转存为对象格式仍然需要使用字符串分割的方法,
Node.js 提供了另一个内置模块 querystring 来实现这个功能
需要使用 querystring.parse() 方法来转换格式,如下代码所示:
const http = require('http')
const querystring = require('querystring')
let app = http.createServer()

app.on('request', (req,res)=>{

    var user_data = ''

    req.on('data', params =>{
        user_data += params;
    })
    req.on('end', ()=>{
        let result = querystring.parse(user_data)

        console.log(result)
    });
    res.end()
});
app.listen(3000)
结果如下:
[Object: null prototype] { username: 'xiaoming', password: '123456' }
路由
用户输入在浏览器地址栏输入不同路径服务端对其进行不同的响应,需要使用 req.url 方法,来获取当前浏览器地址栏中的路径。如下代码所示:
const http = require('http')
const url = require('url')
let app = http.createServer()
app.on('request', (req,res)=>{
// 用户输入的浏览器地址
let pathname = url.parse(req.url).pathname
res.writeHead(200, {
'content-type': 'text/html; charset=utf8;'
})
// 根据用户输入地址的不同,做不同响应
if (pathname === '/' || pathname === '/index'){
res.write('欢迎来到首页')
res.end()
}else if(pathname === '/list'){
res.end('欢迎来到列表页')
}else{
res.write(`not found
`)
}
res.end()
})
app.listen(3000)
地址栏中输入不同的路径页面会得到不同的响应结果。
访问静态资源
用户在浏览器地址栏中输入域名和端口之后,不能只是简单的提示文本,可以通过地址栏中的路径,判断用户要访问哪个资源,然后将地址栏中的路径拼接成硬盘中的真实路径。通过 fs 模块对其进行读取,在将读取到的结果写到页面中。
如下代码所示:
const http = require('http')
const url = require('url')
const path = require('path')
const fs = require('fs')
let app = http.createServer()
app.on('request', (req,res)=>{
if (req.method === 'GET'){
// 获取用户输入的路径
let path_name = url.parse(req.url).pathname
// 拼接成硬盘路径
let result_path = path.join(__dirname,`public${path_name}`)
/*使用 fs 模块html文件中的数据进行读取*/
fs.readFile(result_path, (err,doc)=>{
// 如果读取发生了异常
if (err != null){
// 状态码为 404,字符集为utf8
res.writeHead(404,{
'content-type': 'text/html; charset=utf8;'
})
res.end(`资源未找到
`)
}
res.writeHead(200, {
'content-type': 'text/html; charset=utf8'
})
// 将读取到的内容写入到 html 页面
res.end(doc)
})
}
})
app.listen(3000)
mime 模块
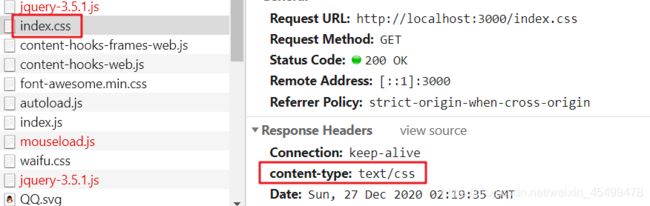
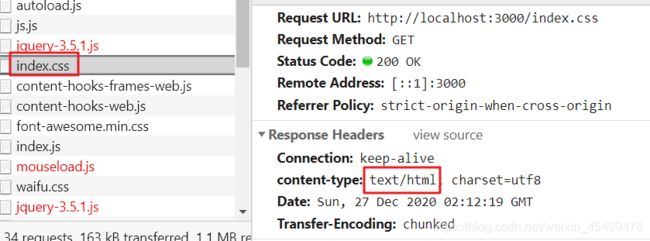
上述代码中,执行之后在浏览器地址栏输入 localhost:3000/index.html 之后访问到了首页文件,但是访问之后 css 样式却没有被应用,在 network 中查看发现 css 样式被解析成了 html:
Node.js 的第三方模块 mime ,解决了这个问题,该模块会根据路径判断当前的 MIME 的类型,并将其返回。
NPM 中的mime模块
将上述代码改成:
const http = require('http')
const url = require('url')
const path = require('path')
const fs = require('fs')
const mime = require('mime')
let app = http.createServer()
app.on('request', (req,res)=>{
if (req.method === 'GET'){
// 获取用户输入的路径
let path_name = url.parse(req.url).pathname
/*
* 将用户输入的浏览器地址路径转换成硬盘上的路径
* 使用 __dirname 获取绝对路径
* 使用 path.join 进行拼接*/
let result_path = path.join(__dirname, `public${path_name}`)
// 根据路径获取请求的数据类型
let data_type = mime.getType(result_path)
/*
* 使用 fs 模块html文件中的数据进行读取*/
fs.readFile(result_path, (err,doc)=>{
// 如果读取发生了异常
if (err != null){
// 状态码为 404,字符集为utf8
res.writeHead(404,{
'content-type': 'text/html; charset=utf8;'
})
res.end(`资源未找到
`)
}
res.writeHead(200, {
'content-type': data_type
})
// 将读取到的内容写入到 html 页面
res.end(doc)
})
}
})
app.listen(3000)
再次访问 localhost:3000/index.html css 结果如下: