SpringCloud & Vue 分布式微架构(2) - 搭建注册中心
一、创建子项目(spring boot):注册中心
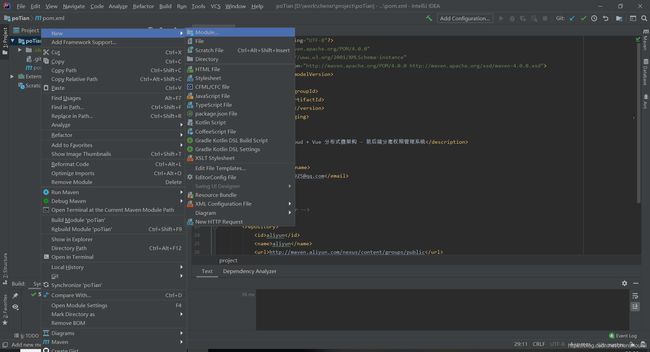
1、右键父项目(poTian) -> New -> Module
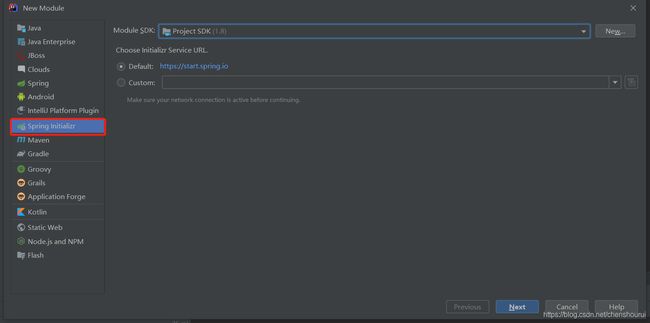
2、选中Spring Initializr,选择jdk,创建spring boot子项目
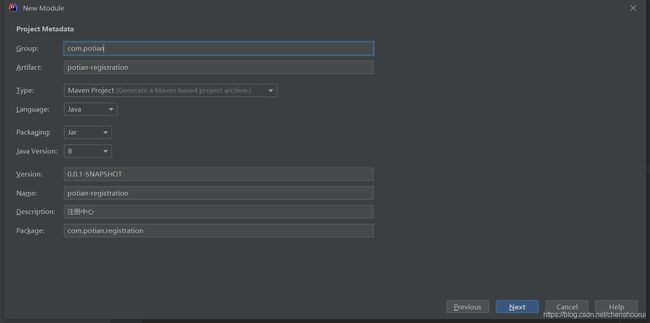
3、填写项目坐标GroupId、ArtifactId(确保项目唯一性),项目名等信息
4、选择spring boot项目需要引进的模块(比如web模块等)
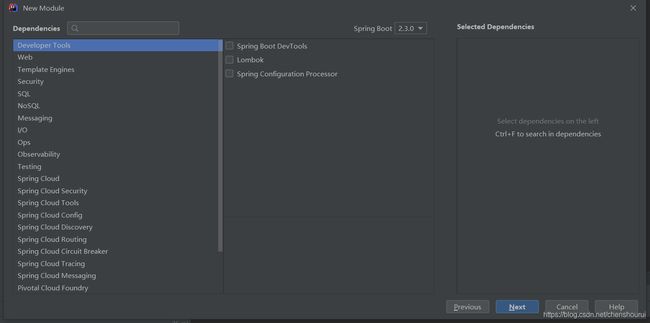
注:这里不选任何模块,如需要,我们自己引入即可
5、点击next,添加模块名和模块路径(一般情况下默认即可)

6、点击Finish,可以看到如下项目结构目录

7、pom.xml如下(里面主要引入了spring boot2.3核心和test模块)
    4.0.0

        org.springframework.boot
        spring-boot-starter-parent
        2.3.0.RELEASE


    com.potian
    potian-registration
    0.0.1-SNAPSHOT
    potian-registration
    注册中心


        1.8


            org.springframework.boot
            spring-boot-starter


            org.springframework.boot
            spring-boot-starter-test
            test


                    org.junit.vintage
                    junit-vintage-engine


                org.springframework.boot
                spring-boot-maven-plugin
注:引入spring-boot-starter-parent指定相应的版本(这里用2.3),后面引入的其他模块都是与2.3版本相关的版本
二、整合配置文件
- 创建父子依赖关系
- 引入父项目pom中添加
节点,引入子项目
potian-registration
- 将子项目的spring boot相关的依赖包、版本管理等信息放到父项目pom文件中(同一个项目,我们引用的jar版本应该时一致的,到时所有子项目引用父项目即可)
    1.8


        org.springframework.boot
        spring-boot-starter


        org.springframework.boot
        spring-boot-starter-test
        test


                org.junit.vintage
                junit-vintage-engine
- 在父项目pom.xml中设置项目的版本号为1.0,并且添加spring cloud版本号Hoxton.RELEAS
    1.8
    1.0
    Hoxton.RELEASE
- 修改父项目pom.xml的version节点的值为${potian.version},这时候这个节点的直接就是上面设置的1.0
${potian.version} - 子项目potian-registration的pom.xml文件引用父项目(可以看到,这里引用父项目的版本也是使用${potian.version},这就避免修改父项目版本号,所有子项目也要修改)
2.在父项目pom.xml添加spring cloud版本依赖(Hoxton.RELEAS)
            org.springframework.cloud
            spring-cloud-dependencies
            ${spring-cloud.version}
            pom
            import
注:dependencyManagement只是声明依赖,并不实现引入,因此子项目需要显示的声明需要用的依赖。如果不在子项目中声明依赖,是不会从父项目中继承下来的;只有在子项目中写了该依赖项,并且没有指定具体版本,才会从父项目中继承该项,并且version和scope都读取自父pom;另外如果子项目中指定了版本号,那么会使用子项目中指定的jar版本。
因为所有的子项目都只会使用部分的spring cloud模块,所有将spring cloud放在父项目dependencyManagemen节点,后面我们需要哪些子模块在子项目定义即可
三、创建注册中心(子项目)
- 在子项目potian-registration引入eureka注册中心
        org.springframework.cloud
        spring-cloud-starter-netflix-eureka-server
注:spring-cloud-starter-eureka-server 在1.5版本中可以使用,在2.0版本中废弃,建议使用spring-cloud-starter-netflix-eureka-server
- 修改启动类名字PotianRegistrationApplication.java为RegistrationApplication.java(右键PotianRegistrationApplication.java ->Refacor->Rename)
注:这一步不是必须,我只是看着名字有点别扭
- 为RegistrationApplication.java添加@EnableEurekaServer注解,表示这个项目是一个注册中心
package com.potian.registration;
import org.springframework.boot.SpringApplication;
import org.springframework.boot.autoconfigure.SpringBootApplication;
import org.springframework.cloud.netflix.eureka.server.EnableEurekaServer;
@SpringBootApplication
@EnableEurekaServer
public class RegistrationApplication {
public static void main(String[] args) {
SpringApplication.run(RegistrationApplication.class, args);
}
}
- 删除子项目potian-registration的application.properties文件 创建 application.yml(因为现在.yml比较流行,这里也用这种方式),并添加如下配置
server:
  port: 9999  # 端口号

eureka:
  instance:
    hostname: 127.0.0.1    #设置hostname
  client:
    register-with-eureka: false  #禁止自己当做服务注册
    fetch-registry: false        #注册中心不负责检索服务
    service-url:
      defaultZone: http://${eureka.instance.hostname}:${server.port}/eureka/  # 默认的注册中心地址

spring:
  application:
    name: potian-registration   #设置项目名称
fetch-registry: 检索服务选项,当设置为True(默认值)时,会进行服务检索,注册中心不负责检索服务。
register-with-eureka: 服务注册中心也会将自己作为客户端来尝试注册自己,为true(默认)时自动生效
eureka.client.serviceUrl.defaultZone是一个默认的注册中心地址。配置该选项后,可以在服务中心进行注册。
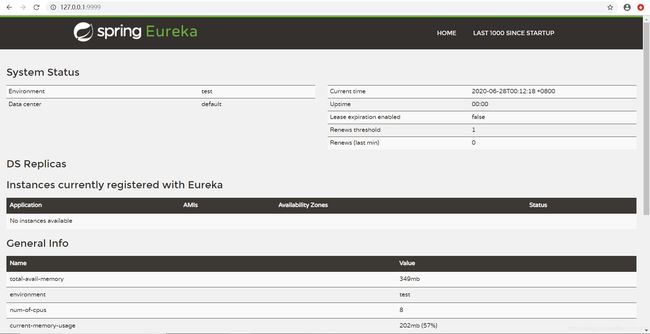
- 启动项目,访问http://127.0.0.1:9999/,看到如下界面(注册中心搭建完成)
- 添加安全设置
1、引入安全配置
    org.springframework.boot
    spring-boot-starter-security
注:如果此时没有在配置文件中设置密码,在启动的时候会在控制台中生成随机的(但是不清楚默认登陆名称,有知道的留言告知一下)
#Using generated security password: 0baf6c18-7d5a-40a5-a904-2f2db43a1886
2、在potian-registration配置文件添加安全配置
spring:
  application:
    name: potian-registration   #设置项目名称
  security:   # Eureka 安全认证
    basic:
      enabled: true  # 开启安全认证
    user:
      name: root
      password: 123456
3、访问http://127.0.0.1:9999/ 会跳转到登陆界面
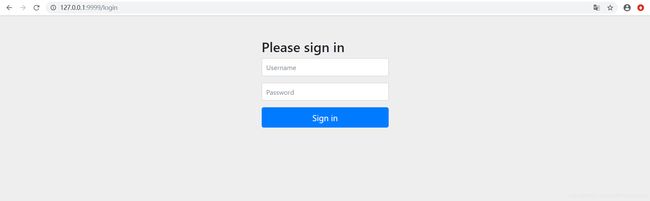
输入配置的用户名、密码,即可进入注册中心界面
potian-registration完整配置文件如下
server:
  port: 9999  # 端口号

eureka:
  instance:
    hostname: 127.0.0.1    #设置hostname
  client:
    register-with-eureka: false  #禁止自己当做服务注册
    fetch-registry: false        #注册中心不负责检索服务
    service-url:
      defaultZone: http://${eureka.instance.hostname}:${server.port}/eureka/  # 默认的注册中心地址

spring:
  application:
    name: potian-registration   #设置项目名称
  security:   # Eureka 安全认证
    basic:
      enabled: true  # 开启安全认证
    user:
      name: root
      password: 123456
如写的不好,欢迎各位大神多多指导!
下章会写一下高可用注册中心怎么玩!