idea创建SpringMVC项目
我用的是IntelliJ IDEA 2019.3.3 x64版本
通过IDEA建立一个简单SpringMVC项目的大致过程:
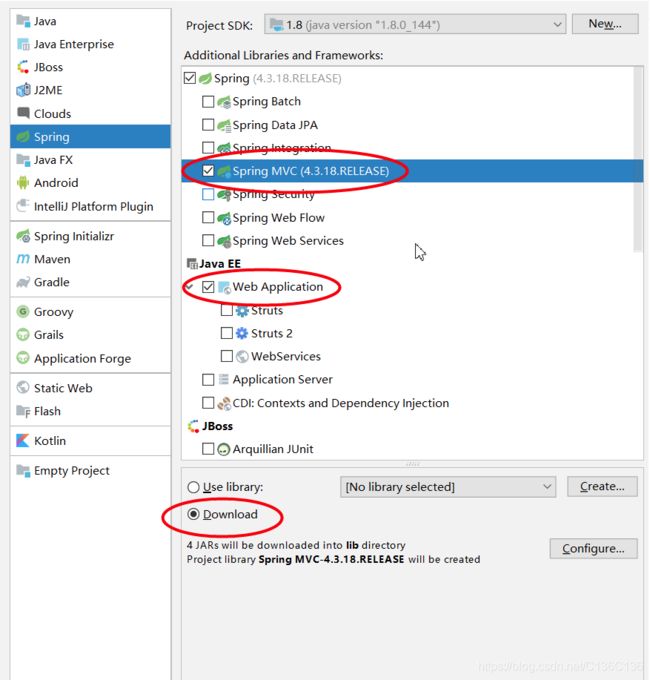
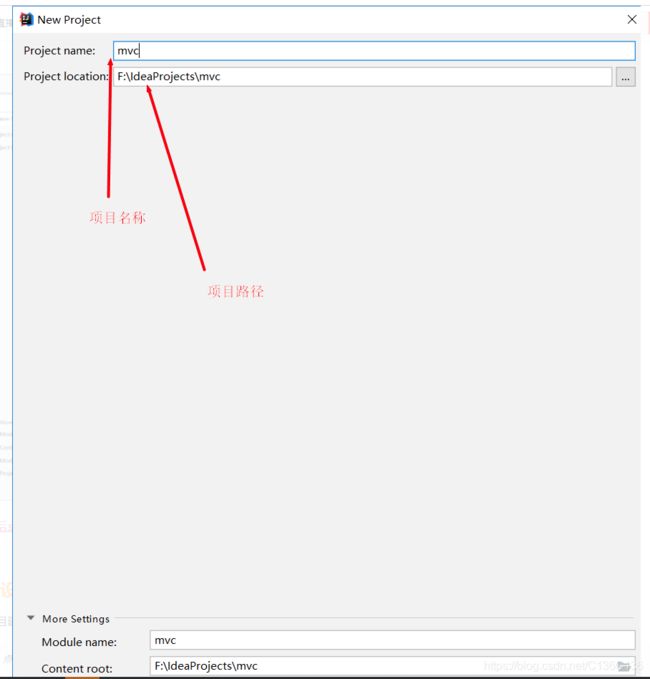
通过IDEA新建SpringMVC项目
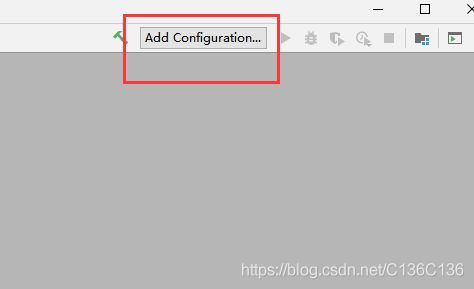
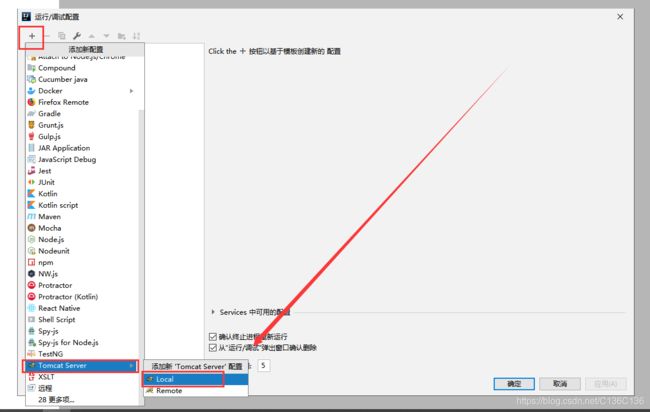
设置运行、调试相关配置
导入Spring MVC 相关类库
添加 Controller【MVC的C】
修改 url-pattern(web.xml)
修改dispatcher-servlet.xml
配置 ViewResolver(dispatcher-servlet.xml)
添加视图文件(.jsp)【MVC的V】
通过 Model 向 View 传值 【MVC的M】
1.通过IDEA新建Spring MVC项目
2.设置运行、调试相关配置
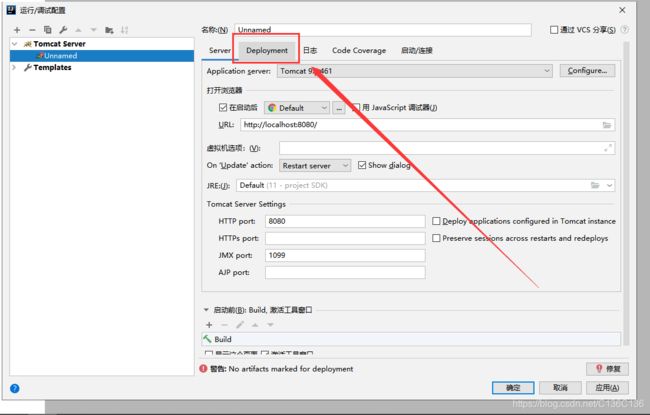
项目建好后,并不能直接运行,Run和Debug菜单都是灰色不能点击的
要需要做一下运行和调试的相关配置
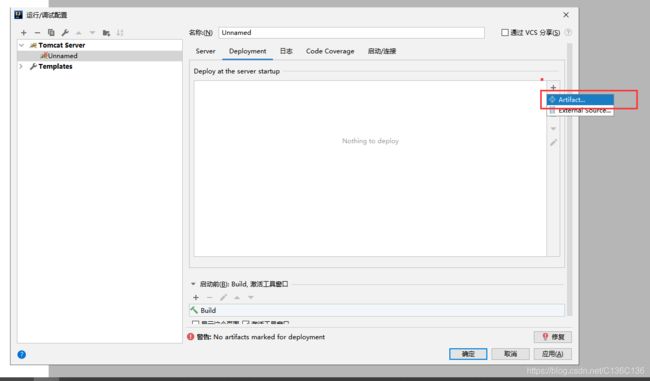
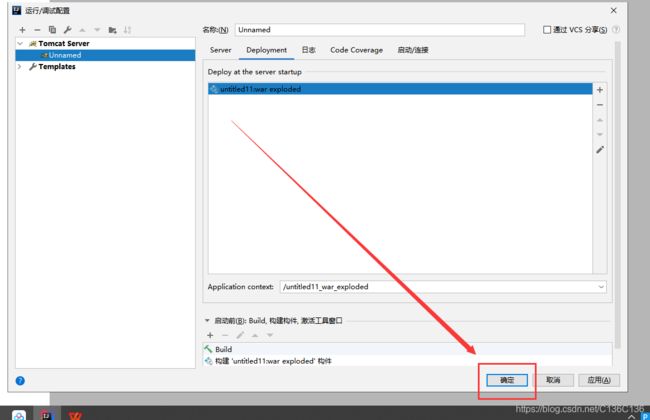
创建Artifact,最后记得点OK保存
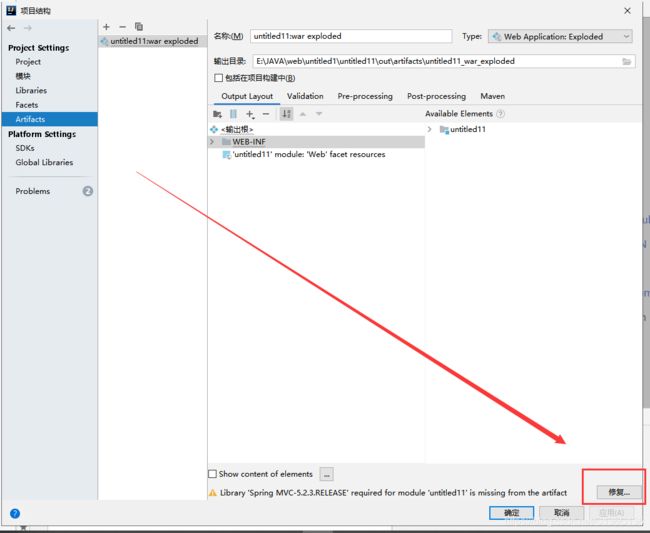
3. 导入Spring MVC相关类库(不一定,有时会没有自动导入,要来这里导入下)
点开"Artifacts"选项卡后,上面有多出很明显的提示,缺失Spring MVC相关类库的引用
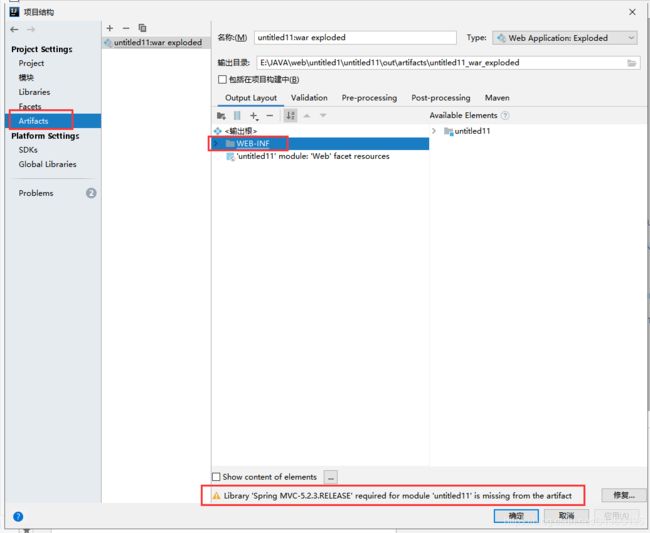
如果这里没有感叹号报错的话,说明没有缺失Spring MVC相关类库的引用,可以跳过这步
然后确定即可;
此时访问 http://localhost:8080/index.jsp,可以正常访问了
4.添加Controller 【MVC的C】
站点可以打开了,不过我们这个不是MVC,因为没有M、没有V也没有C
从MVC中的C(Controller)开始,继续配置
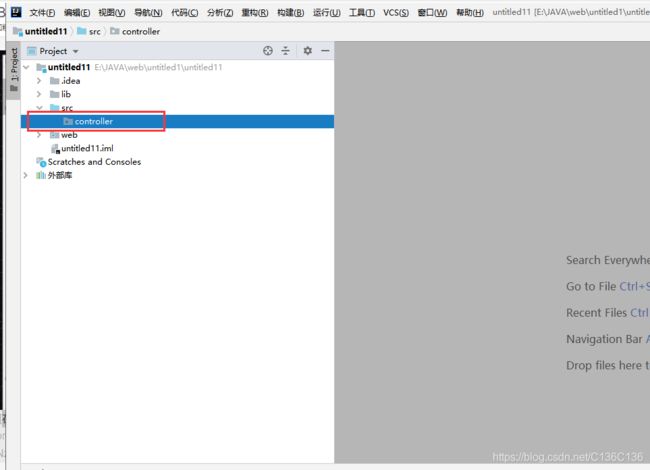
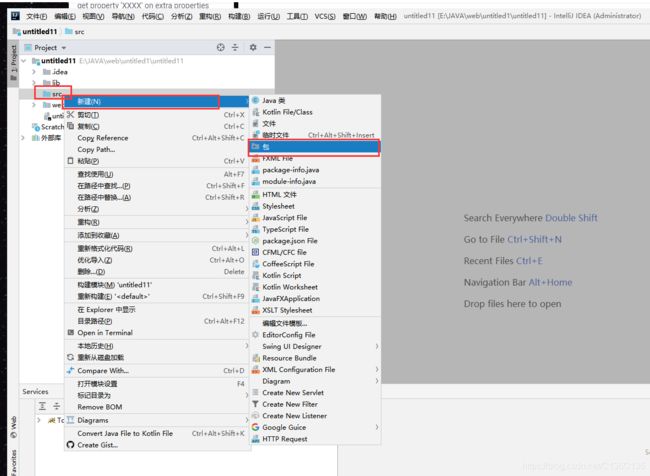
在新建Controller之前,首先要建一个包,SpringMVC是没法运行在默认包下的,按照如下方式建包,
如建的包名称为:controller (其实包名随意,但是必须要有。。。)
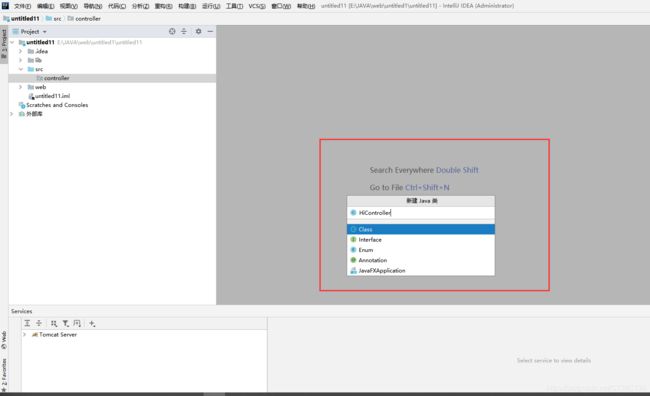
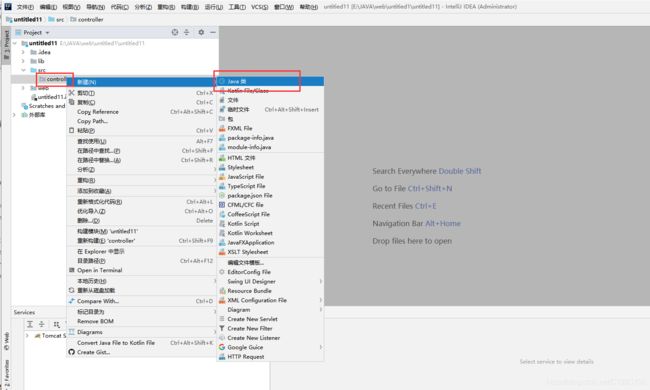
再这个包下新建Java Class文件 HiController(注意有没有加类级别的@RequestMapping,下面介绍)
package controller;

import org.springframework.stereotype.Controller;
import org.springframework.web.bind.annotation.RequestMapping;

@Controller
@RequestMapping("/hi")             //类级别,这个可以没有,但加了必须在dispatcher-servlet.xml添加prefix和suffix
public class HiController {


    @RequestMapping("/say")     //方法级别,必须要有,这个决定方法处理哪个请求
    public String sayHi() {
        return "index";        //这个是加了类级别的@RequestMapping 写法
    }

    @RequestMapping("/say2")
    public String sayHi2() {
        return "WEB-INF/jsp/index.jsp";   //这个是没加了类级别的@RequestMapping写法
    }
}
类上的注解@RequestMapping("/hi")指定 Url路径前边一部分
方法上的注解@RequestMapping("/say")指定 Url路径最后一部分
也可以只把注解写在方法上,比如@RequestMapping("/hi/say”)
要访问一下这个Controller的Action 地址应该是:http://localhost:8080/hi/say.form
修改 url-pattern(web.xml)
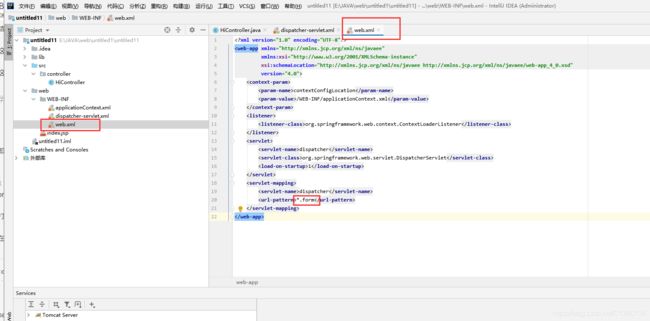
先打开web\WEB-INF\web.xml文件
有关于ServletMapping的设置,通过这个设置,可以配置那些类型的url用那些servlet来处理
结合这一段xml,我们可以看到,IDEA默认帮我配置了一个名字叫做dispatcher的Servlet
这个Servlet使用org.springframework.web.servlet.DispatcherServlet这个类来处理
这个Servlet对应的Url是*.form
修改*.form改成斜杠
如果不喜欢每个MVC Url后边都带一个form,可以改成斜杠
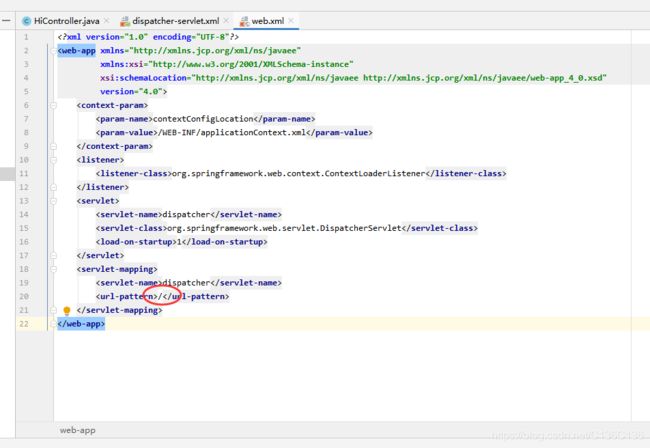
<?xml version="1.0" encoding="UTF-8"?>
<web-app xmlns="http://xmlns.jcp.org/xml/ns/javaee"
         xmlns:xsi="http://www.w3.org/2001/XMLSchema-instance"
         xsi:schemaLocation="http://xmlns.jcp.org/xml/ns/javaee http://xmlns.jcp.org/xml/ns/javaee/web-app_4_0.xsd"
         version="4.0">
    <context-param>
        <param-name>contextConfigLocation</param-name>
        <param-value>/WEB-INF/applicationContext.xml</param-value>
    </context-param>
    <listener>
        <listener-class>org.springframework.web.context.ContextLoaderListener</listener-class>
    </listener>
    <servlet>
        <servlet-name>dispatcher</servlet-name>
        <servlet-class>org.springframework.web.servlet.DispatcherServlet</servlet-class>
        <load-on-startup>1</load-on-startup>
    </servlet>
    <servlet-mapping>
        <servlet-name>dispatcher</servlet-name>
        <url-pattern>/</url-pattern>
    </servlet-mapping>
</web-app>
5. 修改dispatcher-servlet.xml
component-scan就是告诉Servlet去哪里找到相应的Controller
修改 dispatcher-servlet.xml
<?xml version="1.0" encoding="UTF-8"?>
<beans xmlns="http://www.springframework.org/schema/beans"
       xmlns:xsi="http://www.w3.org/2001/XMLSchema-instance"
       xmlns:context="http://www.springframework.org/schema/context"
       xmlns:mvc="http://www.springframework.org/schema/mvc"
       xsi:schemaLocation="http://www.springframework.org/schema/beans http://www.springframework.org/schema/beans/spring-beans.xsd
        http://www.springframework.org/schema/context http://www.springframework.org/schema/context/spring-context-4.1.xsd
        http://www.springframework.org/schema/mvc http://www.springframework.org/schema/mvc/spring-mvc-4.1.xsd">

    <!-- scan the package and the sub package -->
    <context:component-scan base-package="controller"/>

    <!-- don't handle the static resource -->
    <mvc:default-servlet-handler />

    <!-- if you use annotation you must configure following setting -->
    <mvc:annotation-driven />

    <!-- configure the InternalResourceViewResolver -->
    <bean class="org.springframework.web.servlet.view.InternalResourceViewResolver"
          id="internalResourceViewResolver">
        <!-- 前缀 -->
        <property name="prefix" value="/WEB-INF/jsp/" />
        <!-- 后缀 -->
        <property name="suffix" value=".jsp" />
    </bean>
</beans>
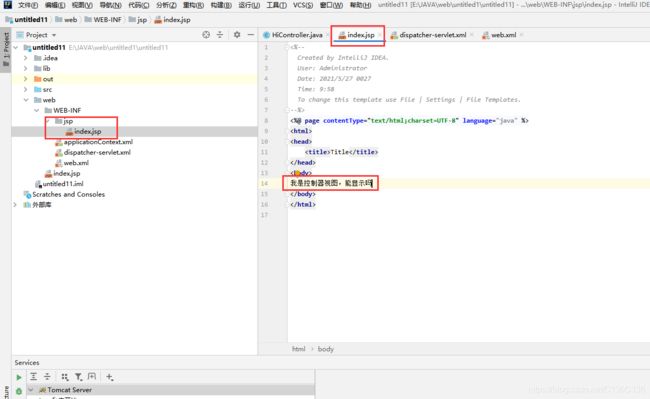
添加视图文件(.jsp) 【MVC的V】
把jsp放在WEB-INF下会比较安全
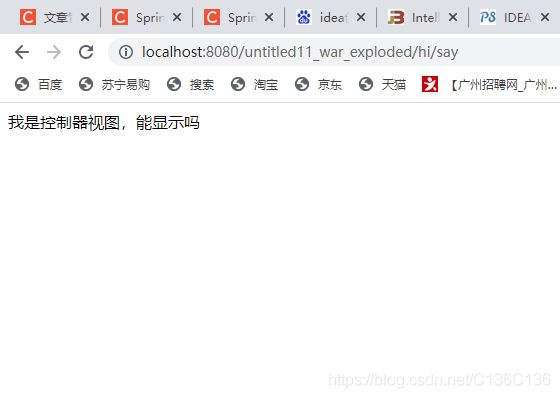
再次访问 http://localhost:8080/hi/say
应该成功了,Controller也把相应的视图找到了
