MyBatis-Plus简单上手教程(案例)(IDEA+SpringBoot+Maven+Mybatis-Plus)
一、简单开始
1、简介
MyBatis-Plus 是一个 Mybatis 增强版工具,在 MyBatis 上扩充了其他功能,并没有改变Mybatis的基本功能,为了简化开发提交效率而存在。
官网文档地址:
https://mp.baomidou.com/guide/
MyBatis-Plus 特性:
https://mp.baomidou.com/guide/#%E7%89%B9%E6%80%A7
2、使用
(1)准备工作
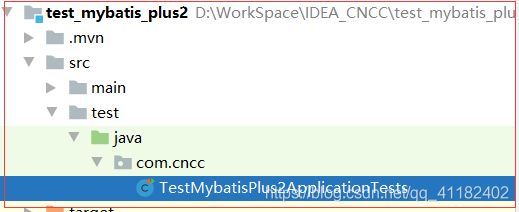
使用IDEA创建一个SpringBoot+Maven项目。
(3)添加 MyBatis-Plus 依赖(mybatis-plus-boot-starter)
<dependency>
    <groupId>com.baomidougroupId>
    <artifactId>mybatis-plus-boot-starterartifactId>
    <version>3.3.1.tmpversion>
dependency>
(4)添加MySQL、Lombok依赖
<dependency>
    <groupId>mysqlgroupId>
    <artifactId>mysql-connector-javaartifactId>
    <version>8.0.18version>
dependency>

<dependency>
    <groupId>org.projectlombokgroupId>
    <artifactId>lombokartifactId>
    <version>1.18.10version>
dependency>
(5)完整依赖文件(pom.xml)
<project xmlns="http://maven.apache.org/POM/4.0.0" xmlns:xsi="http://www.w3.org/2001/XMLSchema-instance"
         xsi:schemaLocation="http://maven.apache.org/POM/4.0.0 https://maven.apache.org/xsd/maven-4.0.0.xsd">
    <modelVersion>4.0.0modelVersion>
    <parent>
        <groupId>org.springframework.bootgroupId>
        <artifactId>spring-boot-starter-parentartifactId>
        <version>2.2.11.RELEASEversion>
        <relativePath/>
    parent>
    <groupId>com.cnccgroupId>
    <artifactId>test_mybatis_plus2artifactId>
    <version>0.0.1-SNAPSHOTversion>
    <name>test_mybatis_plus2name>
    <description>Demo project for Spring Bootdescription>

    <properties>
        <java.version>1.8java.version>
    properties>

    <dependencies>

        <dependency>
            <groupId>com.baomidougroupId>
            <artifactId>mybatis-plus-boot-starterartifactId>
            <version>3.3.1.tmpversion>
        dependency>

        <dependency>
            <groupId>com.baomidougroupId>
            <artifactId>mybatis-plus-generatorartifactId>
            <version>3.3.1.tmpversion>
        dependency>

        <dependency>
            <groupId>org.apache.velocitygroupId>
            <artifactId>velocityartifactId>
            <version>1.7version>
        dependency>


        <dependency>
            <groupId>mysqlgroupId>
            <artifactId>mysql-connector-javaartifactId>
            <version>8.0.18version>
        dependency>


        <dependency>
            <groupId>org.projectlombokgroupId>
            <artifactId>lombokartifactId>
            <version>1.18.10version>
        dependency>

        <dependency>
            <groupId>org.springframework.bootgroupId>
            <artifactId>spring-boot-starterartifactId>
        dependency>

        <dependency>
            <groupId>org.springframework.bootgroupId>
            <artifactId>spring-boot-starter-testartifactId>
            <scope>testscope>
            <exclusions>
                <exclusion>
                    <groupId>org.junit.vintagegroupId>
                    <artifactId>junit-vintage-engineartifactId>
                exclusion>
            exclusions>
        dependency>
        <dependency>
            <groupId>junitgroupId>
            <artifactId>junitartifactId>
        dependency>
        <dependency>
            <groupId>org.springframework.bootgroupId>
            <artifactId>spring-boot-starter-webartifactId>
        dependency>
    dependencies>

    <build>
        <plugins>
            <plugin>
                <groupId>org.springframework.bootgroupId>
                <artifactId>spring-boot-maven-pluginartifactId>
            plugin>
        plugins>

        <resources>
            <resource>
                <directory>src/main/javadirectory>
                <includes>
                    <include>**/*.xmlinclude>
                includes>
            resource>
            <resource>
                <directory>src/main/resourcesdirectory>
            resource>
        resources>
    build>

project>
(6)在数据库中创建一个表
我建了一个t_user表,字段为id,name,password。
(7)在 application.yml 文件中配置 mysql 数据源信息。
spring:
  datasource:
    driver-class-name: com.mysql.cj.jdbc.Driver
    username: root
    password: 123456
    url: jdbc:mysql://localhost:3306/test?useUnicode=true&characterEncoding=utf8&serverTimezone=UTC

(8)对于entity、mapper,service,controller的创建有两种方式。一种为自己手动创建,另一种为使用Mybatis-Plus代码生成器自动生成。
自己手动创建:
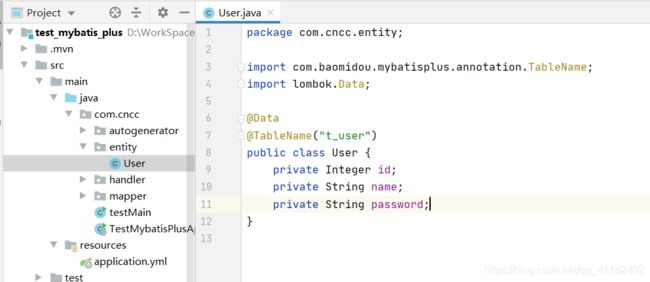
编写表对应的 实体类。
package entity;

import lombok.Data;

@Data
public class User {
    private Long id;
    private String name;
    private String password;
}
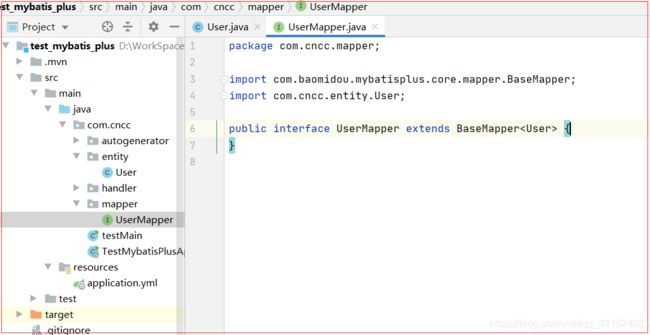
编写操作实体类的 Mapper 类。需继承 BaseMapper,这是 mybatis-plus 封装好的类。
package com.cncc.mapper;

import com.baomidou.mybatisplus.core.mapper.BaseMapper;
import com.cncc.entity.User;

public interface UserMapper extends BaseMapper<User> {
}
手动创建就到这里。service和controller暂时省略。因为实体类、Mapper 类都写好后就可以使用了。
(使用参考(9))
代码生成器创建:
添加依赖
        <dependency>
            <groupId>com.baomidougroupId>
            <artifactId>mybatis-plus-generatorartifactId>
            <version>3.3.1.tmpversion>
        dependency>

        <dependency>
            <groupId>org.apache.velocitygroupId>
            <artifactId>velocityartifactId>
            <version>1.7version>
        dependency>
新建一个测试类
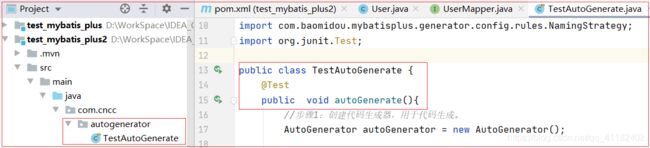
(注意import的类,别导错了)
package com.cncc.autogenerator;

import com.baomidou.mybatisplus.annotation.IdType;
import com.baomidou.mybatisplus.generator.AutoGenerator;
import com.baomidou.mybatisplus.generator.config.DataSourceConfig;
import com.baomidou.mybatisplus.generator.config.GlobalConfig;
import com.baomidou.mybatisplus.generator.config.PackageConfig;
import com.baomidou.mybatisplus.generator.config.StrategyConfig;
import com.baomidou.mybatisplus.generator.config.rules.DateType;
import com.baomidou.mybatisplus.generator.config.rules.NamingStrategy;
import org.junit.Test;

public class TestAutoGenerate {
    @Test
    public  void autoGenerate(){
        //步骤1:创建代码生成器,用于代码生成。
        AutoGenerator autoGenerator = new AutoGenerator();

        //步骤2: 全局配置。指定代码输出路径以及包名、作者等信息。
        GlobalConfig globalConfig = new GlobalConfig();
        // 填写代码生成的目录(自己项目所在目录)
        String projectPath = "D:\\WorkSpace\\IDEA_CNCC\\test_mybatis_plus2";
        // 拼接出代码最终输出的目录
        globalConfig.setOutputDir(projectPath+"/src/main/java");
        // 配置开发者信息(可选)(需要修改)
        globalConfig.setAuthor("zyk");
        // 配置是否打开目录,false 为不打开(可选)
        globalConfig.setOpen(false);
        // 实体属性 Swagger2 注解,添加 Swagger 依赖,开启 Swagger2 模式(可选)
        //globalConfig.setSwagger2(true);
        // 重新生成文件时是否覆盖,false 表示不覆盖(可选)
        globalConfig.setFileOverride(false);
        // 配置主键生成策略,此处为 ASSIGN_ID(可选)
        globalConfig.setIdType(IdType.ASSIGN_ID);
        // 配置日期类型,此处为 ONLY_DATE(可选)
        globalConfig.setDateType(DateType.ONLY_DATE);
        // 默认生成的 service 会有 I 前缀
        globalConfig.setServiceName("%sService");
        autoGenerator.setGlobalConfig(globalConfig);

        // 步骤3:数据源配置。(需要修改)  用于指定需要生成代码的数据仓库,数据表。
        DataSourceConfig dsc = new DataSourceConfig();
        // 配置数据库 url 地址
        dsc.setUrl("jdbc:mysql://localhost:3306/test?useUnicode=true&characterEncoding=utf8&serverTimezone=UTC");
        // dsc.setSchemaName("testMyBatisPlus"); // 可以直接在 url 中指定数据库名
        // 配置数据库驱动
        dsc.setDriverName("com.mysql.cj.jdbc.Driver");
        // 配置数据库连接用户名
        dsc.setUsername("root");
        // 配置数据库连接密码
        dsc.setPassword("123456");
        autoGenerator.setDataSource(dsc);

        // 步骤:4:包配置  配置包信息
        PackageConfig packageConfig = new PackageConfig();
        // 配置父包名(需要修改)
        packageConfig.setParent("com.cncc");
        // 配置模块名(需要修改)  (这里是设置com.cncc的下一级,如果为空,则创建的包会直接在com.cncc下;如果不为空,例如填为test,则创建的包会在com.cncc.test下.)
        packageConfig.setModuleName("");
        // 配置 entity 包名
        packageConfig.setEntity("entity");
        // 配置 mapper 包名
        packageConfig.setMapper("mapper");
        // 配置 service 包名
        packageConfig.setService("service");
        // 配置 controller 包名
        packageConfig.setController("controller");
        autoGenerator.setPackageInfo(packageConfig);

        // 步骤5:策略配置(数据库表配置)
        StrategyConfig strategy = new StrategyConfig();
        // 指定表名(可以同时操作多个表,使用 , 隔开)(需要修改)
        strategy.setInclude("t_user");
        // 配置数据表与实体类名之间映射的策略
        strategy.setNaming(NamingStrategy.underline_to_camel);
        // 配置数据表的字段与实体类的属性名之间映射的策略
        strategy.setColumnNaming(NamingStrategy.underline_to_camel);
        // 配置 lombok 模式
        strategy.setEntityLombokModel(true);
        // 配置 rest 风格的控制器(@RestController)
        strategy.setRestControllerStyle(true);
        // 配置驼峰转连字符
        strategy.setControllerMappingHyphenStyle(true);
        // 配置表前缀,生成实体时去除表前缀
        // 此处的表名为 test_mybatis_plus_user,模块名为 test_mybatis_plus,去除前缀后剩下为 user。
        strategy.setTablePrefix(packageConfig.getModuleName() + "_");
        autoGenerator.setStrategy(strategy);

        // Step6:执行代码生成操作
        autoGenerator.execute();

    }
}
运行测试方法后:
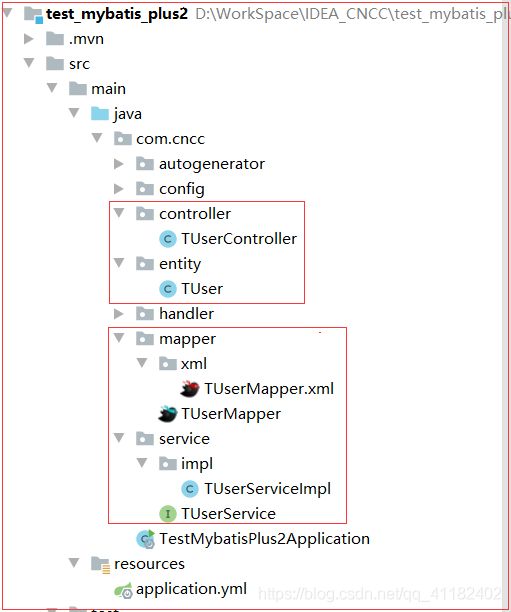
(9)实体类、Mapper 类都写好了,就可以使用了。
Step1:先得在启动类里扫描 Mapper 类,即添加 @MapperScan 注解
package com.cncc;

import org.mybatis.spring.annotation.MapperScan;
import org.springframework.boot.SpringApplication;
import org.springframework.boot.autoconfigure.SpringBootApplication;

@SpringBootApplication
@MapperScan("com.cncc.mapper")
public class TestMybatisPlusApplication {

    public static void main(String[] args) {
        SpringApplication.run(TestMybatisPlusApplication.class, args);
    }

}
Step2:在测试类里写一个测试方法测试一下。
    @Autowired
    private UserMapper userMapper;

    @Test
    public void testSelect() {
        System.out.println(("----- selectAll method test ------"));
        List<User> userList = userMapper.selectList(null);
        for(User user:userList) {
            System.out.println(user);
        }
    }
(10)总结:
通过以上简单操作,就能对 user 表进行 CRUD 操作,不需要去编写 xml 文件。
注:
若遇到报错mapper文件扫描不到,在pom.xml文件里添加如下代码:
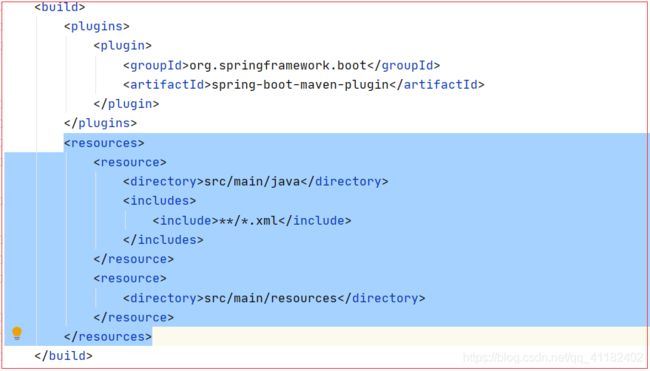
<resources>
            <resource>
                <directory>src/main/javadirectory>
                <includes>
                    <include>**/*.xmlinclude>
                includes>
            resource>
            <resource>
                <directory>src/main/resourcesdirectory>
            resource>
        resources>
二、Mybatis-Plus 常用操作
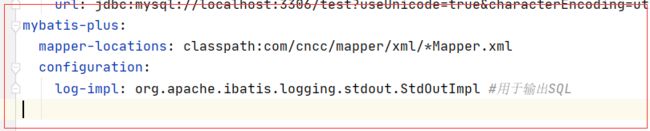
1、配置日志
想要查看执行的 sql 语句,可以在 yml 文件中添加配置信息,如下。
mybatis-plus:
  configuration:
    log-impl: org.apache.ibatis.logging.stdout.StdOutImpl
2、自动填充数据功能
(1)添加、修改数据时,每次都会使用相同的方式进行填充。比如 数据的创建时间、修改时间等。
Mybatis-plus 支持自动填充这些字段的数据。
给之前的数据表新增两个字段:创建时间create_time、修改时间update_time。
并使用 代码生成器生成代码。
(3)使用自动填充功能。
Step1:
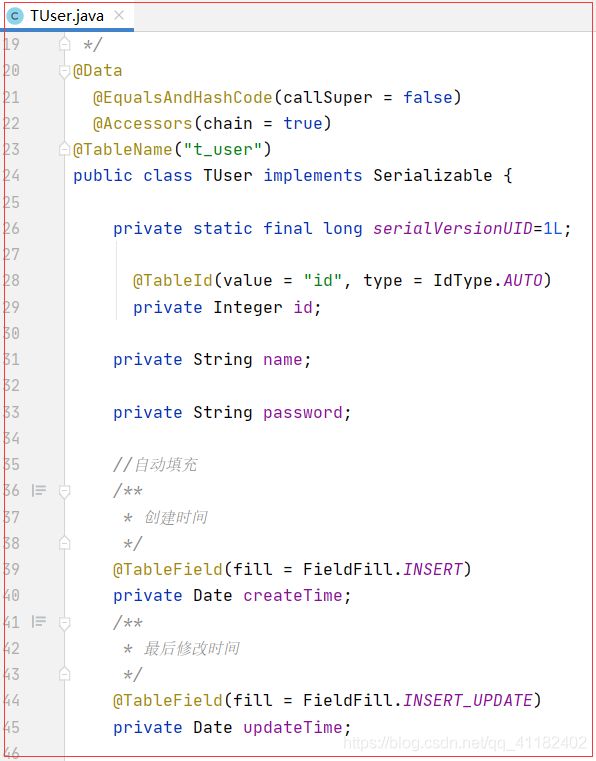
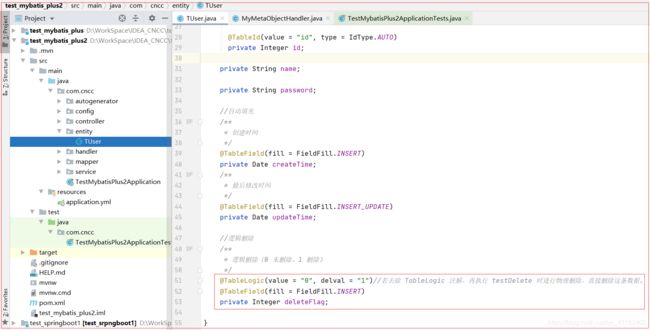
在实体类里使用 @TableField 注解标注需要进行填充的字段。
/**
 * 创建时间
 */
@TableField(fill = FieldFill.INSERT)
private Date createTime;

/**
 * 最后修改时间
 */
@TableField(fill = FieldFill.INSERT_UPDATE)
private Date updateTime;
[外链图片转存失败,源站可能有防盗链机制,建议将图片保存下来直接上传(img-gpYh5O2W-1606980063900)(C:\Users\KK\AppData\Roaming\Typora\typora-user-images\1606908908847.png)]
Step2:
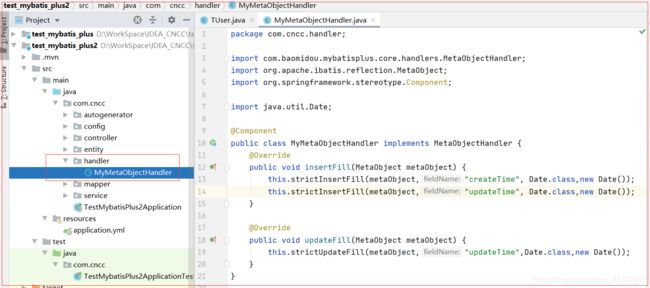
自定义一个类,实现 MetaObjectHandler 接口,并重写方法。
添加 @Component 注解,交给 Spring 去管理。
package com.cncc.handler;

import com.baomidou.mybatisplus.core.handlers.MetaObjectHandler;
import org.apache.ibatis.reflection.MetaObject;
import org.springframework.stereotype.Component;

import java.util.Date;

@Component
public class MyMetaObjectHandler implements MetaObjectHandler {
    @Override
    public void insertFill(MetaObject metaObject) {
    	//createTime、updateTime为属性名
        this.strictInsertFill(metaObject,"createTime", Date.class,new Date());
        this.strictInsertFill(metaObject,"updateTime", Date.class,new Date());
    }

    @Override
    public void updateFill(MetaObject metaObject) {
        this.strictUpdateFill(metaObject,"updateTime",Date.class,new Date());
    }
}
Step3:
简单测试一下。
    @Test
    void testInsert2(){//自动填充数据测试  这里自动填充了创建时间和最后修改时间
        TUser uer = new TUser();
        uer.setName("ZiDong3").setPassword("2222222");
        if (userService.save(uer)){
            for (TUser user : userService.list()) {
                System.out.println(user);
            }
        }else {
            System.out.println("添加数据失败!");
        }

    }
3、逻辑删除
(1)简介
删除数据,可以通过物理删除,也可以通过逻辑删除。
物理删除指的是直接将数据从数据库中删除,不保留。
逻辑删除指的是修改数据的某个字段,使其表示为已删除状态,而非删除数据,保留该数据在数据库中,但是查询时不显示该数据(查询时过滤掉该数据)。
给数据表增加一个字段:delete_flag,用于表示该数据是否被逻辑删除。
(2)使用逻辑删除。
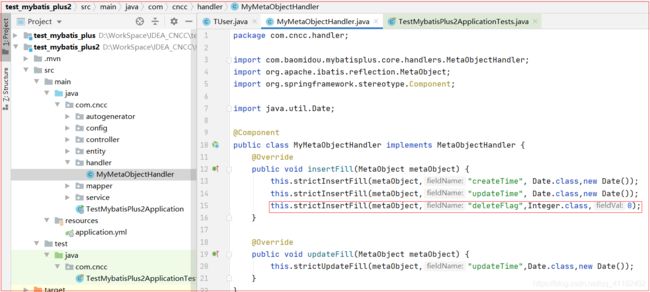
可以定义一个自动填充规则,初始值为 0。0 表示未删除, 1 表示删除。
//在实体类里添加属性
/**
 * 逻辑删除(0 未删除、1 删除)
 */
@TableLogic(value = "0", delval = "1")
@TableField(fill = FieldFill.INSERT)
private Integer deleteFlag;


//在自定义的实现MetaObjectHandler接口的类里
@Override
public void insertFill(MetaObject metaObject) {
    this.strictInsertFill(metaObject, "deleteFlag", Integer.class, 0);
}
(3)简单测试
使用 mybatis-plus 封装好的方法时,会自动添加逻辑删除的功能。
若是自定义的 sql 语句,需要手动添加逻辑。
//逻辑删除
    /*
        物理删除指的是直接将数据从数据库中删除,不保留。
  逻辑删除指的是修改数据的某个字段,使其表示为已删除状态,
    而非删除数据,保留该数据在数据库中,但是查询时不显示该
    数据(查询时过滤掉该数据)。
     */
    //可以定义一个自动填充规则,初始值为 0。0 表示未删除, 1 表示删除。
    //注意:当使用逻辑删除这个功能后,若提供判断的属性值不为0(假设设置0表示未删除),则查不到。
    @Test
    public void testDelete() {
        if (userService.removeById(12)) {
            System.out.println("删除数据成功");
            userService.list().forEach(System.out::println);
        } else {
            System.out.println("删除数据失败");
        }
    }
现有数据 为:
![]()
执行 testDelete 进行逻辑删除后:
![]()
PS:若去除属性上的 TableLogic 注解,则再执行 testDelete 时会进行物理删除,直接删除这条数据。
4、分页插件的使用
Step1:
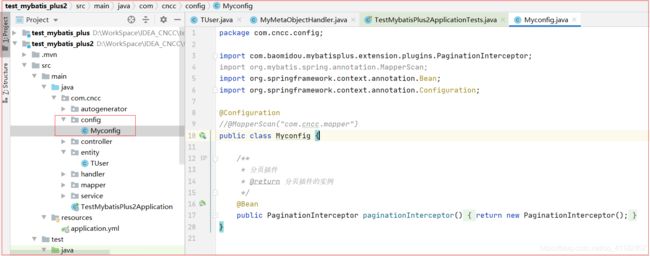
配置分页插件。
编写一个 配置类,内部使用 @Bean 注解将 PaginationInterceptor 交给 Spring 容器管理。
package com.cncc.config;

import com.baomidou.mybatisplus.extension.plugins.PaginationInterceptor;
import org.mybatis.spring.annotation.MapperScan;
import org.springframework.context.annotation.Bean;
import org.springframework.context.annotation.Configuration;

@Configuration
//@MapperScan("com.cncc.mapper")
public class Myconfig {

    /**
     * 分页插件
     * @return 分页插件的实例
     */
    @Bean
    public PaginationInterceptor paginationInterceptor() {
        return new PaginationInterceptor();
    }
}
Step2:
编写分页代码。
直接 new 一个 Page 对象,对象需要传递两个参数(当前页,每页显示的条数)。
调用 mybatis-plus 提供的分页查询方法,其会将 分页查询的数据封装到 Page 对象中。
//分页查询
/*
直接 new 一个 Page 对象,对象需要传递两个参数(当前页,每页显示的条数)。
调用 mybatis-plus 提供的分页查询方法,其会将 分页查询的数据封装到 Page 对象中。
*/
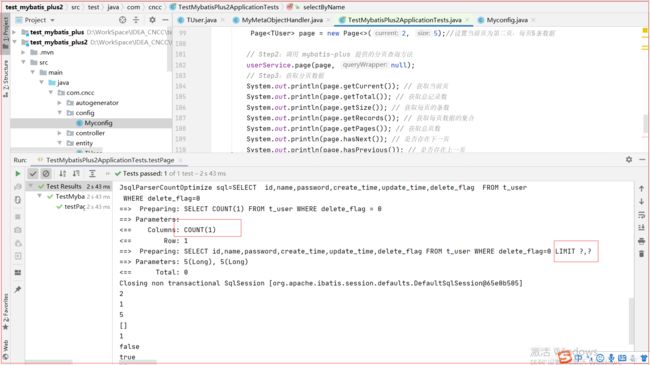
@Test
public void testPage() {
// Step1:创建一个 Page 对象
// Page page = new Page<>();//默认当前页为第一页,每页大小为10
Page<TUser> page = new Page<>(2, 5);//设置当前页为第二页,每页5条数据
// Step2:调用 mybatis-plus 提供的分页查询方法
userService.page(page, null);
// Step3:获取分页数据
System.out.println(page.getCurrent()); // 获取当前页
System.out.println(page.getTotal()); // 获取总记录数
System.out.println(page.getSize()); // 获取每页的条数
System.out.println(page.getRecords()); // 获取每页数据的集合
System.out.println(page.getPages()); // 获取总页数
System.out.println(page.hasNext()); // 是否存在下一页
System.out.println(page.hasPrevious()); // 是否存在上一页
}
[外链图片转存失败,源站可能有防盗链机制,建议将图片保存下来直接上传(img-MwFazeXf-1606980063914)(C:\Users\KK\AppData\Roaming\Typora\typora-user-images\1606976358353.png)]
5、乐观锁(待补充)
三、Mybatis-Plus CRUD 操作了解
1、Mapper 接口方法(CRUD)
使用代码生成器生成的 mapper 接口中,其继承了 BaseMapper 接口。而 BaseMapper 接口中封装了一系列 CRUD 常用操作(当然,自定义代码执行也可以),可以直接使用。
此处简单介绍一下 BaseMapper 接口中的常用方法:
添加数据:
| 方法 | 介绍 |
|---|---|
| int insert(T entity); | // 插入一条记录 |
注:
    T         表示任意实体类型
    entity    表示实体对象
删除数据:
| 方法 | 介绍 |
|---|---|
| int deleteById(Serializable id); | // 根据主键 ID 删除 |
| int deleteByMap(@Param(Constants.COLUMN_MAP) Map |
// 根据 map 定义字段的条件删除 |
| int delete(@Param(Constants.WRAPPER) Wrapper wrapper); | // 根据实体类定义的 条件删除对象 |
| int deleteBatchIds(@Param(Constants.COLLECTION) Collection idList); | // 进行批量删除 |
注:
    id        表示 主键 ID
    columnMap 表示表字段的 map 对象
    wrapper   表示实体对象封装操作类,可以为 null。
    idList    表示 主键 ID 集合(列表、数组),不能为 null 或 empty
修改数据:
| 方法 | 介绍 |
|---|---|
| int updateById(@Param(Constants.ENTITY) T entity); | // 根据 ID 修改实体对象。 |
| int update(@Param(Constants.ENTITY) T entity, @Param(Constants.WRAPPER) Wrapper updateWrapper); | // 根据 updateWrapper 条件修改实体对象 |
注:
    update 中的 entity 为 set 条件,可以为 null。
    updateWrapper 表示实体对象封装操作类(可以为 null,里面的 entity 用于生成 where 语句)
查询数据:
| 方法 | 介绍 |
|---|---|
| T selectById(Serializable id); | // 根据 主键 ID 查询数据 |
| List selectBatchIds(@Param(Constants.COLLECTION) Collection idList); | // 进行批量查询 |
| List selectByMap(@Param(Constants.COLUMN_MAP) Map |
// 根据表字段条件查询 |
| T selectOne(@Param(Constants.WRAPPER) Wrapper queryWrapper); | // 根据实体类封装对象 查询一条记录 |
| Integer selectCount(@Param(Constants.WRAPPER) Wrapper queryWrapper); | // 查询记录的总条数 |
| List selectList(@Param(Constants.WRAPPER) Wrapper queryWrapper); | // 查询所有记录(返回 entity 集合) |
| List |
// 查询所有记录(返回 map 集合) |
| List selectObjs(@Param(Constants.WRAPPER) Wrapper queryWrapper); | // 查询所有记录(但只保存第一个字段的值) |
| // 查询所有记录(返回 entity 集合),分页 | |
| // 查询所有记录(返回 map 集合),分页 |
注:
    queryWrapper 表示实体对象封装操作类(可以为 null)
    page 表示分页查询条件
2、Service 接口方法(CRUD)
使用 代码生成器 生成的 service 接口中,其继承了 IService 接口。IService 内部进一步封装了 BaseMapper 接口的方法(当然也提供了更详细的方法)。使用时,可以通过 生成的 mapper 类进行 CRUD 操作,也可以通过 生成的 service 的实现类进行 CRUD 操作。(当然,自定义代码执行也可以)
此处简单介绍一下 IService 中封装的常用方法:
添加数据:
| 方法 | 介绍 |
|---|---|
| default boolean save(T entity); | // 调用 BaseMapper 的 insert 方法,用于添加一条数据。 |
| boolean saveBatch(Collection entityList, int batchSize); | // 批量插入数据 |
注:
    entityList 表示实体对象集合
    batchSize 表示一次批量插入的数据量,默认为 1000
添加或修改数据:
| 方法 | 介绍 |
|---|---|
| boolean saveOrUpdate(T entity); | // id 若存在,则修改, id 不存在则新增数据 |
| default boolean saveOrUpdate(T entity, Wrapper updateWrapper); | // 先根据条件尝试更新,然后再执行 saveOrUpdate 操作 |
| boolean saveOrUpdateBatch(Collection entityList, int batchSize); | // 批量插入并修改数据 |
删除数据:
| 方法 | 介绍 |
|---|---|
| default boolean removeById(Serializable id); | // 调用 BaseMapper 的 deleteById 方法,根据 id 删除数据。 |
| default boolean removeByMap(Map |
// 调用 BaseMapper 的 deleteByMap 方法,根据 map 定义字段的条件删除 |
| default boolean remove(Wrapper queryWrapper); | // 调用 BaseMapper 的 delete 方法,根据实体类定义的 条件删除对象。 |
| default boolean removeByIds(Collection idList); | // 用 BaseMapper 的 deleteBatchIds 方法, 进行批量删除。 |
修改数据:
| 方法 | 介绍 |
|---|---|
| default boolean updateById(T entity); | // 调用 BaseMapper 的 updateById 方法,根据 ID 选择修改。 |
| default boolean update(T entity, Wrapper updateWrapper); | // 调用 BaseMapper 的 update 方法,根据 updateWrapper 条件修改实体对象。 |
| boolean updateBatchById(Collection entityList, int batchSize); | // 批量更新数据 |
查找数据:
| 方法 | 介绍 |
|---|---|
| default T getById(Serializable id); | // 调用 BaseMapper 的 selectById 方法,根据 主键 ID 返回数据。 |
| default List listByIds(Collection idList); | // 调用 BaseMapper 的 selectBatchIds 方法,批量查询数据。 |
| default List listByMap(Map |
// 调用 BaseMapper 的 selectByMap 方法,根据表字段条件查询 |
| default T getOne(Wrapper queryWrapper); | // 返回一条记录(实体类保存)。 |
| Map |
// 返回一条记录(map 保存)。 |
| default int count(Wrapper queryWrapper); | // 根据条件返回 记录数。 |
| default List list(); | // 返回所有数据。 |
| default List list(Wrapper queryWrapper); | // 调用 BaseMapper 的 selectList 方法,查询所有记录(返回 entity 集合)。 |
| default List |
// 调用 BaseMapper 的 selectMaps 方法,查询所有记录(返回 map 集合)。 |
| default List listObjs(); | // 返回全部记录,但只返回第一个字段的值。 |
| default |
// 调用 BaseMapper 的 selectPage 方法,分页查询 |
| default |
// 调用 BaseMapper 的 selectMapsPage 方法,分页查询 |
注:
    get 用于返回一条记录。
    list 用于返回多条记录。
    count 用于返回记录总数。
    page 用于分页查询。
链式调用:
| 方法 | 介绍 |
|---|---|
| default QueryChainWrapper query(); | // 普通链式查询 |
| default LambdaQueryChainWrapper lambdaQuery(); | // 支持 Lambda 表达式的修改 |
| default UpdateChainWrapper update(); | // 普通链式修改 |
| default LambdaUpdateChainWrapper lambdaUpdate(); | // 支持 Lambda 表达式的修改 |
注:
    query 表示查询
    update 表示修改
    Lambda 表示内部支持 Lambda 写法。
形如:
    query().eq("column", value).one();
    lambdaQuery().eq(Entity::getId, value).list();
    update().eq("column", value).remove();
    lambdaUpdate().eq(Entity::getId, value).update(entity);
3、条件构造器(Wrapper,定义 where 条件)(待补充)
【通用条件:】
【比较大小: ( =, <>, >, >=, <, <= )】
    eq(R column, Object val); // 等价于 =,例: eq("name", "老王") ---> name = '老王'
    ne(R column, Object val); // 等价于 <>,例: ne("name", "老王") ---> name <> '老王'
    gt(R column, Object val); // 等价于 >,例: gt("name", "老王") ---> name > '老王'
    ge(R column, Object val); // 等价于 >=,例: ge("name", "老王") ---> name >= '老王'
    lt(R column, Object val); // 等价于 <,例: lt("name", "老王") ---> name < '老王'
    le(R column, Object val); // 等价于 <=,例: le("name", "老王") ---> name <= '老王'

【范围:(between、not between、in、not in)】
   between(R column, Object val1, Object val2); // 等价于 between a and b, 例: between("age", 18, 30) ---> age between 18 and 30
   notBetween(R column, Object val1, Object val2); // 等价于 not between a and b, 例: notBetween("age", 18, 30) ---> age not between 18 and 30
   in(R column, Object... values); // 等价于 字段 IN (v0, v1, ...),例: in("age",{1,2,3}) ---> age in (1,2,3)
   notIn(R column, Object... values); // 等价于 字段 NOT IN (v0, v1, ...), 例: notIn("age",{1,2,3}) ---> age not in (1,2,3)
   inSql(R column, Object... values); // 等价于 字段 IN (sql 语句), 例: inSql("id", "select id from table where id < 3") ---> id in (select id from table where id < 3)
   notInSql(R column, Object... values); // 等价于 字段 NOT IN (sql 语句)

【模糊匹配:(like)】
    like(R column, Object val); // 等价于 LIKE '%值%',例: like("name", "王") ---> name like '%王%'
    notLike(R column, Object val); // 等价于 NOT LIKE '%值%',例: notLike("name", "王") ---> name not like '%王%'
    likeLeft(R column, Object val); // 等价于 LIKE '%值',例: likeLeft("name", "王") ---> name like '%王'
    likeRight(R column, Object val); // 等价于 LIKE '值%',例: likeRight("name", "王") ---> name like '王%'

【空值比较:(isNull、isNotNull)】
    isNull(R column); // 等价于 IS NULL,例: isNull("name") ---> name is null
    isNotNull(R column); // 等价于 IS NOT NULL,例: isNotNull("name") ---> name is not null

【分组、排序:(group、having、order)】
    groupBy(R... columns); // 等价于 GROUP BY 字段, ..., 例: groupBy("id", "name") ---> group by id,name
    orderByAsc(R... columns); // 等价于 ORDER BY 字段, ... ASC, 例: orderByAsc("id", "name") ---> order by id ASC,name ASC
    orderByDesc(R... columns); // 等价于 ORDER BY 字段, ... DESC, 例: orderByDesc("id", "name") ---> order by id DESC,name DESC
    having(String sqlHaving, Object... params); // 等价于 HAVING ( sql语句 ), 例: having("sum(age) > {0}", 11) ---> having sum(age) > 11

【拼接、嵌套 sql:(or、and、nested、apply)】
   or(); // 等价于 a or b, 例:eq("id",1).or().eq("name","老王") ---> id = 1 or name = '老王'
   or(Consumer<Param> consumer); // 等价于 or(a or/and b),or 嵌套。例: or(i -> i.eq("name", "李白").ne("status", "活着")) ---> or (name = '李白' and status <> '活着')
   and(Consumer<Param> consumer); // 等价于 and(a or/and b),and 嵌套。例: and(i -> i.eq("name", "李白").ne("status", "活着")) ---> and (name = '李白' and status <> '活着')
   nested(Consumer<Param> consumer); // 等价于 (a or/and b),普通嵌套。例: nested(i -> i.eq("name", "李白").ne("status", "活着")) ---> (name = '李白' and status <> '活着')
   apply(String applySql, Object... params); // 拼接sql(若不使用 params 参数,可能存在 sql 注入),例: apply("date_format(dateColumn,'%Y-%m-%d') = {0}", "2008-08-08") ---> date_format(dateColumn,'%Y-%m-%d') = '2008-08-08'")
   last(String lastSql); // 无视优化规则直接拼接到 sql 的最后,可能存若在 sql 注入。
   exists(String existsSql); // 拼接 exists 语句。例: exists("select id from table where age = 1") ---> exists (select id from table where age = 1)

【QueryWrapper 条件:】
    select(String... sqlSelect); // 用于定义需要返回的字段。例: select("id", "name", "age") ---> select id, name, age
    select(Predicate<TableFieldInfo> predicate); // Lambda 表达式,过滤需要的字段。
    lambda(); // 返回一个 LambdaQueryWrapper

【UpdateWrapper 条件:】
    set(String column, Object val); // 用于设置 set 字段值。例: set("name", null) ---> set name = null
    etSql(String sql); // 用于设置 set 字段值。例: setSql("name = '老李头'") ---> set name = '老李头'
    lambda(); // 返回一个 LambdaUpdateWrapper
简单使用测试:
@Test
public void testQueryWrapper() {
    // Step1:创建一个 QueryWrapper 对象
    QueryWrapper<User> queryWrapper = new QueryWrapper<>();

    // Step2: 构造查询条件
    queryWrapper
            .select("id", "name", "age")
            .eq("age", 20)
            .like("name", "j");

    // Step3:执行查询
    userService
            .list(queryWrapper)
            .forEach(System.out::println);
}
PS:如果本文档对您有用,还请点个大拇指