SpringBoot入门到精通-基于阿里云短信服务-定义Starter封装通用组件
前言
在实际项目开发中,有大量的公用功能,SpringBoot提供了便利的方式支持我们对公共业务功能进行抽取封装,本篇文章是基于SpringBoot定义starter,以短信为例,定义通用的starter组件实现短信的发送。
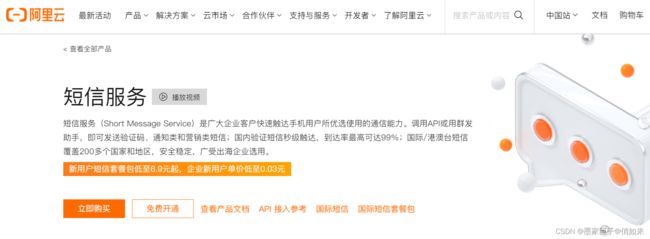
开启阿里云短信
登录阿里云,使用支付宝扫描即可登录,然后在产品中找到短信服务,开通短信服务。点击免费开通,根据流程走就可以了。

进入控制台之后,根据教程操作 申请签名,申请模板,系统设置,然后发送短信

在国内消息菜单中,提供了对签名和模板的管理,可以添加签名和添加模板。 在签名审核通过之前我们可以使用阿里自带的测试模板来测试。

在 概念 菜单 ,下方位置有一个调用API发送短信,点击进去可以看到阿里云提供的代码示例

进入的界面如下

左边可以选择相应的服务,中间位置可以填写相关参数,比如:签名,模板编号等。右边有代码示例,在SDK依赖信息中能找到Jar包。只不过如果我们想要调用API的方式来发送短信还需要获取到 accesKeyId 以及 accessKeySecret 。
获取 AccessKey
回到上一页,点击头像,点击AccessKey管理

进去之后,选择 开始使用子账户AccessKey,因为AccessKey的权限太高,如下

进去之后,选择 创建用户,勾选上 Open ApI调用访问才可以通过代码调用API发送短信

确定之后,请记录下来你的 accessKeyId以及accessKeySecret 。然后点击 用户菜单,找到你创建的用户,为你刚才创建的子用户分配权限
这里找到 管理短信服务(SMS)的权限 选择它,点击确认即可。

接下来就可以在开发工具中发送短信了
短信发送测试
导入需要的依赖,这里的依赖是从上面的API demo中 SDK依赖信息中找到的
<dependencies>
   <dependency>
       <groupId>com.aliyungroupId>
       <artifactId>alibabacloud-dysmsapi20170525artifactId>
       <version>1.0.1version>
   dependency>
   <dependency>
            <groupId>org.springframework.bootgroupId>
            <artifactId>spring-boot-starter-testartifactId>
        dependency>
dependencies>
这里编写一个测试类,把刚才API测试的代码拷贝进去测试一下,效果如下
public class AliSMSTest {

    @Test
    public void testSend() throws ExecutionException, InterruptedException {
        //指定key和秘钥
        StaticCredentialProvider provider = StaticCredentialProvider.create(Credential.builder()
                .accessKeyId("你的accessKeyId")
                .accessKeySecret("你的秘钥")
                .build());

        //指定区域
        AsyncClient client = AsyncClient.builder()
                .region("cn-chengdu") // Region ID
                .credentialsProvider(provider)
                .overrideConfiguration(ClientOverrideConfiguration.create().setEndpointOverride("dysmsapi.aliyuncs.com"))
                .build();

        //使用的是API demo中的测试模板
        SendSmsRequest sendSmsRequest = SendSmsRequest.builder()
                .signName("阿里云短信测试")    //签名
                .templateCode("SMS_154950909")  //模板的编码
                .phoneNumbers("你的手机号") //接收短信手机号
                .templateParam("{\"code\":\"1234\"}") //验证码内容
                .build();

        //执行发送,这里使用的是异步
        CompletableFuture<SendSmsResponse> response = client.sendSms(sendSmsRequest);
        SendSmsResponse resp = response.get();
        System.out.println(new Gson().toJson(resp));
        client.close();
    }
}
执行之后会返回一个很长的JSON结果,我这里把重要的信息贴出来如下
body={“code”:“OK”,“requestId”:“0F8C12F5-15C5-5210-ABFE-C3E2377CBED4”,“bizId”:“260600960707508556^0”,“message”:“OK”}
定义Starter封装短信组件
不知道你是否在SpringBoot中使用过JdbcTemplate 或者 RedisTemplate ,我们只需要导入其依赖spring-boot-data-starter-redis, 然后再yaml中做简单的redis配置,就可以在service中注入RedisTemplate进行使用。非常的方便,我们希望我们的发短信功能也能实现类似于Redis的效果。
如果你对SpringBoot的自动配置不了解,请先看《SpringBoot自动配置原理(五)》 , 然后再看《SpringBoot自定义starter(六)》相信你对定义Starter有了自己的深刻认识,当然你不看这2篇文章也没关系,你认真跟着下面的代码走就行。
第一步:我们需要新建一个模块,比如:ymcc-basic-starter-sms ,然后导入依赖
<dependencies>
        <dependency>
            <groupId>com.aliyungroupId>
            <artifactId>alibabacloud-dysmsapi20170525artifactId>
            <version>1.0.1version>
        dependency>
        <dependency>
            <groupId>org.projectlombokgroupId>
            <artifactId>lombokartifactId>
        dependency>

        <dependency>
            <groupId>com.alibabagroupId>
            <artifactId>fastjsonartifactId>
            <version>1.2.50version>
        dependency>
    dependencies>
第二步: 定义一个properties类,我们把阿里云短信的相关参数做成配置,这样方便修改
@Data
//绑定配置
@ConfigurationProperties(prefix = "alicloud.sms")
public class AliSMSProperties {
    //key ID
    private String accessKeyId;
    //秘钥
    private String accessKeySecret;
    //地区
    private String region;
    //签名
    private String signName;
    //模板编号
    private String templateCode;
}
第三步:定义一个AliSMSTemplate类,用来发送短信,类似于RedisTemplate ,只不过这里要求把AliSMSProperties注入进来使用。代码如下
public class AliSMSTemplate {
    //配置对象
    private AliSMSProperties properties;

    public AliSMSTemplate(){}

    //构造器注入配置对象
    public AliSMSTemplate(AliSMSProperties properties){
        this.properties = properties;
    }
    //提供发送短信验证码的方法,参数为:手机号 , 验证码
    public Map<String,Object> doSendSMSCode(String phone,String code){
        StaticCredentialProvider provider = StaticCredentialProvider.create(Credential.builder()
                .accessKeyId(properties.getAccessKeyId())
                .accessKeySecret(properties.getAccessKeySecret())
                .build());

        AsyncClient client = AsyncClient.builder()
                .region(properties.getRegion()) // Region ID
                .credentialsProvider(provider)
                .overrideConfiguration(ClientOverrideConfiguration.create().setEndpointOverride("dysmsapi.aliyuncs.com"))
                .build();

        SendSmsRequest sendSmsRequest = SendSmsRequest.builder()
                .signName(properties.getSignName())
                .templateCode(properties.getTemplateCode())
                .phoneNumbers(phone)
                .templateParam("{\"code\":\""+code+"\"}")
                .build();
        //执行发送
        CompletableFuture<SendSmsResponse> response = client.sendSms(sendSmsRequest);
        SendSmsResponse resp = null;
        try {
            resp = response.get();
        } catch (Exception e) {
            e.printStackTrace();
            //出现错误
            Map<String,Object> result = new HashMap<>();
            result.put("error",e.getMessage());
            return result;
        }

        //处理结果
        String json = new Gson().toJson(resp);
        Map<String,Object> result = JSON.parseObject(json,Map.class);
        client.close();
        return result;
    }

}
第四步:编写的自动配置类AliSMSAutoConfiguration,把AliSMSTemplate注册到容器中。
//开启AliSMSProperties 配置功能
@EnableConfigurationProperties(AliSMSProperties.class)
@Configuration
public class AliSMSAutoConfiguration {

    //这里会自动注入 AliSMSProperties对象
    @Bean
    public AliSMSTemplate aliSMSTemplate(AliSMSProperties properties){
        //创建AliSMSTemplate,注册到Spring容器中
        return new AliSMSTemplate(properties);
    }
}
虽然我们在一个注解了 @Configuration 的配置类中定义了AliSMSTemplate,但是该类要被Spring扫描加载才会起作用,SpringBoot 提供了自动配置功能,它使用类似于SPI的方式去扫描classpath下的META-INF中的spring.factories中的配置类,自动装载到Spring容器中。利用这一特性我们可以完成 AliSMSAutoConfiguration 的自动配置。如下
第五步:也是非常重要的一步,在resources目录创建META-INF/spring.factories文件,内容如下
# Auto Configure
org.springframework.boot.autoconfigure.EnableAutoConfiguration=\
  cn.itsource.config.AliSMSAutoConfiguration
代码整理结构如下

到这里,我们的短信组件就封装好了,然后就是在项目中使用。
第六步:在项目中,导入短信组件 ymcc-basic-starter-sms
<dependency>
  <groupId>cn.itsource.ymccgroupId>
    <artifactId>ymcc-basic-starter-smsartifactId>
    <version>1.0-SNAPSHOTversion>
dependency>
第七步:在项目的yaml中配置阿里云短信参数 , 这些参数会被设置到 AliSMSProperties 对象中
alicloud:
  sms:
    accessKeyId: 你的key
    accessKeySecret: 你的秘钥
    region: cn-chengdu
    signName: "阿里云短信测试"
    templateCode: SMS_154950909
第八步:编写测试类,注入AliSMSTemplate实现短信的发送
@RunWith(SpringRunner.class)
@SpringBootTest(classes = UserStart.class)
public class SMSTest {

	//注入模板
    @Autowired
    private AliSMSTemplate aliSMSTemplate;

    @Test
    public void testSendSms(){
		//发送短信
        Map<String, Object> map = aliSMSTemplate.doSendSMSCode("手机号", "1234");
        System.out.println(map);
    }
}
测试结果如下:
{headers={“Access-Control-Allow-Origin”:“*”,“x-acs-request-id”:“0F8C12F5-15C5-5210-ABFE-C3E2377CBED4”,“Access-Control-Allow-Methods”:“POST, GET, OPTIONS, PUT, DELETE”,“Connection”:“keep-alive”,“Content-Length”:“110”,“Access-Control-Max-Age”:“172800”,“Date”:“Wed, 17 Aug 2022 03:38:28 GMT”,“Access-Control-Allow-Headers”:“X-Requested-With, X-Sequence, _aop_secret, _aop_signature, x-acs-action, x-acs-version, x-acs-date, Content-Type”,“Content-Type”:“application/json;charset=utf-8”,“x-acs-trace-id”:“e551b0f118e32f07fdd6de1d30d0eac3”}, body={“code”:“OK”,“requestId”:“0F8C12F5-15C5-5210-ABFE-C3E2377CBED4”,“bizId”:“260600960707508556^0”,“message”:“OK”}}
总结
为了方便大家理解,我这里画了一个图
以后有类似于发短信,文件上传等这样的通用功能,我们都可以定义成starter,使用更加方便。
