Springboot 整合多种NoSQL
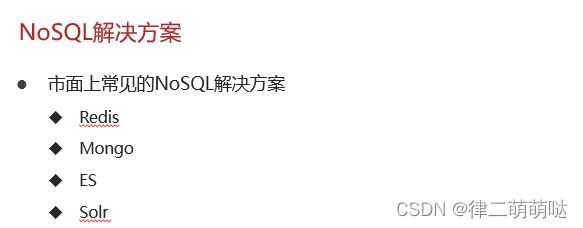
Springboot 整合多种NoSQL
Redis
Redis是一款key-value存储结构的内存级NoSQL数据库
- 支持多种数据存储格式
- 支持持久化
- 支持集群
1. Redis安装(Windows版)
Redis下载( Windows版)
- https://github.com/tporadowski/redis/releases
Redis安装与启动( Windows版)
- Windows解压安装或一键式安装
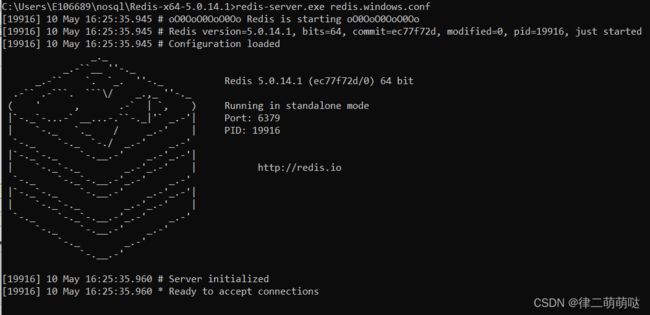
- 服务端启动命令
redis-server.exe redis.windows.conf
客户端启动命令
redis-cli.exe
2. Redis基本操作
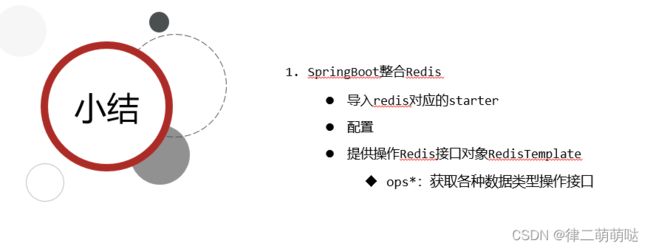
3. SpringBoot整合Redis
导入SpringBoot整合Redis坐标
<dependency>
	<groupId>org.springframework.bootgroupId>
	<artifactId>spring-boot-starter-data-redisartifactId>
dependency>
配置Redis(采用默认配置)
spring:
  redis:
    host: localhost
    port: 6379
主机:localhost(默认)
端口:6379(默认)
RedisTemplate提供操作各种数据存储类型的接口API
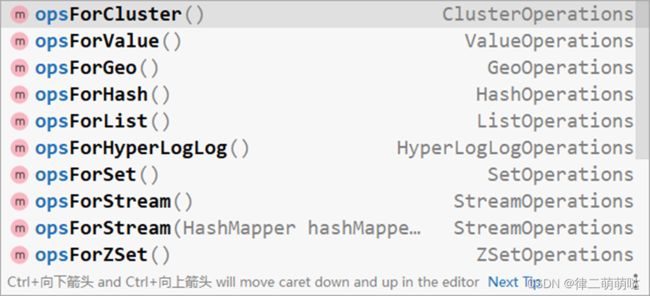
客户端:RedisTemplate
- RedisTemplate以对象作为key和value,内部对数据进行序列化
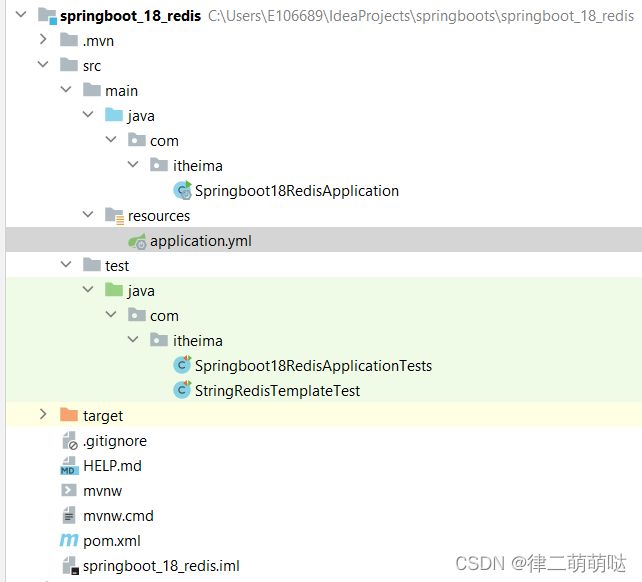
package com.itheima;

import org.junit.jupiter.api.Test;
import org.springframework.beans.factory.annotation.Autowired;
import org.springframework.boot.test.context.SpringBootTest;
import org.springframework.data.redis.core.HashOperations;
import org.springframework.data.redis.core.RedisTemplate;
import org.springframework.data.redis.core.ValueOperations;

@SpringBootTest
class Springboot18RedisApplicationTests {

    @Autowired
    private RedisTemplate redisTemplate;

    @Test
    void set() {
       redisTemplate.opsForValue().set("age","22");
    }
    @Test
    void get() {
        Object age = redisTemplate.opsForValue().get("age");
        System.out.println(age.toString());
    }
    @Test
    void hset() {
        HashOperations ops = redisTemplate.opsForHash();
        ops.put("info","a","aa");
    }
    @Test
    void hget() {
        HashOperations ops = redisTemplate.opsForHash();
        Object o = ops.get("info", "a");
        System.out.println(o);
    }
}
- StringRedisTemplate以字符串作为key和value,与Redis客户端操作等效
package com.itheima;

import org.junit.jupiter.api.Test;
import org.springframework.beans.factory.annotation.Autowired;
import org.springframework.boot.test.context.SpringBootTest;
import org.springframework.data.redis.core.StringRedisTemplate;
import org.springframework.data.redis.core.ValueOperations;


@SpringBootTest
public class StringRedisTemplateTest {
    //private RedisTemplate redisTemplate;//操作对象
    //与客户端保持一样的数据
    @Autowired
    private StringRedisTemplate stringRedisTemplate;//操作字符串
    @Test
    void get(){
        ValueOperations<String, String> ops = stringRedisTemplate.opsForValue();
        String name = ops.get("name");
        System.out.println(name);
    }
}
客户端选择:jedis
<dependency>
    <groupId>redis.clientsgroupId>
    <artifactId>jedisartifactId>
dependency>
配置客户端专用属性
spring:
  redis:
    host: localhost
    port: 6379
    client-type: lettuce
    lettuce:
      pool:
        max-active: 16
    jedis:
      pool:
        max-active: 16
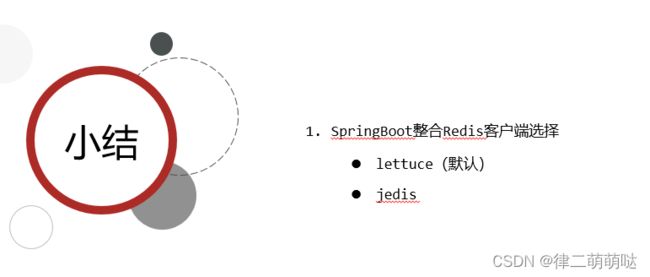
lettcus与jedis区别
- jedis连接Redis服务器是直连模式,当多线程模式下使用jedis会存在线程安全问题,解决方案可以通过配置连接池使每个连接专用,这样整体性能就大受影响。
- lettcus基于Netty框架进行与Redis服务器连接,底层设计中采用StatefulRedisConnection。
StatefulRedisConnection自身是线程安全的,可以保障并发访问安全问题,所以一个连接可以被多线程复用。当然lettcus也支持多连接实例一起工作。
Mongodb
MongoDB是一个开源、高性能、无模式的文档型数据库。NoSQL数据库产品中的一种,是最像关系型数据库的非关系型数据库
1. Mongodb应用场景
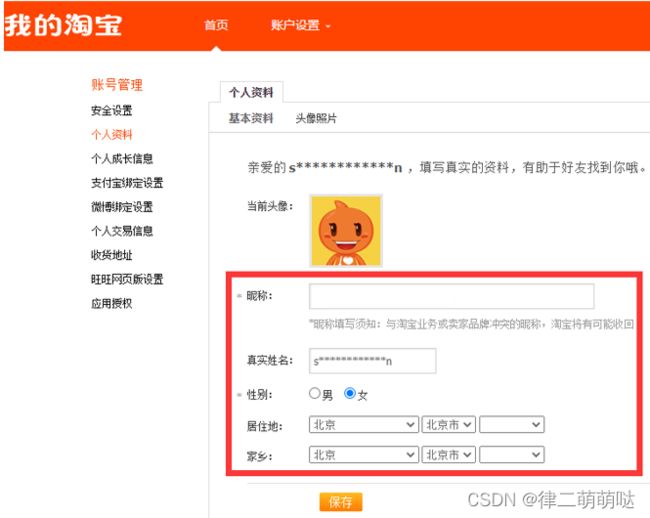
淘宝用户数据
- 存储位置:数据库
- 特征:永久性存储,修改频度极低
游戏装备数据、游戏道具数据
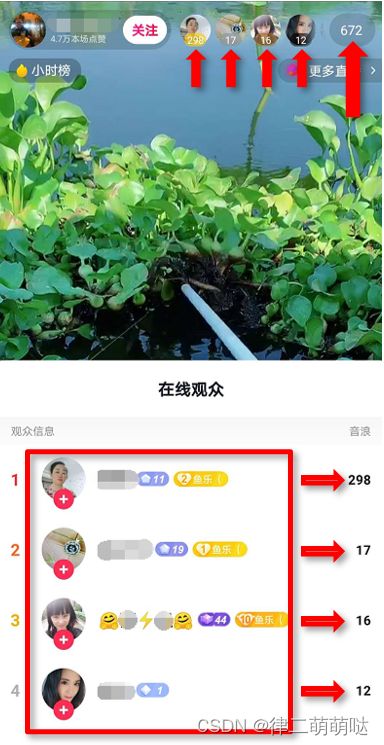
直播数据、打赏数据、粉丝数据
-
存储位置:数据库、Mongodb
-
特征:永久性存储与临时存储相结合,
修改频度极高
物联网数据
-
存储位置:Mongodb
-
特征:临时存储,修改频度飞速
其他数据……
2. Mongodb安装、启动
Windows版Mongo下载
https://www.mongodb.com/try/download
Windows版Mongo安装
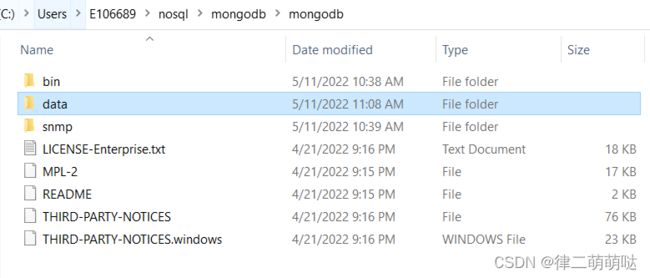
解压缩后设置数据目录
- 在bin同级目录创建data/db
Windows版Mongo启动
服务端启动
mongod --dbpath=..\data\db
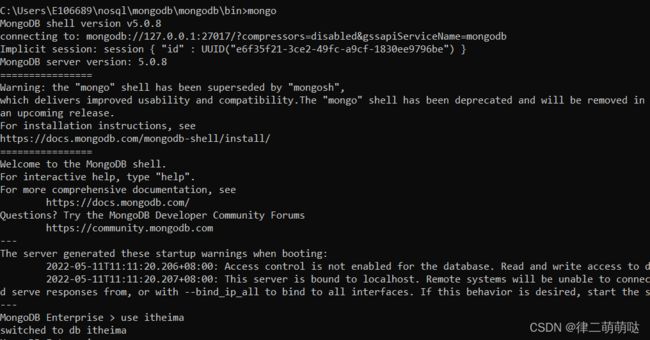
客户端启动
mongo --host=127.0.0.1 --port=27017
Windows版Mongo安装问题及解决方案
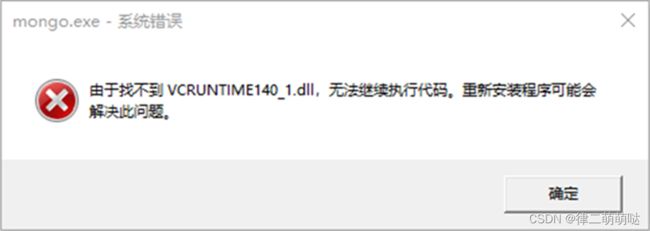
步骤一:下载对应的dll文件(通过互联网搜索即可)
步骤二:拷贝到windows安装路径下的system32目录中
步骤三:执行命令注册对应dll文件
regsvr32 vcruntime140_1.dll
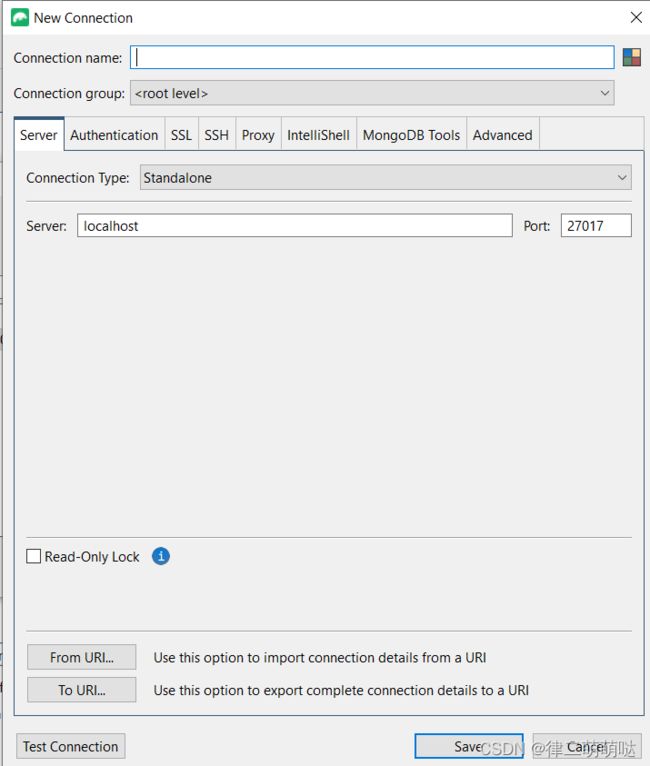
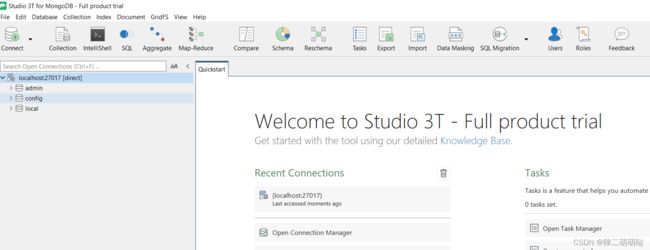
3. 可视化客户端Robo 3T安装与连接
可视化客户端——Robo 3T
下载地址:
https://studio3t.com/download-thank-you/?OS=win64
4. Mongodb基础CRUD
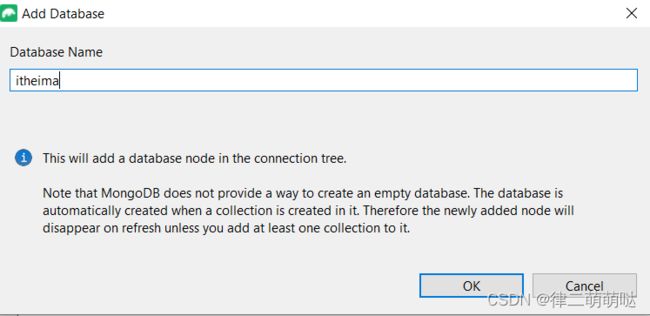
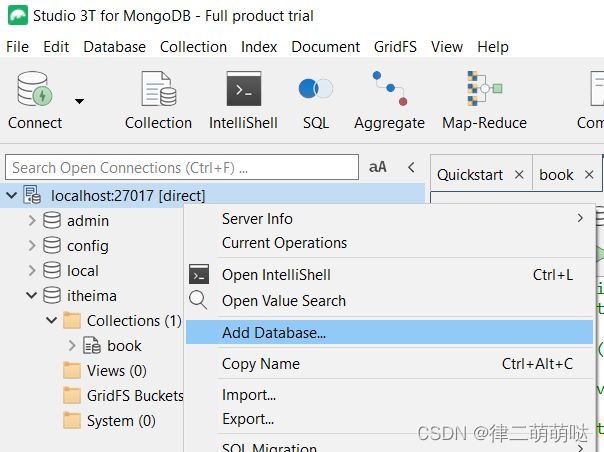
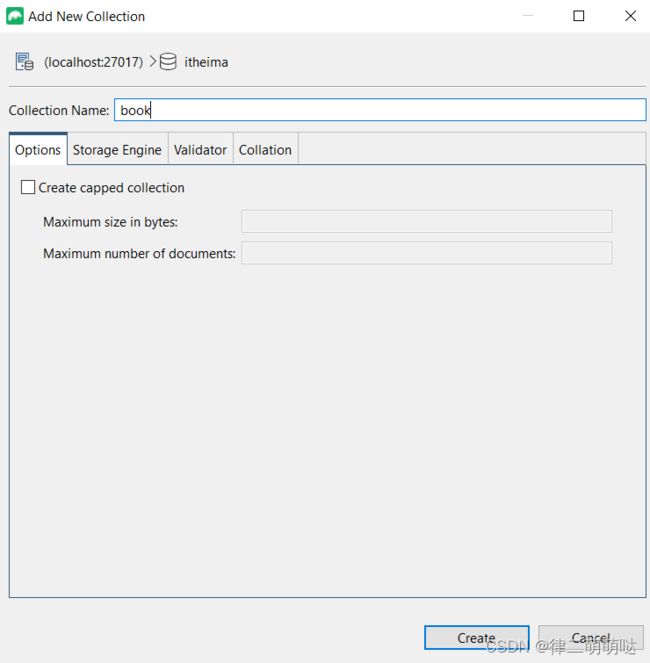
添加collection,相当于数据库的表
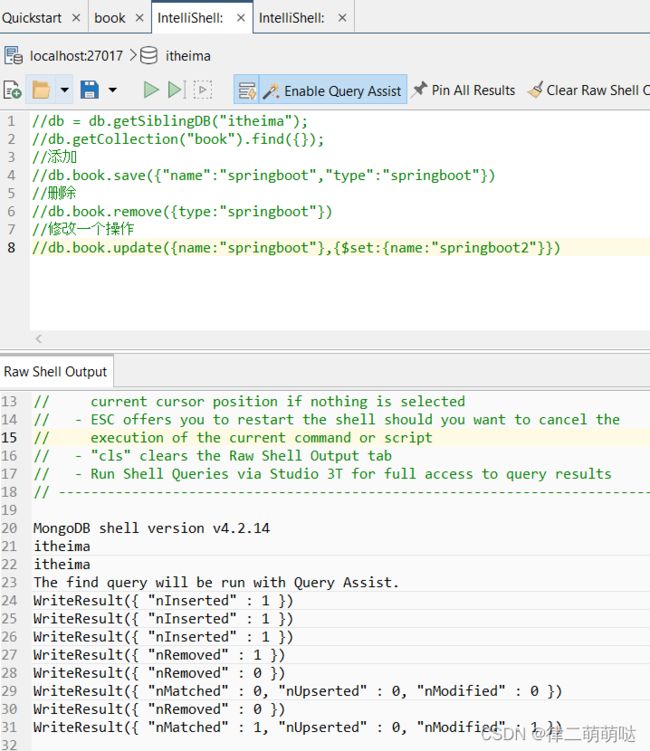
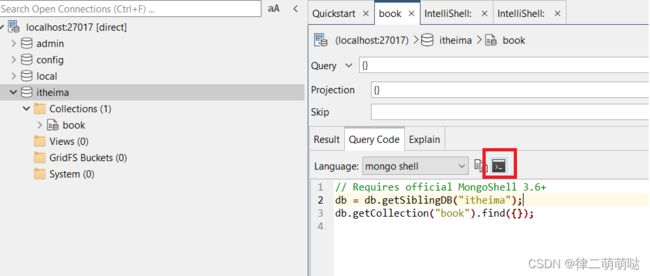
打开命令行窗口编写SQL
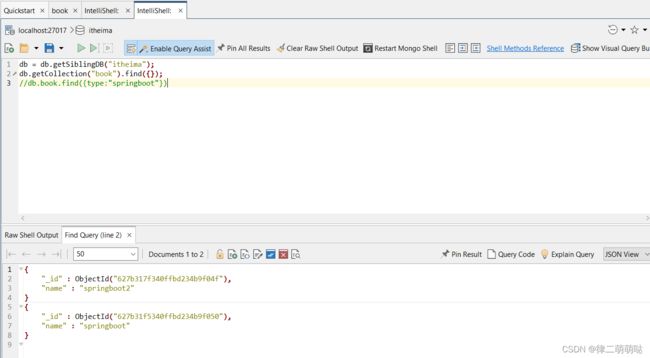
新增
- db.集合名称.insert/save/insertOne(文档)
修改
- db.集合名称.remove(条件)
删除
- db.集合名称.update(条件,{操作种类:{文档}})
基础查询
- 查询全部:db.集合.find();
- 查第一条:db.集合.findOne()
- 查询指定数量文档:db.集合.find().limit(10) //查10条文档
- 跳过指定数量文档:db.集合.find().skip(20) //跳过20条文档
- 统计:db.集合.count()
- 排序:db.集合.sort({age:1}) //按age升序排序
- 投影:db.集合名称.find(条件,{name:1,age:1}) //仅保留name与age域
条件查询
- 基本格式:db.集合.find({条件})
- 模糊查询:db.集合.find({域名:/正则表达式/}) //等同SQL中的like,比like强大,可以执行正则所有规则
- 条件比较运算:db.集合.find({域名:{$gt:值}}) //等同SQL中的数值比较操作,例如:name>18
- 包含查询:db.集合.find({域名:{$in:[值1,值2]}}) //等同于SQL中的in
- 条件连接查询:db.集合.find({$and:[{条件1},{条件2}]}) //等同于SQL中的and、or
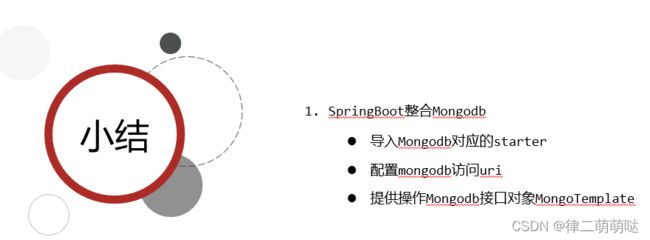
5. Spring boot 整合Mongodb
- 导入Mongodb驱动
<dependency>
    <groupId>org.springframework.bootgroupId>
    <artifactId>spring-boot-starter-data-mongodbartifactId>
dependency>
- 配置客户端
spring:
  data:
    mongodb:
      uri: mongodb://localhost/itheima
客户端读写Mongodb
package com.itheima;

import com.itheima.domain.Book;
import org.junit.jupiter.api.Test;
import org.springframework.beans.factory.annotation.Autowired;
import org.springframework.boot.test.context.SpringBootTest;
import org.springframework.data.mongodb.core.MongoTemplate;

import java.util.List;

@SpringBootTest
class Springboot19MongodbApplicationTests {

    @Autowired
    private MongoTemplate mongoTemplate;

    @Test
    void testSave() {
        Book book=new Book();
        book.setId(2);
        book.setName("spring boot2");
        book.setDescription("spring boot2");
        book.setType("spring boot2");
        mongoTemplate.save(book);
    }
    @Test
    void testFind() {
        List<Book> bookList = mongoTemplate.findAll(Book.class);
        System.out.println(bookList);
    }
    @Test
    void testDelete(){
        Book book=new Book();
        book.setId(2);
        mongoTemplate.remove(book);
    }
}
ElasticSearch(ES)
Elasticsearch是一个分布式全文搜索引擎
1. ES应用场景
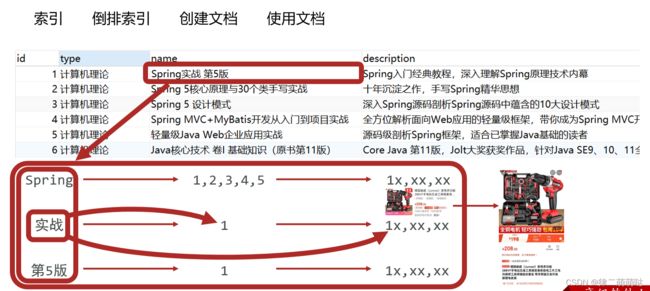
2. ES相关概念
3. ES下载与安装
Windows版ES下载
https://www.elastic.co/cn/downloads/elasticsearch
Windows版ES安装与启动
运行 elasticsearch.bat
4. ElasticSearch 启动常见错误
1、received plaintext http traffic on an https channel,
   closing connection Netty4HttpChannel received plaintext
   http traffic on an https channel, closing connection Netty4HttpChannel
   {localAddress=/[0:0:0:0:0:0:0:1]:9200, remoteAddress=/[0:0:0:0:0:0:0:1]:55367}
解决
- 是因为
开启了 ssl 认证。 - 在 ES/config/elasticsearch.yml 文件中把
xpack.security.http.ssl:enabled
设置成 false即可
2、elasticsearch 账号密码
windows 下直接启动 ElasticSearch ,见到 started 为成功启动,访问 htttp://localhost:9200 需要输入密码,是因为开启了密码验证模式。
找了一轮没看到有账号密码,干脆就设置免密登录就好。
解决
找到 elasticsearch.yml 文件, 把 xpack.security.enabled 属性设置为 false 即可。
#Enable security features
xpack.security.enabled: false

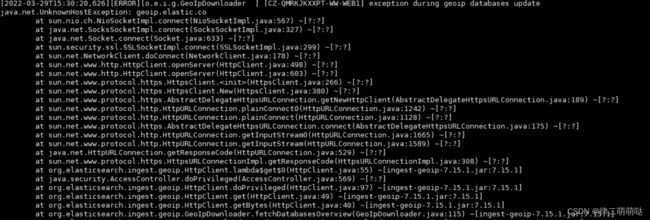
3. exception during geoip databases update
- 此版本将GeoIp功能默认开启了采集。在默认的启动下是会去官网的默认地址下获取最新的Ip的GEO信息
ingest.geoip.downloader.enabled: false
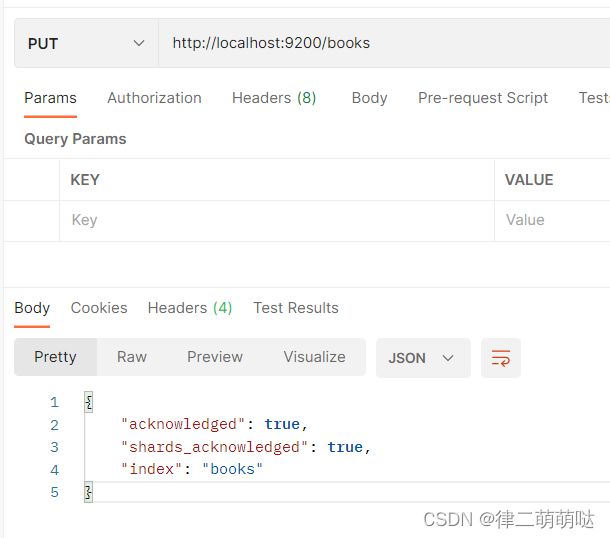
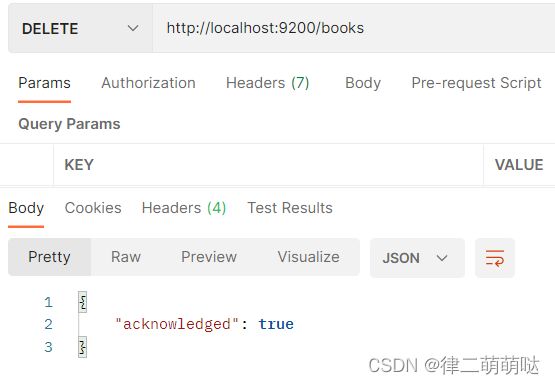
5. 索引操作
6. IK分词器安装
IK分词器
下载:https://github.com/medcl/elasticsearch-analysis-ik/releases
将下载后的文件解压到plugins folder下面

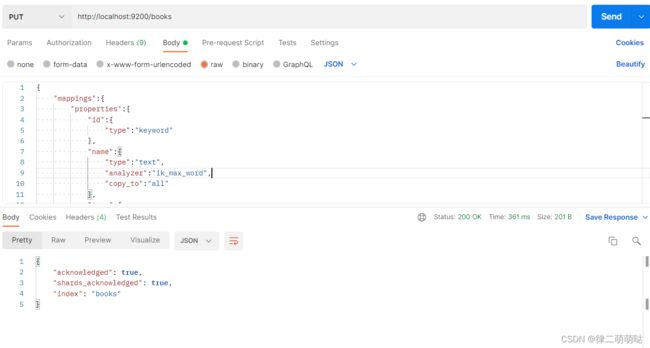
7. 设置索引创建规则(应用)
{
    "mappings":{
        "properties":{
            "id":{
                "type":"keyword"
            },
            "name":{
                "type":"text",
                "analyzer":"ik_max_word",
                "copy_to":"all"
            },
            "type":{
                "type":"text",
                "analyzer":"ik_max_word"
            },
            "descripition":{
                "type":"text",
                "analyzer":"ik_max_word",
                "copy_to":"all"
            },
            "all":{
                "type":"text",
                "analyzer":"ik_max_word"
            }
        }
    }
}
8. 文档操作(增删改查)
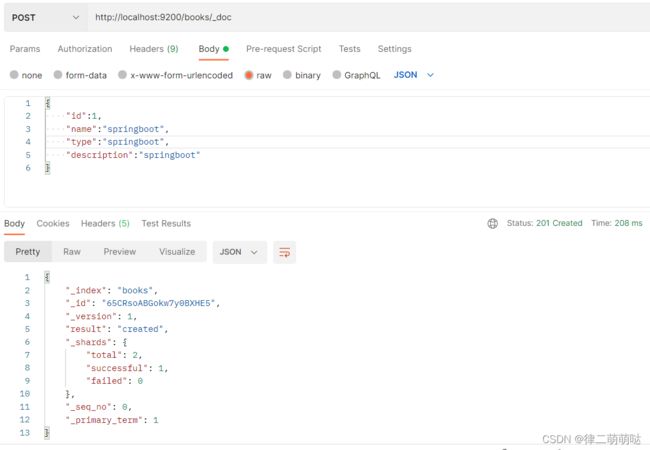
创建文档
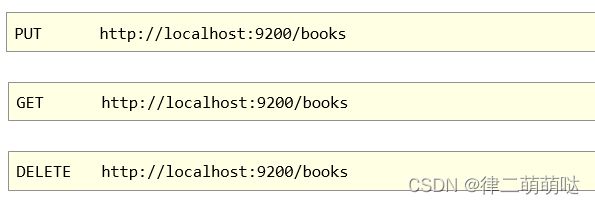
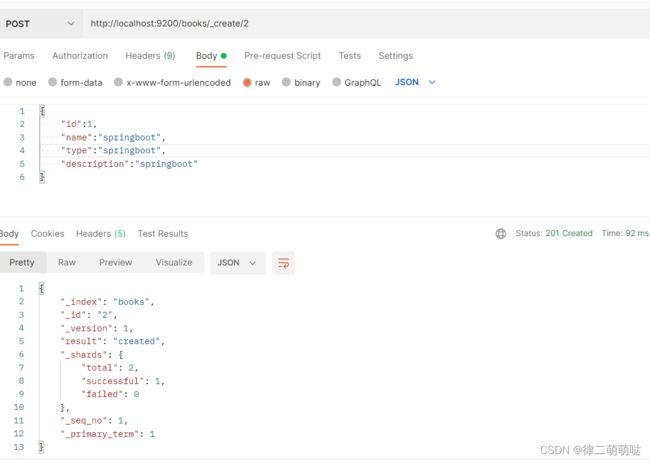
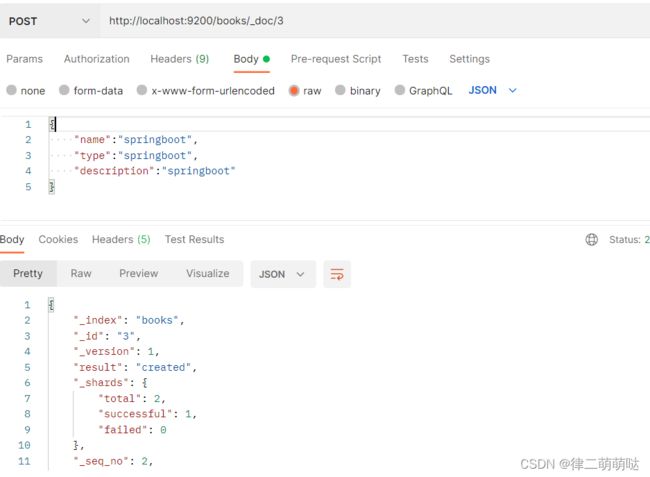
- POST http://localhost:9200/books/_doc #使用系统生成id
- POST http://localhost:9200/books/_create/1 #使用指定id,
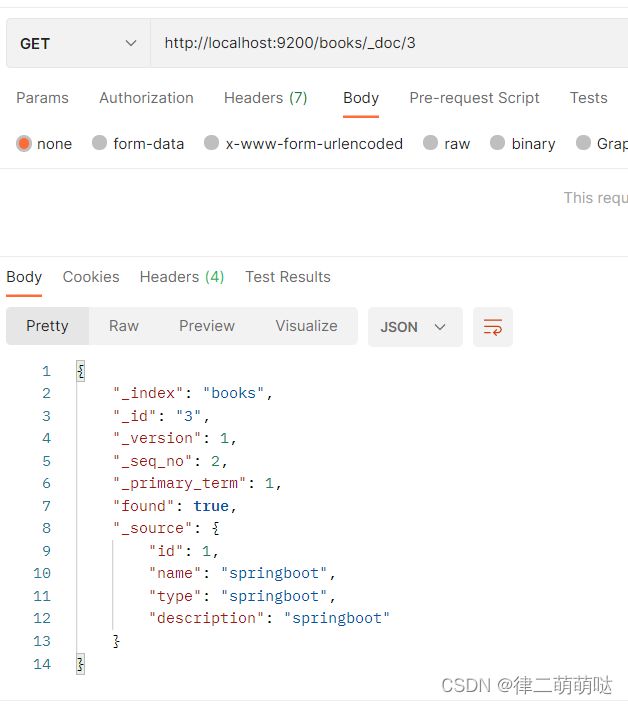
GET http://localhost:9200/books/_doc/1 #查询单个文档
GET http://localhost:9200/books/_search #查询全部文档
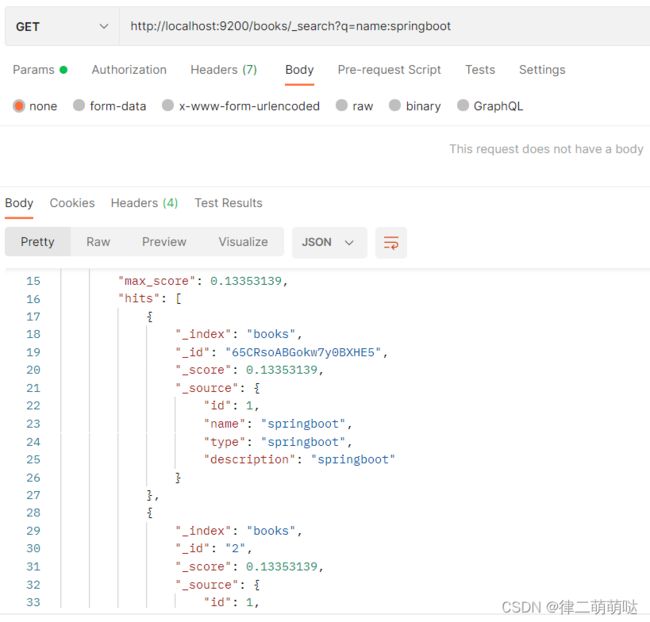
条件查询
GET http://localhost:9200/books/_search?q=name:springboot
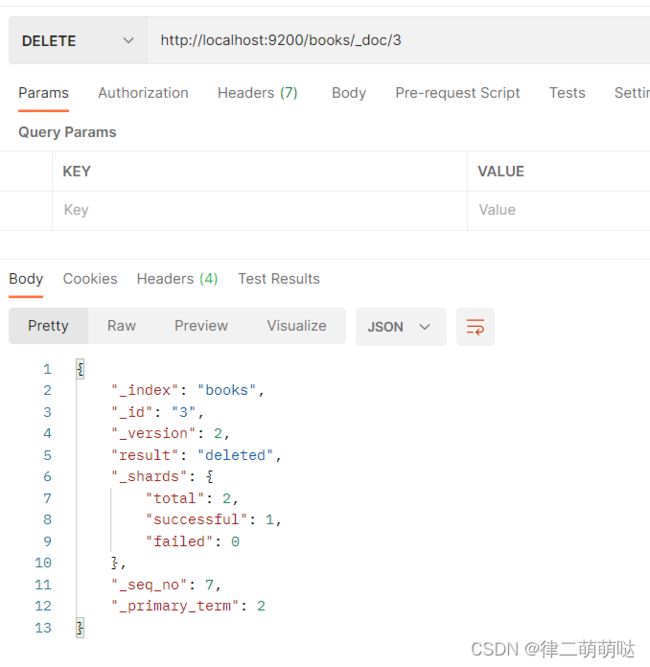
DELETE http://localhost:9200/books/_doc/1
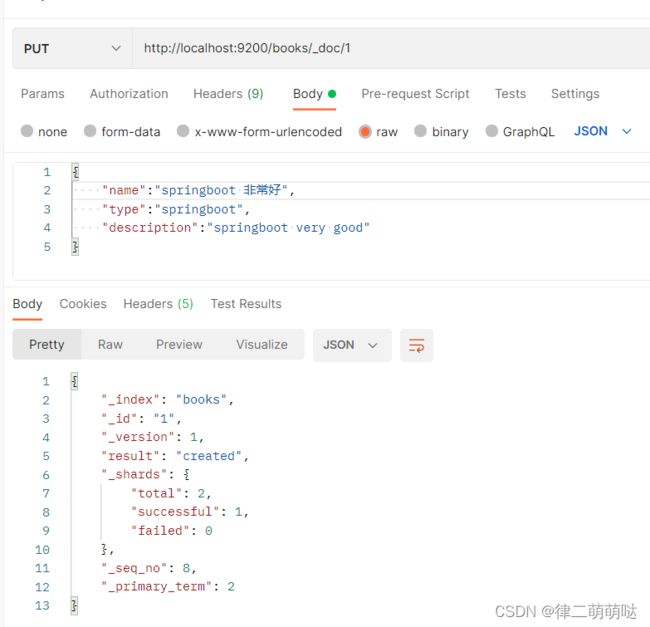
PUT http://localhost:9200/books/_doc/1
{
    "name":"springboot",
    "type":"springboot",
    "description":"springboot"
}
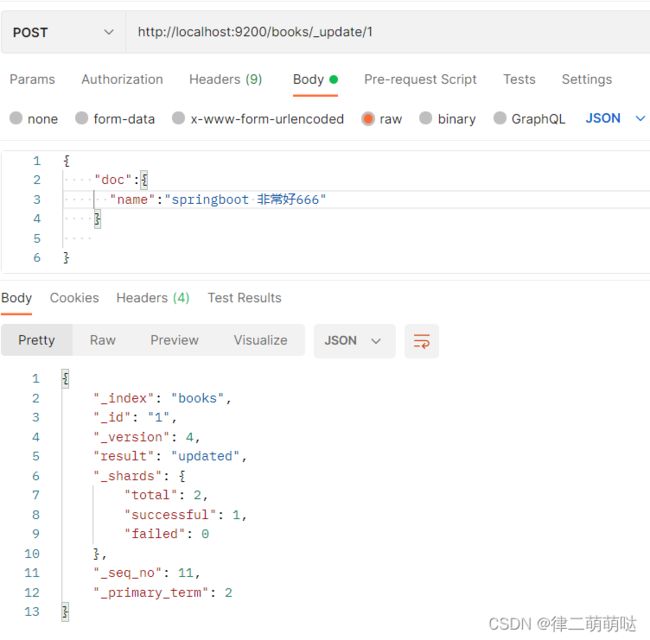
POST http://localhost:9200/books/_update/1
{
    "doc":{
        "name":"springboot"
    }
}
9. Springboot整合ES
SpringBoot平台并没有跟随ES的更新速度进行同步更新,ES提供了High Level Client操作ES
导入坐标
  <dependency>
            <groupId>org.elasticsearch.clientgroupId>
            <artifactId>elasticsearch-rest-high-level-clientartifactId>
        dependency>
        <dependency>
            <groupId>org.springframework.bootgroupId>
            <artifactId>spring-boot-starter-testartifactId>
            <scope>testscope>
        dependency>
        <dependency>
            <groupId>org.projectlombokgroupId>
            <artifactId>lombokartifactId>
        dependency>
        <dependency>
            <groupId>com.baomidougroupId>
            <artifactId>mybatis-plus-boot-starterartifactId>
            <version>3.4.3version>
        dependency>

        <dependency>
            <groupId>com.alibabagroupId>
            <artifactId>druidartifactId>
            <version>1.1.21version>
        dependency>

        <dependency>
            <groupId>com.microsoft.sqlservergroupId>
            <artifactId>mssql-jdbcartifactId>
            <version>8.2.2.jre8version>
        dependency>
        <dependency>
            <groupId>org.projectlombokgroupId>
            <artifactId>lombokartifactId>
            <version>1.18.20version>
            <scope>providedscope>
        dependency>
        <dependency>
            <groupId>com.alibabagroupId>
            <artifactId>fastjsonartifactId>
            <version>1.2.78version>
        dependency>
配置(无)
spring:
  datasource:
    url: jdbc:sqlserver://sybasehk-sit-intl-ag.aiaazure.biz:1433;database=db_vas;useUnicode=true;characterEncoding=utf8;characterSetResults=utf8
    driver-class-name: com.microsoft.sqlserver.jdbc.SQLServerDriver
    username: hsybmgr
    password: Password2020!
    type: com.alibaba.druid.pool.DruidDataSource
  #elasticsearch:
      #  rest:
  #    uris: http://localhost:9200
#把sql语句打印在控制台
logging:
  level:
    com:
      example:
        mapper : debug
#设置mybatis-plus相关的配置
mybatis-plus:
  global-config:
    db-config:
      table-prefix: tbl_
      id-type: auto
  configuration:
    log-impl: org.apache.ibatis.logging.stdout.StdOutImpl
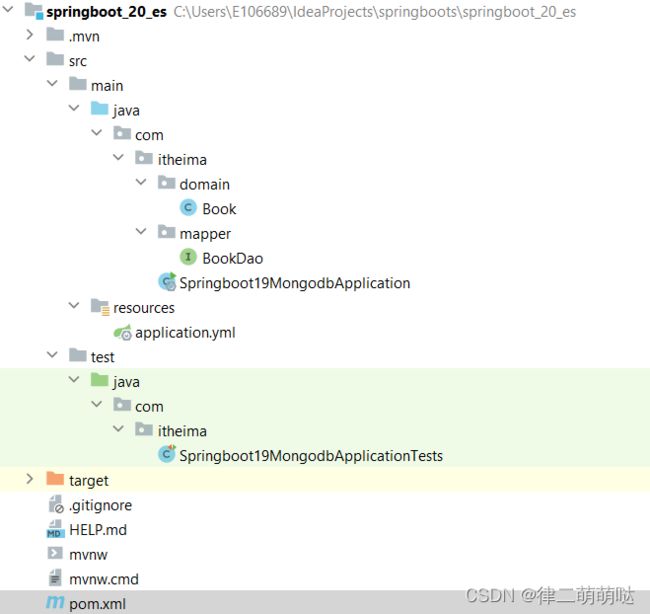
Book
@Data
public class Book {
    private Integer id;
    private String name;
    private String type;
    private String description;

}
BookDao
package com.itheima.mapper;

import com.baomidou.mybatisplus.core.mapper.BaseMapper;
import com.itheima.domain.Book;
import org.apache.ibatis.annotations.Mapper;

@Mapper
public interface BookDao  extends BaseMapper<Book> {

}
客户端
@Test
void test() throws IOException {
	 HttpHost host = HttpHost.create("http://localhost:9200");
	 RestClientBuilder builder = RestClient.builder(host);
	 RestHighLevelClient client = new RestHighLevelClient(builder);
	 //客户端操作
	 CreateIndexRequest request = new CreateIndexRequest("books");
	 //获取操作索引的客户端对象,调用创建索引操作
	 client.indices().create(request, RequestOptions.DEFAULT);
	 //关闭客户端
	 client.close();
 }
客户端改进
@SpringBootTest
class Springboot18EsApplicationTests {
 	RestHighLevelClient client;
    @BeforeEach
    void setUp() {
        //创建客户端
        HttpHost hosts=HttpHost.create("http://localhost:9200");
        RestClientBuilder builder= RestClient.builder(hosts);
        client=new RestHighLevelClient(builder);
    }

    @AfterEach
    void tearDown() throws IOException {
        client.close();
    }
   @Test
   void testCreateIndex() throws IOException {
       //创建索引
       CreateIndexRequest request=new CreateIndexRequest("books");
       client.indices().create(request, RequestOptions.DEFAULT);
   }
}
创建索引
    @Test
    void testCreateIndex() throws IOException {
        //创建客户端
        HttpHost hosts=HttpHost.create("http://localhost:9200");
        RestClientBuilder builder= RestClient.builder(hosts);
        client=new RestHighLevelClient(builder);
        //创建索引
        CreateIndexRequest request=new CreateIndexRequest("books");
        client.indices().create(request, RequestOptions.DEFAULT);
    }
创建带IK的索引
@Test
    void testCreateIndexByIK() throws IOException {
        //创建索引
        CreateIndexRequest request=new CreateIndexRequest("books");
        String json="{\n" +
                "    \"mappings\":{\n" +
                "        \"properties\":{\n" +
                "            \"id\":{\n" +
                "                \"type\":\"keyword\"\n" +
                "            },\n" +
                "            \"name\":{\n" +
                "                \"type\":\"text\",\n" +
                "                \"analyzer\":\"ik_max_word\",\n" +
                "                \"copy_to\":\"all\"\n" +
                "            },\n" +
                "            \"type\":{\n" +
                "                \"type\":\"text\",\n" +
                "                \"analyzer\":\"ik_max_word\"\n" +
                "            },\n" +
                "            \"descripition\":{\n" +
                "                \"type\":\"text\",\n" +
                "                \"analyzer\":\"ik_max_word\",\n" +
                "                \"copy_to\":\"all\"\n" +
                "            },\n" +
                "            \"all\":{\n" +
                "                \"type\":\"text\",\n" +
                "                \"analyzer\":\"ik_max_word\"\n" +
                "            }\n" +
                "        }\n" +
                "    }\n" +
                "}";
        //设置请求中的参数
        request.source(json, XContentType.JSON);
        client.indices().create(request, RequestOptions.DEFAULT);

    }
添加文档
  //添加一条文档
    @Test
    void testCreateDoc() throws IOException {
        Book book = bookDao.selectById(1);
        String json = JSON.toJSONString(book);
        IndexRequest request=new IndexRequest("books").id(book.getId().toString());
        request.source(json, XContentType.JSON);
        try{
            client.index(request,RequestOptions.DEFAULT);
        }catch (Exception e){
            if(!(e.getMessage()).contains("Created")){
                throw e;
            }
        }
    }
批量添加文档
//批量添加文档
    @Test
    void testCreateDocs() throws IOException {
        List<Book> bookList = bookDao.selectList(null);
        try{
            BulkRequest bulkRequest=new BulkRequest();
            for (Book book : bookList) {
                String json = JSON.toJSONString(book);
                IndexRequest request=new IndexRequest("books").id(book.getId().toString());
                request.source(json, XContentType.JSON);
                bulkRequest.add(request);
            }
            client.bulk(bulkRequest,RequestOptions.DEFAULT);
        }catch (Exception e){
            System.out.println(e.getMessage());
        }
    }
按id查询文档
//按id查询
    @Test
    public void testGet() throws IOException {
        GetRequest request=new GetRequest("books","1");
        GetResponse response = client.get(request, RequestOptions.DEFAULT);
        String json = response.getSourceAsString();
        System.out.println(json);
    }
按条件查询文档
//按条件查询
    @Test
    public void testSearch() throws IOException {
        SearchRequest request=new SearchRequest("books");
        //设置条件
        SearchSourceBuilder builder=new SearchSourceBuilder();
        builder.query(QueryBuilders.termQuery("name","spring"));
        request.source(builder);

        SearchResponse response = client.search(request, RequestOptions.DEFAULT);
        //拿到所有命中结果
        SearchHits hits = response.getHits();
        for (SearchHit hit : hits) {
            String source = hit.getSourceAsString();
            Book book = JSON.parseObject(source, Book.class);
            System.out.println(book);
        }
    }
