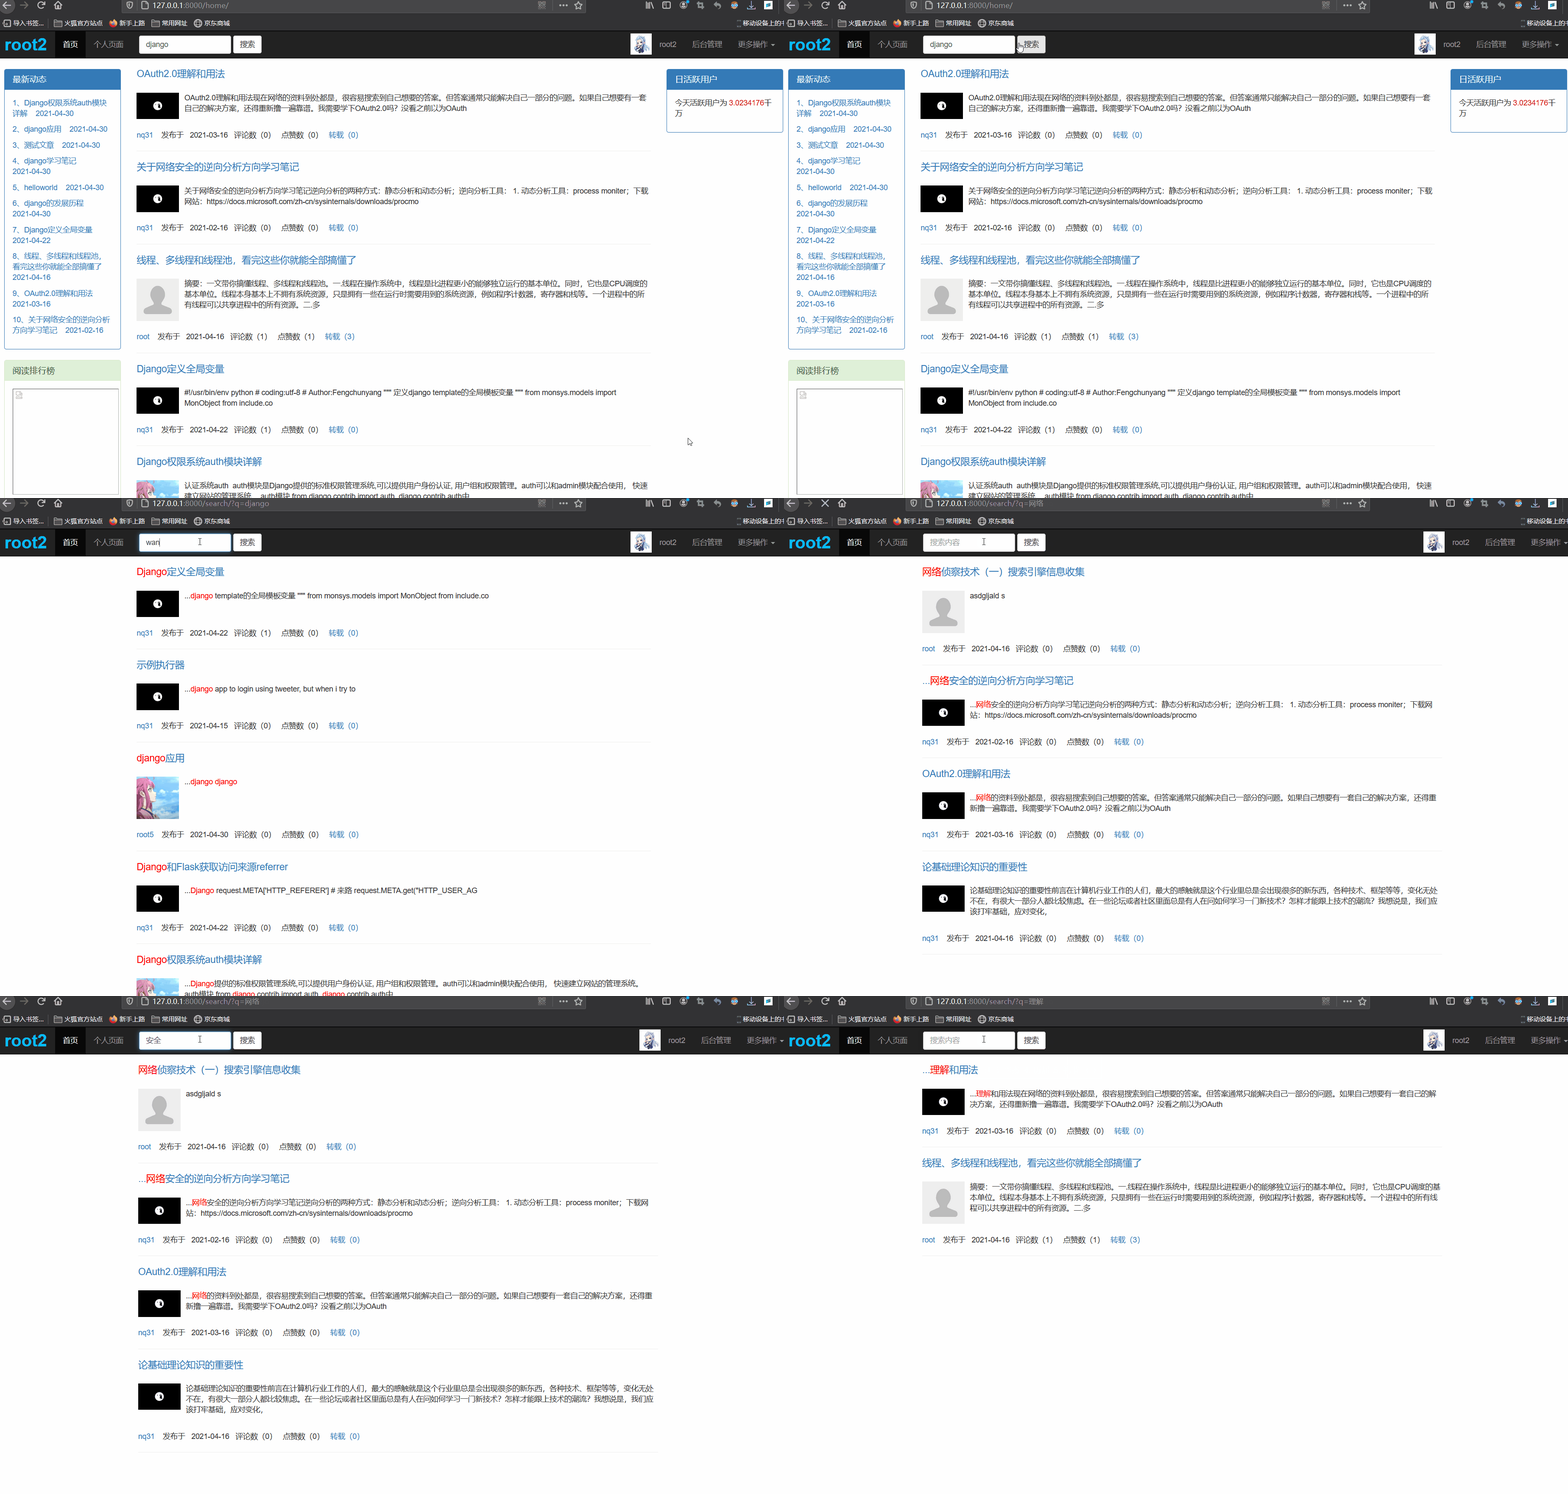
Django全文检索Haystack模块
一、先下载依懒的库
# 1、下载django-haystack
#注意:django2.0版本以上的,尽量安装django-haystack 3.0版本及以上,以防出现错误
pip install django-haystack
#如果报错,则安装pip3 install setuptools_scm后再安装django-haystack

# 2、 下载搜索引擎库whoosh
# 注意:whoosh只支持英文分词(也就是英文关键字),如果使用该引擎搜索中文关键字可以不会有结果,我就出现中文搜索关键词结果为空情况。
pip install whoosh

# 3、下载搜索引擎jieba
# jieba是为了弥补whoosh不支持中文缺点
pip install jieba
二、在django项目中的配置文件配置haystack
# 1、在app中注册,注意:必须放在app上面
INSTALLED_APPS = [
    'django.contrib.admin',
   。...
    'django.contrib.staticfiles',
    'haystack',
    # 下面放app
    'app01.apps.App01Config',
]

# 2、配置搜索引擎
# 官方文档提供四种引擎配置:Solr、Elasticsearch、Whoosh、Xapian。
# 这里只以Whoosh为例,其他感兴趣可以看[官方文档](https://django-haystack.readthedocs.io/en/master/tutorial.html#installation)

HAYSTACK_CONNECTIONS = {
    'default': {
        'ENGINE': 'haystack.backends.whoosh_backend.WhooshEngine',
        'PATH': os.path.join(os.path.dirname(__file__), 'whoosh_index'),
    },
}
# 注意:PATH是你创建索引的时候,索引存放的位置
三、数据处理
1、在要做全文检索的app下创建一个search_indexes.py文件,名字必须是search_indexes.py,
这里以文章表article为例子,内容如下:
import datetime
from haystack import indexes
# 导入你的文章表
from myapp.models import Article

# 注意;类名(ArticleIndex)必须是模型名+Index,这里以app下models文件下的Article模型表为例
class ArticleIndex(indexes.SearchIndex, indexes.Indexable):
    ‘’‘
    document=True  表示haystack和搜索引擎都将使用该字段的内容作为索引
    user_tempalte=True 表示可以使用数据模版,也就是templates目录下的索引字段文件。
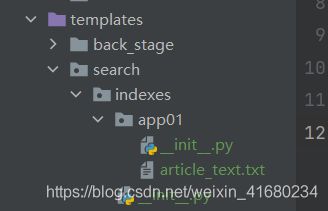
    如:templates/search/indexes/myapp/article_text.txt
    注意: myapp是你要建立全文检索的app名,article_text是模型表名小写+_text
    ’‘’
    text = indexes.CharField(document=True, use_template=True)
 #   author = indexes.CharField(model_attr='user')
 #  pub_date = indexes.DateTimeField(model_attr='pub_date')

    # 必须重载这个方法
    def get_model(self):
    	# return 模型表(也就是要做全文检索的表)
        return Article

    def index_queryset(self, using=None):
        """Used when the entire index for model is updated."""
        # 针对哪些数据进行检索,可以在这对数据做处理
        #return self.get_model().objects.filter(pub_date__lte=datetime.datetime.now())
        return self.get_model().objects.all()
2、templates模板目录下建立数据模版文件,路径为templates/search/indexex/app名/表名小写+_text.txt

txt文件里面写要检索的字段
# 这里以文章表的 title字段、content字段、为例子
{{ object.title }}
{{ object.content }}
3、添加视图函数的url
url(r'^search/', include('haystack.urls')),4、创建搜索页面的模板html文件,存放在templates下的search目录下,必须叫search.html
注意:从结果列表中取出对象后,必须加object,再取属性值,如下面代码所示
{% extends 'base.html' %}

{% block content %}
    <h2>Searchh2>
    <form method="get" action=".">
        <table>
            {{ form.as_table }}
            <tr>
                <td> td>
                <td>
                    <input type="submit" value="Search">
                td>
            tr>
        table>

        {% if query %}
            <h3>Resultsh3>

            {% for result in page.object_list %}
                <p>
                    <a href="{{ result.object.get_absolute_url }}">{{ result.object.title }}a>
                p>
            {% empty %}
                <p>No results found.p>
            {% endfor %}

            {% if page.has_previous or page.has_next %}
                <div>
                    {% if page.has_previous %}<a href="?q={{ query }}&page={{ page.previous_page_number }}">{% endif %}« Previous{% if page.has_previous %}a>{% endif %}
                    |
                    {% if page.has_next %}<a href="?q={{ query }}&page={{ page.next_page_number }}">{% endif %}Next »{% if page.has_next %}a>{% endif %}
                div>
            {% endif %}
        {% else %}
            {# Show some example queries to run, maybe query syntax, something else? #}
        {% endif %}
    form>
{% endblock %} <form class="navbar-form navbar-left" action="/search/">
<div class="form-group">
<input type="text" class="form-control" name="q" placeholder="搜索内容">
div>
<button type="submit" class="btn btn-default">搜索button>
form>四、搜索结果高亮显示
官方文档提供的例子:
# result.summary是文本块
{% highlight result.summary with query %}

# html_tag “div" 表示高亮关键字加上一个div标签,不写,则默认加span标签
# css_class "highlight_me_please".表示高亮标签的样为 highligth_me_please.css文件中的样式
{% highlight result.summary with query html_tag "div" css_class "highlight_me_please" %}

# max_length 40 表示高亮关键字最长的长度为40.
{% highlight result.summary with query max_length 40 %}
例子如下:
1、先在模板里面加载 highlight,这里是直接在文件中写样式,没有单独新建一个css文件写样式。
{% block rignt_tag %}
    {#    先加载 hightlight  #}
    {% load highlight %}
    {% for obj in page.object_list %}
        <ul class="media-list">
            <li class="media">
                <h4 class="media-heading">
                    <a href="/{{ obj.object.blog.userinfo.username }}/article/{{ obj.pk }}">{% highlight obj.object.title with query %}a>
                h4>
                <br>
                <div class="media-left">
                    <a href="#">
                        <img class="media-object" src="/media/{{ obj.object.blog.userinfo.avatar }}" alt="..."
                             width="80">
                    a>
                div>
                <div class="media-body">
                    <p>{% highlight obj.object.desc with query %}p>
                div>
                <br>
                <div>
              li>
        ul>
        <hr>
    {% endfor %}

      {#   这里 hightlight 样式  #}
      <style>
        span.highlighted {
            color: red;
        }
    style>
五、jieba实现中文分词(中文关键字)
1、先从python包中复制whoosh_backend.py到app中,并改名为whoosh_cn_backend.py
注意:whoosh_backend.py所在位置为\site-packages\haystack\backends\whoosh_backend.py
![]()
2、对whoosh_cn_backend.py做以下修改:
中的analyzer替换成ChineseAnyalyzer(),
1、导入 ChineseAnalyze
from jieba.analyse import ChineseAnalyzer
2、替换schema_fields[field_class.index_fieldname] = TEXT(下的analyzer
analyzer=ChineseAnalyzer(),
HAYSTACK_CONNECTIONS = {
     'default': {
         # 设置haystack的搜索引擎
         'ENGINE':'app01.whoosh_cn_backend.WhooshEngine',
        # 'ENGINE': 'haystack.backends.whoosh_backend.WhooshEngine',
         # 设置索引文件的位置
         'PATH': os.path.join(BASE_DIR, 'whoosh_index'),
     }
}六、实时更新索引值
当我们发布新的文章的时候,发现检索结果并没有新的文章,原因:是因为索引值没有随文章的更新而更新,因此,解决实时更新问题,可以在django配置文件中,设置信号量。
# 在django配置文件中,添加索引值,文章更新的时候,就会自动更新索引值
HAYSTACK_SIGNAL_PROCESSOR = 'haystack.signals.RealtimeSignalProcessor'
RealtimeSignalProcessor源码如下:
class RealtimeSignalProcessor(BaseSignalProcessor):
    """
    Allows for observing when saves/deletes fire & automatically updates the
    search engine appropriately.
    当 检索对象出现保存或者删除的时候更新索引值。
    """
    def setup(self):
        # Naive (listen to all model saves).
        models.signals.post_save.connect(self.handle_save)
        models.signals.post_delete.connect(self.handle_delete)

        # Efficient would be going through all backends & collecting all models
        # being used, then hooking up signals only for those.
    def teardown(self):
        # Naive (listen to all model saves).
        models.signals.post_save.disconnect(self.handle_save)
        models.signals.post_delete.disconnect(self.handle_delete)
        # Efficient would be going through all backends & collecting all models
        # being used, then disconnecting signals only for those.


