调用链跟踪Spring Cloud Sleuth+zipkin
例如阿里的鹰眼、京东Hydra、新浪Watchman等。
一、Sleuth简介
https://spring.io/projects/spring-cloud-sleuth

【翻译】(Spring Cloud Sleuth可以实现)针对Spring Cloud应用程序的分布式跟踪,兼容Zipkin、HTrace和基于日志的(如Elk)跟踪。

【翻译】Spring Cloud Sleuth为Spring Cloud实现了一个分布式跟踪解决方案,大量借鉴了Dapper、Zipkin和HTrace。对于大多数用户来说,Sleuth是不可见的,并且你的当前应用与外部系统的所有交互都是自动检测的。你可以简单地在日志中捕获数据,或者将其发送到远程收集器中。
二、Sleuth基本理论

(1)trace与span
- trace:跟踪单元是从客户端所发起的请求抵达被跟踪系统的边界开始,到被跟踪系统向客户返回响应为止的过程,这个过程称为一个 trace。
- span:每个 trace 中会调用若干个服务,为了记录调用了哪些服务,以及每次调用所消耗的时间等信息,在每次调用服务时,埋入一个调用记录,这样两个调用记录之间的区域称为一个 span。
- 关系:一个 trace由若干个有序的 span 组成。
Spring Cloud Sleuth 为服务之间调用提供链路追踪功能。为了唯一的标识trace与span,系统为每个trace与span都指定了一个64位长度的数字作为ID,即traceID与spanID
(2)annotation
Spring Cloud Sleuth中有三个重要概念,除了trace、span外,还有一个就是annotation。这个annotation并不是我们平时代码中写的@开头的注解,一个专有名词,用于及时记录事件的实体,表示一个事件发生的时间点。这些实体本身仅仅是为了原理叙述的方便,对于Spring Cloud Sleuth本身并没有什么必要性。这样的实体有多个,常用的有四个:
- cs:Client Send,表示客户端发送请求的时间点
- sr:Server Receive,表示服务端接收到请求的时间点
- ss:Server Send,表示服务端向客户端发送响应的时间点
- cr:Client Receive,表示客户端接收到服务端响应的时间点
(3)Sleuth的日志采样
只要在工程中添加了 Spring Cloud Sleuth依赖, 那么工程在启动与运行过程中就会自动生成很多的日志。Sleuth会为日志信息打上收集标记,需要收集的设置为true,不需要的设置为false。这个标记可以通过在代码中添加自己的日志信息看到
(4)日志采样率
Sleuth对于这些日志支持抽样收集,即并不是所有日志都会上传到日志收集服务器,日志收集标记就起这个作用。默认的采样比例为: 0.1,即 10%。在配置文件中可以修改该值。若设置为1 则表示全部采集,即100%。
日志采样默认使用的是的水塘抽样算法(统计学)
三、zipkin下载
(1)官网
https://zipkin.io/
zipkin是Twitter开发的一个分布式系统APM(Application Performance Management,应用性能管理)工具,其是基于Google Dapper实现的,用于完成日志的聚合。其与Sleuth联用,可以为用户提供调用链路监控可视化UI界面。
zipkin系统结构
服务器组成

zipkin服务器主要由 4 个核心组件构成:
- Collector:收集组件,它主要用于处理从外部系统发送过来的跟踪信息,将这些信息转换为 Zipkin 内部处理的 Span 格式,以支持后续的存储、分析、展示等功能。
- Storage:存储组件,它主要用于处理收集器接收到的跟踪信息,默认会将这些信息存储在内存中,也可以修改存储策略,例如,将跟踪信息存储到数据库中。
- API:外部访问接口组件,外部系统通过这里的API可以实现对系统的监控。
- UI:用于操作界面组件,基于 API 组件实现的上层应用。通过 UI 组件用户可以方便而有直观地查询和分析跟踪信息。
日志发送方式
在Spring Cloud Sleuth + zipkin系统中,客户端中一旦发生服务间的调用,就会被配置在微服务中的 Sleuth 的监听器监听,然后生成相应的 Trace 和 Span 等日志信息,并发送给zipkin服务端。发送的方式主要有两种,一种是通过 via HTTP 报文的方式,也可以通过Kafka、RabbitMQ发送
(2)zipkin服务端下载
https://zipkin.io/pages/quickstart.html
![]()

(3)zipkin服务端启动
默认端口9411

访问zipkin服务器

四、Sleuth + zipkin
(1)搭建基本环境
- zipkin
- 一个eureka项目
- 一个消费者项目
- 一个提供者项目
五、创建eureka项目
(1)创建项目,命名00-eurekaserver-8000

(2)依赖
    4.0.0

    com.abc
    00-eurekaserver-8000
    0.0.1-SNAPSHOT
    jar


        org.springframework.boot
        spring-boot-starter-parent
        2.1.7.RELEASE


        1.8
        Greenwich.SR2


            org.springframework.cloud
            spring-cloud-starter-netflix-eureka-server


            org.springframework.boot
            spring-boot-starter-test
            test


                org.springframework.cloud
                spring-cloud-dependencies
                ${spring-cloud.version}
                pom
                import


                org.springframework.boot
                spring-boot-maven-plugin
(3)application.yml配置
server:
  port: 8000

eureka:
  instance:
    hostname: localhost  # 指定Eureka主机
  client:
    register-with-eureka: false   # 指定当前主机是否向Eureka服务器进行注册
    fetch-registry: false    # 指定当前主机是否要从Eurka服务器下载服务注册列表
    service-url:   # 服务暴露地址
     defaultZone: http://localhost:8000/eureka
#     defaultZone: http://${eureka.instance.hostname}:${server.port}/eureka

#  server:
#    enable-self-preservation: false    # 关闭自我保护
(4)启动类
package com.abc.eureka;

import org.springframework.boot.SpringApplication;
import org.springframework.boot.autoconfigure.SpringBootApplication;
import org.springframework.cloud.netflix.eureka.server.EnableEurekaServer;

@SpringBootApplication
@EnableEurekaServer   // 开启Eureka服务
public class EurekaServerApplication {

    public static void main(String[] args) {
        SpringApplication.run(EurekaServerApplication.class, args);
    }
}
六、创建消费者项目
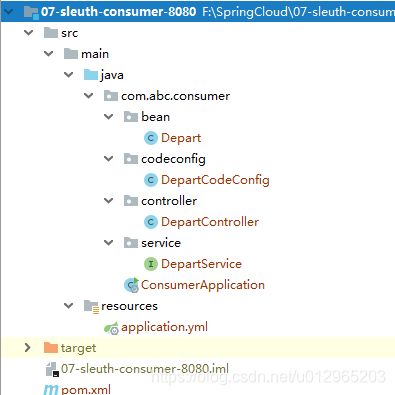
(1)创建项目
(2)依赖
    4.0.0

    com.abc
    07-sleuth-consumer-8080
    0.0.1-SNAPSHOT
    jar


        org.springframework.boot
        spring-boot-starter-parent
        2.1.7.RELEASE


        1.8
        Greenwich.SR1


            org.springframework.cloud
            spring-cloud-starter-sleuth
            2.1.2.RELEASE


            org.springframework.cloud
            spring-cloud-starter-openfeign


            org.springframework.boot
            spring-boot-starter-actuator


            org.springframework.cloud
            spring-cloud-starter-netflix-eureka-client


            org.springframework.boot
            spring-boot-starter-web


            org.projectlombok
            lombok
            true


                org.springframework.cloud
                spring-cloud-dependencies
                ${spring-cloud.version}
                pom
                import


                org.springframework.boot
                spring-boot-maven-plugin
(3)application.yml配置
spring:
  application:  # 指定微服务对外暴露的名称
    name: abcmsc-consumer-depart

eureka:
  client:
    service-url: # 指定Eureka服务注册中心
      defaultZone: http://localhost:8000/eureka
(4)实体类
package com.abc.consumer.bean;

import lombok.Data;

@Data
public class Depart {
    private Integer id;
    private String name;
}
(5)RestTemplate类
package com.abc.consumer.codeconfig;

import org.springframework.cloud.client.loadbalancer.LoadBalanced;
import org.springframework.context.annotation.Bean;
import org.springframework.context.annotation.Configuration;
import org.springframework.web.client.RestTemplate;

@Configuration
public class DepartCodeConfig {

    @LoadBalanced
    @Bean
    public RestTemplate restTemplate() {
        return new RestTemplate();
    }
}
(6)控制层
package com.abc.consumer.controller;

import com.abc.consumer.bean.Depart;
import com.abc.consumer.service.DepartService;
import lombok.extern.slf4j.Slf4j;
import org.springframework.beans.factory.annotation.Autowired;
import org.springframework.web.bind.annotation.*;

import java.util.List;

@Slf4j
@RestController
@RequestMapping("/consumer/depart")
public class DepartController {
    @Autowired
    private DepartService service;

    @GetMapping("/get/{id}")
    public Depart getHandle(@PathVariable("id") int id) {
        log.info("消费者的处理器方法被调用");
        return service.getDepartById(id);
    }

}
(7)接口层
package com.abc.consumer.service;


import com.abc.consumer.bean.Depart;
import org.springframework.cloud.openfeign.FeignClient;
import org.springframework.stereotype.Service;
import org.springframework.web.bind.annotation.*;

import java.util.List;

@Service
@FeignClient("abcmsc-provider-depart")
@RequestMapping("/provider/depart")
public interface DepartService {

    @GetMapping("/get/{id}")
    Depart getDepartById(@PathVariable("id") int id);

}
(8)启动类
package com.abc.consumer;

import org.springframework.boot.SpringApplication;
import org.springframework.boot.autoconfigure.SpringBootApplication;
import org.springframework.cloud.openfeign.EnableFeignClients;

// 指定Feign接口所在的包
@EnableFeignClients(basePackages = "com.abc.consumer.service")
@SpringBootApplication
public class ConsumerApplication {

    public static void main(String[] args) {
        SpringApplication.run(ConsumerApplication.class, args);
    }

}
七、创建提供者项目
(1)创建项目

(2)依赖
    4.0.0

    com.abc
    07-sleuth-provider-8081
    0.0.1-SNAPSHOT
    jar


        org.springframework.boot
        spring-boot-starter-parent
        2.1.7.RELEASE


        1.8
        Greenwich.SR1


            org.springframework.cloud
            spring-cloud-starter-sleuth
            2.1.2.RELEASE


            org.springframework.boot
            spring-boot-starter-actuator


            org.springframework.cloud
            spring-cloud-starter-netflix-eureka-client


            com.alibaba
            druid
            1.1.10


            mysql
            mysql-connector-java
            5.1.47
            runtime


            org.springframework.boot
            spring-boot-starter-data-jpa


            org.springframework.boot
            spring-boot-starter-web


            org.projectlombok
            lombok
            true


                org.springframework.cloud
                spring-cloud-dependencies
                ${spring-cloud.version}
                pom
                import


                org.springframework.boot
                spring-boot-maven-plugin
(3)application.yml配置
server:
  port: 8081

spring:
  jpa:
    generate-ddl: true
    show-sql: true
    hibernate:
      ddl-auto: none

  # 配置数据源
  datasource:
    type: com.alibaba.druid.pool.DruidDataSource
    driver-class-name: com.mysql.jdbc.Driver
    url: jdbc:mysql:///test?useUnicode=true&characterEncoding=utf8
    username: root
    password: root

  application:
    name: abcmsc-provider-depart   # 暴露微服务名称

# 指定Eureka服务中心
eureka:
  client:
    service-url:
      defaultZone: http://localhost:8000/eureka

info:
  company.name: www.abc.com
  company.addr: China Beijing
  company.tel: 12345678
  app.name: abc-msc
  app.desc: mic-server-cloud
  author: abc
(4)实体类
package com.abc.provider.bean;

import com.fasterxml.jackson.annotation.JsonIgnoreProperties;
import lombok.Data;

import javax.persistence.Entity;
import javax.persistence.GeneratedValue;
import javax.persistence.GenerationType;
import javax.persistence.Id;

@Data
@Entity
@JsonIgnoreProperties({"hibernateLazyInitializer", "handler", "fieldHandler"})
public class Depart {
    @Id
    @GeneratedValue(strategy = GenerationType.IDENTITY)
    private Integer id;
    private String name;
}
(5)数据链路层
package com.abc.provider.repository;

import com.abc.provider.bean.Depart;
import org.springframework.data.jpa.repository.JpaRepository;

// 第一个泛型:当前Repository的操作对象类型
// 第二个泛型:当前Repository的操作对象的id类型
public interface DepartRepository extends JpaRepository {
}
(6)控制层
package com.abc.provider.controller;

import com.abc.provider.bean.Depart;
import com.abc.provider.service.DepartService;
import lombok.extern.slf4j.Slf4j;
import org.springframework.beans.factory.annotation.Autowired;
import org.springframework.cloud.client.ServiceInstance;
import org.springframework.cloud.client.discovery.DiscoveryClient;
import org.springframework.web.bind.annotation.*;

import java.util.List;

@Slf4j
@RequestMapping("/provider/depart")
@RestController
public class DepartController {
    @Autowired
    private DepartService service;

    // 注入服务发现客户端
    @Autowired
    private DiscoveryClient client;

    @GetMapping("/get/{id}")
    public Depart getHandle(@PathVariable("id") int id) {
        log.info("生产者的处理器方法被调用");
        return service.getDepartById(id);
    }

}
(7)接口层
package com.abc.provider.service;


import com.abc.provider.bean.Depart;

import java.util.List;

public interface DepartService {
    Depart getDepartById(int id);
}
(8)接口实现类
package com.abc.provider.service;

import com.abc.provider.bean.Depart;
import com.abc.provider.repository.DepartRepository;
import org.springframework.beans.factory.annotation.Autowired;
import org.springframework.stereotype.Service;

import java.util.List;

@Service
public class DepartServiceImpl implements DepartService {
    @Autowired
    private DepartRepository repository;
    @Override
    public Depart getDepartById(int id) {
        if(repository.existsById(id)) {
            return repository.getOne(id);
        }
        Depart depart = new Depart();
        depart.setName("no this depart");
        return depart;
    }

}
(9)启动类
package com.abc.provider;

import org.springframework.boot.SpringApplication;
import org.springframework.boot.autoconfigure.SpringBootApplication;

@SpringBootApplication
public class ProviderApplication {

    public static void main(String[] args) {
        SpringApplication.run(ProviderApplication.class, args);
    }
}
八、测试
(1)启动zipkin
java -jar zipkin.jar
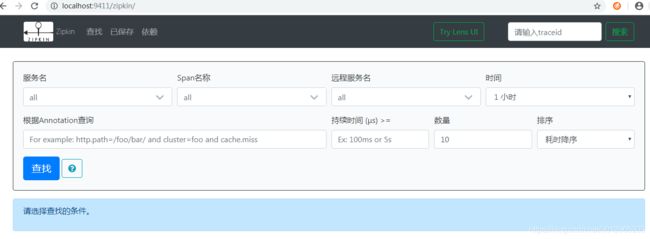
http://localhost:9411/zipkin
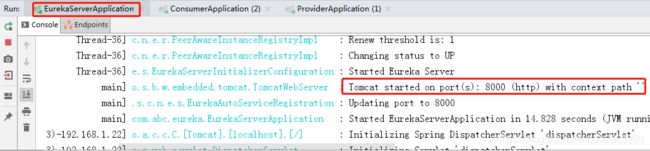
(2)启动eureka
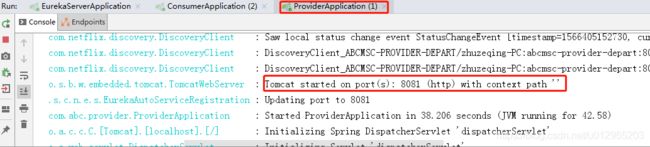
(3)启动消费者

(4)启动消费者
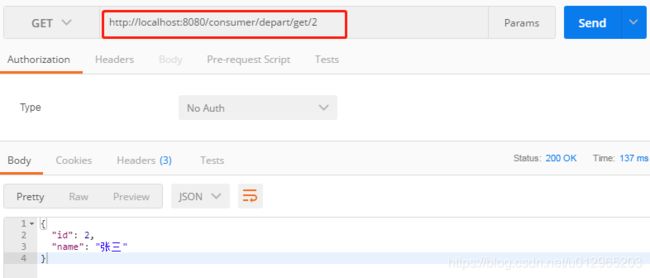
(5)效果
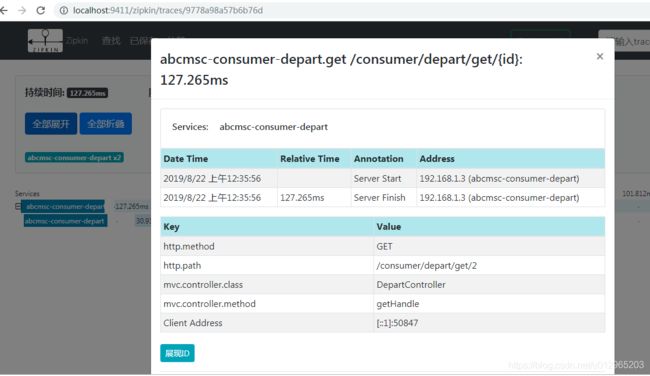
请求 http://localhost:8080/consumer/depart/get/2之后
访问 http://localhost:9411/zipkin,可以看到日志收集信息。