用代码过中秋,python海龟月饼你要不要尝一口?

目录
一、2022年中秋祝福
二、Python 海龟画图主要方法
(1)海龟画图的主要步骤
(2)海龟画图的坐标体系
(3)海龟画图的一些建议
(4)海龟画图常用命令
三、中秋月饼图片欣赏
四、收集的“用代码画月饼”作品系列
1.冰皮月饼
2、Crossin牌“月饼”
3、福字月饼
4、花纹月饼
5、MATLAB绘制一款2.5D月饼
一、2022年中秋祝福
这次2022年CSDN中秋征文的主题是程序员过中秋的一百种方式,我属程序员吗?答案是否定的。如果一个人能越早把自己清晰定位,就能在某个方面做到极致,越早做出成绩,这种方法是正确的。每个人的天赋不一样,人生际遇也不一样。我没有把自己定位在某一个固定点上,因为我觉得很多东西都是看似无关,但却有联系,懂了,你就能发现理解一些。。。
这个世界每天都在变化,特别是一些高科技(不特指某一个方面,是各种高新技术的综合体)的突飞猛进,有时真的会让人觉得。。。如果你遇到一些不可思议的事情,请不要害怕,照顾好自己,珍惜身边每一个对你好的人。平时不要轻易自满,这个世界上永远会有比你本事高的人和团体。
话题扯远了,还是聊中秋吧。程序员过中秋,可以用代码编织一份与众不同的祝福,为身边的人送上一份独特的礼物。例如,用代码定制月饼,定制中秋贺卡等等。
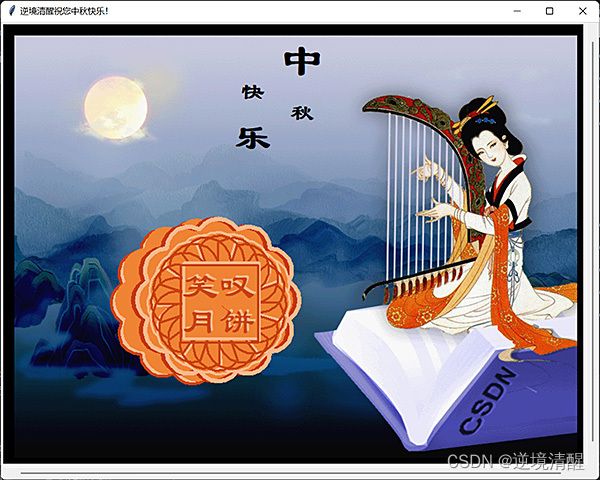
这次中秋我用python画了一个月饼送给大家,python动画画面构思:江山如画,皓月当空,琴音袅袅,逆境清醒借CSDN这个平台和大家一起分享中秋月饼,祝大家中秋快乐!
走寻半生仍笑叹,愿你释怀世间愁与冷,得失看平淡。愿你开怀永不孤单,让快乐弥漫。愿星光为你,漆黑里指路,萤火明晰双眼,辨分真与假。愿你的身后,总有力量,愿你成为自己的太阳!愿你永驻时光!
二、Python 海龟画图主要方法
海龟绘图(turtle库)是python的内部模块,使用前导入即可 import turtleku
海龟有几个关键属性:方向、位置和画笔属性
(1)海龟画图的主要步骤
通常我们绘图时
第一步,导入海龟库和绘图时可能用到的一些库,例如随机函数库random,numpy库等等,具体要看实际情况。
使用方法:
import turtle
import random
第二步,使用setup()设置画布尺寸
画布(canvas)
画布就是我们用于绘图的区域, 我们可以设置它的大小和初始位置
设置画布大小:
1. turtle.screensize(canvwidth=None, canvheight=None, bg=None)
参数分别为画布的宽(单位像素), 高, 背景颜色
turtle.screensize()默认大小(400, 300)
例如:turtle.screensize(800, 600, “black”)
2. turtle.setup(width=数值, height=数值, startx=None, starty=None)
setup()设置窗体大小及位置。
参数:
width, height:为整数时, 表示像素;
width, height:为小数时, 表示占据电脑屏幕的比例
turtle.setup(width=0.5, height=0.85, startx=None, starty=None)
turtle.setup(width=0.6, height=0.6)
(startx, starty): 这一坐标表示 矩形窗口左上角顶点的位置, 如果为空,则窗口位于屏幕中心
如:turtle.setup(width=800, height=800, startx=100, starty=100)
第三步,设置画笔
使用Pen()设定海龟画图对象,即画笔:turtle.Pen()
t = turtle.Pen()
使用t来代替turtle.Pen()。一劳永逸的做法,可简化输入代码。
(2)海龟画图的坐标体系
代码执行后就建立了画布,屏幕中间可以看见海龟 (箭头arrow)
在海龟绘图中,海龟的起点即画布中央为 (0,0),移动单位是像素 (pixel),海龟的头部是x轴方向,为0度。
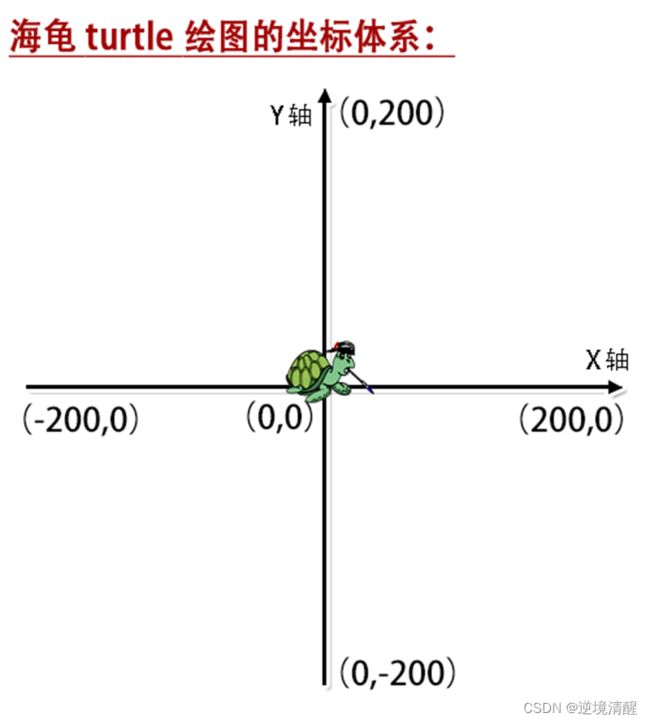
turtle绘图中, 就是使用位置方向描述海龟(画笔)的状态
想象绘图区有一只机器海龟,起始位置在 x-y 平面的 (0, 0) 点。先执行 import turtle,再执行 turtle.forward(15),它将(在屏幕上)朝所面对的 x 轴正方向前进 15 像素,随着它的移动画出一条线段。再执行 turtle.right(25),它将原地右转 25 度。
描述海龟时使用了两个词语:坐标原点(位置),面朝x轴正方向(方向),
在画图过程中,如果没明确的指定坐标和角度,那此时所有的角度和位置都是相对的(相对于当前海龟的位置和角度)。
画月饼常会用到画圆:turtle.circle(radius, extent=None, steps=None)
参数:
• radius -- 一个数值
• extent -- 一个数值 (或 None)
• steps -- 一个整型数 (或 None)
绘制一个 radius 指定半径的圆。
圆心在海龟左边 radius 个单位;
extent 为一个夹角,用来决定绘制圆的一部分。如未指定 extent* 则绘制整个圆。如果 *extent 不是完整圆周,则以当前画笔位置为一个端点绘制圆弧。如果 radius 为正值则朝逆时针方向绘制圆弧,否则朝顺时针方向。
最终海龟的朝向会依据 extent 的值而改变。
圆实际是以其内切正多边形来近似表示的,其边的数量由 steps 指定。
如果未指定边数则会自动确定。此方法也可用来绘制正多边形。
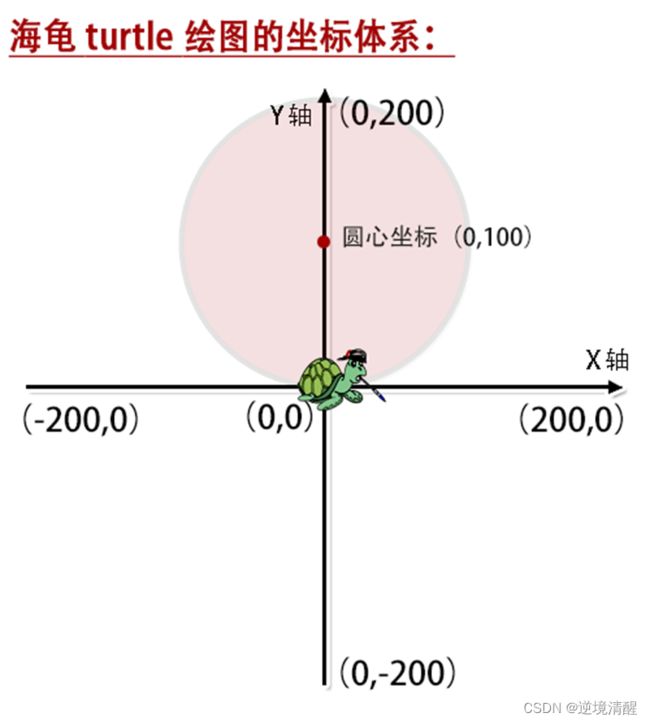
画一个半径为100的圆形,circle(100),注意画完后圆心位置不在原点。
(3)海龟画图的一些建议
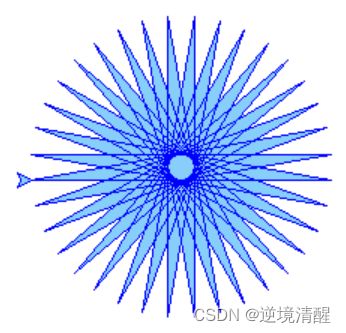
a、使用海龟绘图可以编写重复执行简单动作的程序画出精细复杂的形状。
| from turtle import * speed(0) color('blue', '#87CEFA') begin_fill() while True: forward(200) left(170) if abs(pos()) < 1: break end_fill() |
 |
b、隐藏画笔;设置速度,可以画得更快些;
c、海龟绘图时的颜色代码可以参考下面链接
色彩颜色对照表系列(1~5)(16进制、RGB、CMYK、HSV、中英文名)
挑选出自己喜欢的颜色,拷贝相应的颜色代码值放入海龟颜色设置中。
(4)海龟画图常用命令
| 代码命令 |
作用 |
| import turtle |
导入海龟库 |
| t = turtle.Pen() |
从工具箱子获取海龟画笔 |
| turtle.setup() |
画布设置(尺寸,距离) |
| showturtle() |
显示画笔箭头 |
| turtle.hideturtle() |
隐藏画笔 |
| turtle.bgcolor("black") |
画布背景色(例如黑色) |
| turtle.color() |
画笔颜色,填充颜色。可以使用颜色名称或十六进制RGB代码 |
| speed() |
设置画笔速度。值1~9,0最快t.speed(0) |
| circle(半径) |
画圆 |
| circle(半径,弧度) |
画弧线 |
| pencolor(‘颜色’) |
设置画笔颜色 |
| fillcolor(‘颜色’) |
设置填充颜色 |
| begin_fill() |
开始填充 |
| end_fill() |
结束填充 |
| forward(距离)或fd() |
控制画笔前进 |
| goto(横,纵) |
控制画笔移动到指定位置 |
| penup() |
抬起画笔 |
| pendown() |
落下画笔 |
| left(旋转角度) |
画笔左转 |
| right(旋转角度) |
设置画笔右转 |
| setheading(指向角度) |
画笔的指向,右是0,逆时针0-360递增 |
| write() |
写字,可指定显示字体,字体大小等 |
| turtle.done() |
关闭画笔,结束绘制,但画面保留 |
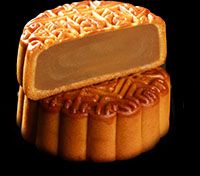
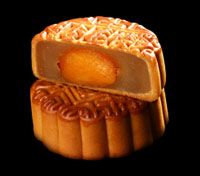
三、中秋月饼图片欣赏
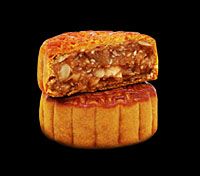
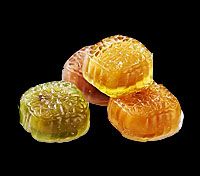
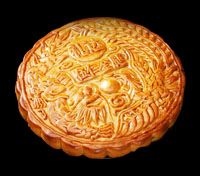
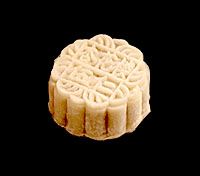
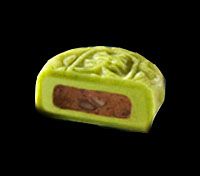
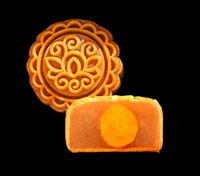
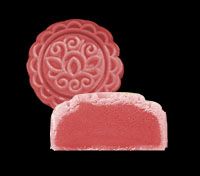
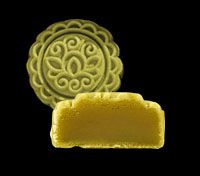
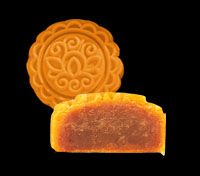
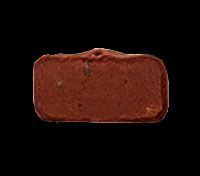
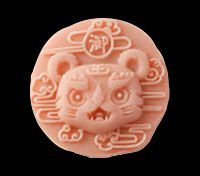
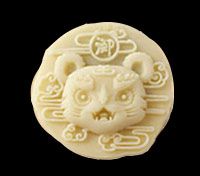
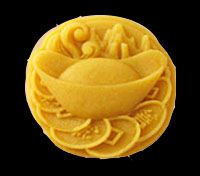
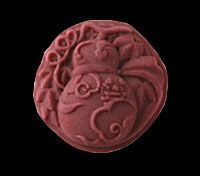
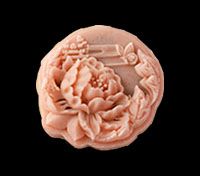
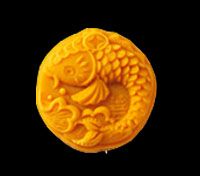
要画月饼先要留意月饼长什么样,中秋节少不了月饼,现在的月饼除了传统口味的,还出了不少新口味,外观造型上也有创新,一起来看一下吧。
|
|
|
|
| 莲蓉月饼 |
蛋黄莲蓉月饼 |
白莲双黄 |
|
|
|
|
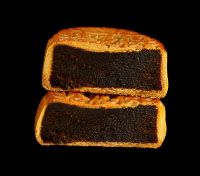
| 豆沙月饼 |
绿豆月饼 |
五仁月饼 |
|
|
|
|
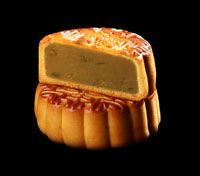
| 水晶月饼 |
苏式月饼 |
五仁月饼(大) |
|
|
|
|
| 冰皮月饼 |
绿茶月饼 |
奶油椰蓉 |
|
|
|
|
| 溏心蛋黄 |
杨枝甘露 |
韵香乌龙茶 |
|
|
|
|
| 白桃茉莉花 |
蓝莓黑莓 |
夏威夷果仁巧克力 |
|
|
|
|
| 芋泥芝士奇亚籽 |
金沙奶黄 |
枣泥核桃 |
|
|
|
|
| 臻品奶黄 |
栗蓉 |
红豆 |
|
|
|
|
| 奶黄 |
黑芝麻 |
南瓜 |


四、收集的“用代码画月饼”作品系列: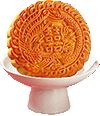
这次我用python 海龟画的月饼,因时间的关系,除了增加了情景底图,其他的在代码上没有什么独特之处(我的代码就先不贴出来了),月饼的画法主要借鉴了下面几个作品的思路。让我们一起来学一下吧。
1.冰皮月饼
个人观点:这款月饼画法简洁,纯海龟作图,入门简单,封装调用,只需修改几个参数就可制作出同款月饼。欠缺的是外观的月饼花纹。

from turtle import *

# 隐藏海龟
hideturtle()
# 颜色模式
colormode(255)
'''
函数说明:

pensize:画笔粗细
pencolor:画笔颜色
fillcolor:填充颜色
begin_fill:开始填充
fd:前进
circle:画圆
right:右转
end_fill():结束填充

'''


def MoonCake(bgcolor, mkcolor, wdcolor, words):
    '''
    参数说明:

    bgcolor: 背景颜色
    mkcolor: 月饼颜色
    wdcolor: 文字颜色
    words: 文字(4个字)
    '''
    pensize(2)
    pencolor(0, 0, 0)
    fillcolor(bgcolor)

    begin_fill()
    for i in range(12):
        if i == 5:
            p = pos()
        circle(30, 120)
        right(90)
    end_fill()

    penup()
    fd(20)
    pendown()

    fillcolor(mkcolor)

    begin_fill()
    for i in range(12):
        circle(30, 120)
        right(90)
    end_fill()

    pencolor(wdcolor)

    left(90)
    fd(140)
    left(90)
    fd(140)
    left(90)
    fd(72)
    p = pos()
    wd1 = words[0:2]
    wd2 = words[2:4]
    write(wd1, font=('Arial', 70, 'normal'))
    fd(70)
    write(wd2, font=('Arial', 70, 'normal'))
    left(90)
    fd(140)


# MoonCake((231, 162, 63), (255, 166, 16), (204, 22, 58), '五仁月饼')

MoonCake((97, 154, 195),(186, 204, 217) ,(17, 101, 154), '冰皮月饼')
mainloop()
作者:二哥不像程序员
原文地址:中秋节快到了,别学Python了,进来排队领块月饼吧【纯手工哪种】!_二哥不像程序员的博客-CSDN博客
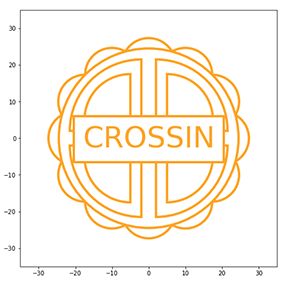
2、Crossin牌“月饼”
个人观点:这款月饼画法上用到了numpy和matplotlib库,需要掌握相应的基础知识。
import numpy as np
from numpy import sin, cos, pi
import matplotlib.pyplot as plt
import matplotlib.patches as mpatch
from matplotlib.patches import Arc, Circle, Wedge
from matplotlib.collections import PatchCollection

length = 20
R = 3**0.5*length/(3**0.5*cos(pi/12)-sin(pi/12))
r = 2*sin(pi/12)*R/3**0.5

arc1 = Arc([0, length], width=2*r, height=2*r, angle=0, theta1=30, theta2=150, ec='orange', linewidth=4)
arc2 = Arc([-length/2, length/2*3**0.5], width=2*r, height=2*r, angle=0, theta1=60, theta2=180, ec='orange', linewidth=4)
arc3 = Arc([-length/2*3**0.5, length/2], width=2*r, height=2*r, angle=0, theta1=90, theta2=210, ec='orange', linewidth=4)
arc4 = Arc([-length, 0], width=2*r, height=2*r, angle=0, theta1=120, theta2=240, ec='orange', linewidth=4)
arc5 = Arc([-length/2*3**0.5, -length/2], width=2*r, height=2*r, angle=0, theta1=150, theta2=270, ec='orange', linewidth=4)
arc6 = Arc([-length/2, -length/2*3**0.5], width=2*r, height=2*r, angle=0, theta1=180, theta2=300, ec='orange', linewidth=4)
arc7 = Arc([0, -length], width=2*r, height=2*r, angle=0, theta1=210, theta2=330, ec='orange', linewidth=4)
arc8 = Arc([length/2, -length/2*3**0.5], width=2*r, height=2*r, angle=0, theta1=240, theta2=360, ec='orange', linewidth=4)
arc9 = Arc([length/2*3**0.5, -length/2], width=2*r, height=2*r, angle=0, theta1=270, theta2=390, ec='orange', linewidth=4)
arc10 = Arc([length, 0], width=2*r, height=2*r, angle=0, theta1=300, theta2=420, ec='orange', linewidth=4)
arc11 = Arc([length/2*3**0.5, length/2], width=2*r, height=2*r, angle=0, theta1=330, theta2=450, ec='orange', linewidth=4)
arc12 = Arc([length/2, length/2*3**0.5], width=2*r, height=2*r, angle=0, theta1=0, theta2=120, ec='orange', linewidth=4)

art_list = [arc1, arc2, arc3, arc4, arc5, arc6, arc7, arc8, arc9, arc10, arc11, arc12]

circle = Circle((0,0), R, ec='orange', fc='white', linewidth=4)

wedge1 = Wedge([-2, 2], R-5, 90, 180, ec='orange', fc=r'white', linewidth=4)
wedge2 = Wedge([-5, 5], R-12, 90, 180, ec='orange', fc=r'white', linewidth=4)
wedge3 = Wedge([-2, -2], R-5, 180, 270, ec='orange', fc=r'white', linewidth=4)
wedge4 = Wedge([-5, -5], R-12, 180, 270, ec='orange', fc=r'white', linewidth=4)
wedge5 = Wedge([2, -2], R-5, 270, 360, ec='orange', fc=r'white', linewidth=4)
wedge6 = Wedge([5, -5], R-12, 270, 360, ec='orange', fc=r'white', linewidth=4)
wedge7 = Wedge([2, 2], R-5, 0, 90, ec='orange', fc=r'white', linewidth=4)
wedge8 = Wedge([5, 5], R-12, 0, 90, ec='orange', fc=r'white', linewidth=4)

art_list.extend([circle, wedge1, wedge2, wedge3, wedge4, wedge5, wedge6, wedge7, wedge8])
fig, ax = plt.subplots(figsize=(8,8))
ax.set_aspect('equal')
for a in art_list:
    ax.add_patch(a)

plt.text(-18, -2.5, 'CROSSIN', fontfamily=r'Times New Man', bbox=dict(boxstyle='square', fc="w", ec='orange', linewidth=4),  fontsize=50, color='orange')

plt.ylim([-35, 35])
plt.xlim([-35, 35])

plt.show()
作者:Crossin的编程教室
原文地址:
中秋节到了,送你一个Python做的Crossin牌“月饼”_Crossin的编程教室的博客-CSDN博客
3、福字月饼
个人观点:这款月饼是python 海龟月饼,有花纹

import turtle

def goto(x, y):#定义提笔的位置
    turtle.penup() #将笔提起,移动时无图
    turtle.goto(x, y)
    turtle.pendown() #将笔放下,移动时绘图。


def yuebing_wai():
    turtle.pensize(20)#画笔调粗点
    turtle.color( "#F8CD32","#FBA92D")#填充颜色,F8CD32是圆圈的边缘颜色,FBA92D是圆圈的填充颜色
    goto(0, -200)#画笔起点位于(0,0)点的下方200向量处
    turtle.begin_fill()#准备开始填充
    turtle.circle(200)#定义半径
    turtle.end_fill()#填充结束


def yuebing_zhong():
    goto(0, 0)#画笔起点位于(0,0)处
    turtle.color("#F0BE7C")
    for _ in range(20):#_是占位符,表示临时变量,仅用一次,后面无需再用到
        turtle.right(18)#顺时针移动18度
        turtle.begin_fill()
        turtle.forward(220)#向前移动的距离
        turtle.circle(40, 180)#上一条向前移动220之后,开始画半径40的半圆
        turtle.goto(0, 0)#画完半圆之后回到(0,0)
        turtle.right(360)#顺时针转个360度
        turtle.end_fill()


def yuebing_nei():#逻辑同上
    turtle.right(360)
    turtle.color('#F5E16F')#内层颜色
    goto(0, -180)
    for _ in range(12):
        turtle.begin_fill()
        turtle.circle(60, 120)
        turtle.left(180)
        turtle.circle(60, 120)
        turtle.end_fill()


def fu():#
    turtle.right(50)
    goto(-70, -80)#更高坐标尽量使字靠中间
    turtle.color("Gold")#颜色
    turtle.write("福", font=("华文隶书", 120, "bold"))
    turtle.done()


if __name__ == '__main__':
    turtle.speed(90)
    yuebing_zhong()
    yuebing_wai()
    yuebing_nei()
    fu()


turtle.done()
作者:weixin_39912368
原文地址:
python趣味代码_趣味项目:用Python代码做个月饼送给你!_weixin_39912368的博客-CSDN博客
4、花纹月饼
个人观点:这款月饼属纯python 海龟绘制,外观精致,有花纹和文字,用函数定义了月饼的不同部分,修改起来不难。

import turtle

t = turtle.Pen()  # 画笔一 用于画图
t.speed(0)


# 花纹颜色 #F29407
# 饼身颜色 #F8B41A

# 画 饼身部分
def outfill_flower(flower_num: "花瓣数量", flower_color: "花瓣颜色"):
    for i in range(flower_num):
        t.left(i * (360 // flower_num))
        t.color(flower_color)
        t.penup()
        t.forward(200)
        t.pendown()
        t.fillcolor(flower_color)
        t.begin_fill()
        t.circle(60)
        t.end_fill()
        t.penup()
        t.home()


# 画 饼身外围 花纹部分
def out_line_flower(flower_num: "花纹数量", flower_color: "花纹颜色"):
    for i in range(flower_num):
        t.pensize(5)
        t.left(i * (360 // 18))
        t.color(flower_color)
        t.penup()
        t.forward(192)
        t.pendown()
        t.circle(60)
        t.penup()
        t.home()


# 画内测的大圆 大圆的填充色比饼身略亮
def big_circle(circle_color: "大圆颜色", circle_fill_color: "大圆填充颜色", circle_size: "大圆半径"):
    t.goto(circle_size, 0)
    t.left(90)
    t.pendown()
    t.pensize(8)
    t.color(circle_color)
    t.fillcolor(circle_fill_color)
    t.begin_fill()
    t.circle(circle_size)
    t.end_fill()
    t.penup()
    t.home()


# 饼上印花文字 文字内容和坐标用字典存储
def write_font(text_content: "文本内容", text_color: "文本颜色", size: "文字大小"):
    t.color(text_color)
    for x in text_content:
        t.penup()
        t.goto(text_content[x])
        t.write(x, align='center', font=('simhei', size, 'bold'))
    t.penup()
    t.home()
    t.color('#F29407')


# 饼身中间矩形条纹部分
def body_center_line(width: "矩形宽度", height: "矩形高度"):
    t.penup()
    t.home()
    t.pensize(4)
    t.pendown()
    t.backward(width / 2)
    t.forward(width)
    t.left(90)
    t.forward(height)
    t.left(90)
    t.forward(width)
    t.left(90)
    t.forward(height * 2)
    t.left(90)
    t.forward(width)
    t.left(90)
    t.forward(height)
    t.penup()
    t.home()


# 矩形条纹两侧的四个花纹 画笔轨迹是一样的 所以只需要传入不同的初始位置和角度即可复用代码
def center_flower(start_point: "落笔位置", start_angle: "落笔朝向", angle_direction_change: "新朝向",
                  rectangle_height: "矩形高度", circle_direction: "花纹弧度"):
    t.penup()
    t.goto(start_point)
    t.pendown()
    t.setheading(start_angle)
    t.forward(10)
    t.setheading(angle_direction_change)
    t.forward(20)
    t.backward(rectangle_height * 2)
    t.forward(rectangle_height * 2)
    t.setheading(start_angle)
    t.circle(circle_direction * 70, 90)
    t.setheading(start_angle + 180)
    t.forward(60)
    t.setheading(angle_direction_change)
    t.forward(30)
    t.penup()
    t.home()


# 饼身上下左右的花纹
def out_flower(begin_x: "落笔横坐标", begin_y: "落笔纵坐标", start_angle: "落笔朝向"):
    t.penup()
    t.goto(begin_x, begin_y)
    t.pendown()
    t.setheading(start_angle)
    t.forward(20)
    t.right(90)
    t.circle(-100, 20)

    t.penup()
    t.goto(begin_x, begin_y)
    t.pendown()
    t.setheading(start_angle)
    t.right(90)
    t.circle(-100, 30)
    t.left(90)
    t.forward(45)
    t.left(95)
    t.circle(190, 50)
    t.left(95)
    t.forward(45)
    t.left(90)
    t.circle(-100, 31)
    t.setheading(start_angle)
    t.forward(20)
    t.left(90)
    t.circle(100, 20)
    t.penup()
    t.home()

# 以下代码开始调用各种功能
if __name__ == "__main__":
	# 设置画布名称
    t.screen.title('中秋快乐')
    # 画 饼身部分
    outfill_flower(18, '#F8B41A')
    # 画 饼身外围 花纹部分
    out_line_flower(18, '#F29407')
    # 画内测的大圆 大圆的填充色比饼身略亮
    # big_circle('#F29407','#F8B41A',200)
    big_circle('#F29407', '#F8B51D', 200)
    # 饼上印花文字 文字内容和坐标用字典存储
    text_content = {'花': (-100, 70), '好': (100, 70), '月': (100, -120), '圆': (-98, -125)}  # 圆字坐标最后向下微调了一下
    # write_font(text_content,'#F29407',40)
    write_font(text_content, '#FC932B', 40)
    # 饼身中间矩形条纹部分
    body_center_line(12, 80)
    # 矩形条纹两侧的四个花纹
    center_flower((6, 60), 0, 90, 80, -1)
    center_flower((6, -60), 0, -90, 80, 1)
    center_flower((-6, 60), 180, 90, 80, 1)
    center_flower((-6, -60), 180, -90, 80, -1)
    # 饼身上下左右的花纹
    out_flower(6, 110, 90)
    out_flower(-110, 6, 180)
    out_flower(-6, -110, 270)
    out_flower(110, -6, 360)
    # 可以再加点字
    # text_content2 = {'天': (-50, 30), '地': (50, 30), '仁': (50, -60), '和': (-50, -60)}  # 圆字坐标最后向下微调了一下
    # write_font(text_content2, '#F29407',30)

    # 隐藏画笔
    t.hideturtle()
    # 保持画布显示
    turtle.done()
作者:浪淘三千
原文地址:python画中秋月饼,用turtle海龟库画中秋月饼_浪淘三千的博客-CSDN博客_python画月饼
5、MATLAB绘制一款2.5D月饼
个人观点:这款月饼是MATLAB绘制的,月饼花纹精致、立体。透视感可略作修改。

function moonCake
% @author:slandarer
ax=gca;
hold(ax,'on');
axis equal
ax.XLim=[-15,15];
ax.YLim=[-15,15];
CSet=[0.92 0.51 0.11;1 0.7 0.09;0.87 0.41 0.05];


for i=[1:7,9,8]
    if i==1
        tt=linspace(0,-pi/16,100);
    elseif i==9
        tt=linspace(-pi+pi/16,-pi,100);
    else
        tt=linspace(-pi/16-(i-2)*pi/8,-pi/16-(i-1)*pi/8,100);
    end
    xSet=cos(tt).*(10+abs(cos(tt.*8)));
    xMin=find(xSet==min(xSet));tt(xMin)
    xMax=find(xSet==max(xSet));
    t1=min([xMin(1),xMax(1)]);
    t2=max([xMin(1),xMax(1)]);
    xSet=cos(tt(t1:t2)).*(10+abs(cos(tt(t1:t2).*8)));
    ySet=sin(tt(t1:t2)).*(10+abs(cos(tt(t1:t2).*8)))-3;
    fill([xSet(1),xSet,xSet(end)],[ySet(1)+3,ySet,ySet(end)+3],CSet(mod(i,2)+1,:),'EdgeColor','none')


end
t=linspace(0,2*pi,640);
fill(cos(t).*(10+abs(cos(t.*8))),sin(t).*(10+abs(cos(t.*8))),CSet(1,:),'EdgeColor','none')
plot(cos(t).*(9+abs(cos(t.*8))),sin(t).*(9+abs(cos(t.*8)))-0.3,'Color',CSet(3,:),'LineWidth',6)
plot(cos(t).*8.7,sin(t).*8.7-0.3,'Color',CSet(3,:),'LineWidth',4)
plot(cos(t).*(9+abs(cos(t.*8))),sin(t).*(9+abs(cos(t.*8))),'Color',CSet(2,:),'LineWidth',6)
plot(cos(t).*8.7,sin(t).*8.7,'Color',CSet(2,:),'LineWidth',4)

plot([0 0],[-7 7]-0.3,'Color',CSet(3,:),'LineWidth',4)
plot([-7 7],[0 0]-0.3,'Color',CSet(3,:),'LineWidth',4)
plot([0 0],[-7 7],'Color',CSet(2,:),'LineWidth',4)
plot([-7 7],[0 0],'Color',CSet(2,:),'LineWidth',4)


t4=linspace(0,pi/2,100);
xSet4=[cos(t4).*6+1,1,6,cos(t4(1:end-12)).*5+1,2,4.8,cos(t4(17:end-40)).*3.9+1];
ySet4=[sin(t4).*6+1,1,1,sin(t4(1:end-12)).*5+1,2,2,sin(t4(17:end-40)).*3.9+1];

plot(xSet4,ySet4-0.3,'Color',CSet(3,:),'LineWidth',4)
plot(-xSet4,ySet4-0.3,'Color',CSet(3,:),'LineWidth',4)
plot(xSet4,-ySet4-0.3,'Color',CSet(3,:),'LineWidth',4)
plot(-xSet4,-ySet4-0.3,'Color',CSet(3,:),'LineWidth',4)
plot(xSet4,ySet4,'Color',CSet(2,:),'LineWidth',4)
plot(-xSet4,ySet4,'Color',CSet(2,:),'LineWidth',4)
plot(xSet4,-ySet4,'Color',CSet(2,:),'LineWidth',4)
plot(-xSet4,-ySet4,'Color',CSet(2,:),'LineWidth',4)
end
作者:slandarer
原文地址:中秋节快到了,一起用MATLAB绘制一款2.5D月饼叭_slandarer的博客-CSDN博客
中秋贺卡
佳节来临,还可以自己制作一份精美的手工贺卡,在中秋之夜送去真挚的祝福!

作者:顾木子
原文地址:【中秋系列】火遍Python的中秋节贺卡,现在学还不晚!_顾木子吖的博客-CSDN博客
'''
Function:
    生成中秋祝福贺卡
csdn账号:顾木子吖
'''
import os
import io
import sys
from PyQt5.QtGui import QIcon
from PyQt5.QtWidgets import *
from PyQt5 import QtWidgets, QtGui
from PIL import Image, ImageDraw, ImageFont


'''生成中秋祝福贺卡'''
class newyearCardGUI(QtWidgets.QWidget):
    def __init__(self):
        super(newyearCardGUI, self).__init__()
        self.setFixedSize(600, 500)
        self.setWindowTitle('中秋贺卡生成器-源码基地:#959755565#')
        self.setWindowIcon(QIcon('icon/icon.png'))
        self.grid = QGridLayout()
        # 一些全局变量
        self.card_image = None
        self.font_size = 35
        # 定义组件
        # --Label
        self.content_label = QLabel('内容路径:')
        self.bg_label = QLabel('背景路径:')
        self.font_label = QLabel('字体路径:')
        self.fontcolor_label = QLabel('字体颜色:')
        self.show_label = QLabel()
        self.show_label.setScaledContents(True)
        self.show_label.setMaximumSize(600, 300)
        # --输入框
        self.content_edit = QLineEdit()
        self.content_edit.setText('contents/1.card')
        self.bg_edit = QLineEdit()
        self.bg_edit.setText('bgimages/1.png')
        self.font_edit = QLineEdit()
        self.font_edit.setText('fonts/font.TTF')
        # --按钮
        self.choose_content_button = QPushButton('选择路径')
        self.choose_bg_button = QPushButton('选择路径')
        self.choose_font_button = QPushButton('选择路径')
        self.generate_button = QPushButton('生成贺卡')
        self.save_button = QPushButton('保存贺卡')
        # --下拉框
        self.font_color_combobox = QComboBox()
        for color in ['red', 'white', 'black', 'blue', 'yellow', 'green']:
            self.font_color_combobox.addItem(color)
        # 布局
        self.grid.addWidget(self.show_label, 0, 0, 5, 5)
        self.grid.addWidget(self.content_label, 5, 0, 1, 1)
        self.grid.addWidget(self.content_edit, 5, 1, 1, 3)
        self.grid.addWidget(self.choose_content_button, 5, 4, 1, 1)
        self.grid.addWidget(self.bg_label, 6, 0, 1, 1)
        self.grid.addWidget(self.bg_edit, 6, 1, 1, 3)
        self.grid.addWidget(self.choose_bg_button, 6, 4, 1, 1)
        self.grid.addWidget(self.font_label, 7, 0, 1, 1)
        self.grid.addWidget(self.font_edit, 7, 1, 1, 3)
        self.grid.addWidget(self.choose_font_button, 7, 4, 1, 1)
        self.grid.addWidget(self.fontcolor_label, 8, 0, 1, 1)
        self.grid.addWidget(self.font_color_combobox, 8, 1, 1, 1)
        self.grid.addWidget(self.generate_button, 8, 3, 1, 1)
        self.grid.addWidget(self.save_button, 8, 4, 1, 1)
        self.setLayout(self.grid)
        # 事件绑定
        self.choose_content_button.clicked.connect(self.openContentFilepath)
        self.choose_bg_button.clicked.connect(self.openBGFilepath)
        self.choose_font_button.clicked.connect(self.openFontFilepath)
        self.generate_button.clicked.connect(self.generate)
        self.save_button.clicked.connect(self.save)
        self.generate()
    '''生成贺卡'''
    def generate(self):
        # 检查路径是否存在
        content_path = self.content_edit.text()
        bg_path = self.bg_edit.text()
        font_path = self.font_edit.text()
        font_color = self.font_color_combobox.currentText()
        if (not self.checkFilepath(content_path)) or (not self.checkFilepath(bg_path)) or (not self.checkFilepath(font_path)):
            self.card_image = None
            return False
        # 写贺卡
        contents = open(content_path, encoding='utf-8').read().split('\n')
        font_card = ImageFont.truetype(font_path, self.font_size)
        image = Image.open(bg_path).convert('RGB')
        draw = ImageDraw.Draw(image)
        draw.text((180, 30), contents[0], font=font_card, fill=font_color)
        for idx, content in enumerate(contents[1: -1]):
            draw.text((220, 40+(idx+1)*40), content, font=font_card, fill=font_color)
        draw.text((180, 40+(idx+2)*40+10), contents[-1], font=font_card, fill=font_color)
        # 显示
        fp = io.BytesIO()
        image.save(fp, 'BMP')
        qtimg = QtGui.QImage()
        qtimg.loadFromData(fp.getvalue(), 'BMP')
        qtimg_pixmap = QtGui.QPixmap.fromImage(qtimg)
        self.show_label.setPixmap(qtimg_pixmap)
        self.card_image = image
    '''打开贺卡内容文件'''
    def openContentFilepath(self):
        filepath = QFileDialog.getOpenFileName(self, "请选取贺卡内容文件", '.')
        self.content_edit.setText(filepath[0])
    '''打开贺卡背景图片文件'''
    def openBGFilepath(self):
        filepath = QFileDialog.getOpenFileName(self, "请选取贺卡背景图片", '.')
        self.bg_edit.setText(filepath[0])
    '''打开字体路径'''
    def openFontFilepath(self):
        filepath = QFileDialog.getOpenFileName(self, "请选取字体文件", '.')
        self.font_edit.setText(filepath[0])
    '''保存贺卡'''
    def save(self):
        filename = QFileDialog.getSaveFileName(self, '保存', './card.jpg', '所有文件(*)')
        if filename[0] != '' and self.card_image:
            self.card_image.save(filename[0])
            QDialog().show()
    '''检查文件是否存在'''
    def checkFilepath(self, filepath):
        if not filepath:
            return False
        return os.path.isfile(filepath)


'''run'''
if __name__ == '__main__':
    app = QApplication(sys.argv)
    gui = newyearCardGUI()
    gui.show()
    sys.exit(app.exec_())
程序员中秋怎么过?可做的很多,编中秋主题游戏、小程序,用代码营造出中秋节各种特效浪漫场景,中秋节主题相关各种数据分析统计。。。。
其实,程序员和其他行业的人没有什么太大的区别,各行各业都有自己的起落和不容易。但中秋节,大家能做的都一样,就是珍惜所有,抽时间多陪陪家人吧