基于 Hexo 键入评论功能,重点推荐 Twikoo
原文链接:基于 Hexo 键入评论功能
注意:本站的评论系统已从 Valine 更换成 Twikoo。
前言
本站基于
Hexo搭建,用的 hexo-theme-butterfly 主题 v3.7.1,请注意最新的 hexo-theme-butterfly 版本已经更新到 v4.3.0 。
如果你是 v3.7.1 之外的版本,可能有些地方会有出入,请留意。
注意:我的博客根目录路径为 【G:/hexo-blog/blog-demo】,下文所说的根目录都是此路径,将用
[BlogRoot]代替。如果不清楚根目录路径,请回到教程 基于 Hexo 从零开始搭建个人博客(二),查看你执行hexo init xxx这条命令时所选择的路径,例如我选择的路径是【G:/hexo-blog】,我的博客根目录即为【G:/hexo-blog/xxx】。
修改站点配置文件_config.yml,路径为【BlogRoot/_config.yml】。
修改主题配置文件_config.butterfly.yml,路径为【BlogRoot/_config.butterfly.yml】。
若你的主题版本大于 v4.0.0,应该留意到,与 v3.7.1 版本相比,各评论的配置项已经变的更为精简,具体请参考你所使用主题版本的配置项,只需要将目标信息,填入评论的配置项就行,这里主要推荐使用 Twikoo。
推荐阅读
- 基于 Hexo 从零开始搭建个人博客(一)
- 基于 Hexo 从零开始搭建个人博客(二)
- 基于 Hexo 从零开始搭建个人博客(三)
- 基于 Hexo 从零开始搭建个人博客(四)
- 基于 Hexo 从零开始搭建个人博客(五)
- 基于 Hexo 从零开始搭建个人博客(六)
- 基于 Hexo 键入搜索功能
- 基于 Hexo 键入分享功能
- 基于 Hexo 键入在线聊天功能
- Hexo + Butterfly 自定义右键菜单
通用配置
从3.0.0开始,开启评论需要在comments-use中填写你需要的评论,这里参照你主题版本的格式写。
支持双评论显示,只需要配置两个评论(第一个为默认显示)
comments:
  # Up to two comments system, the first will be shown as default
  # Choose: Disqus/Disqusjs/Livere/Gitalk/Valine/Waline/Utterances/Facebook Comments/Twikoo
  use:
    # - Disqus
    # - Valine
    - Twikoo # 这里按照你主题版本的格式写
  text: true # Display the comment name next to the button
  # lazyload: The comment system will be load when comment element enters the browser's viewport.
  # If you set it to true, the comment count will be invalid
  lazyload: true
  count: true # Display comment count in post's top_img
  card_post_count: true # Display comment count in Home Page
| 参数 | 解释 |
|---|---|
| use | 使用的评论(请注意,最多支持两个,如果不需要请留空) 注意:双评论不能是 Disqus 和 Disqusjs 一起,由于其共用同一个 ID,会出错 |
| text | 是否显示评论服务商的名字 |
| lazyload | 是否为评论开启lazyload,开启后,只有滚动到评论位置时才会加载评论所需要的资源(开启 lazyload 后,评论数将不显示) |
| count | 是否在文章顶部显示评论数 livere、Giscus 和 utterances 不支持评论数显示 |
| card_post_count | 是否在首页文章卡片显示评论数 gitalk、livere 、Giscus 和 utterances 不支持评论数显示 |
Twikoo(推荐)
Twikoo 是一个简洁、安全、免费的静态网站评论系统,基于腾讯云开发。
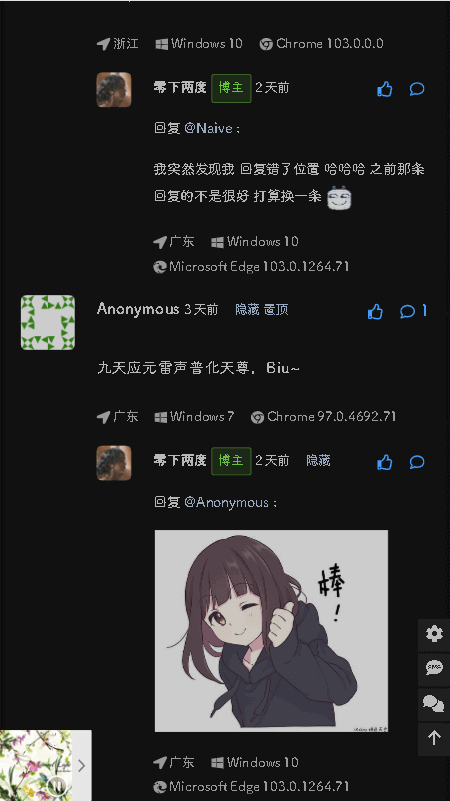
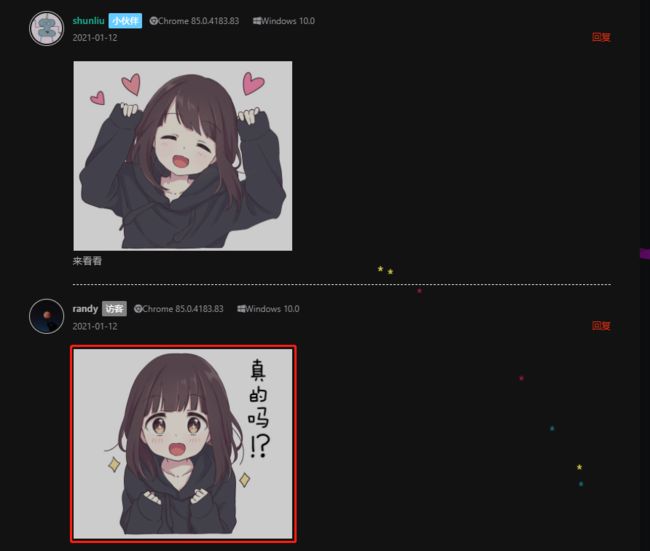
效果预览
特色
简单
- 免费搭建(使用云开发作为评论后台,每个用户均长期享受1个免费的标准型基础版1资源套餐)
- 简单部署(支持一键部署、手动部署、命令行部署)
易用
- 支持回复、点赞
- 无需额外适配,支持搭配浅色主题与深色主题使用
- 支持 API 调用,批量获取文章评论数、最新评论
- 访客在昵称栏输入 QQ 号,会自动补全 QQ 昵称和 QQ 邮箱
- 访客填写数字 QQ 邮箱,会使用 QQ 头像作为评论头像
- 支持评论框粘贴图片(可禁用)
- 支持插入图片(可禁用)
- 支持去不图床、云开发图床
- 支持插入表情(可禁用)
- 支持 Ctrl + Enter 快捷回复
- 评论框内容实时保存草稿,刷新不会丢失
- 支持 Katex 公式
- 支持按语言的代码高亮
安全
- 隐私信息安全(通过云函数控制敏感字段(邮箱、IP、环境配置等)不会泄露)
- 支持 Akismet 垃圾评论检测(需自行注册 akismet.com)
- 支持腾讯云内容安全垃圾评论检测(需自行注册 腾讯云内容安全)
- 支持人工审核模式
- 防 XSS 注入
- 支持限制每个 IP 每 10 分钟最多发表多少条评论
即时
- 支持邮件提醒(访客和博主)
- 支持微信提醒(仅针对博主,基于 Server酱,需自行注册)
- 支持 QQ 提醒(仅针对博主,基于 Qmsg酱,需自行注册)
- 支持 QQ 提醒(针对博主QQ或者群,基于 go-cqhttp,需自己有服务器)
个性
- 支持自定义评论框背景图片
- 支持自定义“博主”标识文字
- 支持自定义通知邮件模板
- 支持自定义评论框提示信息(placeholder)
- 支持自定义表情列表(兼容 OwO 的数据格式)
- 支持自定义【昵称】【邮箱】【网址】必填 / 选填
- 支持自定义代码高亮主题
便捷管理
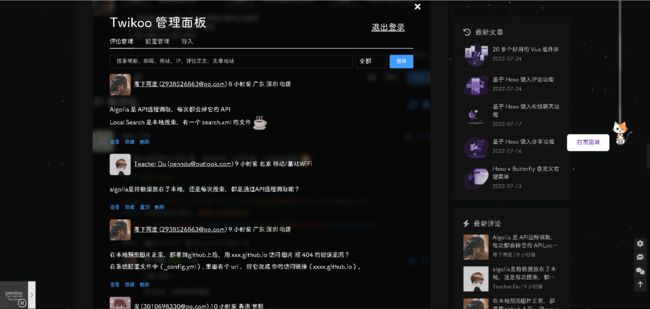
- 内嵌式管理面板,通过密码登录,可方便地查看评论、隐藏评论、删除评论、修改配置
- 支持隐藏管理入口,通过输入暗号显示
- 支持从 Valine、Artalk、Disqus 导入评论
缺点
- 国外请求较慢
- 部署需要实名认证
- 不支持 IE
本站是用 Vercel + MongoDB 方案搭建 Twikoo 评论系统。
其他几种部署方式这里不做讲解,详情请参考:Twikoo 文档 。
Vercel 部署
频教程
Twikoo Vercel 部署教程
步骤
填好图上所需内容,点击【Create your Atlas account】。
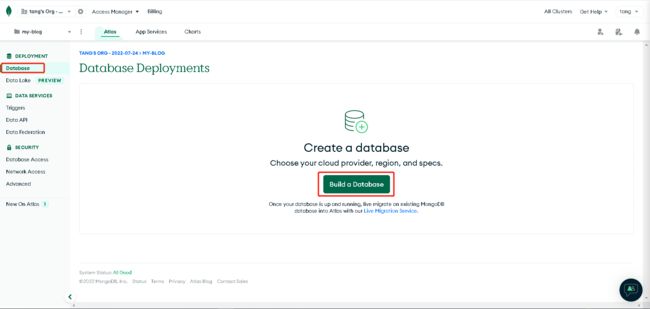
2. 创建免费 MongoDB 数据库,区域推荐选择 【AWS / N. Virginia (us-east-1)】


3. 创建数据库用户,按步骤设置允许所有 IP 地址的连接(为什么?),填完信息后,点击【Finish and Close】


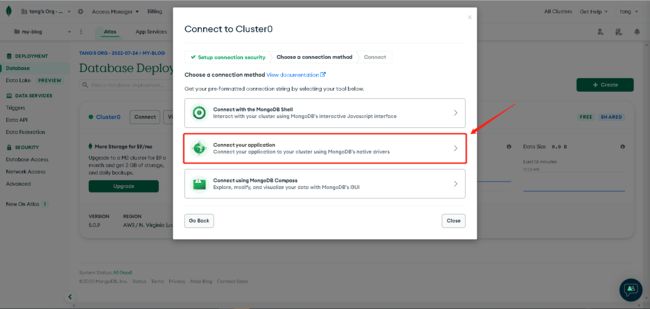
4. 在 Clusters 页面点击 【Connect】,选择【Connect your appliction】,记录数据库连接字符串,请将连接字符串中的


5. 申请 Vercel 账号,可以选择 Github 账号来同步
6. 点击 此链接 将 Twikoo 一键部署到 Vercel

点击 Create,等待 Deploy完成,可看到如下效果:

7. 进入【Settings】->【Environment Variables】,添加环境变量【MONGODB_URI】,值为第 3 步的数据库连接字符串

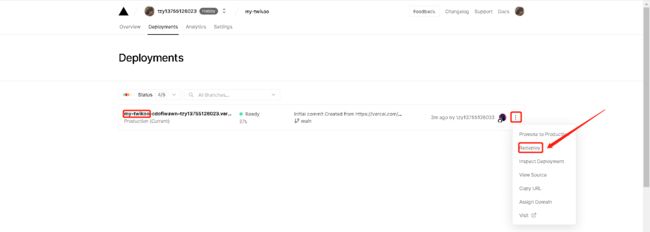
8. 进入【Deployments】,然后在任意一项后面点击更多(三个点),然后点击【Redeploy】,最后点击下面的【Redeploy】

9. 进入【Overview】,点击【Domains】下方的链接,如果环境配置正确,可以看到 “Twikoo 云函数运行正常” 的提示

Vercel Domains(包含 https:// 前缀,例如 https://xxx.vercel.app)即为您的环境 id

10. 在主题中写入 Twikoo 配置项。
在主题配置文件_config.butterfly.yml中修改以下内容,将你换环境id填入对应位置
# Twikoo
# https://github.com/imaegoo/twikoo
twikoo:
  envId: https://xxxxxx.vercel.app/
  region:
  visitor: true
  option:
| 参数 | 解释 |
|---|---|
| envId | 环境id |
| region | 环境地域,默认为 ap-shanghai,如果您的环境地域不是上海,需传此参数 |
| visitor | 是否显示文章閲读数 |
| option | 可选配置 |
开启 visitor 后,文章页的访问人数将改为 Twikoo 提供,而不是 不蒜子。
- 重新编译运行,即可看到效果,点击评论区输入框下方的齿轮状按钮,设置你的管理密码,具体配置信息这里不做讲解,按照注解进行配置即可。
Disqus
- 前往 Disqus官网 注册账号

- 登入后点击首页的【GET STARTED】,选择【I want to install Disqus on my site】

- 输入下图中所需信息:Websit Name,Category,Language,点击【Create Site】

| 参数 | 解释 |
|---|---|
| Websit Name | short name,且是唯一,像我是设置的 tzy1997-blog,short name 在配置评论时需要用到 |
| Category | 类别,自行选择 |
| Language | 语言,自行选择 |
- 【Select Plan】选择 Basic

- 接下来在【Configure Disqus】输入一些配置信息

- 在【Setup Mederration】选择一个模式就好,最后点击【Complete Setup】

- 在主题配置文件
_config.butterfly.yml中修改以下内容,将你在第3步输入的【Websit Name】填入到 shortname
# disqus
# https://disqus.com/
disqus:
  shortname: tzy1997-blog
Disqusjs
与Disqus一样,但由于Disqus在中国大陆无法访问, 使用Disqusjs可以在无法访问Disqus时显示评论。具体可参考Disqusjs。
- 配置 Disqus Application,在 Disqus API Application 处注册一个 Application。


- 点击进入新创建的 Application,获取你的 API Key(公钥)。

- 在 Application 的 Settings 页面设置你使用 DisqusJS 时的域名。Disqus API 会检查 API 请求的 Referrer 和 Origin。

- 在主题配置文件
_config.butterfly.yml中配置以下内容:
# Alternative Disqus - Render comments with Disqus API
# DisqusJS 評論系統,可以實現在網路審查地區載入 Disqus 評論列表,兼容原版
# https://github.com/SukkaW/DisqusJS
disqusjs:
  shortname:
  siteName:
  apikey:
  api: https://disqus.skk.moe/disqus/
  nocomment: # display when a blog post or an article has no comment attached
  admin:
  adminLabel:
各参数解释如下:
| 参数 | 解释 |
|---|---|
| shortname | 你的 Disqus Forum 的 shortname,你可以在 Disqus Admin - Settings - General - Shortname 获取你的 shortname 必须,无默认值 |
| siteName | 你站点的名称,将会显示在「评论基础模式」的 header 中;该配置应该和 Disqus Admin - Settings - General - Website Name 一致 非必须,无默认值 |
| apikey | DisqusJS 向 API 发起请求时使用的 API Key,你应该在配置 Disqus Application 时获取了 API Key。 DisqusJS 支持填入一个 包含多个 API Key 的数组,每次请求时会随机使用其中一个;如果你只填入一个 API Key,可以填入 string 或 Array。 必填,无默认值 |
| api | DisqusJS 请求的 API Endpoint,通常情况下你应该配置一个 Disqus API 的反代并填入反代的地址。你也可以直接使用 DISQUS 官方 API 的 Endpoint https://disqus.com/api/,或是使用我搭建的 Disqus API 反代 Endpoint https://disqus.skk.moe/disqus/。如有必要可以阅读关于搭建反代的 相关内容建议,默认值为 https://disqus.skk.moe/disqus/ |
| nocomment | 没有评论时的提示语(对应 Disqus Admin - Settings - Community - Comment Count Link - Zero comments) 非必须,默认值为 这里冷冷清清的,一条评论都没有 |
| admin | 你的站点的 Disqus Moderator 的用户名(也就是你的用户名)。你可以在 Disqus - Settings - Account - Username 获取你的 Username 非必须,无默认值 |
| adminLabel | 你想显示在 Disqus Moderator Badge 中的文字。该配置应和 Disqus Admin - Settings - Community - Moderator Badge Text 相同 非必须,无默认值 |
Livere
- 前往 来必力官网 注册账号。
- 进入管理页面。

- 选择默认的免费 City 版,点击【现在安装】

- 输入基本的信息,点击【申请获取代码】

- 获取【data-uid】

- 在主题配置文件
_config.butterfly.yml中配置以下内容:
# livere (來必力)
# https://www.livere.com/
livere:
  uid: 这里填你的uid
Gitalk
Gitalk 是一个基于 GitHub Issue 和 Preact 开发的评论插件。特性如下:
- 使用 GitHub 登录
- 支持多语言 [en, zh-CN, zh-TW, es-ES, fr, ru, de, pl, ko, fa, ja]
- 支持个人或组织
- 无干扰模式(设置 distractionFreeMode 为 true 开启)
- 快捷键提交评论 (cmd|ctrl + enter)
首先,您需要选择一个公共github存储库(已存在或创建一个新的github存储库)用于存储评论。
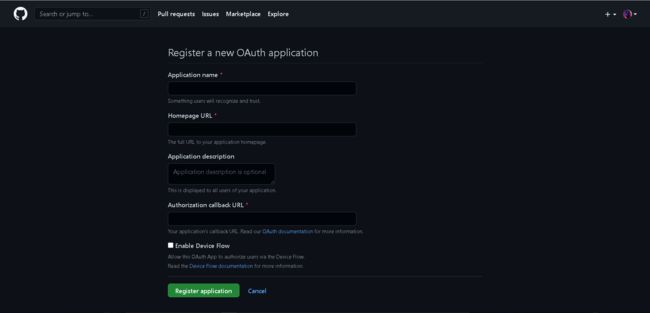
然后需要点击右上角头像【Settings】->【Developer settings】->【OAuth Apps】->【New OAuth App】 创建【GitHub Application】进行基本配置 ,找不到地方直接 点击这里申请。
【Homepage URL】填写博客的仓库地址,例如我的填写https://tzy13755126023.github.io。
【Authorization callback URL】填写当前使用的域名,例如我的填写https://tzy1997.com,没有域名,跟【Homepage URL】保持一致即可。
然后可看到目标client_id, 继续点击【Generate a new client secret】即可得到目标【client_secret】。
大致的基本信息如下图:
最后在主题配置文件_config.butterfly.yml中配置以下内容:
# gitalk
# https://github.com/gitalk/gitalk
gitalk:
  client_id: 'GitHub Application Client ID'
  client_secret: 'GitHub Application Client Secret'
  repo: 'GitHub repo'
  owner: 'GitHub repo owner'
  admin: 'GitHub repo owner and collaborators, only these guys can initialize github issues'
  language: en # en, zh-CN, zh-TW, es-ES, fr, ru
  perPage: 10 # Pagination size, with maximum 100.
  distractionFreeMode: false # Facebook-like distraction free mode.
  pagerDirection: last # Comment sorting direction, available values are last and first.
  createIssueManually: true # Gitalk will create a corresponding github issue for your every single page automatically
  option:
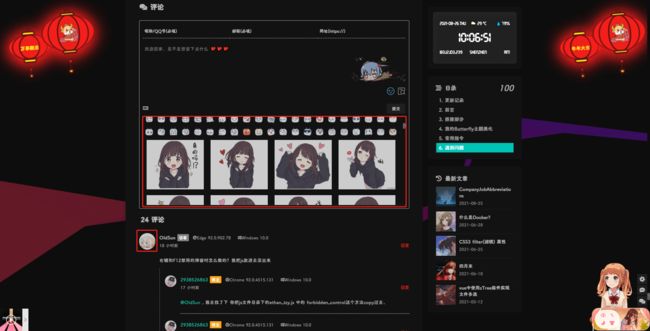
效果如下:
详情可参考 Gitalk Readme。
Valine
Valine 诞生于2017年8月7日,是一款基于LeanCloud的快速、简洁且高效的无后端评论系统。
由于 Valine 的国际版共享域名将于 2022 年 8 月 1 日起不再向中国大陆的最终用户提供服务,国际版共享域名仅服务于海外用户。本站已弃用 Valine ,改为 Twikoo。如果你更喜欢 Valine 的风格,你可以使用它的国区版。
参考教程
Valine 文档
Hexo 优化 — Valine 扩展之邮件通知
Valine 添加验证码、博主标签及评论微信、QQ 通知
详情可参考 基于 Hexo 从零开始搭建个人博客(六),其中有提到过 Valine。
Waline
Waline 是一款从 Valine 衍生的带后端评论系统。可以将 Waline 等价成 With backend Valine。
具体配置可参考 waline 文档,这里也不做详细讲解。
在主题配置文件_config.butterfly.yml中配置以下内容:
# waline - A simple comment system with backend support fork from Valine
# https://waline.js.org/
waline:
  serverURL: # Waline server address url
  avatar: monsterid # gravatar style https://zh-tw.gravatar.com/site/implement/images/#default-image
  emojiCDN: # emoji CDN
  bg: # waline background
  visitor: false
  option:
开启 pageview 后,文章页的访问人数将改为 Waline 提供,而不是 不蒜子。
Utterances
与 Gitalk 一样,基于 GitHub issues 的评论工具。相对于 Gitalk,其相对需要权限较少。
详细配置可参考 Utterances。
在主题配置文件_config.butterfly.yml中配置以下内容:
# utterances
# https://utteranc.es/
utterances:
  repo:
  # Issue Mapping: pathname/url/title/og:title
  issue_term: pathname
  # Theme: github-light/github-dark/github-dark-orange/icy-dark/dark-blue/photon-dark
  light_theme: github-light
  dark_theme: photon-dark
效果如下:
Giscus
一个基于 GitHub Discussions 的评论,详细配置请参考 Giscus 文档。
在主题配置文件_config.butterfly.yml中配置以下内容:
# Giscus
# https://giscus.app/
giscus:
  repo:
  repo_id:
  category_id:
  theme:
    light: light
    dark: dark
  option:
效果如下:

