Spring Thymeleaf 模版注入分析
Spring Thymeleaf模版注入分析
-
- 0x00 前言
- 0x01 前置知识
-
- 片段表达式
- Thymeleaf 预处理
- 0x02 实验环境
- 0x03 模板解析流程 & 漏洞分析
-
- 获取modelandview对象
- processDispatchResult
- 0x04 payload分析
- 0x05 总结
- 0x06 修复方式
- 0x07 参考
0x00 前言
最近在学习审计的时候学习到了关于Spring下Thymeleaf模版注入的知识,随即来记录一下
0x01 前置知识
片段表达式
Thymeleaf模版存在很多表达式,感觉和jsp模板里的表达式差不多。不过功能更强大
比如以下
- 变量表达式:
${...} - 选择变量表达式:
*{...} - 消息表达:
#{...} - 链接 URL 表达式:
@{...} - 片段表达式:
~{...}
这里主要关注片段表达式,这个功能呢就是可以将其他模板的部分片段插入到本模板中。这个在每个模板中插入footer时经常用到
比如你在/WEB-INF/templates/footer.html中定义了这么一个片段
DOCTYPE html>

<html xmlns:th="http://www.thymeleaf.org">

  <body>

    <div th:fragment="aaa">
      copyright 2022
    div>

  body>

html>
现在要在另一个模板中引用该片段,则可以使用片段表达式
<body>

  ...

  <div th:insert="~{footer :: aaa}">div>

body>
片段表达式的语法有三种形式:
- ~{templatename::selector},这种呢前面是被选的模板名,后面是片段名
- ~{templatename},这种的话是直接引用被选模板的全部片段
- ~{::selector} 或 ~{this::selector},这种意思就是选择本模板下名为selector的片段名
PS:注意如果片段表达式中出现::,那么后面必须跟片段名。否则会报错
Thymeleaf 预处理
Thymeleaf模版引擎有一个特性叫做表达式预处理(Expression PreProcessing),置于__...__之中会被预处理,预处理的结果再作为表达式的一部分继续处理。举例如下:
~{user/__${new java.util.Scanner(T(java.lang.Runtime).getRuntime().exec("whoami").getInputStream()).next()}__::.x/whoami}
会被预先处理为如下,然后再解析片段表达式
~{user/rerce::.x/whoami}
0x02 实验环境
controller如下
return "index"意为返回用model渲染的index.html模板
index.html
DOCTYPE html>
<html  xmlns:th="http://www.thymeleaf.org">
<head>
    <meta charset="UTF-8">
    <title>titletitle>
head>
<body>
hello 第一个Thymeleaf程序
<div th:text="${name}">div>
body>
html>
访问index,成功获取到渲染后的页面
0x03 模板解析流程 & 漏洞分析
先来梳理以下Spring下模板渲染流程
之前讲到过Spring中的前端控制器DispatcherServlet,这个是根据请求派遣到对应controller处理然后对结果进行解析的核心类
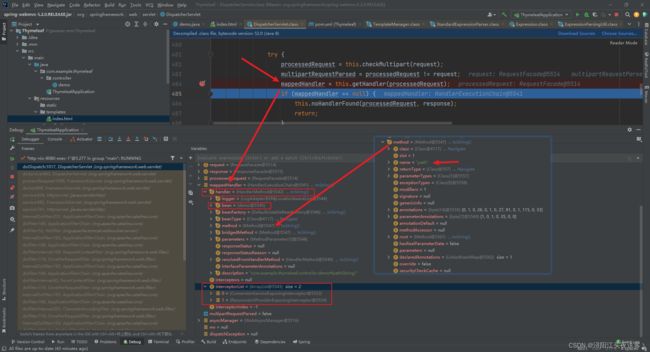
现在重新梳理一遍DispatcherServlet#doDispatch方法
protected void doDispatch(HttpServletRequest request, HttpServletResponse response) throws Exception {
    	/**
		 * 声明变量 HttpServletRequest HandlerExecutionChain Handler执行链包含和最后执行的Handler
		 */
        HttpServletRequest processedRequest = request;
        HandlerExecutionChain mappedHandler = null;
    	//是不是一个多组件请求
        boolean multipartRequestParsed = false;
    	//异步管理器
        WebAsyncManager asyncManager = WebAsyncUtils.getAsyncManager(request);

        try {
            try {
                //定义模型与视图
                ModelAndView mv = null;
                //异常
                Object dispatchException = null;

                try {
                    /**
				 	* 检查是否上传请求
				 	*/
                    processedRequest = this.checkMultipart(request);
                    multipartRequestParsed = processedRequest != request;
                    //根据请求processedRequest获取handler执行链 HandlerExecutionChain,其中包含了适配的handler以及interceptor
                    mappedHandler = this.getHandler(processedRequest);
                    if (mappedHandler == null) {
                        /**
					 	* 如果mappedHandler为空就返回404
					 	*/
                        this.noHandlerFound(processedRequest, response);
                        return;
                    }
					// 确定当前请求的处理程序适配器
                    HandlerAdapter ha = this.getHandlerAdapter(mappedHandler.getHandler());
                    /**
				 	* 获取请求方法
				 	* 处理last-modified 请求头
				 	*/
					// Process last-modified header, if supported by the handler.
                    String method = request.getMethod();
                    boolean isGet = "GET".equals(method);
                    if (isGet || "HEAD".equals(method)) {
                        //获取最近修改时间,缓存
                        long lastModified = ha.getLastModified(request, mappedHandler.getHandler());
                        if ((new ServletWebRequest(request, response)).checkNotModified(lastModified) && isGet) {
                            return;
                        }
                    }

                    /**
				 	* 4.预处理,执行interceptor拦截器等
				 	*/
                    if (!mappedHandler.applyPreHandle(processedRequest, response)) {
                        return;
                    }

                    /**
				 	* 执行Controller中(Handler)的方法,返回ModelAndView视图
				 	*/
					// Actually invoke the handler.
                    mv = ha.handle(processedRequest, response, mappedHandler.getHandler());
                    if (asyncManager.isConcurrentHandlingStarted()) {
                        /**
					 	* 判断 是不是异步请求,是就返回了
					 	*/
                        return;
                    }

                    /**
				 	* 如何返回的modelandview为空,则将URI path作为mav的值
				 	*/
                    this.applyDefaultViewName(processedRequest, mv);
                    /**
				 	* 拦截器后置处理
				 	*/
                    mappedHandler.applyPostHandle(processedRequest, response, mv);
                } catch (Exception var20) {
                    dispatchException = var20;
                } catch (Throwable var21) {
                    dispatchException = new NestedServletException("Handler dispatch failed", var21);
                }

                /**
			 	* 利用返回的mv进行页面渲染
			 	*/
                this.processDispatchResult(processedRequest, response, mappedHandler, mv, (Exception)dispatchException);
            } catch (Exception var22) {
                this.triggerAfterCompletion(processedRequest, response, mappedHandler, var22);
            } catch (Throwable var23) {
                /**
			 	* 最终对页面渲染完成调用拦截器中的AfterCompletion方法
			 	*/
                this.triggerAfterCompletion(processedRequest, response, mappedHandler, new NestedServletException("Handler processing failed", var23));
            }

        } finally {
            if (asyncManager.isConcurrentHandlingStarted()) {
                if (mappedHandler != null) {
                    mappedHandler.applyAfterConcurrentHandlingStarted(processedRequest, response);
                }
            } else if (multipartRequestParsed) {
                //清除由多个部分组成的请求使用的所有资源
                this.cleanupMultipart(processedRequest);
            }

        }
    }
下面走一遍流程
当我们访问127.0.0.1:8080/path?lang=aaa时候
获取modelandview对象
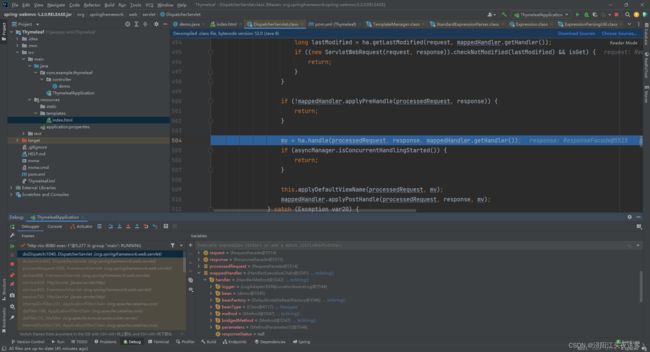
直接从ha.handle开始说起,即已经获得到了处理该请求的handler
好了程序走到ha.handle,开始进行参数绑定和方法执行。参数绑定spring那篇文章已经讲过了。这里就不再赘述,重点关注方法调用和执行
跟进handle,来到handleInternal这个方法就是使用Handler处理request并获取ModelAndView,可以看到调用了invokeHandlerMethod,而参数handlerMethod中包含了要执行的方法path
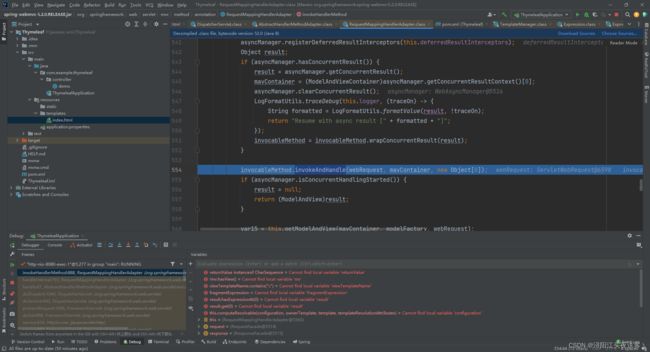
跟进invokeHandlerMethod,可以看到对handlerMethod包装了一下转换为invocableMethod
直接来到554行invocableMethod调用invokeAndHandle
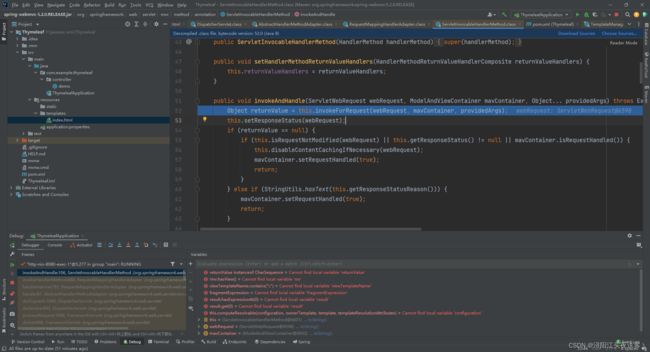
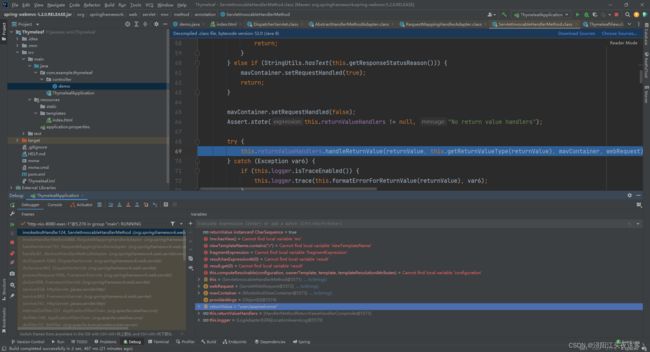
跟进invokeAndHandle,这里的invokeForRequest就很关键。其是根据url获取调用对应的controller,然后将返回值赋值给returnvalue。将returnvalue做为待查找的模板名,Thymeleaf会去查找对应的模板进行渲染
可以看到返回值为user/aaa/welcome
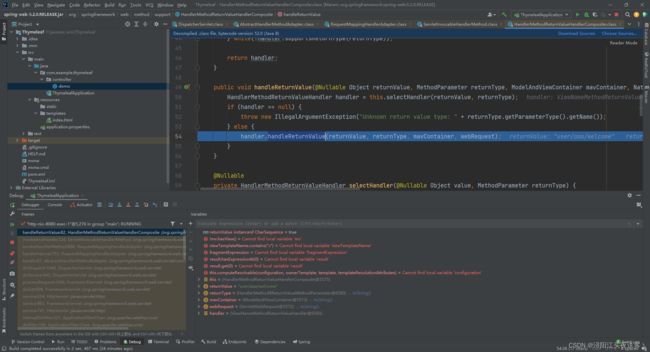
然后进入到handleReturnValue,这个是根据returnValue的值填充ModelAndViewContainer
首先获取returnValue的处理器handler,然后调用handleReturnValue对returnValue进行处理
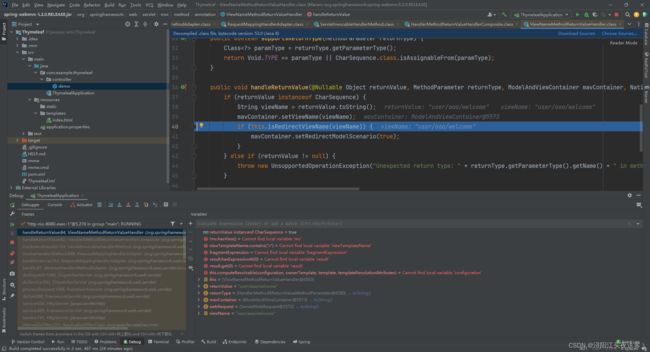
mavContainer.viewName设置为returnValue
判断返回值是否以redirect:开头,如果是的话则设置重定向的属性
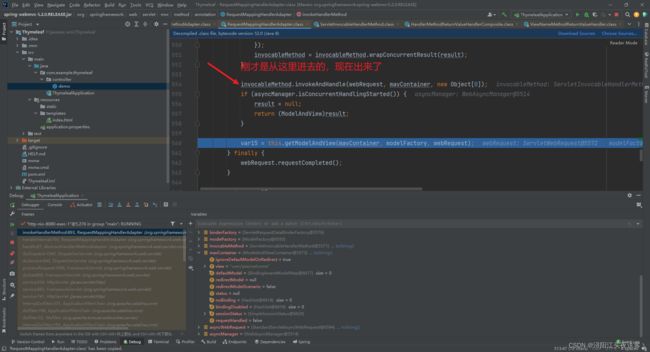
好了mavContainer也处理完了,一路返回来到RequestMappingHandlerAdapter#invokeHandlerMethod
根据mavContainer获得modelandview对象
回到核心类,此时已经获取到了modelandview对象
processDispatchResult
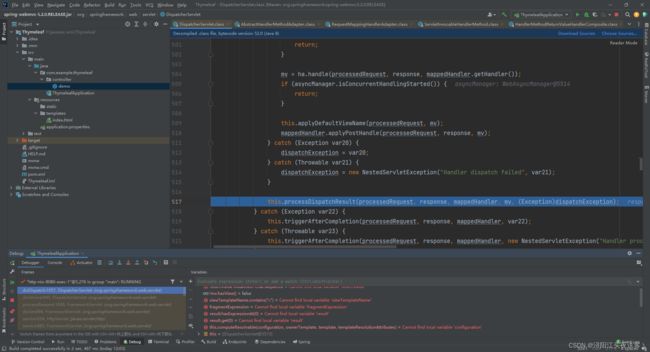
获取到mv后,进入processDispatchResult进行视图渲染
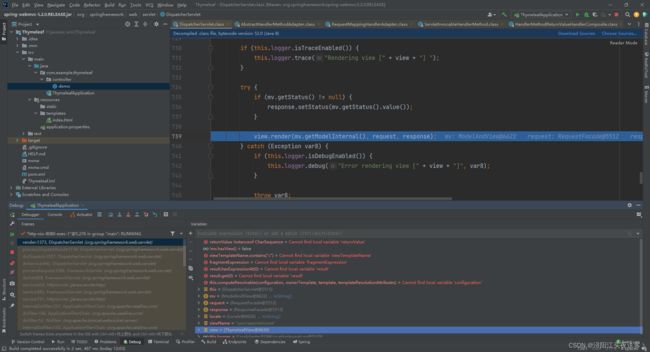
跟进render,传入mv
首先获取视图解析器,然后调用解析的render渲染模板
protected void render(ModelAndView mv, HttpServletRequest request, HttpServletResponse response) throws Exception {
        Locale locale = this.localeResolver != null ? this.localeResolver.resolveLocale(request) : request.getLocale();
        response.setLocale(locale);
        String viewName = mv.getViewName();
        View view;
        if (viewName != null) {
            //获取视图解析器
            view = this.resolveViewName(viewName, mv.getModelInternal(), locale, request);
            if (view == null) {
                throw new ServletException("Could not resolve view with name '" + mv.getViewName() + "' in servlet with name '" + this.getServletName() + "'");
            }
        } else {
            view = mv.getView();
            if (view == null) {
                throw new ServletException("ModelAndView [" + mv + "] neither contains a view name nor a View object in servlet with name '" + this.getServletName() + "'");
            }
        }
        if (this.logger.isTraceEnabled()) {
            this.logger.trace("Rendering view [" + view + "] ");
        }
        try {
            if (mv.getStatus() != null) {
                response.setStatus(mv.getStatus().value());
            }
        //渲染
            view.render(mv.getModelInternal(), request, response);
        } catch (Exception var8) {
            if (this.logger.isDebugEnabled()) {
                this.logger.debug("Error rendering view [" + view + "]", var8);
            }
            throw var8;
        }
    }
可以看到获取的视图解析器为thymeleafview,跟进render
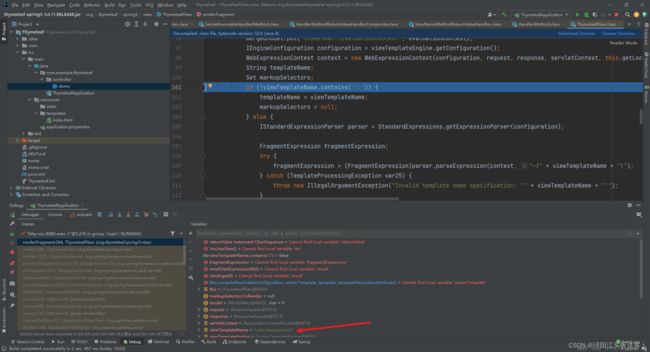
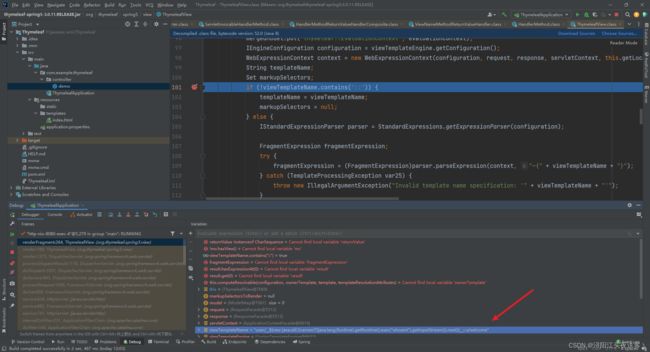
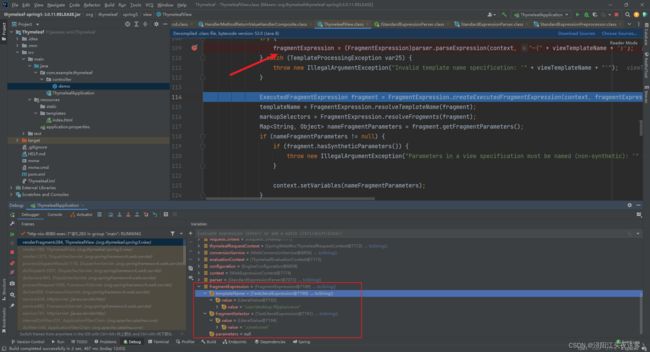
这里来到了关键位置,可以看到首先判断viewTemplateName是否包含::如果包含的话进入else分支,进行表达式预处理
我们更换payload为lang=__$%7bnew%20java.util.Scanner(T(java.lang.Runtime).getRuntime().exec(%22id%22).getInputStream()).next()%7d__::.x
此时viewTemplateName就是user/lang=__${new java.util.Scanner(T(java.lang.Runtime).getRuntime().exec("whoami").getInputStream()).next()}__::.x/welcome
当viewTemplateName中包含::时,thymeleaf会认为其是一个要处理的片段表达式,会给其加上~{}然后进行解析
来到109行,跟进parseExpression
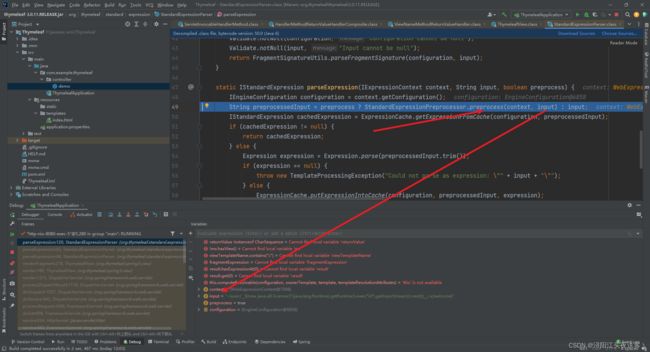
首先会对片段表达式进行thymeleaf预处理
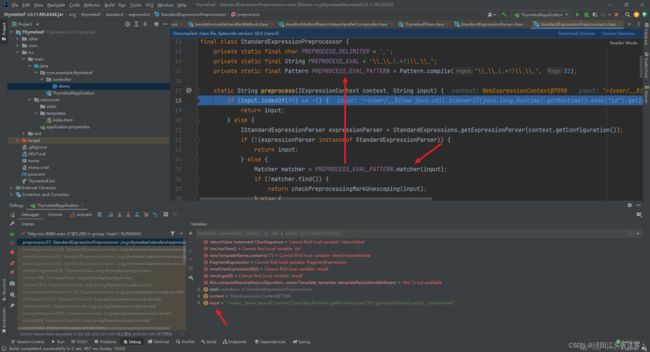
首先进行正则提取出__…__之间的东西
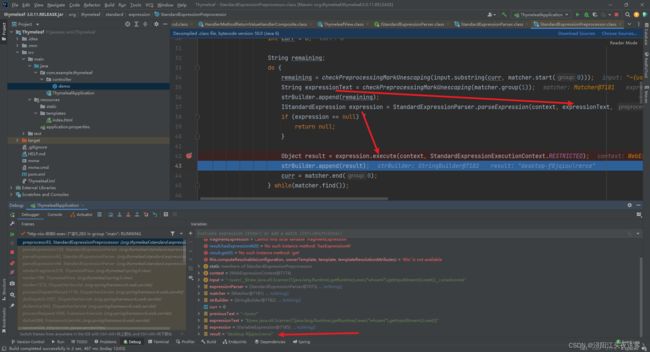
此时提取出的就是${new java.util.Scanner(T(java.lang.Runtime).getRuntime().exec(“whoami”).getInputStream()).next()}
然后调用execute执行,跟进execute最终调用org/thymeleaf/standard/expression/VariableExpression#executeVariableExpression使用SpEL执行表达式,触发任意代码执行。
然后返回result,返回到ThymeleafView#renderFragment。可以看到我们controller返回的模板名被解析
user/lang=__${new java.util.Scanner(T(java.lang.Runtime).getRuntime().exec("whoami").getInputStream()).next()}__::.x/welcome被解析为了user/desktop-f0jqiou\rerce模板然后selector为.x/welcome
但是由于找不到user/desktop-f0jqiou\rerce模板,所以最终会返回404页面并携带出whoami结果
0x04 payload分析
针对这个payload,有两种情况
__${new java.util.Scanner(T(java.lang.Runtime).getRuntime().exec("whoami").getInputStream()).next()}__::.x
- controller有返回值,这种情况::后面只要有值就行
- controller无返回值,这种情况::后面必须要有.
这种情况是通过uri path注入,前面讲到过如果controller没有return值则会在核心类中进入applyDefaultViewName,用uri path给viewname赋值,这里面会对后缀做一个清除,如果没有.的话会使得::被stipe掉,从而无法进入预处理导致无法执行任意代码
https://www.anquanke.com/post/id/254519#h3-12
payload各种变形
spel表达式不仅可以放在templatename位置,也可以放在selector位置,只不过一个有回显一个无回显
payload放在了templatename位置会以找不到模板名的方式回显回来
但如果payload放在selector位置,通过上面的分析其实也是可以触发命令执行的,只不过不会回显
各种场景下的payload变形可以参考如下两篇
https://xz.aliyun.com/t/8568
https://www.anquanke.com/post/id/254519#h3-12
0x05 总结
可以说就是Thymeleaf在处理controller返回的templatename时,如果检测到其中包含::则会认为其是一个片段表达式会对其加上~{}进行解析,在解析之前会对该表达式预处理,该过程中通过正则取出两个横线之间的内容(如果没有就不预处理,直接return)即${new java.util.Scanner(T(java.lang.Runtime).getRuntime().exec("whoami").getInputStream()).next()}。然后调用标准解析器对其进行解析,因为最终是一个spel表达式,所以导致spel命令执行。将该执行结果替换到templatename上,所以最终templatename变为了~{user/desktop-f0jqiou\rerce::.x/welcome},然后再进行片段表达式解析,::前面的为模板名但又因为找不到user/desktop-f0jqiou\rerce这个模板,所以最终会以报错的方式将命令结果回显回来
0x06 修复方式
- 配置
@ResponseBody或者@RestController
这样 spring 框架就不会将其解析为视图名,而是直接返回, 不再调用模板解析。
- 在返回值前面加上 “redirect:”
这样不再由 Spring ThymeleafView来进行解析,而是由 RedirectView 来进行解析。
- 在方法参数中加上 HttpServletResponse 参数、
由于controller的参数被设置为HttpServletResponse,Spring认为它已经处理了HTTP Response,因此不会发生视图名称解析。
0x07 参考
https://www.anquanke.com/post/id/254519
https://xz.aliyun.com/t/10514
https://www.cnblogs.com/nice0e3/p/16212784.html
https://xz.aliyun.com/t/8568


