vue3:vue3+vite+ts+pinia
一、背景
记录一套技术方案。
二、项目基础
2.1、创建项目
yarn create vite
选择后完成
2.2、vite.config.ts 配置alias:
import { defineConfig } from 'vite'
import vue from '@vitejs/plugin-vue'
import { resolve } from 'path'

// https://vitejs.dev/config/
export default defineConfig({
  plugins: [vue()],
  resolve: {
    alias: {
      '@': resolve(__dirname, 'src')
    }
  }
})
2.3、安装element-plus
https://element-plus.gitee.io/zh-CN/guide/installation.html#%E4%BD%BF%E7%94%A8%E5%8C%85%E7%AE%A1%E7%90%86%E5%99%A8
2.4、配置环境变量:
CSDN
2.5、配置router
vite2+vue3+TS+vue-router_ChenNianA的博客-CSDN博客
https://www.jianshu.com/p/5f0301bca0ed
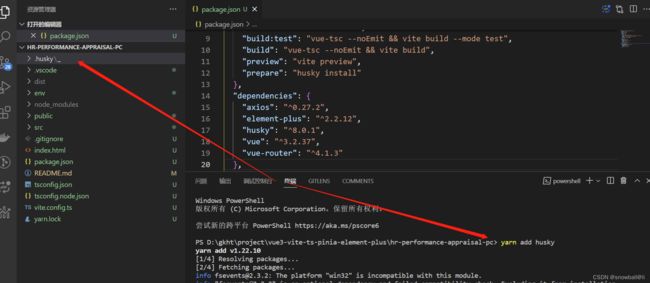
2.6、安装husky
【Vue】EsLint+Husky 实现代码提交时自动校验_夜雨Gecer的博客-CSDN博客_husky vue
2.7、安装sass
安装后重启项目
npm install sass sass-loader -D
经过测试不需要安装sass-loader,安装了会报错
2.8、使用pinia
学习Pinia 第一章(介绍Pinia)_小满zs的博客-CSDN博客
2.9、使用cookie
安装cookie
pnpm add @types/js-cookie
pnpm add js-cookie
页面引入
import cookie from 'js-cookie'
使用cookie
const token = `Bearer ${cookie.get('token')}`
console.log('16', token) 使用成功![]()
2.10、处理问题:
解决方法:
{
  "compilerOptions": {
    "target": "ESNext",
    "useDefineForClassFields": true,
    "module": "ESNext",
    "moduleResolution": "Node",
    "strict": true,
    "jsx": "preserve",
    "sourceMap": true,
    "resolveJsonModule": true,
    "isolatedModules": true,
    "esModuleInterop": true,
    "lib": ["ESNext", "DOM"],
    "skipLibCheck": true,
    "baseUrl": "./",
    "paths": {
      "@/*": ["src/*"]
    }
  },
  "include": ["src/**/*.ts", "src/**/*.d.ts", "src/**/*.tsx", "src/**/*.vue"],
  "references": [{ "path": "./tsconfig.node.json" }]
}
问题得到处理,不报错了
2.11、请求接口:
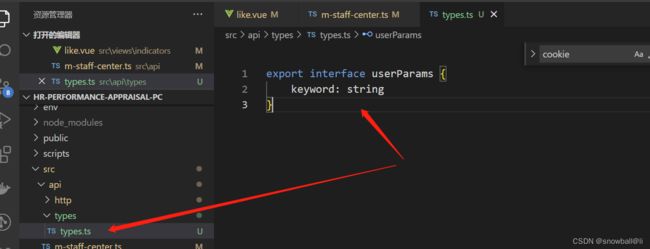
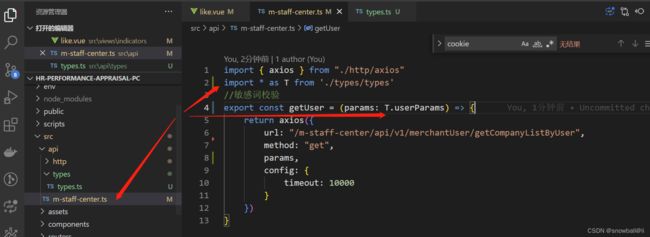
类型限制:
定义
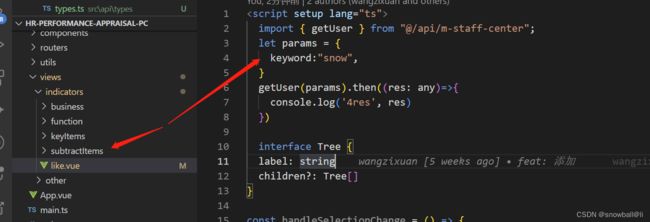
使用:
报错如图
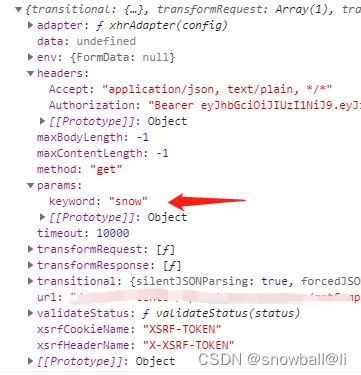
2.12、get请求传递参数:
// 定义请求方法
export const getUser = (data: T.userParams) => {
    return axios({
        method: "get",
        url: "/abc/getCompanyListByUser",
        data,
        config: {
            timeout: 10000
        }
    })
}


// 业务文件---直接和post方法一样的传递参数即可
import { getUser } from "@/api/m-staff-center";
let params = {
  keyword:"snow",
}
getUser(params).then((res: any)=>{
  console.log('4res', res)
})
这里已经得到了参数
2.13、prototype定义全局方法及使用
  import { getCurrentInstance } from 'vue'
  let internalInstance = getCurrentInstance();
  console.log(internalInstance.appContext.config.globalProperties.$api)
vue 3.0 prototype 替代用法_寻ing的博客-CSDN博客_prototype vue3
2.14、api Generators
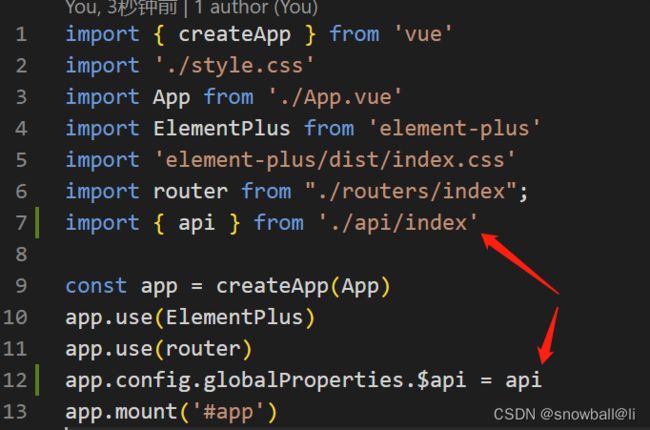
这种方式的优势,就是不需要每个业务文件都去引用具体的接口了,比较省事,个人推荐
main.ts
import { createApp } from 'vue'
import './style.css'
import App from './App.vue'
import ElementPlus from 'element-plus'
import 'element-plus/dist/index.css'
import router from "./routers/index";
import { api } from './api/index'

const app = createApp(App)
app.use(ElementPlus)
app.use(router)
app.config.globalProperties.$api = api // 全局定义属性
app.mount('#app')
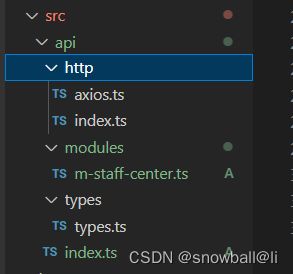
目录:
api/http/axios.ts
import instance from "./index"
/**
 * @param {String} method  请求的方法:get、post、delete、put
 * @param {String} url     请求的url:
 * @param {Object} data    请求的参数
 * @param {Object} config  请求的配置
 * @returns {Promise}     返回一个promise对象,其实就相当于axios请求数据的返回值
 */
const axios = async ({
    method,
    url,
    data,
    config
}: any): Promise => {
    method = method.toLowerCase();
    if (method == 'post') {
        return instance.post(url, data, { ...config })
    } else if (method == 'get') {
        return instance.get(url, {
            params: data,
            ...config
        })
    } else if (method == 'delete') {
        return instance.delete(url, {
            params: data,
            ...config
        })
    } else if (method == 'put') {
        return instance.put(url, data, { ...config })
    } else {
        console.error('未知的method' + method)
        return false
    }
}
export {
    axios
}
api/http/index.ts
    import axios from 'axios'
    import cookie from 'js-cookie'
    //创建axios的一个实例
    var instance = axios.create({
        // baseURL: import.meta.env.VITE_RES_URL, //接口统一域名
        timeout: 6000, //设置超时
        headers: {
            'Content-Type': 'application/json;charset=UTF-8;',
        }
    })
    //请求拦截器
    instance.interceptors.request.use((config: any) => {
        // 每次发送请求之前判断是否存在token,如果存在,则统一在http请求的header都加上token,不用每次请求都手动添加了
        const token = `Bearer ${cookie.get('token')}`
        console.log('16', token)
        token && (config.headers.Authorization = token)
        //若请求方式为post,则将data参数转为JSON字符串
        if (config.method === 'post') {
            config.data = JSON.stringify(config.data);
        } else if(config.method === 'get'){
            console.log('21', config)
        }
        return config;
    }, (error: any) =>
        // 对请求错误做些什么
        Promise.reject(error));

    //响应拦截器
    instance.interceptors.response.use((response: any) => {
        //响应成功
        console.log('响应成功');
        return response.data;
    }, (error: any) => {
        console.log(error)
        //响应错误
        if (error.response && error.response.status) {
            const status = error.response.status
            console.log(status);
            return Promise.reject(error);
        }
        return Promise.reject(error);
    });
    export default instance;
api/index.ts
import { axios } from './http/axios'
const files:any = import.meta.globEager("./modules/*.ts") // 导入文件
let api:any = {}
let apiGenerators:any = [] // modules目录下文件内容的数组,每一个文件是一个{}
for (const key in files) {
  if (Object.prototype.hasOwnProperty.call(files, key)) {
    apiGenerators.push(files[key].default)
  }
}
console.log('12apiGenerators', apiGenerators)
apiGenerators.forEach((generator:any) => {
  const apiInstance = generator({ // 创建axios实例
    axios
  })
  for (const apiName in apiInstance) {
    if (apiInstance.hasOwnProperty(apiName)) {
      api[apiName] = apiInstance[apiName]
    }
  }
})

export { api }
api/types/types.ts
export interface userParams {
    keyword: string
}
api/modules/m-staff-center.ts
import * as T from '../types/types'

export default ({
    axios
  }:any) => ({
    getUser(data: T.userParams) {
      return axios({
        url: '/m-staff-center/api/v1/abc/getCompanyListByUser',
        data,
        method: "get"
      })
    },
    getUser2(data: T.userParams) {
      return axios({
        url: '/m-staff-center/api/v1/abc/getCompanyListByUser',
        data,
        method: "get"
      })
    },
})
业务文件使用:
 import { getCurrentInstance } from 'vue'
  let internalInstance = getCurrentInstance();
  let Api = internalInstance.appContext.config.globalProperties.$api
  let params = {
    keyword:"",
  }
  Api.getUser(params).then((res: any)=>{
    console.log('17res', res)
  })
经过测试,请求成功
2.15、vue-global-api
安装:
pnpm add vue-global-api
main.ts引入
作用:
使用vue-global-api 就无需像如下方式去引入了,Instead of import APIs from vue in every file
import { ref, computed, watch } from 'vue'
vue-global-api - npm
2.16、reset.less
2.17、uno.css(原子化css)
Unocss(原子化css) 使用(vue3 + vite + ts)_全村d希望的博客-CSDN博客
三、记录问题
3.1、“NodeRequire”上不存在属性“context”
解决:
pnpm add @types/webpack-env
亲测,成功。
3.2、vue3+ts+vite2不适用require导入文件
import.meta.globEager
https://www.jianshu.com/p/995e0670bb76
解决:
四、欢迎交流指正,关注我,一起学习。
五、参考链接:
Geeker-Admin/App.vue at master · HalseySpicy/Geeker-Admin · GitHub
https://www.jianshu.com/p/3f5a413a296f
pinia快速入门 (一) - 知乎
什么是pinia?Vue中怎么使用它?-Vue.js-PHP中文网
vite.config.js配置入门详解 - 威武的大萝卜 - 博客园
Property 'context' does not exist on type 'NodeRequire' - 简书 (jianshu.com)
(1条消息) 关于文件导入:required.context 和 vite Glob 导入_thingir的博客-CSDN博客
最优雅解决typescript报错:“元素隐式具有 “any“ 类型,因为类型为 “string“ 的表达式不能用于索引类型”_皛心的博客-CSDN博客


