vite 创建Vue3项目搭建基本框架
Vue3现在已经开始变为Vue的默认版本,总结一下Vite+Vue3+Typescript搭建项目流程。
1.vite初始化项目
执行西面的命令
npm init vite@latest my-vue-app之后会出现选择语言版本
选择vue之后回车,选择vue-ts后回车初始化项目
npm install


npm run dev
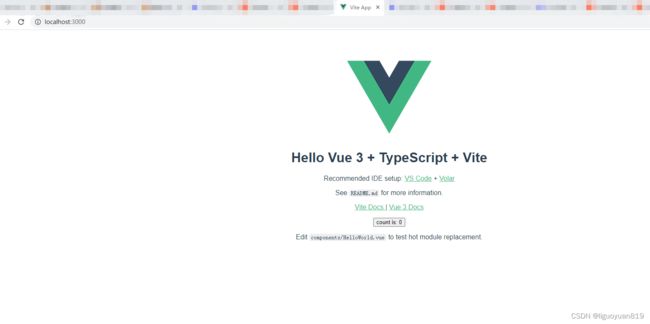
执行万npm run dev 之后,在浏览器中打开 http://localhost:3000/出现以下页面项目既初始化页面
2.开发登录页面
开发页面需要用到vue-router(路由),vuex(状态化管理)等,因此需要添加对应的依赖。本项目使用element-ui作为前端开发库,因此需要添加对应的版本库(由于element-ui不支持vue3,因此需要使用element-plus组件库),css处理使用了scss,也需要安装对应的依赖,请求接口使用了axios,没有后端接口,前端使用mockjs 模拟接口数据
执行一下代码,安装对应依赖库。
npm install vue-router vuex element-plus sass sass-loader axiosnpm install mockjs --save-devmockjs的使用在本项目中需要在 vite.config.ts文件中配置,同时需要安装插件vite-plugin-mock
npm install vite-plugin-mock --save-dev修改vite.config.ts,添加对应的配置
import { defineConfig } from 'vite'
import vue from '@vitejs/plugin-vue'
import { viteMockServe } from 'vite-plugin-mock'

// https://vitejs.dev/config/
export default defineConfig({
  plugins: [vue(),
    viteMockServe({
      supportTs:false,
      logger: false,
      mockPath: "./mock/"
    })
  ]
})
在根目录下创建mock文件夹,在该文件夹下建立index.js文件,添加需要模拟的接口数据
export default [{
    type:'get',
    url:'/user/login',
    response: () => {
        return {isAuth:true}
    }
},{
    type:'get',
    url:'/user/menu',
    response: () => {
        return {menusList:[{
            id:'/sysManagent',
            title:'系统管理',
            subMenuList:[
                {
                    id:'/userList',
                    title:'用户管理',
                    path:'/user/manage'
                },
                {
                    id:'/roleList',
                    title:'角色管理',
                    path:'/user/role'
                },
                {
                    id:'/permissionList',
                    title:'权限管理',
                    path:'/user/permission'
                }
            ]
        },{
            id:'businessManagent',
            title:'业务管理',
            subMenuList:[
                {
                    id:'/businessList',
                    title:'业务逻辑'
                }
            ]
        }],statusCode:200}
    }
}]
在src文件夹下建立文件夹router、store
在router文件夹下建立index.ts 文件,添加对应的登录页面(需要新建登录页面组件)
import { createRouter, createWebHistory, RouteRecordRaw } from "vue-router";
import Login from '../components/Login.vue'

const routes: Array = [
    {
        path:'/',
        redirect:'/login'
    },
    {
        path:'/login',
        component:Login
    }
];

const router = createRouter({
    history: createWebHistory(),
    routes
})

router.beforeEach((to,from,next) => {
    const isAuth = getStorage('isAuth',true);
    if(to.path !== '/login' && !isAuth){
        next({path:'/login'})
    } else {
        next();
    }
})

export default router;
在store文件夹下新建index.ts文件
import { createStore } from "vuex";

export default createStore({
    state:{
        isCollapse:false
    },
    mutations:{
        COLLAPSE_CHANGE:(state)=>{
            state.isCollapse = !state.isCollapse;
        }
    },
    actions:{
        collpaseChange:(context)=>{
            context.commit('COLLAPSE_CHANGE');
        }
    }
})
在main.ts 文件中引入路由、vuex,element组件
import { createApp } from 'vue'
import App from './App.vue'
import router from './router'
import ElementPlus from 'element-plus'
import 'element-plus/dist/index.css'
import * as ElIcons from '@element-plus/icons-vue'
import './assets/css/global.scss'
import store from './store/index'
import autoLogout from './utils/autoLogout'

const app = createApp(App);
for(const name in ElIcons){
    app.component(name,(ElIcons as any)[name]);
}

app.use(router).use(store).use(autoLogout).use(ElementPlus).mount('#app')
在components文件下新建Login.vue组件
登录
3.登录之后的项目布局
登录之后系统进入到项目首页,由于项目是单页应用,需要定义基本布局组件,以后的页面内容放到布局组件的子组件中。
新建Home.vue组件
整体分为头部组件,侧边栏组件和展示区,在新建aside和header文件夹,在这个下面新建对应的Aside.vue组件和Header.vue组件
Aside.vue组件
{{ it.title }}
Header.vue组件
vue管理系统
退出登录
在router中配置Home组件的路由
const routes: Array = [
    {
        path:'/',
        redirect:'/login'
    },
    {
        path:'/login',
        component:Login
    },
    {
        path:'/home',
        component:() => import('../components/Home.vue'),
        redirect:'/welcome',
        children:[
            {
                path:'/welcome',
                component:() => import('../components/Welcome.vue')
            }
        ]
    }
]; 

