springcloud搭建实战<三>【消费方 consumer+FeignClient调用】
工具:IntelliJ IDEA 2019.2.4
JDK:1.8
父项目以及注册中心、服务方详见之前博客。
【消费方与之前服务方步骤一致,以下文章步骤基本一致】
补充:服务之间调用:ribbon 、 feign。那为什么选择feign呢?
feign其实封装了ribbon,也就是说,ribbon的配置feign也生效。
其次,feign的使用,是接口更加规范。代码会更加统一。
第一步:新建消费方 springcloud-consumer
1、打开父项目,file->new module
2、选择spring Initialize ->next
3、填写项目信息、next
4、dependencies 选择Srping Cloud Routing->OpenFeign 选择springboot版本。next,finish.
5、pom.xm 文件修改
    4.0.0

        com.cloud
        springcloud_demo
        1.0-SNAPSHOT


    com.cloud
    cloud_client
    0.0.1-SNAPSHOT
    cloud_client
    Demo project for Spring Boot


        1.8
        Hoxton.SR8


            org.springframework.boot
            spring-boot-starter-web


            org.springframework.cloud
            spring-cloud-starter-netflix-eureka-client


            org.springframework.cloud
            spring-cloud-starter-openfeign


            org.springframework.boot
            spring-boot-starter-test
            test


                    org.junit.vintage
                    junit-vintage-engine


                org.springframework.cloud
                spring-cloud-dependencies
                ${spring-cloud.version}
                pom
                import


                org.springframework.boot
                spring-boot-maven-plugin
6、修改application配置文件,本人习惯yml配置.
注意:name 最好不要用下划线_ ,否则feign之间调用会报错。
server:
  port: 8091

spring:
  application:
    name: cloud-consumer

eureka:
  client:
    service-url:
      defaultZone: http://user:123456@localhost:8080/eureka/ #服务注册中信地址,含有BASIC认证的用户名和密码
  instance:
    prefer-ip-address: true #将IP注册到服务注册中心
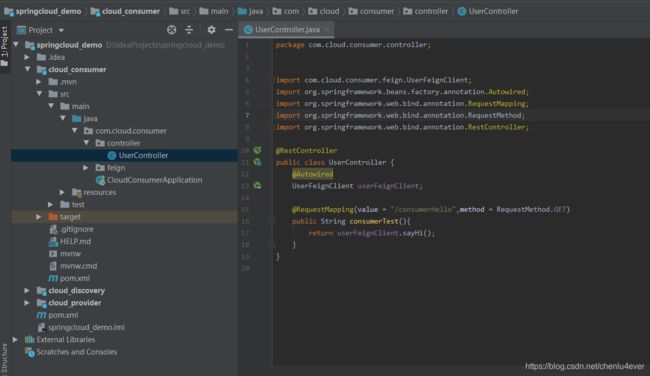
7、写一个测试类controller
@RestController
public class UserController {
    @Autowired
    UserFeignClient userFeignClient;

    @RequestMapping(value = "/consumerHello",method = RequestMethod.GET)
    public String consumerTest(){
        return userFeignClient.sayHi();
    }
}
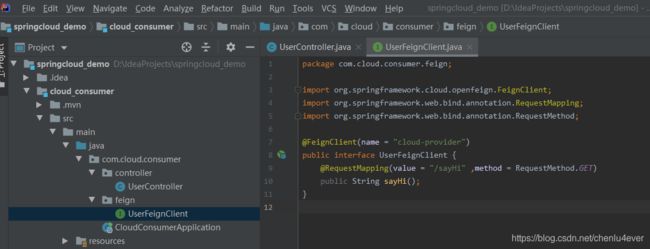
8、写一个测试Client,并通过FeignClient方式调用provider服务
注意:最好不要用GetMapping,否则有可能报404
@FeignClient(name = "cloud-provider")
public interface UserFeignClient {
    @RequestMapping(value = "/sayHi" ,method = RequestMethod.GET)
    public String sayHi();
}
9、修改启动文件,CloudProviderApplication .java, 启动项目
注意:确保provider服务端已经正常启动。
provider项目详见上一篇
@EnableFeignClients
@EnableDiscoveryClient
@SpringBootApplication
public class CloudConsumerApplication {

    public static void main(String[] args) {
        SpringApplication.run(CloudConsumerApplication.class, args);
    }

}
9、访问测试接口


