centos7篇---安装anaconda
centos7篇---安装anaconda
- 一·Anaconda下载
- 二·Anaconda安装
- 三·配置镜像源
- 四·root用户安装的anaconda如何给普通用户使用
一·Anaconda下载
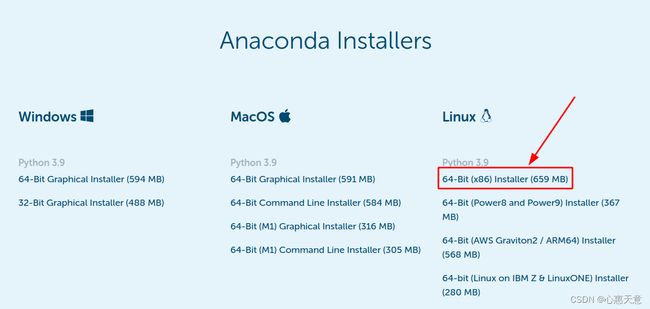
进入anaconda官方网站下载个人免费版本,网站链接,点击download,选择Linux平台的安装包
二·Anaconda安装
1.执行如下指令,安装anaconda
# 进入当保存文件的目录,执行此指令, 后期由于版本更新,可能会与此文件命名有所不同
bash Anaconda3-2020.11-Linux-x86_64.sh
2.按照安装提示,键入回车,
Please, press ENTER  to continue
>>> ENTER
3.安装此版本时,会强制用户看完整个协议,直接一路回车就行,直到看到确认信息
# 输入yes,表示同意安装协议
Do you accept the license terms? [yes|no][no]
>>> yes
# 使用默认路径,直接键入回车,使用自定义路径,直接输入安装路径
# 此处使用 /opt/anaconda3作为安装路径
Anaconda3 will now be installed into this location:
/root/anaconda3
- Press ENTER to confirm the location
- Press CTRL-C to abort the installation
- Or specify a different location below

[/root/anaconda3] >>> /opt/anaconda3
注:安装位置可以在执行安装脚本的时候直接指定,可以这样修改执行内容:
bash Anaconda3-2020.11-Linux-x86_64.sh -p /opt/anaconda3
这样可跳过软件安装路径确认阶段,直接安装到指定目录下。
5.环境变量初始化
# 此处询问是否初始化conda的环境,直接输入yes

Do you wish the installer to initialize Anaconda3
by running conda init?

[yes|no][no] >>> yes

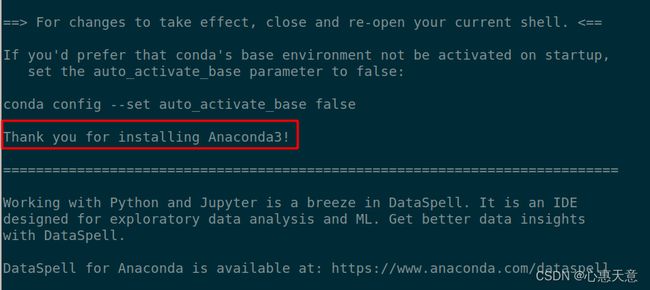
安装完成

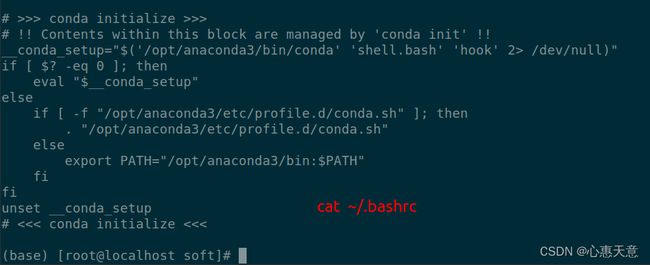
6.初始化时,anaconda将配置写入了~/.bashrc 文件,直接执行
source ~/.bashrc
后即可正常使用了。
7.配置多用户使用
将anaconda初始化时,写入到 ~/.bashrc 文件中的内容复制到 /etc/bashrc 文件中,内容如下(此处仅为示例,请复制本机对应文件中的相应内容)
# >>> conda initialize >>>
# !! Contents within this block are managed by 'conda init' !!
__conda_setup="$('/opt/anaconda3/bin/conda' 'shell.bash' 'hook' 2> /dev/null)"
if [ $? -eq 0 ]; then
    eval "$__conda_setup"
else
    if [ -f "/opt/anaconda3/etc/profile.d/conda.sh" ]; then
        . "/opt/anaconda3/etc/profile.d/conda.sh"
    else
        export PATH="/opt/anaconda3/bin:$PATH"
    fi
fi
unset __conda_setup
# <<< conda initialize <<<
三·配置镜像源
conda配置镜像源:
使用conda进行安装时,访问的是国外的网络,所以下载和安装包时会特别慢。我们需要更换到国内镜像源地址,这里我更换到国内的清华大学地址。(永久添加镜像)
Windows和Linux 对于conda修改镜像源的方法一样
1)查看anaconda中已经存在的镜像源
conda config --show channels
2)添加镜像源(永久添加)
conda config --add channels https://mirrors.tuna.tsinghua.edu.cn/anaconda/pkgs/free/
conda config --add channels https://mirrors.tuna.tsinghua.edu.cn/anaconda/pkgs/main/
conda config --add channels https://mirrors.tuna.tsinghua.edu.cn/anaconda/cloud/conda-forge/
3) 设置搜索时显示通道地址
conda config --set show_channel_urls yes
4)若不想按照上述步骤添加镜像,可使用以下命令直接指定安装时使用的镜像地址(以opencv为例):
conda install opencv -c https://mirrors.tuna.tsinghua.edu.cn/anaconda/pkgs/main/
![]()
5)添加完后查看
conda config --show channels
2、pip使用国内镜像源
一般在使用conda install安装时会出现包无法找到或者安装失败的情况,此时可以使用pip install来尝试安装(以opencv为例):
pip install opencv
若安装速度过慢可单独指定安装镜像加快安装:
pip install opencv -i https://mirrors.aliyun.com/pypi/simple/
此处列举国内常用pip安装镜像:
清华:https://pypi.tuna.tsinghua.edu.cn/simple
阿里云:https://mirrors.aliyun.com/pypi/simple/
中国科技大学: https://pypi.mirrors.ustc.edu.cn/simple/
华中理工大学:https://pypi.hustunique.com/
山东理工大学:https://pypi.sdutlinux.org/
豆瓣:https://pypi.douban.com/simple/
channels:
  - defaults
show_channel_urls: true
default_channels:
  - https://mirrors.tuna.tsinghua.edu.cn/anaconda/pkgs/main
  - https://mirrors.tuna.tsinghua.edu.cn/anaconda/pkgs/free
  - https://mirrors.tuna.tsinghua.edu.cn/anaconda/pkgs/r
  - https://mirrors.tuna.tsinghua.edu.cn/anaconda/cloud/Paddle/
custom_channels:
  conda-forge: https://mirrors.tuna.tsinghua.edu.cn/anaconda/cloud
  msys2: https://mirrors.tuna.tsinghua.edu.cn/anaconda/cloud
  bioconda: https://mirrors.tuna.tsinghua.edu.cn/anaconda/cloud
  menpo: https://mirrors.tuna.tsinghua.edu.cn/anaconda/cloud
  pytorch: https://mirrors.tuna.tsinghua.edu.cn/anaconda/cloud
  simpleitk: https://mirrors.tuna.tsinghua.edu.cn/anaconda/cloud
四·root用户安装的anaconda如何给普通用户使用
服务器里安装了anaconda,结果发现只有root用户才能使用,其他的用户都无法使用conda命令!
【解决方案】
首先,root用户安装anaconda的时候,需要安装在普通用户可以访问的目录下,比如/usr/local、/opt、/home之类的
其次,普通用户登陆后,需要执行以下conda init 使conda的路径等系统环境变量信息写入当前用户的bashrc下
例:
anaconda 装在了 (需要查看anaconda3安装路径)
/opt/anaconda3
普通用户 需要执行
/opt/anaconda3/bin/conda init bash
普通用户再执行启用配置命令
source ~/.bashrc
然后重新连接SSH (推荐)
或者
即使你没有重新连接ssh也可以通过(没试过)
source activate base
或
conda activate base
能正常使用conda后,你就可以创建你自己的环境了,例
conda create -n xxx python=3.7
环境会装在home中你的用户文件夹下,可以通过
conda env list
查看对应的地址
以上操作的问题是,那个用户需要使用conda,就需要按以上步骤执行一遍,并没有设置成所有用户都可以调用的方式;


