ts里的深拷贝
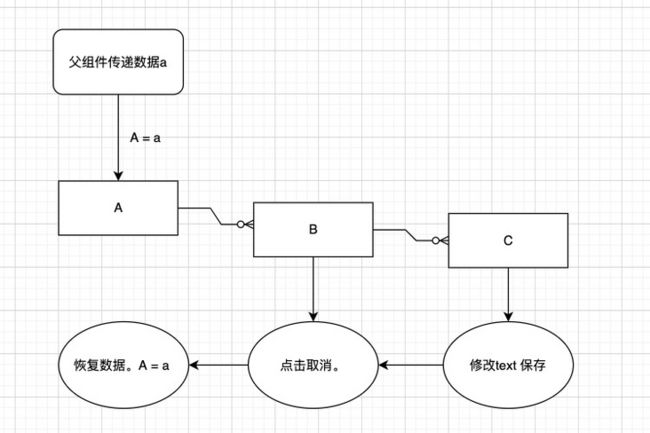
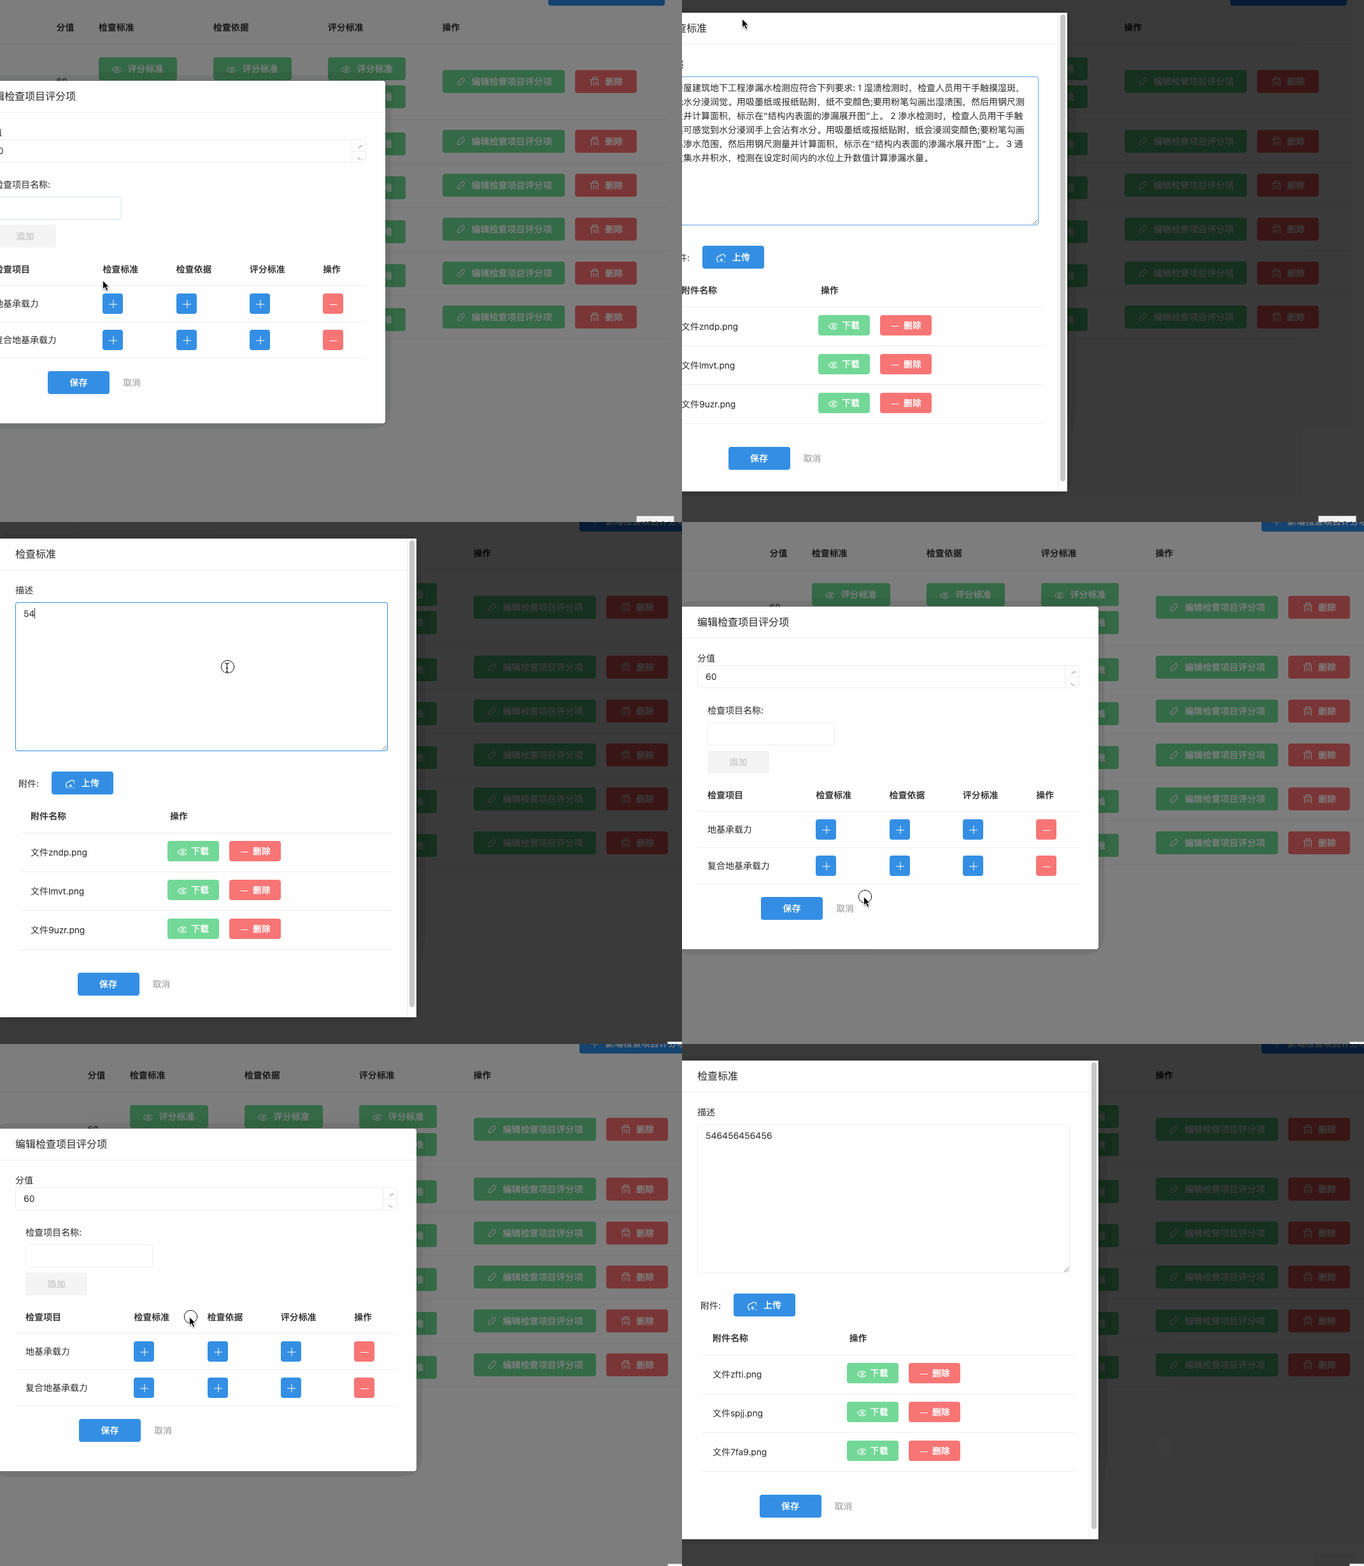
本来想着点击取消,恢复数据后,能取消掉实体的改动。比如如下图, 恢复数据后,A 能恢复到 a 数据的状态。 但是,经过测试发现,并没有。
测试的代码, 可以看到。 带星号的代码
1.ngOnInit()的时候复制了父组件传递的数据a, A = a。
2.在执行close()的时候恢复了数据, A = a。
@Input()
majorItemTemplate!: MajorItemTemplate

ngOnInit(): void {
    this.formGroup.addControl(this.formKey.percent, new FormControl(this.majorItemTemplate.percent, Validators.required));
    this.formGroup.addControl(this.formKey.name, new FormControl(''))

*    this.minorItemTemplates = this.majorItemTemplate.minorItemTemplates;
  }

  close() {
    this.dialog.close();
    // 恢复数据
*    this.minorItemTemplates = this.majorItemTemplate.minorItemTemplates;
    this.formGroup.get(this.formKey.percent)?.setValue(this.majorItemTemplate.percent);
    this.formGroup.get(this.formKey.name)?.setValue('');
  }
之后,通过上面的动图可以看到, 恢复数据,并没有成功。
找到问题
经过多处的 console.log 输出观察到, 恢复数据的时候, 父组件的传递的数据已经改变
所以,无论怎么恢复, 都无法成功。
大家上c++课的时候也讲过深浅拷贝
这就是浅拷贝带来的问题: 创建一个新对象,然后将当前对象的非静态字段复制到该新对象,如果字段是值类型的,那么对该字段执行复制;如果该字段是引用类型的话, 因此,原始对象及其副本引用同一个对象。
所以我们只要把浅拷贝换成深拷贝就好了, 如下图。
[...object]
想起来,以前用到这种方法来进行深拷贝。
 // 恢复数据
 this.minorItemTemplates = [...this.majorItemTemplate.minorItemTemplates];
即es6里的操作符,三个点 ...
es6中引入扩展运算符(...),它用于把一个数组转化为用逗号分隔的参数序列,它常用在不定参数个数时的函数调用,数组合并等情形。因为typeScript是es6的超集,所以typeScript也支持扩展运算符。
比如这样:
let arr1 = [1,2];
let arr2 = [5,6];
let newArr = [20];

//es6 使用扩展运算符
newArr = [20,...arr1,...arr2];  //[20,1,2,5,6]
console.log(newArr);
所以我们可以用它来简单的把数组的引用指向另一个地方,即新建一个数组。
但是经过试验之后不行。 原因是,它只是改变了最外层数组的引用。
假如,数组的元素是一个object, object里也有一个属性是数组的形式。 那么object里的数组引用并不会改变
深拷贝
去google之后发现可以通过JSON的方式进行深拷贝, 先用JSON.stringify()变为Json字符串,然后再用JSON.parse() 解析。之后运行正常
// 恢复数据
this.minorItemTemplates = JSON.parse(JSON.stringify(this.majorItemTemplate.minorItemTemplates));
附件上传
用团队的
所以就用了ngxthy提供的上传组件。
https://tethys.pingcode.com/c...。
这里来讲讲流程。
1. 获取File实体
html:
样式: 
首先, 选择上传之后会触发selectFiles方法。
该组件@Output 回弹的实体是File[], 即File 数组。
可以看到,File 实体继承 Blob 实体
Blob(Binary Large Object)表示二进制类型的大对象。在数据库管理系统中,将二进制数据存储为一个单一个体的集合。
Blob 对象表示一个不可变、原始数据的类文件对象。可以作为文本或二进制数据读取,也可以转换为ReadableStream,以便其方法可以用于处理数据。
2. 调用service方法
ts:
 selectFiles(event: { files: File[] }) {
    if (event.files.length === 1) {
      this.attachmentService.upload(event.files[0])
        .subscribe()
     }
service:
/**
   * 上传文件
   * @param file 文件
   */
  upload(file: File): Observable> {
    const formData: FormData = new FormData();
    formData.append('file', file);
    return this.httpClient.post(`${this.url}/upload`,
      formData, {reportProgress: true, observe: 'events'});
} 把File放在formData中, 发起请求。
reportProgress: true 来显示任何HTTP请求的一些进度
observe: 'events'为查看所有事件,包括传输进度。返回一个类型为 HttpEvent 的 Observable
所以,该响应会不断发出一个类型为HttpEvent的数据
HttpEvent:
这里用到的就是 HttpProgressEvent 和 HttpRespone
其他的HttpEvent好像也不常用到。
当附件上传中时返回HttpProgressEvent, 上传完成时返回HttpRespone
最主要的来了, 就是HttpProgressEvent 中的, loaded 和 total。
loaded 表示已完成的进度。
total 表示总的进度。
所以, 我们用 loaded / total 就可以获取 当前上传进度的百分比。
这里的HttpEventType 也值得注意,总共有5种类型
- Sent = 0,
- UploadProgress = 1,
// 上传进度类型- ResponseHeader = 2,
// 响应头类型- DownloadProgress = 3,
// 下载进度类型- Response = 4,
// 响应类型- User = 5
mockApi
模拟返回数据
{
      method: 'POST',
      url: this.url + '/upload',
      result: (urlMatcher: string[], option: {body: FormData}) => {
        return new Observable>(subscriber => {
          let i = 0;
          const total = randomNumber(10000);
          interval(20).pipe(
            take(100),
            map(() => ++i)
          ).subscribe(data => {
            subscriber.next({
              type: HttpEventType.UploadProgress,
              loaded: data * total / 100,
              total
            } as HttpUploadProgressEvent);
            if (data === 100) {
              subscriber.next({
                type: HttpEventType.Response,
                body: {
                  id: randomNumber(),
                  name: randomString("文件") + '.png',
                  file: {
                    path: 'basic/image/',
                    name: 'left.png'
                  }
                } as Attachment
              } as HttpResponse);
              subscriber.complete();
            }
          });
        });
      }
    }
处理api返回数据
当type 为1 时, 表明正在上传。设置loaded 和 total的值,计算进度,给用户实施反馈。
当type 为4表明上传完成。 把附件添加到列表中。给用户显示已完成
selectFiles(event: { files: File[] }) {
    if (event.files.length === 1) {
      this.attachmentService.upload(event.files[0])
        .subscribe({
          next: httpEvent => {
            // type 为4表明上传完成
            if (httpEvent.type === 4) {
              this.attachments.push(httpEvent.body as Attachment)
              this.attachmentIds = this.attachments.map(attachment => attachment.id);
              // 加入逗号, 设置为"id1,id2,id3"格式的string
              this.formControl.setValue(this.attachmentIds.join(','));
              // 重置进度条
              this.total = this.loaded = undefined;
            }
            // type 为1表明正在上传
            if(httpEvent.type === 1 ) {
              this.loaded = httpEvent.loaded
              this.total = httpEvent.total!;
            }
            console.log(httpEvent)
          }
        })
    }
  }
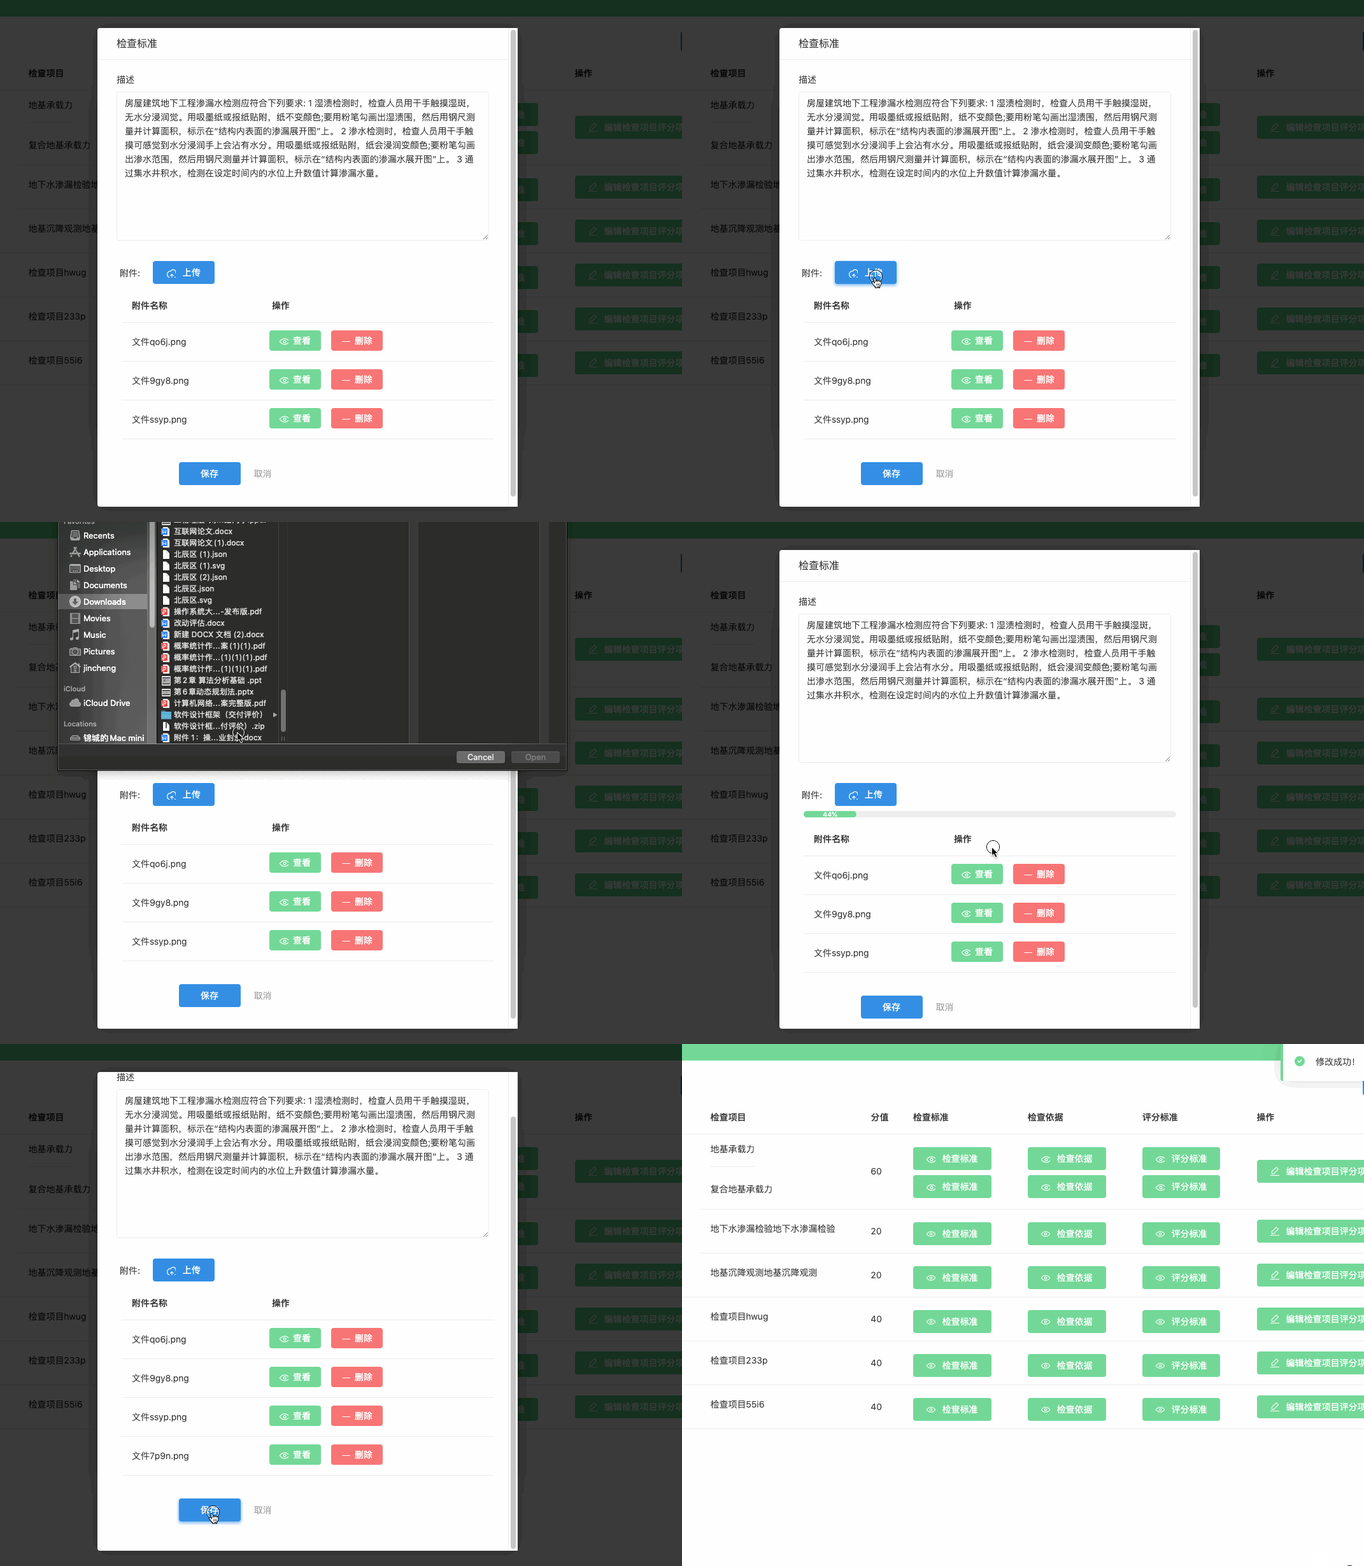
效果
总结
通过这次尝试明白了前台附件等执行流程。 等之后再去理解后台方面的处理后,相信才更能理清思路。


