Unity导出的WebGL、网页前端、服务端以及硬件四级交互结构的实现(简单3d建模网页端物联网)
本文代码基于一个智慧楼宇项目:
前提:(Unity应该使用尽量最新的版本,2020年的应该就行,2019年的未知‘,2018年的好像就不行了)
模式简介:
1.服务端处理楼宇发送的信息,把处理过的信息发送给前端页面,前端页面模型产生变化交互,实现从现实到模型的交互。
2.人为在浏览器端触发模型事件,该前端页面实现向服务端发送信息,服务端再处理数据,给楼宇相应硬件发送信息,实现从模型到现实的交互。
本文着重介绍Unity导出的WebGL、网页前端、服务端之间的交互,硬件由于实际情况不同,仅示范一般情况。
一、现实到模型。
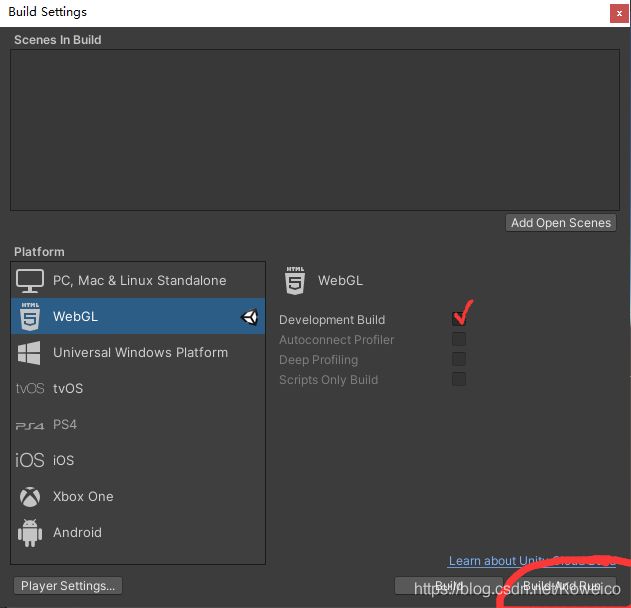
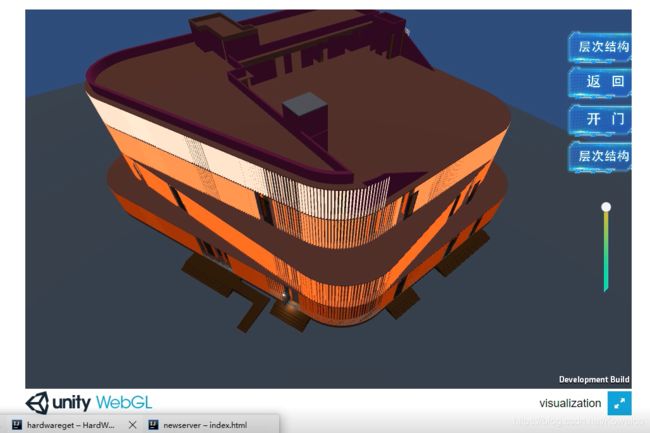
1.从unity导出webgl,实现在网页端查看模型。在unity选择导出为webgl,勾选上Development Build,以便编程。(后续还要对unity中的代码进行修改,可以先不急着导出,看完再动工。)
2.导出之后会有一个文件夹,里面分别是一个html文件、Build文件夹、TemplateDate文件夹。将这三者全部都部署在服务器上。我这里用的是Tomcat,则webapp文件结构如下。

3.修改index.html的内容:可以发现html文件自带了一部分javascript代码
在集中声明变量处增加一个声明temp(1行):
   var container = document.querySelector("#unity-container");
   var canvas = document.querySelector("#unity-canvas");
   var loadingBar = document.querySelector("#unity-loading-bar");
   var progressBarFull = document.querySelector("#unity-progress-bar-full");
   var fullscreenButton = document.querySelector("#unity-fullscreen-button");
   var temp;//-------------------添加-------------------------

在接下来的代码中为temp赋值(添加1行):
      script.onload = () => {
        createUnityInstance(canvas, config, (progress) => {
          progressBarFull.style.width = 100 * progress + "%";
        }).then((unityInstance) => {
          temp=unityInstance;//---------------添加--------------------
          loadingBar.style.display = "none";
          fullscreenButton.onclick = () => {
            unityInstance.SetFullscreen(1);
          };
        }).catch((message) => {
          alert(message);
        });
      };
从此我们就可以用temp变量由前端向unity发送信息了。
不要新建script标签,其他js代码就在这个标签内写就行(在document.body.appendChild(script)之后)。
接下来需要服务器接收到硬件数据,然后向前端主动发送信息。
4.服务器接收硬件代码(非关键,视情况编写):由于前端未实现多线程,这里是把数据都存入队列,以保安全。
public class AcceptHardWare{
    private static ServerSocket server;
    private static Socket socket=null;
    private static InputStream inputStream=null;
    private static Scanner scanner=null;
    static {
        try {
            server = new ServerSocket(8888);
        } catch (IOException e) {
            e.printStackTrace();
        }
    }
    public static void run () throws IOException {
        try {
            socket = server.accept();
            inputStream = socket.getInputStream();
            scanner = new Scanner(inputStream, "UTF-8");
            String info= scanner.useDelimiter("\\A").next();
                System.out.println(Thread.currentThread().getName()+"服务器得到硬件信息为:" + info);
                HardWareInfoQueue.push(info);
            scanner.close();
            inputStream.close();
            socket.close();
        } catch(Exception e)
        {
            e.printStackTrace();
        }finally{
        }
    }
}
5.之后是服务端主动向前端推送信息:
主动发送的方法有:a. 轮询、b.长轮询、c.HTTP流、d.SSE、e.Web Sockets。
这里采用的是长轮询:
服务端代码:
public class LongPolling extends HttpServlet {
    public void doGet(HttpServletRequest request, HttpServletResponse response) throws ServletException, IOException {
        while (HardWareInfoQueue.size()==0){
            try {
                Thread.sleep(1000);
            } catch (InterruptedException e) {
                e.printStackTrace();
            }
        }
        String temp= HardWareInfoQueue.getfirst();
        HardWareInfoQueue.pop();
        Analysis tem = new Analysis(temp);
        response.setContentType("text/html;charset=UTF-8");
        response.getWriter().write(Operate.handleToHtml(tem.getOperations2()));
    }
    public void doPost(HttpServletRequest request, HttpServletResponse response) throws ServletException, IOException {
        doGet(request, response);
    }
}
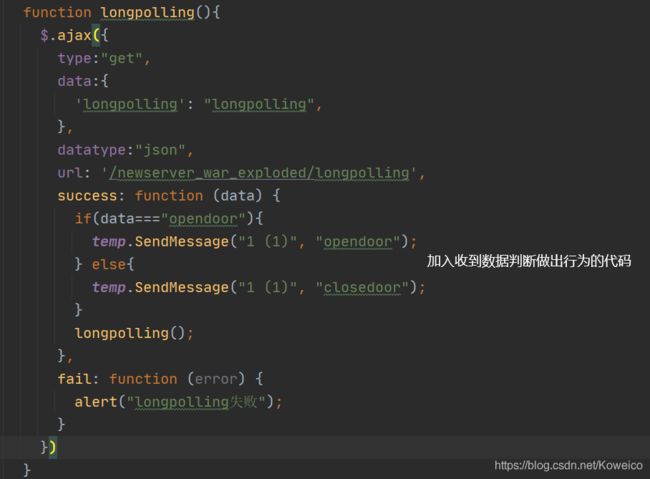
6.前端代码(记得写在一个script标签里,且需要在document.body.appendChild(script)之后)
将ajax查询写在一个函数内,在成功的代码块内记得处理数据触发事件,这里用到关键方法unityInstance.SendMessage(objectName, methodName, value);
给使用该方法调用unity中写好的methodName方法,在该方法内写uinty事件,objectName为对象名称,value为方法参数可无。
这里成功返回后再次调用该函数,以实现不断轮询。
function longpolling(){
        $.ajax({
          type:"get",
          data:{
            'longpolling': "longpolling",
          },
          datatype:"json",
          url: '/newserver_war_exploded/longpolling',
          success: function (data) {
            if(data==="opendoor"){
              temp.SendMessage("1 (1)", "opendoor");
            } else{
              temp.SendMessage("1 (1)", "closedoor");
            }
            longpolling();
          },
          fail: function (error) {
            alert("longpolling失败");
          }
        })
      }
这样的话就需要在unity的c#代码中把事件方法事先写好。代码略过。
7.上述前端代码是一个函数,所以需要在加载时调用。
 document.body.appendChild(script);//注意刚刚所有代码都应该写到这一行的后面
      $(function(){
        $.ajax({
          type:"get",
          data:{},
          datatype:"json",
          url: '/newserver_war_exploded/none',
          success: function (data) {
          },
          fail: function (error) {
          }
        })
        longpolling();
      });
这样就实现了由硬件发出信息,服务器处理后传递给前端页面,同时模型也做出响应。
二、从模型到现实。
1.明确发出点为模型,所以需要修改模型事件的c#代码,在事件触发的函数中加入关键方法:Application.ExternalCall(functionName, value);
使用该方法可调用js中写好的functionName方法,在该方法中写向服务器发送数据的代码,同样value为参数可无。
PS:这个方法在高版本的visual studio中可能会报过时,但是依旧可以使用,unity有了新的向网页发送信息的方法:https://docs.unity3d.com/Manual/webgl-interactingwithbrowserscripting.html,找到一篇有实例的博客https://blog.csdn.net/yy605353183/article/details/90413520作为参考
Application.ExternalCall("opendoor");//写在开门事件的函数内(尾部)

Application.ExternalCall("closerdoor");//写在关门事件的函数内(尾部)
2.所以我们需要在前端中完成opendoor()、closerdoor()函数
 function opendoor() {
        $.ajax({
          type: "get",
          data: {
            'obj': "door",
            'event': "open",
          },
          datatype: "json",
          url: '/newserver_war_exploded/acc',
          success: function (data) {
          },
          fail: function (error) {
            alert("发送失败");
          }
        })
      }
      function closedoor(){
        $.ajax({
          type:"get",
          data:{
            'obj': "door",
            'event': "close",
          },
          datatype:"json",
          url: '/newserver_war_exploded/acc',
          success: function (data) {
          },
          fail: function (error) {
            alert("发送失败");
          }
        })
      }
3.再编写服务端代码接收前端信息
public class AcceptHtml extends HttpServlet {
    public void doGet(HttpServletRequest request, HttpServletResponse response) throws ServletException, IOException {
        String obj= request.getParameter("obj");
        String event= request.getParameter("event");
        System.out.println(Thread.currentThread().getName()+"服务器得到html信息为:" + obj+":"+event);
        Analysis tem = new Analysis(obj,event);
        Operate.handleToHardWare(tem.getOperations1());
//        response.setContentType("text/html;charset=UTF-8");
//        response.getWriter().write("success");
    }
    public void doPost(HttpServletRequest request, HttpServletResponse response) throws ServletException, IOException {
        doGet(request, response);
    }
}
4.再将处理过的信息发送给对应的硬件。略过。
三、效果。
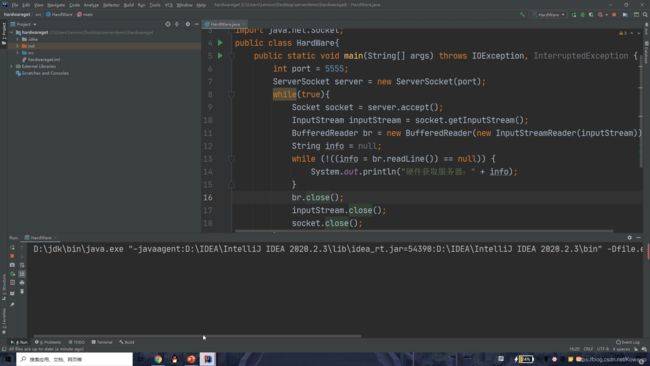
unity模型事件传递至模拟硬件(socket模拟)
服务端运行:

模拟硬件运行:
点击触发开门事件:
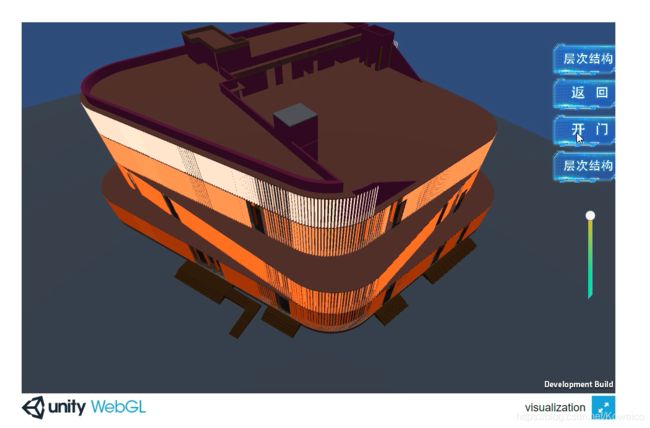
门打开了:
模拟硬件接收到数据:

模拟硬件信号传递至unity模型触发事件
模拟硬件开始发出信息:
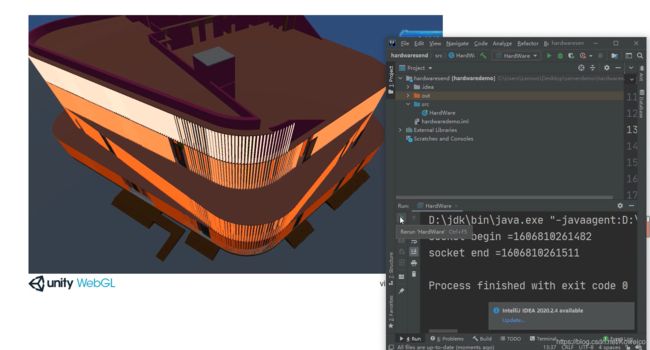
发送成功且模型门打开了:

其他
将demo代码放于以下地址:https://download.csdn.net/download/Koweico/13696008