【笔记】springboot+spring security登录流程实现
在登录控制器中添加一个登录接口login,在其中验证验证码、用户名、密码信息。匹配成功之后,执行Spring Security的登录认证机制。登录成功之后,返回Token令牌凭证。
SysLoginController
@RestController
public class SysLoginController {

	@Autowired
	private Producer producer;
	@Autowired
	private SysUserService sysUserService;
	@Autowired
	private SysLoginLogService sysLoginLogService;
	@Autowired
	private AuthenticationManager authenticationManager;

	@GetMapping("captcha.jpg")
	public void captcha(HttpServletResponse response, HttpServletRequest request) throws ServletException, IOException {
		response.setHeader("Cache-Control", "no-store, no-cache");
		response.setContentType("image/jpeg");

		// 生成文字验证码
		String text = producer.createText();
		// 生成图片验证码
		BufferedImage image = producer.createImage(text);
		// 保存到验证码到 session
		request.getSession().setAttribute(Constants.KAPTCHA_SESSION_KEY, text);

		ServletOutputStream out = response.getOutputStream();
		ImageIO.write(image, "jpg", out);
		IOUtils.closeQuietly(out);
	}

	/**
	 * 登录接口
	 */
	@PostMapping(value = "/login")
	public HttpResult login(@RequestBody LoginBean loginBean, HttpServletRequest request) throws IOException {
		String username = loginBean.getAccount();
		String password = loginBean.getPassword();
		String captcha = loginBean.getCaptcha();
		// 从session中获取之前保存的验证码跟前台传来的验证码进行匹配
		Object kaptcha = request.getSession().getAttribute(Constants.KAPTCHA_SESSION_KEY);
		if(kaptcha == null){
			return HttpResult.error("验证码已失效");
		}
		if(!captcha.equals(kaptcha)){
			return HttpResult.error("验证码不正确");
		}
		// 用户信息
		SysUser user = sysUserService.findByName(username);
		// 账号不存在、密码错误
		if (user == null) {
			return HttpResult.error("账号不存在");
		}
		if (!PasswordUtils.matches(user.getSalt(), password, user.getPassword())) {
			return HttpResult.error("密码不正确");
		}
		// 账号锁定
		if (user.getStatus() == 0) {
			return HttpResult.error("账号已被锁定,请联系管理员");
		}
		// 系统登录认证
		JwtAuthenticatioToken token = SecurityUtils.login(request, username, password, authenticationManager);
		// 记录登录日志
	//	sysLoginLogService.writeLoginLog(username, IPUtils.getIpAddr(request));
		return HttpResult.ok(token);
	}

}
(1)将用户名密码的认证信息封装到JwtAuthenticatioToken对象。
(2)通过调用authenticationManager.authenticate(token)执行认证流程。
(3)通过SecurityContextHolder将认证信息保存到Security上下文。
(4)通过JwtTokenUtils.generateToken(authentication)生成token并返回。
serializable接口的作用:1、存储对象在存储介质中,以便在下次使用的时候,可以很快捷的重建一个副本;2、便于数据传输,尤其是在远程调用的时候
Serializable接口是启用其序列化功能的接口。实现java.io.Serializable 接口的类是可序列化的。没有实现此接口的类将不能使它们的任意状态被序列化或逆序列化
Spring Security 应用级别的安全主要包含两个主要部分,即登录认证(Authentication)和访问授权(Authorization),首先用户登录的时候传入登录信息,登录验证器完成登录认证并将登录认证好的信息存储到请求上下文,然后在进行其他操作,如接口访问、方法调用时,权限认证器从上下文中获取登录认证信息,然后根据认证信息获取权限信息,通过权限信息和特定的授权策略决定是否授权。
spring secuirty:
https://www.cnblogs.com/xifengxiaoma/p/10020960.html
Spring Security的登录认证过程是委托给 AuthenticationManager 完成的,它先是解析出用户名和密码,然后把用户名和密码封装到一个UsernamePasswordAuthenticationToken 中,传递给 AuthenticationManager,交由 AuthenticationManager 完成实际的登录认证过程
spring security的关键配置:
安全配置类
下面这个配置类是Spring Security的关键配置。
在这个配置类中,我们主要做了以下几个配置:
-
访问路径URL的授权策略,如登录、Swagger访问免登录认证等
-
指定了登录认证流程过滤器 JwtLoginFilter,由它来触发登录认证
-
指定了自定义身份认证组件 JwtAuthenticationProvider,并注入 UserDetailsService
-
指定了访问控制过滤器 JwtAuthenticationFilter,在授权时解析令牌和设置登录状态
-
指定了退出登录处理器,因为是前后端分离,防止内置的登录处理器在后台进行跳转
WebSecurityConfig.java
package com.louis.springboot.spring.security.config;

import org.springframework.beans.factory.annotation.Autowired;
import org.springframework.context.annotation.Bean;
import org.springframework.context.annotation.Configuration;
import org.springframework.http.HttpMethod;
import org.springframework.security.authentication.AuthenticationManager;
import org.springframework.security.config.annotation.authentication.builders.AuthenticationManagerBuilder;
import org.springframework.security.config.annotation.method.configuration.EnableGlobalMethodSecurity;
import org.springframework.security.config.annotation.web.builders.HttpSecurity;
import org.springframework.security.config.annotation.web.configuration.EnableWebSecurity;
import org.springframework.security.config.annotation.web.configuration.WebSecurityConfigurerAdapter;
import org.springframework.security.core.userdetails.UserDetailsService;
import org.springframework.security.web.authentication.UsernamePasswordAuthenticationFilter;
import org.springframework.security.web.authentication.logout.HttpStatusReturningLogoutSuccessHandler;

import com.louis.springboot.spring.security.security.JwtAuthenticationFilter;
import com.louis.springboot.spring.security.security.JwtAuthenticationProvider;
import com.louis.springboot.spring.security.security.JwtLoginFilter;

/**
 * Security Config
 * @author Louis
 * @date Nov 28, 2018
 */
@Configuration
@EnableWebSecurity
@EnableGlobalMethodSecurity(prePostEnabled = true)
public class WebSecurityConfig extends WebSecurityConfigurerAdapter {

    @Autowired
    private UserDetailsService userDetailsService;

    @Override
    public void configure(AuthenticationManagerBuilder auth) throws Exception {
        // 使用自定义登录身份认证组件
        auth.authenticationProvider(new JwtAuthenticationProvider(userDetailsService));
    }

    @Override
    protected void configure(HttpSecurity http) throws Exception {
        // 禁用 csrf, 由于使用的是JWT,我们这里不需要csrf
        http.cors().and().csrf().disable()
            .authorizeRequests()
            // 跨域预检请求
            .antMatchers(HttpMethod.OPTIONS, "/**").permitAll()
            // 登录URL
            .antMatchers("/login").permitAll()
            // swagger
            .antMatchers("/swagger-ui.html").permitAll()
            .antMatchers("/swagger-resources").permitAll()
            .antMatchers("/v2/api-docs").permitAll()
            .antMatchers("/webjars/springfox-swagger-ui/**").permitAll()
            // 其他所有请求需要身份认证
            .anyRequest().authenticated();
        // 退出登录处理器
        http.logout().logoutSuccessHandler(new HttpStatusReturningLogoutSuccessHandler());
        // 开启登录认证流程过滤器
        http.addFilterBefore(new JwtLoginFilter(authenticationManager()), UsernamePasswordAuthenticationFilter.class);
        // 访问控制时登录状态检查过滤器
        http.addFilterBefore(new JwtAuthenticationFilter(authenticationManager()), UsernamePasswordAuthenticationFilter.class);
    }

    @Bean
    @Override
    public AuthenticationManager authenticationManager() throws Exception {
        return super.authenticationManager();
    }

}
实例(自己配置固定的用户名和密码)
//Spring Security为Web应用提供了一个适配器类WebSecurityConfigurerAdapter,
// 该类实现了WebSecurityConfigurer 接口,并提供了两个configure方法用于认证和授权操作。 开发者创建自己的Spring Security适配器类是非常简单的,
// 只需定义一个继承WebSecurityConfigurerAdapter的类,并在该类中使用@Configuration注解,
// 就可以通过重写两个configure方法来配置所需要的安全配置。自

@Configuration
public class SecutiryConfig extends WebSecurityConfigurerAdapter {
    //Spring Security为Web应用提供了一个适配器类WebSecurityConfigurerAdapter,
    // 该类实现了WebSecurityConfigurer 接口,并提供了两个configure方法用于认证和授权操作。
    // 开发者创建自己的Spring Security适配器类是非常简单的,
    // 只需定义一个继承WebSecurityConfigurerAdapter的类,
    // 并在该类中使用@Configuration注解,
    // 就可以通过重写两个configure方法来配置所需要的安全配置。
@Override
public void configure(AuthenticationManagerBuilder auth) throws Exception{
    BCryptPasswordEncoder passwordEncoder = new BCryptPasswordEncoder();
    String password = passwordEncoder.encode("123");
    auth.inMemoryAuthentication().withUser("root").password(password).roles("admin");
//如果没有写.roles,会报错Cannot pass a null GrantedAuthority collection
}
    @Bean
  PasswordEncoder getPasswordEncoder() {
        return new BCryptPasswordEncoder();

    }
    @Override
    protected void configure(HttpSecurity http) throws Exception{
        http.formLogin()//这句表示自定义自己的登陆界面
                .loginPage("/login.html")//登录页面设置
                .loginProcessingUrl("/user") //登录访问路径
                .defaultSuccessUrl("/test").permitAll() //表示登陆成功后要跳转到的路径
                .and().authorizeRequests()
                .antMatchers("/","/test/hello").permitAll()//这个用来设置哪些路径可以直接访问,不需要认证
                .anyRequest().authenticated()
                .and().csrf().disable();
    }


}
:
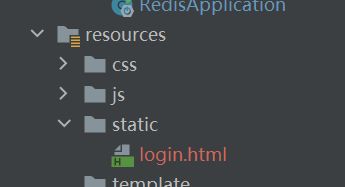
DOCTYPE html>
<html lang="en">
<head>
    <meta charset="UTF-8">
    <title>Titletitle>
head>
<body>
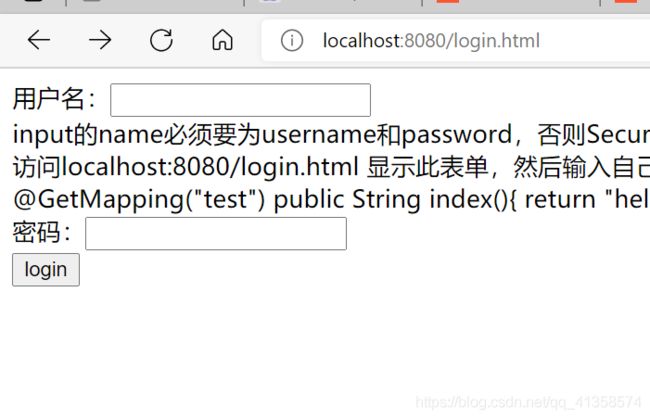
<form action="/user" method="post">
    用户名:<input type="text" name="username">
    <br>input的name必须要为username和password,否则Security得不到其中的值br>
    访问localhost:8080/login.html 显示此表单,然后输入自己配置类中设置的用户名和密码则可以进入登陆成功后的跳转路径
    即/test
    <br>
    @GetMapping("test")
    public String index(){
    return "hello index";
    }
    <br>
    密码:<input type="text" name="password">
    <br>
    <input type="submit" value="login">

form>
body>
html>
controller:
@RestController
public class jpaUserController {
 @GetMapping("test")
    public String index(){
        return "hello index";
    }
    }
    //在实际应用中,可以查询数据库获取用户和权限,
// 这时需要自定义实现userdetails.UserDetailsService接口的类,
// 并重写public UserDetails loadUserByUsername(String username)方法
// 查询对应的用户和权限。:


