华为开源自研AI框架昇思MindSpore入门体验:手写数字识别
目录
- 一、环境安装
-
- 1.进入MindSpore官网
- 2.选择安装版本
- 3.确保为Windows系统
- 4.安装MindSpore
- 5.验证安装
- 6.安装依赖
- 二、模型训练
-
- 1.下载并处理数据集
- 2.创建模型
- 三、以Notebook运行
本教程是在CPU-Ubuntu上安装MindSpore1.8.1,以LeNet5网络模型为例子,实现深度学习中的常见任务
如果你对MindSpore感兴趣,可以关注昇思MindSpore社区

一、环境安装
1.进入MindSpore官网
进入昇思MindSpore官网,点击上方的安装
详见:https://www.mindspore.cn/
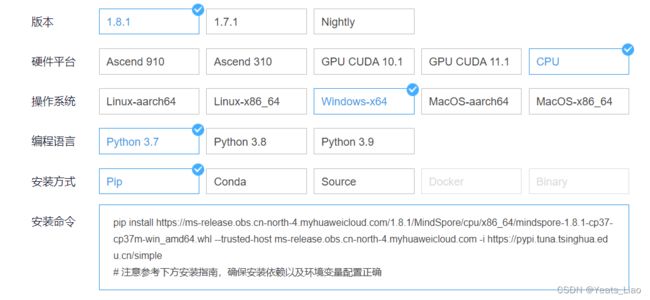
2.选择安装版本
- 版本 1.8.1
- 硬件平台 CPU
- 操作系统 Windows-x64
- 编程语言 Python 3.7
- 安装方式 Pip
3.确保为Windows系统
在确认系统环境信息的过程中,如需了解如何安装第三方依赖软件,可以参考社区提供的实践——在Windows(CPU)上进行源码编译安装MindSpore中的第三方依赖软件安装相关部分
4.安装MindSpore
首先参考版本列表选择想要安装的MindSpore版本,并进行SHA-256完整性校验,以1.8.1版本为例,执行以下命令
set MS_VERSION=1.8.1
然后根据Python版本执行如下命令安装MindSpore
# Python3.7
pip install https://ms-release.obs.cn-north-4.myhuaweicloud.com/%MS_VERSION%/MindSpore/cpu/x86_64/mindspore-%MS_VERSION:-=%-cp37-cp37m-win_amd64.whl --trusted-host ms-release.obs.cn-north-4.myhuaweicloud.com -i https://pypi.tuna.tsinghua.edu.cn/simple
5.验证安装
自动安装后使用Source命令更新环境变量
source ~/.bashrc
验证是否成功安装
python -c "import mindspore;mindspore.run_check()"
如果输出以下则说明MindSpore安装成功了
MindSpore version: 1.8.1
The result of multiplication calculation is correct, MindSpore has been installed successfully!
6.安装依赖
MindSpore Vision套件提供了用于下载并处理MNIST数据集的Mnist模块
pip install mindvision
Jupyter Notebook是一个开源的Web应用程序,允许用户创建和共享包含代码、方程式、可视化和文本的文档。就是在浏览器上运行的python编译器。最大的优点是可以将代码按步骤(块)运行,这在神经网络的编写代码方面很是方便
pip install jupyter
二、模型训练
1.下载并处理数据集
你可以从MNIST数据集下载页面下载,解压后按下方目录结构放置
from mindvision.dataset import Mnist

# 下载并处理MNIST数据集
download_train = Mnist(path="./mnist", split="train", batch_size=32, repeat_num=1, shuffle=True, resize=32, download=True)

download_eval = Mnist(path="./mnist", split="test", batch_size=32, resize=32, download=True)

dataset_train = download_train.run()
dataset_eval = download_eval.run()
2.创建模型
LeNet5网络模型的具体代码
import mindspore.nn as nn

class LeNet5(nn.Cell):
    """
    LeNet-5网络结构
    """
    def __init__(self, num_class=10, num_channel=1):
        super(LeNet5, self).__init__()
        # 卷积层,输入的通道数为num_channel,输出的通道数为6,卷积核大小为5*5
        self.conv1 = nn.Conv2d(num_channel, 6, 5, pad_mode='valid')
        # 卷积层,输入的通道数为6,输出的通道数为16,卷积核大小为5*5
        self.conv2 = nn.Conv2d(6, 16, 5, pad_mode='valid')
        # 全连接层,输入个数为16*5*5,输出个数为120
        self.fc1 = nn.Dense(16 * 5 * 5, 120)
        # 全连接层,输入个数为120,输出个数为84
        self.fc2 = nn.Dense(120, 84)
        # 全连接层,输入个数为84,分类的个数为num_class
        self.fc3 = nn.Dense(84, num_class)
        # ReLU激活函数
        self.relu = nn.ReLU()
        # 池化层
        self.max_pool2d = nn.MaxPool2d(kernel_size=2, stride=2)
        # 多维数组展平为一维数组
        self.flatten = nn.Flatten()

    def construct(self, x):
        # 使用定义好的运算构建前向网络
        x = self.conv1(x)
        x = self.relu(x)
        x = self.max_pool2d(x)
        x = self.conv2(x)
        x = self.relu(x)
        x = self.max_pool2d(x)
        x = self.flatten(x)
        x = self.fc1(x)
        x = self.relu(x)
        x = self.fc2(x)
        x = self.relu(x)
        x = self.fc3(x)
        return x

network = LeNet5(num_class=10)
了LeNet网络模型接口lenet, 定义网络模型
from mindvision.classification.models import lenet

network = lenet(num_classes=10, pretrained=False)
定义损失函数和优化器函数
import mindspore.nn as nn

# 定义损失函数
net_loss = nn.SoftmaxCrossEntropyWithLogits(sparse=True, reduction='mean')

# 定义优化器函数
net_opt = nn.Momentum(network.trainable_params(), learning_rate=0.01, momentum=0.9)
训练及保存模型,MindSpore需要提前声明网络模型在训练过程中是否需要保存中间过程和结果
import mindspore as ms

# 设置模型保存参数,模型训练保存参数的step为1875。
config_ck = ms.CheckpointConfig(save_checkpoint_steps=1875, keep_checkpoint_max=10)

# 应用模型保存参数
ckpoint = ms.ModelCheckpoint(prefix="lenet", directory="./lenet", config=config_ck)
通过MindSpore提供的model.train接口可以方便地进行网络的训练,LossMonitor可以监控训练过程中loss值的变化。
from mindvision.engine.callback import LossMonitor
import mindspore as ms

# 初始化模型参数
model = ms.Model(network, loss_fn=net_loss, optimizer=net_opt, metrics={'accuracy'})

# 训练网络模型,并保存为lenet-1_1875.ckpt文件
model.train(10, dataset_train, callbacks=[ckpoint, LossMonitor(0.01, 1875)])
通过模型运行测试数据集得到的结果,验证模型的泛化能力
acc = model.eval(dataset_eval)

print("{}".format(acc))
加载模型
import mindspore as ms

# 加载已经保存的用于测试的模型
param_dict = ms.load_checkpoint("./lenet/lenet-1_1875.ckpt")
# 加载参数到网络中
ms.load_param_into_net(network, param_dict)
验证模型
import numpy as np
import mindspore as ms
import matplotlib.pyplot as plt

mnist = Mnist("./mnist", split="train", batch_size=6, resize=32)
dataset_infer = mnist.run()
ds_test = dataset_infer.create_dict_iterator()
data = next(ds_test)
images = data["image"].asnumpy()
labels = data["label"].asnumpy()

plt.figure()
for i in range(1, 7):
    plt.subplot(2, 3, i)
    plt.imshow(images[i-1][0], interpolation="None", cmap="gray")
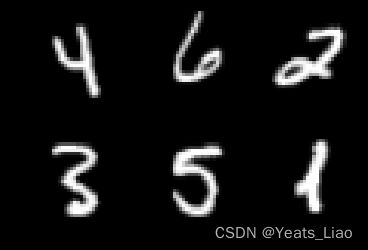
plt.show()

# 使用函数model.predict预测image对应分类
output = model.predict(ms.Tensor(data['image']))
predicted = np.argmax(output.asnumpy(), axis=1)

# 输出预测分类与实际分类
print(f'Predicted: "{predicted}", Actual: "{labels}"')
三、以Notebook运行
我尝试用jupyter notebook体验训练模型,以Notebook运行时,完成安装后需要重启kernel才能执行后续代码。
import numpy as np
import math,struct,pickle
from pathlib import Path
import matplotlib.pyplot as plt
from tqdm import tqdm_notebook
import copy
#MNIST数据集的地址
dataset_path=Path('./MNIST')
train_img_path=dataset_path/'train-images.idx3-ubyte'
train_lab_path=dataset_path/'train-labels.idx1-ubyte'
test_img_path=dataset_path/'t10k-images.idx3-ubyte'
test_lab_path=dataset_path/'t10k-labels.idx1-ubyte'

train_num=50000#训练集的数量
valid_num=10000#验证集的数量
test_num=10000#测试集的数量

with open(train_img_path,'rb') as f:
    struct.unpack('>4i',f.read(16))
    tmp_img=np.fromfile(f,dtype=np.uint8).reshape(-1,28*28)/255
    train_img=tmp_img[:train_num]
    valid_img=tmp_img[train_num:]

with open(test_img_path,'rb') as f:
    struct.unpack('>4i',f.read(16))
    test_img=np.fromfile(f,dtype=np.uint8).reshape(-1,28*28)/255

with open(train_lab_path,'rb') as f:
    struct.unpack('>2i',f.read(8))
    tmp_lab=np.fromfile(f,dtype=np.uint8)
    train_lab=tmp_lab[:train_num]
    valid_lab=tmp_lab[train_num:]

with open(test_lab_path,'rb') as f:
    struct.unpack('>2i',f.read(8))
    test_lab=np.fromfile(f,dtype=np.uint8)
#第一层激活函数
def bypass(x):
    return x
#第二层激活函数
def tanh(x):
    return np.tanh(x)
#第三层激活函数
def softmax(x):
    exp=np.exp(x-x.max())
    return exp/exp.sum()
#第一层激活函数导数
def d_bypass(x):
    return 1
#第二层激活函数导数
def d_tanh(data):
    return 1/(np.cosh(data))**2
#第三层激活函数导数
def d_softmax(data):
    sm=softmax(data)
    return np.diag(sm)-np.outer(sm,sm)
#导数字典
differential={softmax:d_softmax,tanh:d_tanh,bypass:d_bypass}

d_type={bypass:'times',softmax:'dot',tanh:'times'}
#验证softmax函数的导数的正确性
h=0.0001
func=softmax
input_len=4
for i in range(input_len):
    test_input=np.random.rand(input_len)
    derivative=differential[func](test_input)
    value1=func(test_input)
    test_input[i]+=h
    value2=func(test_input)
    print(derivative[i]-(value2-value1)/h)
#验证tang函数的导数的正确性
h=0.000001
func=tanh
input_len=4
for i in range(input_len):
    test_input=np.random.rand(input_len)
    derivative=differential[func](test_input)
    value1=func(test_input)
    test_input[i]+=h
    value2=func(test_input)
    print(derivative[i]-((value2-value1)/h)[i])
#三层神经元的数据维数
dimensions=[28*28,100,10]
#对应三层激活函数
activation=[bypass,tanh,softmax]
#每一层的参数
distribution=[
    {}, #第0层就是原样输出,不用参数
    {'b':[0,0],'w':[-math.sqrt(6/(dimensions[0]+dimensions[1])),math.sqrt(6/(dimensions[0]+dimensions[1]))]},
    {'b':[0,0],'w':[-math.sqrt(6/(dimensions[1]+dimensions[2])),math.sqrt(6/(dimensions[1]+dimensions[2]))]},
]
def init_parameters_b(layer):
    dist=distribution[layer]['b']
    return np.random.rand(dimensions[layer])*(dist[1]-dist[0])+dist[0]
def init_parameters_w(layer):
    dist=distribution[layer]['w']
    return np.random.rand(dimensions[layer-1],dimensions[layer])*(dist[1]-dist[0])+dist[0]
def init_parameters():
    parameter=[]
    for i in range(len(distribution)):
        layer_parameter={}
        for j in distribution[i].keys():
            if j=='b':
                layer_parameter['b']=init_parameters_b(i)
                continue
            if j=='w':
                layer_parameter['w']=init_parameters_w(i)
                continue
        parameter.append(layer_parameter)
    return parameter
init_parameters()
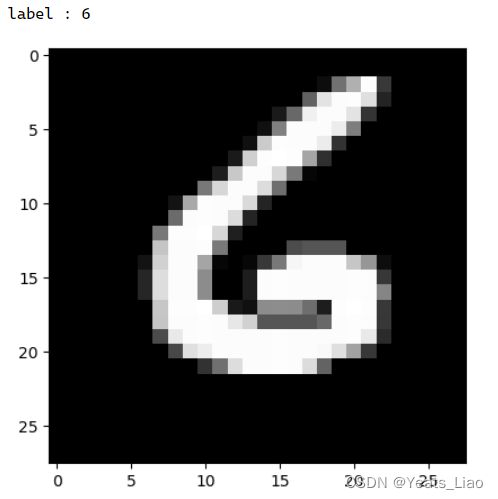
#查看训练集
def show_train(index):
    plt.imshow(train_img[index].reshape(28,28),cmap='gray')
    print('label : {}'.format(train_lab[index]))
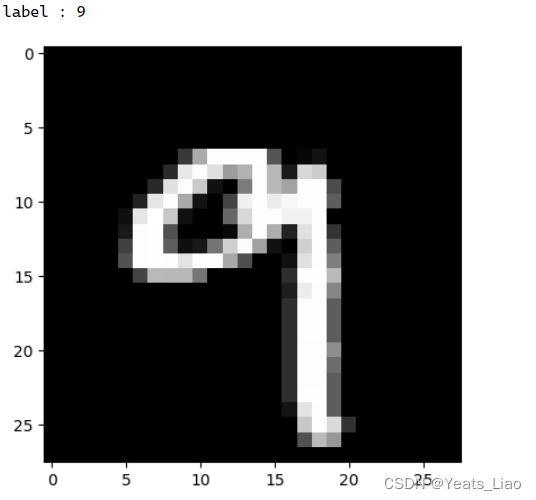
#查看验证集
def show_valid(index):
    plt.imshow(valid_img[index].reshape(28,28),cmap='gray')
    print('label : {}'.format(valid_lab[index]))
#查看测试集
def show_test(index):
    plt.imshow(test_img[index].reshape(28,28),cmap='gray')
    print('label : {}'.format(test_lab[index]))
show_train(np.random.randint(train_num))
show_valid(np.random.randint(valid_num))
show_test(np.random.randint(test_num))


