PyQt5,Qt Designer,PyUIC,pyrcc5安装与使用
一、安装
1、安装pyqt5
方法1:python pip install pyqt5
方法2:PyCharm中依次点击File --> Settings --> Project:pythonProject --> Python Interpreter --> “+” --> 搜索pyqt5 --> Install Package
测试:
import sys
from PyQt5.QtWidgets import QApplication, QWidget
if __name__ == '__main__':
app = QApplication(sys.argv)
w = QWidget()
w.resize(250, 150)
w.move(300, 300)
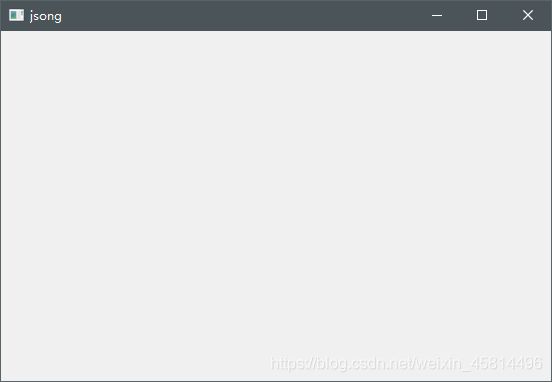
w.setWindowTitle('jsong')
w.show()
sys.exit(app.exec_())
2、安装Qt Designer
pip install pyqt5-tools
安装完成后,designer.exe在Python安装目录下:xxx\Lib\site-packages\qt5_applications\Qt\bin\designer.exe
二、在PyCharm中配置Qt Designer,PyUIC,pyrcc
1、在PyCharm中依次点击File --> Settings --> Tools --> External Tools
1)在Name中添加自己能记住、看懂的名字;
2)Program选择designer.exe安装路径,Working directory选择自己设置的工作文件夹路径;
3)点击“OK”

2、配置PyUIC(.ui文件转换为.py)同1,PyUIC5的安装路径为xxx\Scripts\pyuic5.exe,Arguments输入代码:
$FileName$ -o $FileNameWithoutExtension$.py
3、配置pyrcc(PyQt5的资源文件转码)同1,pyrcc5的安装路径为xxx\Scripts\pyrcc5.exe,Arguments输入代码:
$FileName$ -o $FileNameWithoutExtension$_rc.py
4、配置完成后在Tools --> External Tools中会出现三个附加工具

三、使用
1、在PyCharm打开QtDesigner或则和在安装路径打开designer.exe文件

2、选择Main Window创建一个窗口,从左侧Widget Box中选择Layouts(布局)、Button(按钮)等直接拖动到Main Window窗口中。
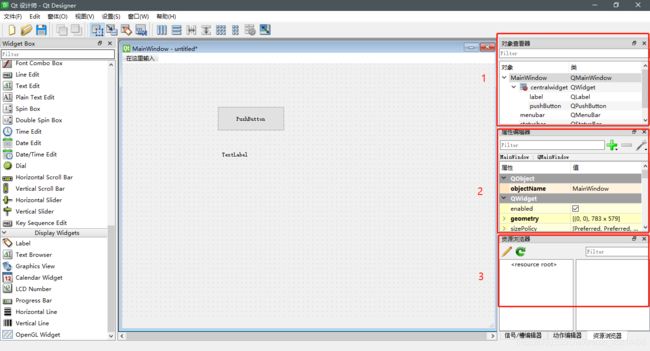
如图:
1)在对象查看器中显示主窗口中被拖进的对象以及Qt类;
2)在属性编辑器中可以查看、修改插入对象的大小,字体,光标等属性
3)资源浏览器可以添加如Botton等控件的图片背景。
3、保存文件得到一个.ui的文件,用记事本打开如下为一个xml格式的文件
<ui version="4.0">
 <class>MainWindowclass>
 <widget class="QMainWindow" name="MainWindow">
  <property name="geometry">
   <rect>
    <x>0x>
    <y>0y>
    <width>783width>
    <height>579height>
   rect>
  property>
  <property name="windowTitle">
   <string>MainWindowstring>
  property>
  <widget class="QWidget" name="centralwidget">
   <widget class="QPushButton" name="pushButton">
    <property name="geometry">
     <rect>
      <x>200x>
      <y>90y>
      <width>141width>
      <height>51height>
     rect>
    property>
    <property name="text">
     <string>PushButtonstring>
    property>
   widget>
   <widget class="QLabel" name="label">
    <property name="geometry">
     <rect>
      <x>210x>
      <y>170y>
      <width>131width>
      <height>41height>
     rect>
    property>
    <property name="text">
     <string>TextLabelstring>
    property>
   widget>
  widget>
  <widget class="QMenuBar" name="menubar">
   <property name="geometry">
    <rect>
     <x>0x>
     <y>0y>
     <width>783width>
     <height>23height>
    rect>
   property>
  widget>
  <widget class="QStatusBar" name="statusbar"/>
 widget>
 <resources/>
 <connections/>
ui>
4、将.ui文件转换成.py文件
1)在PyCharm找到.ui文件,选择PyUIC5工具转换成功。
2)在.ui文件所在目录cmd输入。
pyuic5 - o 新文件名.py ui文件名.ui
??该方法没有成功,提示:Error: one input ui-file must be specified,有知道的大神麻烦告知一下原因
解决办法(要在pyuic5.exe的安装目录内执行命令,且转换文件要在同一路径内):
1)在pyuic5.exe安装文件夹的地址栏输入 cmd回车,在cmd.exe中输入:pyuic5 - o 新文件名.py ui文件名.ui
2)cmd输入:cd /d E:\Program Files\Python3.9.5\Scripts\pyuic5.exe -o 新文件名.py login.ui
得到.py文件:
# -*- coding: utf-8 -*-

# Form implementation generated from reading ui file 'jsong.ui'
#
# Created by: PyQt5 UI code generator 5.15.4
#
# WARNING: Any manual changes made to this file will be lost when pyuic5 is
# run again.  Do not edit this file unless you know what you are doing.


from PyQt5 import QtCore, QtGui, QtWidgets


class Ui_MainWindow(object):
    def setupUi(self, MainWindow):
        MainWindow.setObjectName("MainWindow")
        MainWindow.resize(783, 579)
        self.centralwidget = QtWidgets.QWidget(MainWindow)
        self.centralwidget.setObjectName("centralwidget")
        self.pushButton = QtWidgets.QPushButton(self.centralwidget)
        self.pushButton.setGeometry(QtCore.QRect(200, 90, 141, 51))
        self.pushButton.setObjectName("pushButton")
        self.label = QtWidgets.QLabel(self.centralwidget)
        self.label.setGeometry(QtCore.QRect(210, 170, 131, 41))
        self.label.setObjectName("label")
        MainWindow.setCentralWidget(self.centralwidget)
        self.menubar = QtWidgets.QMenuBar(MainWindow)
        self.menubar.setGeometry(QtCore.QRect(0, 0, 783, 23))
        self.menubar.setObjectName("menubar")
        MainWindow.setMenuBar(self.menubar)
        self.statusbar = QtWidgets.QStatusBar(MainWindow)
        self.statusbar.setObjectName("statusbar")
        MainWindow.setStatusBar(self.statusbar)

        self.retranslateUi(MainWindow)
        QtCore.QMetaObject.connectSlotsByName(MainWindow)

    def retranslateUi(self, MainWindow):
        _translate = QtCore.QCoreApplication.translate
        MainWindow.setWindowTitle(_translate("MainWindow", "MainWindow"))
        self.pushButton.setText(_translate("MainWindow", "PushButton"))
        self.label.setText(_translate("MainWindow", "TextLabel"))
多么漂亮的python代码,自动生成。
5、编写控件入口代码
import sys
from PyQt5.QtWidgets import QApplication, QMainWindow
from jsong import *


class MyWindow(QMainWindow, Ui_MainWindow):
    def __init__(self, parent=None):
        super(MyWindow, self).__init__(parent)
        self.setupUi(self)


if __name__ == "__main__":
    app = QApplication(sys.argv)
    myWin = MyWindow()
    myWin.show()
    sys.exit(app.exec_())
运行得到:
