SSM之Spring注解式缓存Redis
目录
一、Spring整合Redis
①导入相关的pom依赖
②添加对应的配置文件
③Spring-redis的整合配置文件
④测试
完整版pom依赖
二、reids的注解式开发
① @Cacheable
② @CachePut
③ @CacheEvict
小结
三、redis的击穿、穿透、雪崩现象及解决方案
击穿:高并发量的同时key失效,导致请求直接到达数据库
穿透: 很多请求都在访问数据库一定不存在的数据,造成请求将缓存和数据库都穿透的情况
雪崩: 雪崩和击穿类似,不同的是击穿是一个热点 Key 某时刻失效,而雪崩是大量的热点 Key 在一瞬间失效
简略图解
小结
一、Spring整合Redis
①导入相关的pom依赖
2.9.0
1.7.1.RELEASE


    redis.clients
    jedis
    ${redis.version}


    org.springframework.data
    spring-data-redis
    ${redis.spring.version}
②添加对应的配置文件
redis.properties
redis.hostName=192.168.141.128
redis.port=6379
redis.password=123456
redis.timeout=10000
redis.maxIdle=300
redis.maxTotal=1000
redis.maxWaitMillis=1000
redis.minEvictableIdleTimeMillis=300000
redis.numTestsPerEvictionRun=1024
redis.timeBetweenEvictionRunsMillis=30000
redis.testOnBorrow=true
redis.testWhileIdle=true
redis.expiration=3600
③Spring-redis的整合配置文件
注意1:jdbc.properties与redis.properties文件在整合的时候会有冲突现象,解决方式,用引入外部多文件方式进行处理
注意2:pom中可以编译的文件以及目录
记得下载插件lombox
package com.zking.ssm.redis;

import lombok.extern.slf4j.Slf4j;
import org.springframework.cache.annotation.Cacheable;
import org.springframework.cache.interceptor.KeyGenerator;
import org.springframework.util.ClassUtils;

import java.lang.reflect.Array;
import java.lang.reflect.Method;

/**
 * 指定redis中的key value存储中的key字符串的生成规则
 * uname:zs 以前这个uname是手动赋予的
 * 这个uname不想手写了,就通过它来写
 *
 * @enableCache 这个key就通过它来做的
 */

@Slf4j
public class CacheKeyGenerator implements KeyGenerator {
    // custom cache key
    public static final int NO_PARAM_KEY = 0;
    public static final int NULL_PARAM_KEY = 53;

    @Cacheable
    @Override
    public Object generate(Object target, Method method, Object... params) {
        StringBuilder key = new StringBuilder();
//        com.zking.service.ClzServie.get:1
        key.append(target.getClass().getSimpleName()).append(".").append(method.getName()).append(":");
        if (params.length == 0) {
            key.append(NO_PARAM_KEY);
        } else {
            int count = 0;
            for (Object param : params) {
                if (0 != count) {//参数之间用,进行分隔
                    key.append(',');
                }
                if (param == null) {
                    key.append(NULL_PARAM_KEY);
                } else if (ClassUtils.isPrimitiveArray(param.getClass())) {
                    int length = Array.getLength(param);
                    for (int i = 0; i < length; i++) {
                        key.append(Array.get(param, i));
                        key.append(',');
                    }
                } else if (ClassUtils.isPrimitiveOrWrapper(param.getClass()) || param instanceof String) {
                    key.append(param);
                } else {//Java一定要重写hashCode和eqauls
                    key.append(param.hashCode());
                }
                count++;
            }
        }

        String finalKey = key.toString();
//        IEDA要安装lombok插件
        log.debug("using cache key={}", finalKey);
        return finalKey;
    }
}
这个时候运行会出错,因为redis.properties与jdbc.properties在与Spring做整合时发生冲突;所以引入配置文件的地方要放到中applicationContext.xml
将以下的配置内容加入即可
                classpath:jdbc.properties
                classpath:redis.properties
④测试
完整版pom依赖
  4.0.0

  org.example
  ssm2
  1.0-SNAPSHOT
  war

  ssm2 Maven Webapp

  http://www.example.com


    UTF-8
    1.8
    1.8
    3.7.0


    5.0.2.RELEASE

    3.4.5

    5.1.44

    5.1.2

    1.3.1

    2.1.1
    2.4.3

    2.9.1

    4.12
    4.0.0
    1.18.2

    2.9.0
    1.7.1.RELEASE


      org.springframework
      spring-context
      ${spring.version}


      org.springframework
      spring-orm
      ${spring.version}


      org.springframework
      spring-tx
      ${spring.version}


      org.springframework
      spring-aspects
      ${spring.version}


      org.springframework
      spring-web
      ${spring.version}


      org.springframework
      spring-test
      ${spring.version}


      org.mybatis
      mybatis
      ${mybatis.version}


      mysql
      mysql-connector-java
      ${mysql.version}


      com.github.pagehelper
      pagehelper
      ${pagehelper.version}


      org.mybatis
      mybatis-spring
      ${mybatis.spring.version}


      org.apache.commons
      commons-dbcp2
      ${commons.dbcp2.version}


      org.apache.commons
      commons-pool2
      ${commons.pool2.version}


      org.apache.logging.log4j
      log4j-core
      ${log4j2.version}


      org.apache.logging.log4j
      log4j-api
      ${log4j2.version}


      org.apache.logging.log4j
      log4j-web
      ${log4j2.version}


      junit
      junit
      ${junit.version}
      test


      javax.servlet
      javax.servlet-api
      ${servlet.version}
      provided


      org.projectlombok
      lombok
      ${lombok.version}
      provided


      org.springframework
      spring-webmvc
      ${spring.version}


      javax.servlet.jsp
      javax.servlet.jsp-api
      2.3.3


      jstl
      jstl
      1.2


      taglibs
      standard
      1.1.2


      commons-fileupload
      commons-fileupload
      1.3.3


      org.hibernate
      hibernate-validator
      6.0.7.Final


      com.fasterxml.jackson.core
      jackson-databind
      2.9.3


      com.fasterxml.jackson.core
      jackson-core
      2.9.3


      com.fasterxml.jackson.core
      jackson-annotations
      2.9.3


      redis.clients
      jedis
      ${redis.version}


      org.springframework.data
      spring-data-redis
      ${redis.spring.version}


    ssm2


        src/main/java

          **/*.xml


        src/main/resources

          *.properties
          *.xml


          org.apache.maven.plugins
          maven-compiler-plugin
          ${maven.compiler.plugin.version}

            ${maven.compiler.source}
            ${maven.compiler.target}
            ${project.build.sourceEncoding}


          org.mybatis.generator
          mybatis-generator-maven-plugin
          1.3.2


              mysql
              mysql-connector-java
              ${mysql.version}


            true


          maven-clean-plugin
          3.1.0


          maven-resources-plugin
          3.0.2


          maven-compiler-plugin
          3.8.0


          maven-surefire-plugin
          2.22.1


          maven-war-plugin
          3.2.2


          maven-install-plugin
          2.5.2


          maven-deploy-plugin
          2.8.2
二、reids的注解式开发
启动虚拟机VMware,启动虚拟机连接工具
连接redis服务6379
① @Cacheable
配置在方法或类上
作用:本方法执行后,先去缓存看有没有数据,如果没有,从数据库中查找出来,给缓存中存一份,返回结果, 下次本方法执行,在缓存未过期情况下,先在缓存中查找,有的话直接返回,没有的话从数据库查找
ClazzBiz
package com.zking.ssm.biz;
import com.zking.ssm.model.Clazz;
import com.zking.ssm.util.PageBean;
import org.springframework.cache.annotation.Cacheable;
import java.util.List;
import java.util.Map;
public interface ClazzBiz {
int deleteByPrimaryKey(Integer cid);
int insert(Clazz record);
int insertSelective(Clazz record);
Clazz selectByPrimaryKey(Integer cid);
int updateByPrimaryKeySelective(Clazz record);
int updateByPrimaryKey(Clazz record);
List listPager(Clazz clazz, PageBean pageBean);
List 读Spring上下文
@RunWith(SpringJUnit4ClassRunner.class)
@ContextConfiguration(locations={"classpath:applicationContext.xml"})
ClazzBizTest
package com.zking.ssm.redis;

import com.zking.ssm.biz.ClazzBiz;
import org.junit.Test;
import org.junit.runner.RunWith;
import org.springframework.beans.factory.annotation.Autowired;
import org.springframework.test.context.ContextConfiguration;
import org.springframework.test.context.junit4.SpringJUnit4ClassRunner;

/**
 * @author 小坤
 * @create  2022-10-28 17:00
 */
@RunWith(SpringJUnit4ClassRunner.class)
@ContextConfiguration(locations={"classpath:applicationContext.xml"})
public class ClazzBizTest {
    @Autowired
    private ClazzBiz clazzBiz;

    @Test
    public void test1(){
        System.out.println(clazzBiz.selectByPrimaryKey(1));
        System.out.println(clazzBiz.selectByPrimaryKey(1));
    }
}
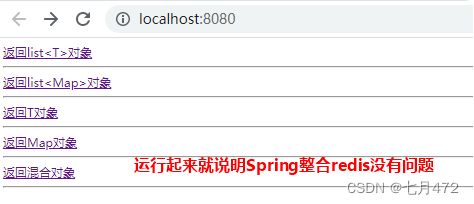
运行图
修改ClazzBiz里的注释
    @Cacheable(value = "xx")
    Clazz selectByPrimaryKey(Integer cid);
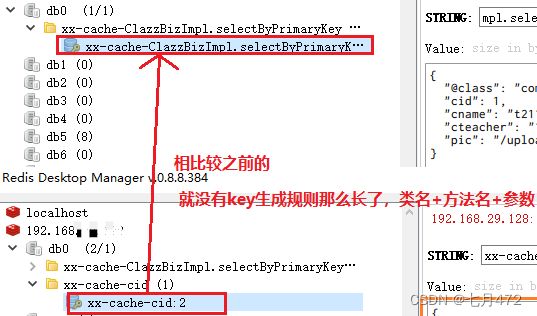
现在我们看看redis的桌面管理器中显示
再次修改注释中的属性 key改变原有的key生成规则
//    xx=cache-cid:1
//    key的作用是改变原有的key生成规则
    @Cacheable(value = "xx",key = "'cid:'+#cid")
    Clazz selectByPrimaryKey(Integer cid);
@Test
public void test1(){
System.out.println(clazzBiz.selectByPrimaryKey(2));
System.out.println(clazzBiz.selectByPrimaryKey(2));
}redis最终存储的对象是JSON
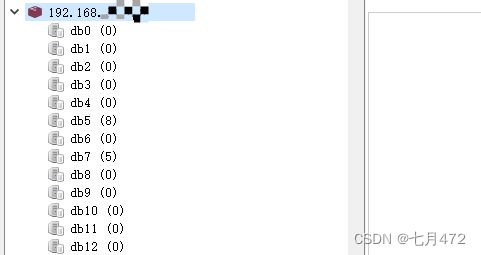
修改注释里的属性 condition判断什么时候修改key属性 将库清空
//    xx=cache-cid:1
//    key的作用是改变原有的key生成规则
//    改变它的生成规则,只有key大于6的时候生成缓存,key小于6不生成缓存
    @Cacheable(value = "xx",key = "'cid:'+#cid",condition = "#cid > 6")
    Clazz selectByPrimaryKey(Integer cid);
@Test
public void test1(){
System.out.println(clazzBiz.selectByPrimaryKey(3));
System.out.println(clazzBiz.selectByPrimaryKey(3));
}运行图
查询了两次数据库
修改ClazzBizTest
 @Test
    public void test1(){
        System.out.println(clazzBiz.selectByPrimaryKey(8));
        System.out.println(clazzBiz.selectByPrimaryKey(8));
    }
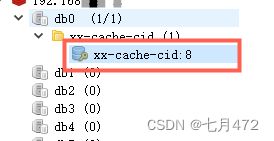
运行结果肯定查询了一次数据库,还生成了缓存
② @CachePut
类似于更新操作,即每次不管缓存中有没有结果,都从数据库查找结果,并将结果更新到缓存,并返回结果。
ClazzBiz
    @CachePut(value = "xx",key = "'cid:'+#cid",condition = "#cid > 6")
    Clazz selectByPrimaryKey(Integer cid);
ClazzBizTest
@Test
    public void test1(){
        System.out.println(clazzBiz.selectByPrimaryKey(9));
        System.out.println(clazzBiz.selectByPrimaryKey(9));
    }
运行图
③ @CacheEvict
用来清除用在本方法或者类上的缓存数据(把指定的数据清空的同时,清除掉redis桌面管理器这里面的缓存清空某一条数据,你传的id是什么,就把id对应的缓存给清掉)
ClazzBiz
    @CacheEvict(value = "xx",key = "'cid:'+#cid")
    int deleteByPrimaryKey(Integer cid);
ClazzBizTest
@Test
    public void test2(){
        clazzBiz.deleteByPrimaryKey(9);
    }
ClazzBizImpl
 @Override
    public int deleteByPrimaryKey(Integer cid) {

//        return clazzMapper.deleteByPrimaryKey(cid);
        System.out.println("不做任何操作,因为我们只清除缓存,不清除数据库");
        return 0;
    }
ClazzBizTest
@Test
    public void test2(){
        clazzBiz.deleteByPrimaryKey(10);
    }
小结:
① @Cacheable 使用注解,缓存并使用
② @CaChePut 只放缓存,不查缓存
③ @CacheEvict 清除缓存,可以去设置权限,清除指定缓存、清除所有缓存
三、redis的击穿、穿透、雪崩现象及解决方案
击穿:高并发量的同时key失效,导致请求直接到达数据库
设置锁
1.获取 Redis 锁,如果没有获取到,则回到任务队列继续排队
2.获取到锁,从数据库拉取数据并放入缓存中
3.释放锁,其他请求从缓存中拿到数据限流:请求redis之前做流量削峰
穿透: 很多请求都在访问数据库一定不存在的数据,造成请求将缓存和数据库都穿透的情况
规则排除
可以增加一些参数检验。例如数据库数据 id 一般都是递增的,如果请求 id = -10 这种参数,势必绕过Redis。避免这种情况,可以对用户真实性检验等操作。null值填充
当缓存穿透时,redis存入一个类似null的值,下次访问则直接缓存返回空,当数据库中存在该数据的值则需要把redis存在的null值清除并载入新值,此方案不能解决频繁随机不规则的key请求。
雪崩: 雪崩和击穿类似,不同的是击穿是一个热点 Key 某时刻失效,而雪崩是大量的热点 Key 在一瞬间失效
给不同的热点key设置不同的缓存策略
简略图解
击穿、穿透、雪崩它们都有共同点会有大量请求:通用的解决方案限流,限流用到的技术RabbitMQ,流量雪崩
击穿的解决方案:给redis上锁,第一个请求拿到锁,从数据库拿数据,缓存到redis中,然后在把锁释放,后面的请求就可以访问了
穿透:因为它的现象是反而不存在的数据,redis跟MySQL都没有这条数据但此时我们可以在
redis设置一条压根就不存在的数据,那下次在访问的话,
那么redis就有数据请求就不会到达MySQL,这是关于穿透
雪崩:是因为大量的key同一时间发生变化,那我们可以采用disregard的方式,
给不同的key设置不同的缓存策略,设置不同的存活时间
小结:
reids的击穿穿透雪崩
击穿:一瞬间大量请求访问某一个key的数据,而这个key正好失效;那么此时大量请求会到数据库
方案:限流,设置redis锁
穿透:访问一个redis以及数据库压根不存在的数据,每一次请求都会到达数据库
方案:设置“null”值
雪崩:一瞬间大量请求访问多个key的数据,而多个key同时失效
方案:通过定时任务,设置不同的缓存机制


