Spring boot学习笔记——狂神说
SpringBoot学习笔记
1.1 简介
Spring Boot 是 Pivotal 团队在 Spring 的基础上提供的一套全新的开源框架,其目的是为了简化 Spring 应用的搭建和开发过程。Spring Boot 去除了大量的 XML 配置文件,简化了复杂的依赖管理。
springboot配置文件名称是固定的:
- application.properties 语法结构:key=value
- application.yaml. 语法结构:key:空格 value
1.2 导入依赖
<dependency>
  <groupId>org.springframework.bootgroupId>
  <artifactId>spring-boot-starter-webartifactId>
dependency>

<dependency>
  <groupId>org.springframework.bootgroupId>
  <artifactId>spring-boot-devtoolsartifactId>
dependency>
1.3 Spring boot核心配置文件(application.properties)
#更改项目的端口号
server.port=8090
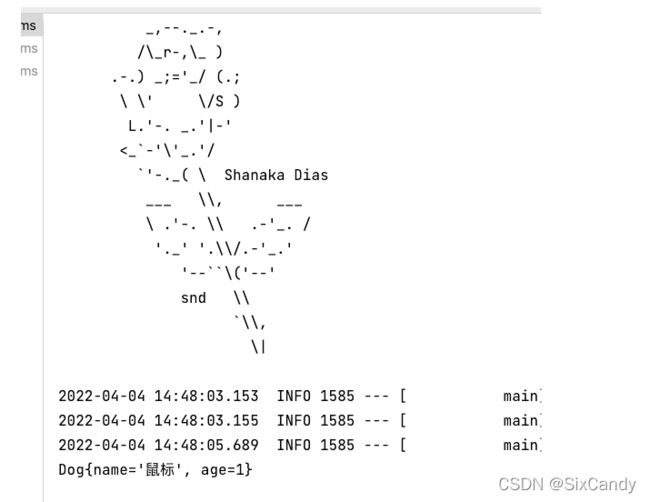
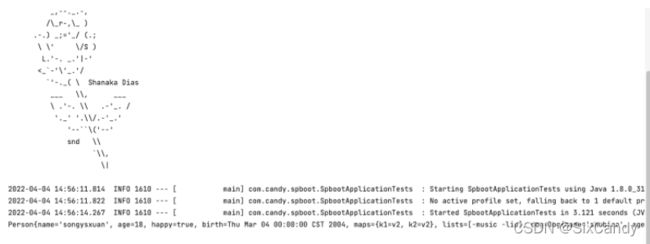
改变banner
1.4 Spring boot核心配置文件(application.yaml)
#key:空格value
server:
  port: 8091
#对象
student:
  name: songyaxuan
  age: 18
#行内写法
students: {name: liuyaowen,age: 16}
#数组
pets:
  -cat
  -dog
pet: [cat,dog]
yaml可以给实体类赋值
原来用@value给实体类赋值:
@Component
public class Dog {
    @Value("鼠标")
    private String name;
    @Value("1")
    private Integer age;
    }
@SpringBootTest
class SpbootApplicationTests {
    @Autowired
    private Dog dog;
    @Test
    void contextLoads() {
        System.out.println(dog);
    }
}
现在通过yaml赋值:
@Component
@ConfigurationProperties(prefix = "person")
public class Person {
    private String name;
    private Integer age;
    private Boolean happy;
    private Date birth;
    private Map<String,Object> maps;
    private List<Object> lists;
    private Dog dog;
}
server:
  port: 8091
person:
  name: songysxuan
  age: 18
  happy: true
  birth: 2004/03/04
  maps: {k1: v2,k2: v2}
  lists:
    -music
    -liu
  dog:
    name: shubiao
    age: 1
@SpringBootTest
class SpbootApplicationTests {
    @Autowired
    private Person person;
    @Test
    void contextLoads() {
        System.out.println(person);
    }
}
绑定指定配置文件并给实体类属性赋值:
tnt.properties:
name=shidaishaoniantuan
age=2
Person.java:
@Component
@PropertySource(value = "classpath:tnt.properties")
public class Person {
    //yaml支持el表达式
    @Value("${name}")
    private String name;
    @Value("${age}")
    private Integer age;
    }
测试类:
@SpringBootTest
class SpbootApplicationTests {
    @Autowired
    //private Dog dog;
    private Person person;
    @Test
    void contextLoads() {
        System.out.println(person.getName());
        System.out.println(person.getAge());
    }
}
1.5 Springboot Web开发
需要解决的问题:
- 导入静态资源
- 首页定制
- jap–模版引擎thymeleaf
- 装配扩展springMVC
- 增删改查
- 拦截器
1.5.1 静态资源
导入依赖:
<dependency>
  <groupId>org.webjarsgroupId>
  <artifactId>jqueryartifactId>
  <version>3.4.1version>
dependency>
访问静态资源:
http://localhost:8080/webjars/jquery/3.4.1/jquery.js
或者创建目录(优先级:resource>statis>public)


1.5.2 首页定制
在templates目录下的所有页面,只能通过controller来跳转!
@RestController
public class IndexController {
    @RequestMapping("/index")
    public String index(){
        return "index";
    }
}
1.5.3 模版引擎thymeleaf
导入依赖:
<dependency>
  <groupId>org.springframework.bootgroupId>
  <artifactId>spring-boot-starter-thymeleafartifactId>
dependency>
导入依赖以后只需要将html放入templates中,就可以通过controller访问来。
html文件中引入:
<html lang="en" xmlns:th="http://www.thymeleaf.org">
<head>
    <meta charset="UTF-8">
    <title>Titletitle>
head>
<body>
 <div th:text="${msg}">div>
body>
html>
1.5.4 装配扩展MVC
先创建一个包config,在里面写一个类
//扩展mvc,implements WebMvcConfigurer并且不可以加注解@EnableWebMvc
@Configuration
public class MyMvcConfig implements WebMvcConfigurer {
    //视图跳转
    @Override
    public void addViewControllers(ViewControllerRegistry registry) {
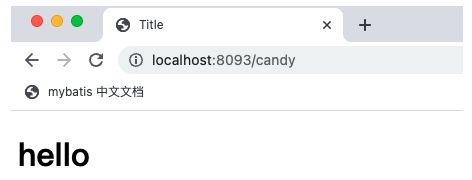
          //请求/candy时页面跳转到hello页面
        registry.addViewController("/candy").setViewName("hello");
    }
}
1.6 项目实战
1.6.1 准备工作
引入Lombok:
<dependency>
  <groupId>org.projectlombokgroupId>
  <artifactId>lombokartifactId>
dependency>
@Data:使用这个注解可以省去实体类中大量的get()、 set()、 toString()等方法。
@AllArgsConstructor:有参构造
@NoArgsConstructor:无参构造
注意:以上注解都是在Lombok中的!!!
package com.candy.pojo;
import lombok.AllArgsConstructor;
import lombok.Data;
import lombok.NoArgsConstructor;

@Data
//有参构造
@AllArgsConstructor
//无参构造
@NoArgsConstructor
public class Department {
    private Integer id;
    private String  departmentName;
}
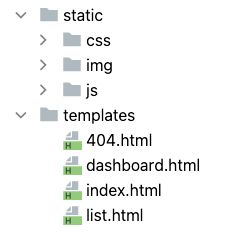
导入模板:
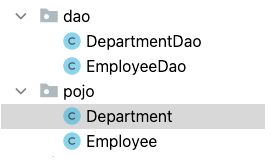
编写实体类和dao层:
Employee.java:
package com.candy.pojo;

import lombok.AllArgsConstructor;
import lombok.Data;
import lombok.NoArgsConstructor;

import java.util.Date;
@Data
@AllArgsConstructor
@NoArgsConstructor
public class Employee {
    private Integer id;
    private String lastName;
    private String email;
    private Integer gender;//0女1男
    private Department department;
    private Date birth;
}
DepartmentDao.java:
package com.candy.dao;
import com.candy.pojo.Department;
import org.springframework.stereotype.Repository;
import java.util.Collection;
import java.util.HashMap;
import java.util.Map;
@Repository
public class DepartmentDao {
    private static Map<Integer, Department> departments = null;
    static {
    departments = new HashMap<Integer, Department>();//创建一个部门表

    departments.put(101,new Department(101,"教学部"));
    departments.put(102,new Department(102,"市场部"));
    departments.put(103,new Department(103,"教研部"));
    departments.put(104,new Department(104,"运营部"));
    departments.put(105,new Department(105,"财务部"));

    }
    //获得所有部门信息
    public Collection<Department> getDepartments(){
        return  departments.values();
    }
    //通过id得到部门
    public Department getDepartmenrById(Integer id){
        return departments.get(id);
    }
}
EmployeeDao.java:
package com.candy.dao;
import com.candy.pojo.Department;
import com.candy.pojo.Employee;
import org.springframework.beans.factory.annotation.Autowired;
import org.springframework.stereotype.Repository;
import java.util.Collection;
import java.util.Date;
import java.util.HashMap;
import java.util.Map;
@Repository
public class EmployeeDao {
    private static Map<Integer,Employee> employees = null;
    @Autowired
    private DepartmentDao departmentDao;
    static {
        employees = new HashMap<Integer,Employee>();//创建一个员工表
        employees.put(1001,new Employee(1001,"马嘉祺","[email protected]",1,new Department(101,"教学部"),new Date()));
        employees.put(1002,new Employee(1002,"丁程鑫","[email protected]",1,new Department(101,"教学部"),new Date()));
        employees.put(1003,new Employee(1003,"宋亚轩","[email protected]",1,new Department(102,"市场部"),new Date()));
        employees.put(1004,new Employee(1004,"刘耀文","[email protected]",1,new Department(102,"市场部"),new Date()));
        employees.put(1005,new Employee(1005,"张真源","[email protected]",1,new Department(103,"教研部"),new Date()));
        employees.put(1006,new Employee(1006,"严浩翔","[email protected]",1,new Department(104,"运营部"),new Date()));
        employees.put(1007,new Employee(1007,"贺峻霖","[email protected]",1,new Department(104,"运营部"),new Date()));

    }
    //主键自增
    private static Integer initId = 1008;
    //增加一个员工
    public void add(Employee employee){
        if (employee.getId()==null){
            employee.setId(initId++);
        }      employee.setDepartment(departmentDao.getDepartmenrById(employee.getDepartment().getId()));
        employees.put(employee.getId(),employee);
    }
    //查询所有员工
    public Collection<Employee> getAll(){
        return employees.values();
    }
    //根据ID查询员工
    public Employee getEmploeeById(Integer id){
        return employees.get(id);
    }
    //删除员工
    public void del(Integer id){
        employees.remove(id);
    }
}
1.6.2 首页实现
先配置路径,可以访问index(在config的MyMvcConfig.java):
@Configuration
public class MyMvcConfig implements WebMvcConfigurer {
    @Override
    public void addViewControllers(ViewControllerRegistry registry) {
        registry.addViewController("/").setViewName("index");
        registry.addViewController("index.html").setViewName("index");
    }
}
导入thymeleaf在模板中,并按照规则修改标签中的属性
#关闭thymeLeaf缓存
spring.thymeleaf.cache=false
DOCTYPE html>
<html lang="en"  xmlns:th="http://www.thymeleaf.org">
	<head>
		<meta http-equiv="Content-Type" content="text/html; charset=UTF-8">
		<meta name="viewport" content="width=device-width, initial-scale=1, shrink-to-fit=no">
		<meta name="description" content="">
		<meta name="author" content="">
		<title>Signin Template for Bootstraptitle>

		<link th:href="@{/css/bootstrap.min.css}" rel="stylesheet">

		<link th:href="@{/css/signin.css}" rel="stylesheet">
	head>
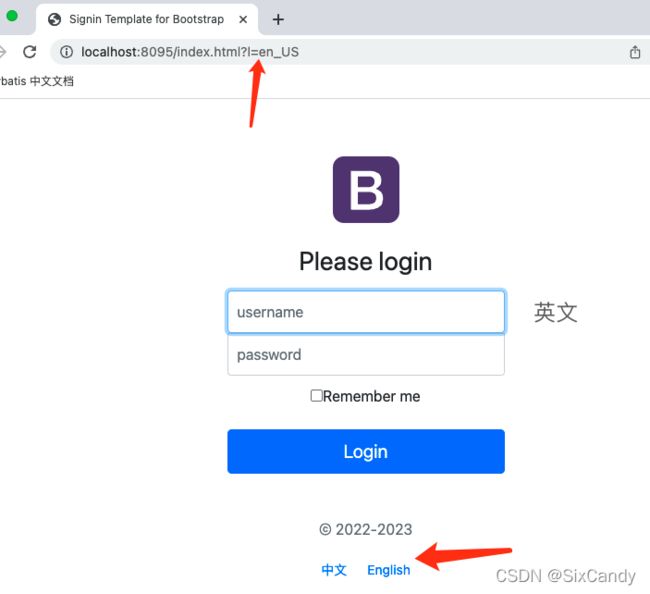
1.6.3 页面国际化
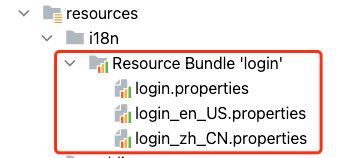
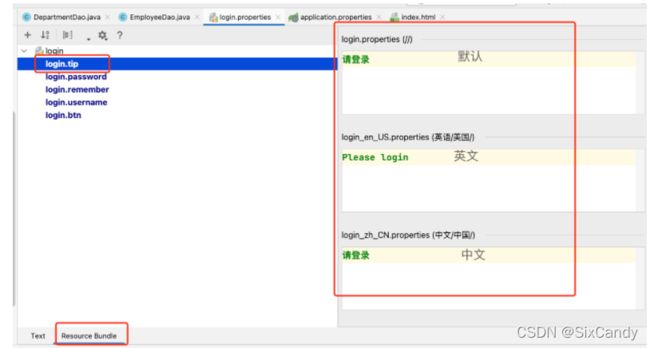
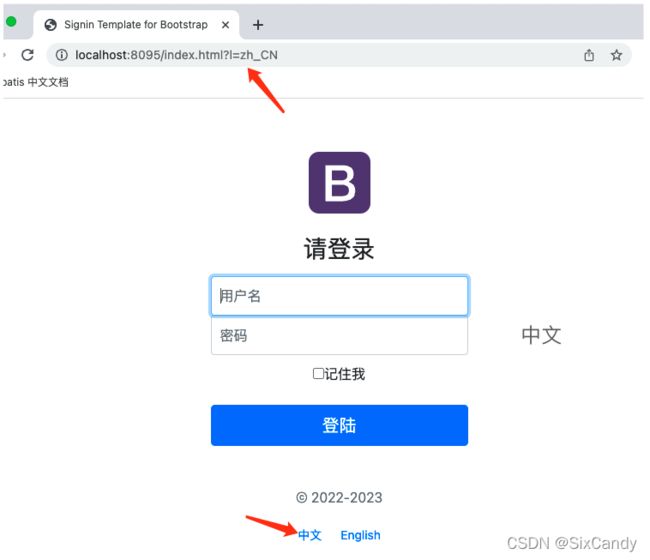
实现页面中文和英文语言切换!!!
然后在application.properties中写好配置文件的路径:
#配置文件的位置
spring.messages.basename=i18n.login
在前端页面中使用语法取值:
	<form class="form-signin" action="dashboard.html">
			<img class="mb-4" th:src="@{/img/bootstrap-solid.svg}" alt="" width="72" height="72">
			<h1 class="h3 mb-3 font-weight-normal" th:text="#{login.tip}">Please loginh1>
			<label class="sr-only" >Usernamelabel>
			<input type="text" class="form-control" th:placeholder="#{login.username}" required="" autofocus="">
			<label class="sr-only">Passwordlabel>
			<input type="password" class="form-control" th:placeholder="#{login.password}" required="">
			<div class="checkbox mb-3">
				<label >
          <input type="checkbox" value="remember-me" th:text="#{login.remember}">
        label>
			div>
			<button class="btn btn-lg btn-primary btn-block" type="submit" th:text="#{login.btn}">Loginbutton>
			<p class="mt-5 mb-3 text-muted">© 2022-2023p>
			<a class="btn btn-sm" th:href="@{/index.html(l='zh_CN')}">中文a>
			<a class="btn btn-sm" th:href="@{/index.html(l='en_US')}">Englisha>
		form>
为了实现中文和English的按钮,我们自己需要自定义国际化,自己写一个类:
![]()
package com.candy.comfig;

import org.springframework.util.StringUtils;
import org.springframework.web.servlet.LocaleResolver;
import javax.servlet.http.HttpServletRequest;
import javax.servlet.http.HttpServletResponse;
import java.util.Locale;


public class MyLocalResolver implements LocaleResolver {
     //解析请求
    @Override
    public Locale resolveLocale(HttpServletRequest request) {
      String  language = request.getParameter("l");
      Locale locale = Locale.getDefault();//如果没有就使用默认的
        //如果请求链接携带了国际化的参数
      if (!StringUtils.isEmpty(language)){
        String[]  split =  language.split("_");
        locale =  new Locale(split[0],split[1]);
        }
        return locale;
    }

    @Override
    public void setLocale(HttpServletRequest request, HttpServletResponse response, Locale locale) {

    }
}
然后在mymvcconfig中注册:
   //自定义国际化
    @Bean
    public LocaleResolver localeResolver(){
        return new MyLocalResolver();
    }
注意:需要先在idea设置的file encoding中将编码语言全部设置为utf-8,否则可能会乱码。
1.6.4 登陆功能实现
在前端页面中设置按钮请求:
<form class="form-signin" th:action="@{/user/login}">
然后写一个controller类管理登陆业务:
package com.candy.controller;
import org.springframework.stereotype.Controller;
import org.springframework.ui.Model;
import org.springframework.util.StringUtils;
import org.springframework.web.bind.annotation.RequestMapping;
import org.springframework.web.bind.annotation.RequestParam;

@Controller
public class LoginController {
    @RequestMapping("/user/login")
    public String login(
            @RequestParam("username") String username,
            @RequestParam("password") String password,
            Model model
             ){
           if(!StringUtils.isEmpty(username)&&"123".equals(password)){
                //登陆成功之后重定向页面
               return "redirect:/main.html";
           }else {
               model.addAttribute("msg","用户名或者密码错误");
               return "index";
           }
    }
}
重定向页面需要在MyMvcConfig.java中配置:
registry.addViewController("main.html").setViewName("dashboard");
1.6.5 登陆拦截器
需要自己写一个拦截类:
package com.candy.comfig;

import org.springframework.web.servlet.HandlerInterceptor;
import javax.servlet.http.HttpServletRequest;
import javax.servlet.http.HttpServletResponse;

public class LoginHandlerInterceptor implements HandlerInterceptor {
    @Override
    public boolean preHandle(HttpServletRequest request, HttpServletResponse response, Object handler) throws Exception {
        //登陆成功之后应该有用户的session
      Object   loginUser = request.getSession().getAttribute("loginUser");
       if (loginUser==null){//没有登陆
           request.setAttribute("msg","没有权限,请先登陆");
           request.getRequestDispatcher("/index.html").forward(request,response);
           return false;
       }else {
           return true;
       }
    }
}
在loginController.java中添加session(并将用户名放入session中保存):
最后在MyMvcConfig.java中注册配置类:
 @Override
    public void addInterceptors(InterceptorRegistry registry) {
        registry.addInterceptor(new LoginHandlerInterceptor())
                .addPathPatterns("/**").excludePathPatterns("/index.html","/","/user/login","/css/**","/img/**","/img/**");

    }
解释:在所有路径下应用,除了/index.html、/、/user/login、所有静态资源
在前端页面中取出用户名:
[[${session.loginUser}]]
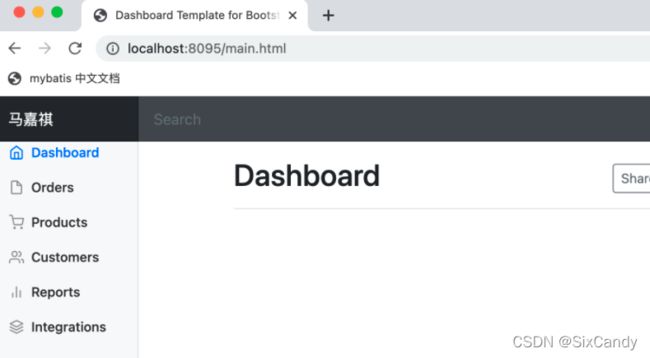
直接访问main.html会被拦截器阻拦:
正常登陆后,会显示用户名:
1.6.6 展示员工页面
抽取公布组件:
新建文件commons,创建commons.html存放公共的导航栏:
首页在commons.html中引入
<html lang="en" xmlns:th="http://www.thymeleaf.org">
将原来dashboard和list中公共的头部导航和侧边导航栏:
<nav class="navbar navbar-dark sticky-top bg-dark flex-md-nowrap p-0" th:fragment="topbar">
    <a class="navbar-brand col-sm-3 col-md-2 mr-0" href="http://getbootstrap.com/docs/4.0/examples/dashboard/#">[[${session.loginUser}]]a>
    <input class="form-control form-control-dark w-100" type="text" placeholder="Search" aria-label="Search">
    <ul class="navbar-nav px-3">
        <li class="nav-item text-nowrap">
            <a class="nav-link" href="http://getbootstrap.com/docs/4.0/examples/dashboard/#">注销a>
        li>
    ul>
nav>
<nav class="col-md-2 d-none d-md-block bg-light sidebar" th:fragment="sidebar">
    <div class="sidebar-sticky">
        <ul class="nav flex-column">
            <li class="nav-item">
                <a th:class="${active=='main.html'?'nav-link active':'nav-link'}" th:href="@{/main.html}">
                    <svg xmlns="http://www.w3.org/2000/svg" width="24" height="24" viewBox="0 0 24 24" fill="none" stroke="currentColor" stroke-width="2" stroke-linecap="round" stroke-linejoin="round" class="feather feather-home">
                        <path d="M3 9l9-7 9 7v11a2 2 0 0 1-2 2H5a2 2 0 0 1-2-2z">path>
                        <polyline points="9 22 9 12 15 12 15 22">polyline>
                    svg>
                    首页 <span class="sr-only">(current)span>
                a>
            li>
            <li class="nav-item">
                <a th:class="${active=='list.html'?'nav-link active':'nav-link'}" th:href="@{/emps}">
                    <svg xmlns="http://www.w3.org/2000/svg" width="24" height="24" viewBox="0 0 24 24" fill="none" stroke="currentColor" stroke-width="2" stroke-linecap="round" stroke-linejoin="round" class="feather feather-users">
                        <path d="M17 21v-2a4 4 0 0 0-4-4H5a4 4 0 0 0-4 4v2">path>
                        <circle cx="9" cy="7" r="4">circle>
                        <path d="M23 21v-2a4 4 0 0 0-3-3.87">path>
                        <path d="M16 3.13a4 4 0 0 1 0 7.75">path>
                    svg>
                    员工管理
                a>
            li>
            <li class="nav-item">
                <a class="nav-link" href="http://getbootstrap.com/docs/4.0/examples/dashboard/#">
                    <svg xmlns="http://www.w3.org/2000/svg" width="24" height="24" viewBox="0 0 24 24" fill="none" stroke="currentColor" stroke-width="2" stroke-linecap="round" stroke-linejoin="round" class="feather feather-bar-chart-2">
                        <line x1="18" y1="20" x2="18" y2="10">line>
                        <line x1="12" y1="20" x2="12" y2="4">line>
                        <line x1="6" y1="20" x2="6" y2="14">line>
                    svg>
                    部门管理
                a>
            li>
        ul>
    div>
nav>
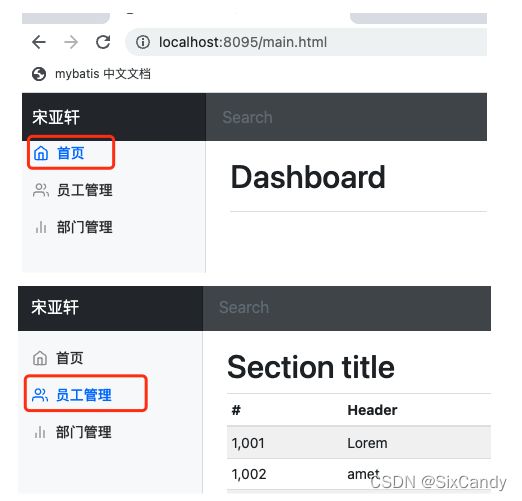
dashboard和list中引入:
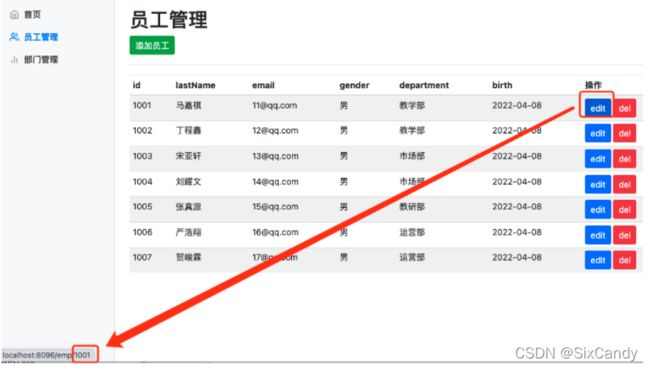
展示员工信息(循环取值):
<table class="table table-striped table-sm">
							<thead>
								<tr>
									<th>idth>
									<th>lastNameth>
									<th>emailth>
									<th>genderth>
									<th>departmentth>
									<th>birthth>
									<th>操作th>
								tr>
							thead>
							<tbody>
								<tr th:each="emp:${emps}">
                   <td th:text="${emp.getId()}">td>
									 <td th:text="${emp.getLastName()}">td>
									 <td th:text="${emp.getEmail()}">td>
									 <td th:text="${emp.getGender()==0?'女':'男'}">td>
									 <td th:text="${emp.department.getDepartmentName()}">td>
									 <td th:text="${#dates.format(emp.getBirth(),'yyyy-MM-dd HH:mm:ss')}">     td>
									 <td>
										 <button class="btn btn-sm btn-primary">editbutton>
										 <button class="btn btn-sm btn-danger">delbutton>
									 td>
								tr>
							tbody>
						table>
1.6.7 添加、修改、删除员工以及404处理和注销
- 添加员工
先把add.html写出来(用list.html改写)
<div class="container-fluid">
			<div class="row">
		       <div th:insert="~{commons/commons::sidebar(active='list.html')}">div>

				<main role="main" class="col-md-9 ml-sm-auto col-lg-10 pt-3 px-4">
					<form th:action="@{/emp}" method="post">
						<div class="form-group">
							<label>lastNamelabel>
							<input type="text"  name="lastName" class="form-control"  placeholder="weishenme">
						div>
						<div class="form-group">
							<label>Emaillabel>
							<input type="email" name="email" class="form-control"  placeholder="[email protected]">
						div>
						<div class="form-group">
							<label>Genderlabel>
							<div class="form-check form-check-inline" >
							   <input class="form-check-input" type="radio" name="gender" value="1">
								<label class="form-check-label">男label>
							div>
							<div class="form-check form-check-inline" >
								<input class="form-check-input" type="radio" name="gender" value="0">
								<label class="form-check-label">女label>
							div>
						div>
						<div class="form-group">
							<label>departmentlabel>
							<select class="form-control" name="department.id" >
								<option th:each="dept:${dep}" th:text="${dept.getDepartmentName()}" th:value="${dept.getId()}">option>
							select>
						div>

						<div class="form-group">
							<label >Birthlabel>
							<input type="text" class="form-control" name="birth" placeholder="tnt">
						div>
						<button type="submit" class="btn btn-primary">addbutton>
					form>
				main>
			div>
		div>
然后去写controller中添加员工的方法:
    @GetMapping("/emp")
    public String toAddpage(Model model){
        //查出部门所有的信息
    Collection<Department>  departments =  departmentDao.getDepartments();
    model.addAttribute("dep",departments);
        return "emp/add";
    }
    @PostMapping("/emp")
    public String addEmp(Employee employee){
        //添加的操作 formward
        System.out.println(employee);
        employeeDao.add(employee);//保存员工信息
        return "redirect:/emp";
    }
注意:
#时间日期格式化
spring.mvc.format.date=yyyy-MM-dd
- 修改员工
添加一个update.html页面(由add.html页面copy)
<main role="main" class="col-md-9 ml-sm-auto col-lg-10 pt-3 px-4">
					<form th:action="@{/updateEmp}" method="post">
						<input type="hidden" name="id" th:value="${emp.getId()}">
						<div class="form-group">
							<label>lastNamelabel>
							<input type="text"  th:value="${emp.getLastName()}" name="lastName" class="form-control"  placeholder="weishenme">
						div>
						<div class="form-group">
							<label>Emaillabel>
							<input type="email" th:value="${emp.getEmail()}" name="email" class="form-control"  placeholder="[email protected]">
						div>
						<div class="form-group">
							<label>Genderlabel>
							<div class="form-check form-check-inline" >
							   <input th:checked="${emp.getGender()==1}" class="form-check-input" type="radio" name="gender" value="1">
								<label class="form-check-label">男label>
							div>
							<div class="form-check form-check-inline" >
								<input th:checked="${emp.getGender()==0}" class="form-check-input" type="radio" name="gender" value="0">
								<label class="form-check-label">女label>
							div>
						div>
						<div class="form-group">
							<label>departmentlabel>
							<select class="form-control" name="department.id" >
								<option  th:selected="${dept.getId()==emp.getDepartment().getId()}" th:each="dept:${departments}" th:text="${dept.getDepartmentName()}" th:value="${dept.getId()}">option>
							select>
						div>

						<div class="form-group">
							<label >Birthlabel>
							<input  th:value="${#dates.format(emp.getBirth(),'yyyy-MM-dd')}" type="text" class="form-control" name="birth" placeholder="tnt">
						div>
						<button type="submit" class="btn btn-primary">donebutton>
					form>
				main>
在controller层加入修改的方法:
  @GetMapping("emp/{id}")
      public String toUpdateEmp(@PathVariable("id")Integer id,Model model){
          Employee employee = employeeDao.getEmploeeById(id);
          model.addAttribute("emp",employee);
          Collection<Department>  departments =  departmentDao.getDepartments();
          model.addAttribute("departments",departments);
           return "emp/update";
      }
      @PostMapping("updateEmp")
      public String updateEmp(Employee employee){
        employeeDao.add(employee);
        return "redirect:/emps";
      }
- 删除员工
<a class="btn btn-sm btn-danger" th:href="@{delemp/{empId}(empId=${emp.id})}">dela>
  @GetMapping("delemp/{id}")
    public String delEmp(@PathVariable("id")Integer id){
        employeeDao.del(id);
        return "redirect:/emps";
    }
- 404处理
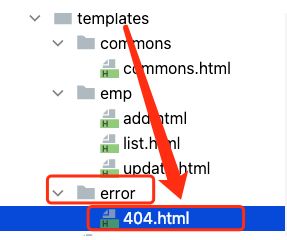
在template文件中创建一个error文件里面放入一些处理错误的页面,idea会自动配置路径:
- 注销
<li class="nav-item text-nowrap">
  <a class="nav-link" th:href="@{/user/logout}">注销a>
li>
  @RequestMapping("/user/logout")
    public String logout(HttpSession session){
         session.invalidate();
         return "redirect:/index.html";
    }
1.7 Spring Data
1.7.1 整合JDBC使用
添加依赖:
<dependency>
  <groupId>org.springframework.bootgroupId>
  <artifactId>spring-boot-starter-jdbcartifactId>
dependency>
<dependency>
  <groupId>org.springframework.bootgroupId>
  <artifactId>spring-boot-starter-webartifactId>
dependency>
<dependency>
  <groupId>mysqlgroupId>
  <artifactId>mysql-connector-javaartifactId>
  <scope>runtimescope>
dependency>
编写application.yaml:
  spring:
    datasource:
      username: root
      password: root12345
      url: jdbc:mysql://localhost:3306/mybts?useUnicode=true&characterEncoding=utf-8&useSSL=true&serverTimezone=UTC
      driver-class-name: com.mysql.cj.jdbc.Driver
测试:
@SpringBootTest
class SpdataApplicationTests {
    @Autowired
    DataSource dataSource;
    @Test
    void contextLoads() {
        //查看默认数据源
        System.out.println(dataSource.getClass());
        //获得数据库连接
        Connection connection = dataSource.getConnection();
        System.out.println(connection);
        //关闭连接
        connection.close();
    }
}
查询数据库内容:
@RestController
public class JDBCController {
       @Autowired
       JdbcTemplate jdbcTemplate;
       //查询数据库的所有信息
       @GetMapping("/userList")
       public List<Map<String,Object>> userList(){
            String sql = "select * from mybts.user";
            List<Map<String,Object>> maps = jdbcTemplate.queryForList(sql);
            return maps;
       }
}
![]()
1.7.2 整合Druid数据源
导入druid依赖:
<dependency>
  <groupId>com.alibabagroupId>
  <artifactId>druidartifactId>
  <version>1.2.7version>
dependency>
在配置文件中选择数据库的数据源类型:
spring:
  datasource:
    username: root
    password: root12345
    url: jdbc:mysql://localhost:3306/mybts?useUnicode=true&characterEncoding=utf-8&useSSL=true&serverTimezone=UTC
    driver-class-name: com.mysql.cj.jdbc.Driver
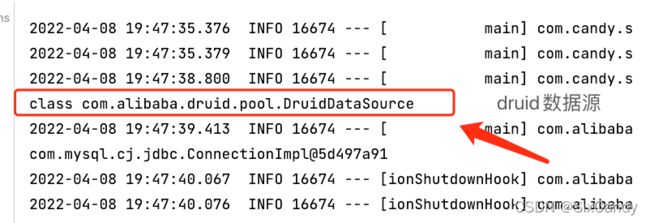
    type: com.alibaba.druid.pool.DruidDataSource
druid常用配置:
druid:
  #     配置初始化大小、最小、最大线程数
  initialSize: 5
  minIdle: 5
  #     CPU核数+1,也可以大些但不要超过20,数据库加锁时连接过多性能下降
  maxActive: 20
  #     最大等待时间,内网:800,外网:1200(三次握手1s)
  maxWait: 60000
  timeBetweenEvictionRunsMillis: 60000
  #     配置一个连接在池中最大空间时间,单位是毫秒
  minEvictableIdleTimeMillis: 300000
  validationQuery: SELECT 1
  testWhileIdle: true
  #     设置从连接池获取连接时是否检查连接有效性,true检查,false不检查
  testOnBorrow: false
  #     设置从连接池归还连接时是否检查连接有效性,true检查,false不检查
  testOnReturn: false
  #     可以支持PSCache(提升写入、查询效率)
  poolPreparedStatements: true
  #   配置监控统计拦截的filters,去掉后监控界面sql无法统计,'wall'用于防火墙
  filters: stat,wall,log4j
  #     保持长连接
  keepAlive: true
  maxPoolPreparedStatementPerConnectionSize: 20
  useGlobalDataSourceStat: true
  connectionProperties: druid.stat.mergeSql=true;druid.stat.slowSqlMillis=500
写一个druidconfig:
@Configuration
public class DruidConfig {
    @ConfigurationProperties(prefix = "spring.datasource")
    @Bean
    public DataSource druidDataSource(){
     return new DruidDataSource();
    }
    //后台监控
    @Bean
    public ServletRegistrationBean statViewServlet(){
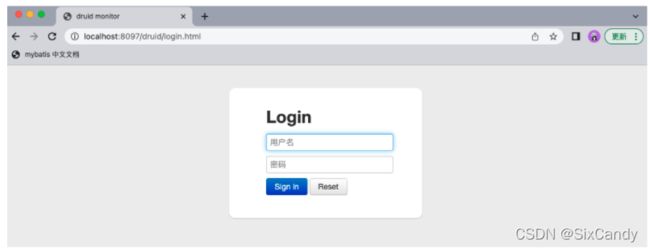
     ServletRegistrationBean<StatViewServlet>  bean =  new ServletRegistrationBean<>(new StatViewServlet(),"/druid/*");
      //后台账号密码配置
        HashMap<String,String> initParameters = new HashMap<>();
        //增加配置
        initParameters.put("loginUsername","admin");//key是固定的
        initParameters.put("loginPassword","123456");
        //允许谁访问  空:所有人都可以
        initParameters.put("allow","");
        //禁止谁访问   谁,域名
        //initParameters.put("candy","192.168.11.123");
        bean.setInitParameters(initParameters);//设置初始化参数
        return bean;
    }
}
web的过滤器:
//WebStatFilter:用于配置Web和Druid数据源之间的管理关联监控统计 @Bean
public FilterRegistrationBean webStatFilter() {
  FilterRegistrationBean bean = new FilterRegistrationBean();
  bean.setFilter(new WebStatFilter());
  //exclusions:设置哪些请求进行过滤排除掉,从而不进行统计
  Map<String, String> initParams = new HashMap<>(); initParams.put("exclusions", "*.js,*.css,/druid/*,/jdbc/*"); bean.setInitParameters(initParams);
  //"/*" 表示过滤所有请求
  bean.setUrlPatterns(Arrays.asList("/*"));
  return bean;
}
1.7.3 整合mybatis
导入依赖:
  <dependency>
    <groupId>org.mybatis.spring.bootgroupId>
    <artifactId>mybatis-spring-boot-starterartifactId>
    <version>2.2.1version>
  dependency>
连接数据库,创建实体类(引入Lombok):
@Data
@NoArgsConstructor
@AllArgsConstructor
public class User {
     private int id;
     private String name;
     private String password;
}
写mapper.java:
@Mapper
@Repository
public interface UserMapper {
    List<User> queryUserList();
    User queryById(int id);
    int addUser(User user);
    int updateUser(User user);
    int delUser(User user);
}
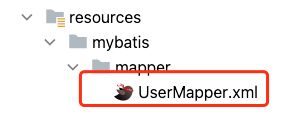
创建UserMapper.xml:
DOCTYPE mapper
        PUBLIC "-//mybatis.org//DTD Mapper 3.0//EN"
        "http://mybatis.org/dtd/mybatis-3-mapper.dtd">
<mapper namespace="com.candy.mapper.UserMapper">
    <select id="queryUserList" resultType="com.candy.pojo.User">
        select * from user
    select>
    <select id="queryById" parameterType="int" resultType="com.candy.pojo.User" >
        select * from user where id =#{id}
    select>
    <insert id="addUser" parameterType="com.candy.pojo.User">
        insert into user(id,name,password) values (#{id},#{name},#{password})
    insert>
    <update id="updateUser" parameterType="com.candy.pojo.User">
        update user set name = #{name},password = #{password}
    update>
    <delete id="delUser" parameterType="int">
        delete from user where id =#{id}
    delete>
mapper>
在application.yaml中写别名:
mybatis:
  type-aliases-package: com.candy.pojo
  mapper-locations:
    - classpath:mybatis/mapper/*.xml
编写controller测试:
@RestController
public class UserController {
    @Autowired
    private UserMapper userMapper;
    @GetMapping("/queryUserList")
    public List<User> queryUserList(){
        List<User> userList = userMapper.queryUserList();
        return userList;
    }
}
1.8 Spring Security
Spring Security is a powerful and highly customizable authentication and access-control framework.
记住以下类:
- WebSecurityConfigurerAdapter 自定义security策略
- AuthenticationManagerBuilder 自定义认证策略
- @EnableWebSecurity: 开启WebSecurity模式 @Enablexxxx开启某个功能
1.8.1 Spring Security环境搭建
导入依赖:
<dependency>
  <groupId>org.springframework.bootgroupId>
  <artifactId>spring-boot-starter-securityartifactId>
dependency>
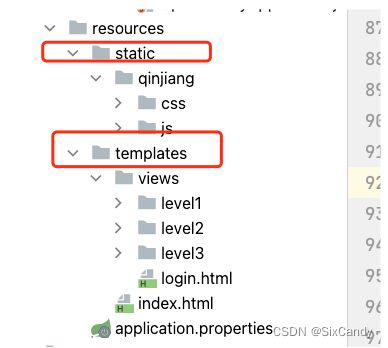
导入静态资源:
https://gitee.com/plushuang/plushuang-springsecurity-project/tree/master/src/main
放入项目中:
关闭模版引擎缓存:
spring.thymeleaf.cache=false
编写controller:
package com.candy.controller;

import org.springframework.stereotype.Controller;
import org.springframework.web.bind.annotation.PathVariable;
import org.springframework.web.bind.annotation.RequestMapping;

@Controller
public class RouterController {
    @RequestMapping({"/","index"})
     public String index(){
         return "index";
     }
    @RequestMapping("/toLogin")
    public String toLogin(){
        return "/views/login";
    }
      @RequestMapping("/level1/{id}")
    public String level1(@PathVariable("id")int id){
        return "/views/level1/"+id;
    }
    @RequestMapping("/level2/{id}")
    public String level2(@PathVariable("id")int id){
        return "/views/level2/"+id;
    }
    @RequestMapping("/level3/{id}")
    public String level3(@PathVariable("id")int id){
        return "/views/level3/"+id;
    }
}
进入index:
1.8.2 用户认证与授权
创建config:
package com.candy.config;

import org.springframework.security.config.annotation.web.builders.HttpSecurity;
import org.springframework.security.config.annotation.web.configuration.EnableWebSecurity;
import org.springframework.security.config.annotation.web.configuration.WebSecurityConfigurerAdapter;
@EnableWebSecurity
public class SecurityConfig extends WebSecurityConfigurerAdapter {
    //链式编程
    //授权
    @Override
    protected void configure(HttpSecurity http) throws Exception{
        //首页所有人可以访问,但是功能页只有有权限的人才能访问
        http.authorizeRequests()
                .antMatchers("/").permitAll()
                .antMatchers("/level1/**").hasRole("vip1")
                .antMatchers("/level2/**").hasRole("vip2")
                .antMatchers("/level3/**").hasRole("vip3");
        //没有权限会跳转到登陆页面
        http.formLogin().loginPage("/toLogin");
        //关闭csrf 防护
        http.csrf().disable();
    }
}
在次点击level页面后会跳转到登陆页面:
添加认证(重写configure(AuthenticationManagerBuilder auth) 方法):
//认证
//密码编码 passwordEncoder
@Override
protected void configure(AuthenticationManagerBuilder auth) throws Exception {
  auth.inMemoryAuthentication().passwordEncoder(new BCryptPasswordEncoder())
    .withUser("123").password(new BCryptPasswordEncoder().encode("123")).roles("vip1","vip2")
    .and()
    .withUser("dingchengxin").password(new BCryptPasswordEncoder().encode("123")).roles("vip3")
    .and()
    .withUser("tnt").password(new BCryptPasswordEncoder().encode("123")).roles("vip1");
}
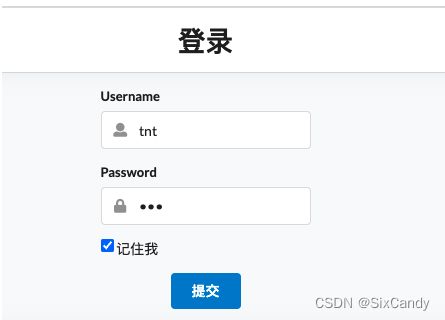
测试,登陆tnt账户:
只能访问level1的内容,没有权限访问level2和level3的内容!
连接数据库的改写方法
import javax.sql.DataSource;

@Autowired
private DataSource dataSource;

@Override
protected void configure(AuthenticationManagerBuilder auth) throws Exception {
  auth.jdbcAuthentication()
    .dataSource(dataSource)
    .usersByUsernameQuery("select username,password,enabled from users WHERE username=?")
    .authoritiesByUsernameQuery("select username,authority from authorities where username=?")
    .passwordEncoder(new BCryptPasswordEncoder());
}
1.8.3 注销及权限控制
- 注销
//注销
http.logout();
<div sec:authorize="isAuthenticated()">
  <a class="item" th:href="@{/logout}">
    <i class="address card icon">i> 注销
  a>
div>
导入thymeleaf和springsecurity整合包:
<dependency>
  <groupId>org.thymeleaf.extrasgroupId>
  <artifactId>thymeleaf-extras-springsecurity5artifactId>
  <version>3.0.4.RELEASEversion>
dependency>
改造index:
springsecurity命名空间:
<html lang="en" xmlns:th="http://www.thymeleaf.org"
      xmlns:sec="http://www.thymeleaf.org/thymeleaf-extras-springsecurity5"
>
<body>

  <div class="ui container">

    <div class="ui segment" id="index-header-nav" th:fragment="nav-menu">
      <div class="ui secondary menu">
        <a class="item"  th:href="@{/index}">首页a>

        <div class="right menu">

          <div sec:authorize="!isAuthenticated()">
            <a class="item" th:href="@{/toLogin}">
              <i class="address card icon">i> 登录
            a>
          div>

          <div sec:authorize="isAuthenticated()">
            <a class="item">
              <i class="address card icon">i>
              用户名:<span sec:authentication="principal.username">span>
              角色:<span sec:authentication="principal.authorities">span>
            a>
          div>
          <div sec:authorize="isAuthenticated()">
            <a class="item" th:href="@{/logout}">
              <i class="address card icon">i> 注销
            a>
          div>
        div>
      div>
    div>
    <div class="ui segment" style="text-align: center">
      <h3>Spring Securityh3>
    div>
    <div>
      <br>
      <div class="ui three column stackable grid">
        <div class="column" sec:authorize="hasRole('vip1')">
          <div class="ui raised segment">
            <div class="ui">
              <div class="content">
                <h5 class="content">Level 1h5>
                <hr>
                <div><a th:href="@{/level1/1}"><i class="bullhorn icon">i> Level-1-1a>div>
                <div><a th:href="@{/level1/2}"><i class="bullhorn icon">i> Level-1-2a>div>
                <div><a th:href="@{/level1/3}"><i class="bullhorn icon">i> Level-1-3a>div>
              div>
            div>
          div>
        div>

        <div class="column" sec:authorize="hasRole('vip2')">
          <div class="ui raised segment">
            <div class="ui">
              <div class="content">
                <h5 class="content">Level 2h5>
                <hr>
                <div><a th:href="@{/level2/1}"><i class="bullhorn icon">i> Level-2-1a>div>
                <div><a th:href="@{/level2/2}"><i class="bullhorn icon">i> Level-2-2a>div>
                <div><a th:href="@{/level2/3}"><i class="bullhorn icon">i> Level-2-3a>div>
              div>
            div>
          div>
        div>

        <div class="column" sec:authorize="hasRole('vip3')">
          <div class="ui raised segment">
            <div class="ui">
              <div class="content">
                <h5 class="content">Level 3h5>
                <hr>
                <div><a th:href="@{/level3/1}"><i class="bullhorn icon">i> Level-3-1a>div>
                <div><a th:href="@{/level3/2}"><i class="bullhorn icon">i> Level-3-2a>div>
                <div><a th:href="@{/level3/3}"><i class="bullhorn icon">i> Level-3-3a>div>
              div>
            div>
          div>
        div>

      div>
    div>

  div>
  <script th:src="@{/qinjiang/js/jquery-3.1.1.min.js}">script>
  <script th:src="@{/qinjiang/js/semantic.min.js}">script>
body>
html>
测试,登陆123,实现动态菜单:
1.8.4 记住我及首页定制
- 记住我
//开启记住我功能   与下面的name属性匹配
http.rememberMe().rememberMeParameter("remember");
<div class="field">
  <input type="checkbox" name="remember"> 记住我
div>
测试:
关闭浏览器后,依然可以跳转到上面的画面!记住我成功!
- 首页定制
1.9 Shiro
Apache Shiro 是 Java 的一个安全框架。
回顾核心API:
- Subject:用户主体
- SecurityManager:安全管理器
- Realm:Shiro 连接数据
1.9.1 Shiro快速开始
导入依赖:
<dependencies>
  <dependency>
    <groupId>org.apache.shirogroupId>
    <artifactId>shiro-coreartifactId>
    <version>1.4.1version>
  dependency>
  <dependency>
    <groupId>org.slf4jgroupId>
    <artifactId>slf4j-simpleartifactId>
    <version>1.7.21version>
  dependency>
  <dependency>
    <groupId>org.slf4jgroupId>
    <artifactId>slf4j-apiartifactId>
    <version>1.7.21version>
  dependency>
  <dependency>
    <groupId>org.slf4jgroupId>
    <artifactId>slf4j-simpleartifactId>
    <version>1.7.21version>
  dependency>
  <dependency>
    <groupId>org.slf4jgroupId>
    <artifactId>jcl-over-slf4jartifactId>
    <version>1.7.21version>
    <scope>testscope>
  dependency>
dependencies>
导入log4j:
<dependency>
  <groupId>log4jgroupId>
  <artifactId>log4jartifactId>
  <version>1.2.17version>
dependency>
编写log4j.properties:
log4j.rootLogger=INFO, stdout
log4j.appender.stdout=org.apache.log4j.ConsoleAppender
log4j.appender.stdout.layout=org.apache.log4j.PatternLayout
log4j.appender.stdout.layout.ConversionPattern=%d %p [%c] - %m %n
# General Apache libraries
log4j.logger.org.apache=WARN
# Spring
log4j.logger.org.springframework=WARN
# Default Shiro logging
log4j.logger.org.apache.shiro=INFO
# Disable verbose logging
log4j.logger.org.apache.shiro.util.ThreadContext=WARN
log4j.logger.org.apache.shiro.cache.ehcache.EhCache=WARN
创建shiro.ini:
[users]
 #user'root'withpassword'secret'andthe'admin'role
root=secret,admin
 #user'guest'withthepassword'guest'andthe'guest'role
 guest=guest,guest
#user'presidentskroob'withpassword'12345'("That'sthesame combination on
#myluggage!!!";)),androle'president'
presidentskroob=12345,president
#user'darkhelmet'withpassword'ludicrousspeed'androles'darklord'and 'schwartz'
darkhelmet=ludicrousspeed,darklord,schwartz
 #user'lonestarr'withpassword'vespa'androles'goodguy'and'schwartz'
lonestarr=vespa,goodguy,schwartz
[roles]
 #'admin'rolehasallpermissions,indicatedbythewildcard'*'
admin=*
 #The'schwartz'rolecandoanything(*)withanylightsaber:
schwartz=lightsaber:*
#The'goodguy'roleisallowedto'drive'(action)thewinnebago(type) with
#licenseplate'eagle5'(instancespecificid)
goodguy=winnebago:drive:eagle5
测试QuickStrat.java:
import org.apache.shiro.SecurityUtils;
import org.apache.shiro.authc.*;
import org.apache.shiro.config.IniSecurityManagerFactory;
import org.apache.shiro.mgt.SecurityManager;
import org.apache.shiro.session.Session;
import org.apache.shiro.subject.Subject;
import org.apache.shiro.util.Factory;
import org.slf4j.Logger;
import org.slf4j.LoggerFactory;

public class QuickStrat {
    private static final transient Logger log = LoggerFactory.getLogger(QuickStrat.class);
    public static void main(String[] args) {
        Factory<SecurityManager> factory = new
                IniSecurityManagerFactory("classpath:shiro.ini");
        SecurityManager securityManager = factory.getInstance();
        SecurityUtils.setSecurityManager(securityManager);
        //获取当前的用户的对象
        Subject currentUser = SecurityUtils.getSubject();
        //通过当前用户获取session
        Session session = currentUser.getSession();
        session.setAttribute("someKey", "aValue");
        String value = (String) session.getAttribute("someKey");
        if (value.equals("aValue")) {
            log.info("Retrieved the correct value! [" + value + "]");
        }
        //判断当前用户是否被认证
        if (!currentUser.isAuthenticated()) {
            //令牌
            UsernamePasswordToken token = new
                    UsernamePasswordToken("lonestarr", "vespa");
            token.setRememberMe(true);//设置记住我
            try {
                currentUser.login(token);//执行登陆操作
            } catch (UnknownAccountException uae) {  //用户名不存在
                log.info("There is no user with username of " +
                        token.getPrincipal());
            } catch (IncorrectCredentialsException ice) {//密码错误
                log.info("Password for account " +
                        token.getPrincipal() + " was incorrect!");
            } catch (LockedAccountException lae) { //账号被锁定
                log.info("The account for username " + token.getPrincipal() + " is locked.  " + "Please contact your administrator to unlock it.");
            } catch (AuthenticationException ae) {//认证异常
                //unexpected condition?  error?
            } }
        log.info("User [" + currentUser.getPrincipal() + "] logged in successfully.");
        //测试角色
        if (currentUser.hasRole("schwartz")) {
            log.info("May the Schwartz be with you!");
        } else {
            log.info("Hello, mere mortal.");
        }
        //粗粒度
        if (currentUser.isPermitted("lightsaber:wield")) {
            log.info("You may use a lightsaber ring.  Use it wisely.");
        } else {
            log.info("Sorry, lightsaber rings are for schwartz masters only.");
        }
        //细粒度
        if (currentUser.isPermitted("winnebago:drive:eagle5")) {
            log.info("You are permitted to 'drive' the winnebago with license plate (id) 'eagle5'.  " +
            "Here are the keys - have fun!");
        } else {
            log.info("Sorry, you aren't allowed to drive the 'eagle5' winnebago!");
        }
        //注销
        currentUser.logout();
        //结束
        System.exit(0);
    }
}
1.9.2 Spring boot集成Shiro
创建一个Spring boot项目
导入Spring boot web和thymeleaf
<dependency>
  <groupId>org.springframework.bootgroupId>
  <artifactId>spring-boot-starter-webartifactId>
dependency>
<dependency>
  <groupId>org.springframework.bootgroupId>
  <artifactId>spring-boot-starter-thymeleafartifactId>
dependency>
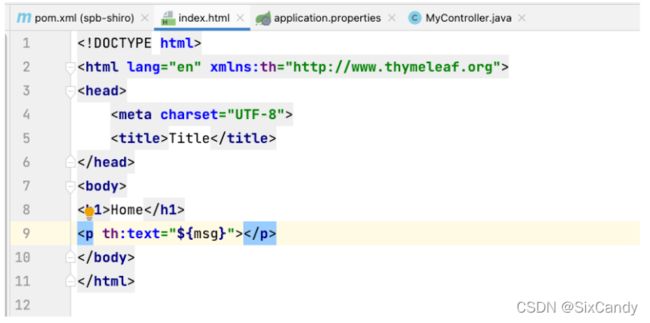
写一个静态页面:
写controller:
@Controller
public class MyController {
    @RequestMapping({"/","/index"})
    public String toIndex(Model model){
       model.addAttribute("msg","hello,honey");
       return "index";
    }
}
导入shiro整合依赖:
<dependency>
  <groupId>org.apache.shirogroupId>
  <artifactId>shiro-springartifactId>
  <version>1.4.1version>
dependency>
编写config:
package com.candy.config;
import org.springframework.context.annotation.Configuration;

@Configuration
public class ShiroConfig {

//第三步:创建 ShiroFilterFactoryBean
//第二步:创建 DefaultWebSecurityManager
//第一步:创建 realm 对象 自定义
}
- 第一步:创建 realm 对象 自定义
package com.candy.config;

import org.apache.shiro.authc.AuthenticationException;
import org.apache.shiro.authc.AuthenticationInfo;
import org.apache.shiro.authc.AuthenticationToken;
import org.apache.shiro.authz.AuthorizationInfo;
import org.apache.shiro.realm.AuthorizingRealm;
import org.apache.shiro.subject.PrincipalCollection;

//自定义  继承AuthorizingRealm
public class UserRealm extends AuthorizingRealm {
    //授权
    protected AuthorizationInfo doGetAuthorizationInfo(PrincipalCollection principalCollection) {
        System.out.println("授权了");
        return null;
    }
   //认证
    protected AuthenticationInfo doGetAuthenticationInfo(AuthenticationToken authenticationToken) throws AuthenticationException {
        System.out.println("认证了");
        return null;
    }
}
在config中使用:
@Bean
public UserRealm userRealm(){
  return new UserRealm();
}
- 第二步:创建 DefaultWebSecurityManager(死代码)
@Bean
public DefaultWebSecurityManager getDefaultWebSecurityManager(@Qualifier("userRealm") UserRealm userRealm){
  DefaultWebSecurityManager securityManager = new DefaultWebSecurityManager();
  //关联UserRealm
  securityManager.setRealm(userRealm);
  return securityManager;
}
- 第三步:创建 ShiroFilterFactoryBean
@Bean
public ShiroFilterFactoryBean getShiroFilterFactoryBean(@Qualifier("getDefaultWebSecurityManager") DefaultWebSecurityManager defaultWebSecurityManager){
  ShiroFilterFactoryBean bean = new ShiroFilterFactoryBean();
  //设置安全管理器
  bean.setSecurityManager(defaultWebSecurityManager);
  return bean;
}
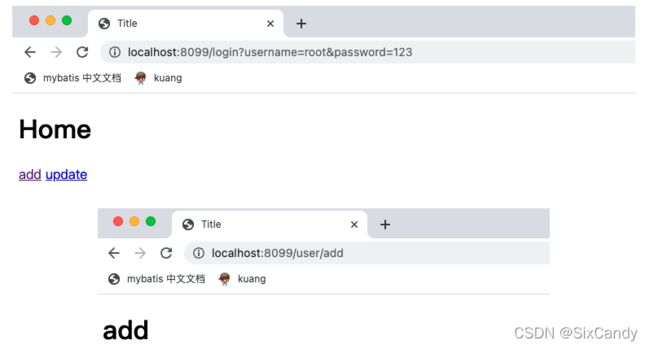
测试:
创建两个静态页面:
在controller中添加方法访问:
@RequestMapping("/user/add")
public String add(){
  return "/user/add";
}
@RequestMapping("/user/uodate")
public String update(){
  return "/user/update";
}
在index.html中添加链接:
<a th:href="@{/user/add.html}">adda>
<a th:href="@{/user/update.html}">updatea>
1.9.3 实现登陆拦截
在shiroFilter方法中添加属性:
//创建 ShiroFilterFactoryBean
    @Bean
    public ShiroFilterFactoryBean getShiroFilterFactoryBean(@Qualifier("getDefaultWebSecurityManager") DefaultWebSecurityManager defaultWebSecurityManager){
        ShiroFilterFactoryBean bean = new ShiroFilterFactoryBean();
        //设置安全管理器
        bean.setSecurityManager(defaultWebSecurityManager);
        //添加shiro的内置过滤器
        /*
           anon:无需认证就可以访问
           authc:必须认证了才能访问
           user:必须拥有"记住我"功能才能用
           perms:拥有对某个资源的权限才能访问
           role:拥有某个角色权限才能访问
         */
        Map<String,String> filterMap = new LinkedHashMap<String,String>();
        filterMap.put("/user/add","authc");
        filterMap.put("/user/update","authc");
        bean.setFilterChainDefinitionMap(filterMap);
        return bean;
    }
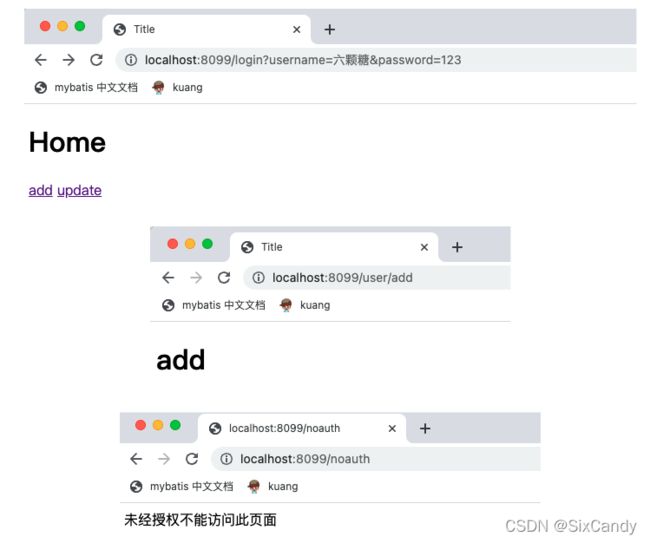
访问/user/add被拦截:
实现拦截后跳转到登陆页面:
创建login.html:
<body>
<h1>loginh1>
<form action="">
    <p>username:<input type="text" name="username">p>
    <p>password:<input type="text" name="password">p>
    <p>LOGIN<input type="submit">p>
form>
body>
在controller层写跳转方法:
@RequestMapping("toLogin")
public String toLogin(){
  return "login";
}
最后在拦截之后设置登陆请求:
1.9.4 实现用户认证
用户认证放在Realm中
先去controller中添加处理登陆过程:
@RequestMapping("/login")
public String login(String username,String password,Model model){
  //获取当前用户
  Subject subject = SecurityUtils.getSubject();
  //封装用户的登陆数据
  UsernamePasswordToken token = new UsernamePasswordToken(username,password);
  try{
    subject.login(token);//执行登陆的方法
    return "index";
  }catch (UnknownAccountException e){//用户名不存在
    model.addAttribute("msg","用户名不存在");
    return "login";
  }catch (IncorrectCredentialsException e){//密码不存在
    model.addAttribute("msg","密码错误");
    return "login";
  }
}
然后去静态页面绑定数据:
最后去Realm中模拟数据并添加认证:
//认证
protected AuthenticationInfo doGetAuthenticationInfo(AuthenticationToken token) throws AuthenticationException {
  System.out.println("认证了");
  //用户名、密码
  String name = "root";
  String password = "123";
  UsernamePasswordToken userToken = (UsernamePasswordToken)token;
  if (!userToken.getUsername().equals(name)){
    return null;//抛出异常 UnknownAccountException
  }
  //密码认证 shiro做
  return new SimpleAuthenticationInfo("",password,"");
}
测试:
1.9.5 整合mybatis
导入依赖:
<dependency>
  <groupId>org.mybatis.spring.bootgroupId>
  <artifactId>mybatis-spring-boot-starterartifactId>
  <version>2.1.1version>
dependency>
<dependency>
  <groupId>mysqlgroupId>
  <artifactId>mysql-connector-javaartifactId>
  <scope>runtimescope>
dependency>

<dependency>
  <groupId>log4jgroupId>
  <artifactId>log4jartifactId>
  <version>1.2.17version>
dependency>

<dependency>
  <groupId>com.alibabagroupId>
  <artifactId>druidartifactId>
  <version>1.2.7version>
dependency>
<dependency>
    <groupId>org.projectlombokgroupId>
    <artifactId>lombokartifactId>
    <version>1.16.10version>
dependency>
新建一个application.yaml:
spring:
  datasource:
    username: root
    password: root12345
    url: jdbc:mysql://localhost:3306/mybts?useUnicode=true&characterEncoding=utf-8&useSSL=true&serverTimezone=UTC
    driver-class-name: com.mysql.cj.jdbc.Driver
    type: com.alibaba.druid.pool.DruidDataSource
druid:
  #     配置初始化大小、最小、最大线程数
  initialSize: 5
  minIdle: 5
  #     CPU核数+1,也可以大些但不要超过20,数据库加锁时连接过多性能下降
  maxActive: 20
  #     最大等待时间,内网:800,外网:1200(三次握手1s)
  maxWait: 60000
  timeBetweenEvictionRunsMillis: 60000
  #     配置一个连接在池中最大空间时间,单位是毫秒
  minEvictableIdleTimeMillis: 300000
  validationQuery: SELECT 1
  testWhileIdle: true
  #     设置从连接池获取连接时是否检查连接有效性,true检查,false不检查
  testOnBorrow: false
  #     设置从连接池归还连接时是否检查连接有效性,true检查,false不检查
  testOnReturn: false
  #     可以支持PSCache(提升写入、查询效率)
  poolPreparedStatements: true
  #   配置监控统计拦截的filters,去掉后监控界面sql无法统计,'wall'用于防火墙
  filters: stat,wall,log4j
  #     保持长连接
  keepAlive: true
  maxPoolPreparedStatementPerConnectionSize: 20
  useGlobalDataSourceStat: true
  connectionProperties: druid.stat.mergeSql=true;druid.stat.slowSqlMillis=500
mybatis:
  type-aliases-package: com.candy.pojo
  mapper-locations:
    - classpath:mapper/*.xml
编写实体类:
package com.candy.pojo;

import lombok.AllArgsConstructor;
import lombok.Data;
import lombok.NoArgsConstructor;

@Data
@NoArgsConstructor
@AllArgsConstructor
public class User {
    private int id;
    private String name;
    private String pwd;
}
编写mapper文件:
@Repository
@Mapper
public interface UserMapper {
    public User queryUserByName(String name);
}
编写mapper配置文件:
DOCTYPE mapper
        PUBLIC "-//mybatis.org//DTD Mapper 3.0//EN"
        "http://mybatis.org/dtd/mybatis-3-mapper.dtd">
<mapper namespace="com.candy.mapper.UserMapper">
    <select id="queryUserByName" parameterType="String"
            resultType="com.candy.pojo.User">
        select * from user where name = #{name}
    select>
mapper>
编写service层:
public interface UserService {
    public User queryUserByName(String name);
}
@Service
public class UserServiceImpl implements UserService{
    @Autowired
    UserMapper userMapper;
    @Override
    public User queryUserByName(String name) {
        return userMapper.queryUserByName(name);
    }
}
测试:
@SpringBootTest
class SpbShiroApplicationTests {
    @Autowired
    UserServiceImpl userService;

    @Test
    void contextLoads() {
        User user = userService.queryUserByName("时代少年团");
        System.out.println(user);
    }
}
改造Realm:
//自定义  继承AuthorizingRealm
public class UserRealm extends AuthorizingRealm {
    @Autowired
    UserService userService;
    //授权
    protected AuthorizationInfo doGetAuthorizationInfo(PrincipalCollection principalCollection) {
        System.out.println("授权了");
        return null;
    }
   //认证
    protected AuthenticationInfo doGetAuthenticationInfo(AuthenticationToken token) throws AuthenticationException {
        System.out.println("认证了");

        UsernamePasswordToken userToken = (UsernamePasswordToken)token;
        //连接数据库
         User  user = userService.queryUserByName(userToken.getUsername());
         if (user==null){
             //用户名不存在
             return null; //shiro底层就会抛出 UnknownAccountException
         }
        //密码认证 shiro做
        return new SimpleAuthenticationInfo("",user.getPwd(),"");
    }
}
测试:
1.9.6 请求授权实现
设置授权限制(shiroFilter中):
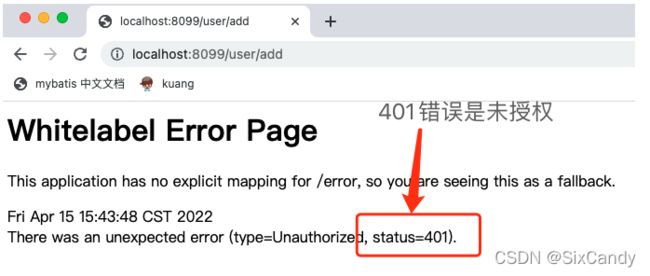
filterMap.put("/user/add","perms[user:add]");
拦截成功!
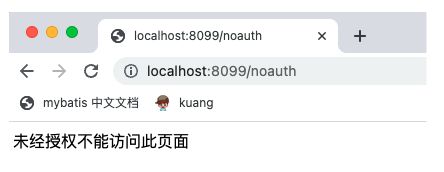
配置未授权页面,添加一个controller方法:
@RequestMapping("/noauth")
@ResponseBody
public String noAuth(){
    return "未经授权不能访问此页面";
}
然后在shiroFilter中设置未授权的跳转:
bean.setUnauthorizedUrl("/noauth");
设置授权:
 //授权
    protected AuthorizationInfo doGetAuthorizationInfo(PrincipalCollection principalCollection) {
        System.out.println("授权了");
        //给资源进行授权
        SimpleAuthorizationInfo info = new SimpleAuthorizationInfo();
        //添加资源的授权字符串
        info.addStringPermission("user:add");
        return info;
    }
测试:
所有用户都可以访问add接口,授权成功:
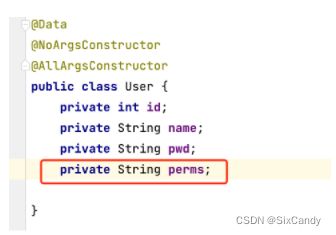
给数据库增加一个字段,存放权限:
修改实体类:
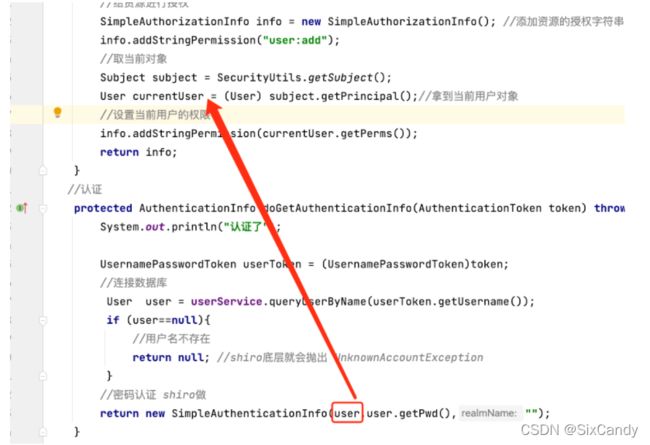
设置授权:
//自定义  继承AuthorizingRealm
public class UserRealm extends AuthorizingRealm {
    @Autowired
    UserService userService;
    //授权
    protected AuthorizationInfo doGetAuthorizationInfo(PrincipalCollection principalCollection) {
        System.out.println("授权了");
        //给资源进行授权
        SimpleAuthorizationInfo info = new SimpleAuthorizationInfo(); //添加资源的授权字符串
        info.addStringPermission("user:add");
        //取当前对象
        Subject subject = SecurityUtils.getSubject();
        User currentUser = (User) subject.getPrincipal();//拿到当前用户对象
        //设置当前用户的权限
        info.addStringPermission(currentUser.getPerms());
        return info;
    }
   //认证
    protected AuthenticationInfo doGetAuthenticationInfo(AuthenticationToken token) throws AuthenticationException {
        System.out.println("认证了");

        UsernamePasswordToken userToken = (UsernamePasswordToken)token;
        //连接数据库
         User  user = userService.queryUserByName(userToken.getUsername());
         if (user==null){
             //用户名不存在
             return null; //shiro底层就会抛出 UnknownAccountException
         }
        //密码认证 shiro做
        return new SimpleAuthenticationInfo(user,user.getPwd(),"");
    }
}
1.9.7 整合thymeleaf
导入依赖:
 <dependency>
            <groupId>com.github.theborakompanionigroupId>
            <artifactId>thymeleaf-extras-shiroartifactId>
            <version>2.0.0version>
        dependency>
改造静态页面,导入shiro命名空间:
<html lang="en" xmlns:th="http://www.thymeleaf.org"
			          xmlns:shiro="http://www.thymeleaf.org/thymeleaf-extras-shiro">
html>
<body>
  <h1>Homeh1>
 <p th:if="${session.loginUser==null}">
   <a th:href="@{/toLogin}">登录a>
  p>
  <p th:text="${msg}">p>
  <div shiro:hasPermission="user:add">
    <a th:href="@{/user/add}">adda>
  div>
  <div shiro:hasPermission="user:update">
    <a th:href="@{/user/update}">updatea>
  div>
body>
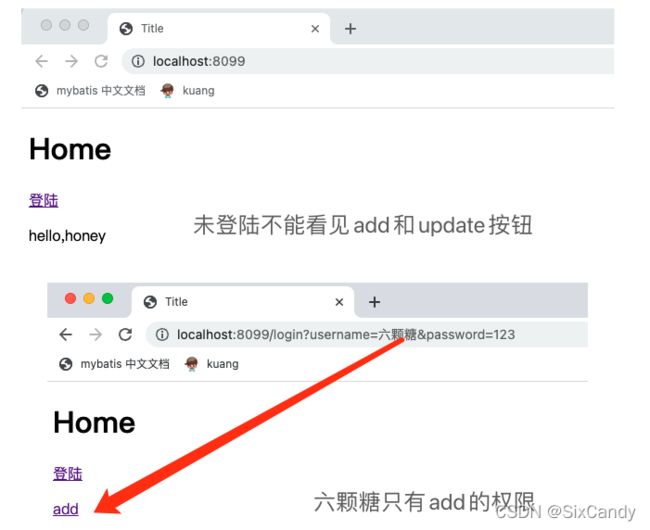
测试:
为了完美,我们在用户登录后应该把信息放到Session中,我们完善下!在执行认证逻辑时候,加入session
(在Realm中):
Subject  subject = SecurityUtils.getSubject();
subject.getSession().setAttribute("loginUser",user);
1.10 Swagger
1.10.1 swagger介绍与集成
前后端分离:vue+springboot
后端:控制、服务层、数据访问层
前端:控制层、视图层
前后端如何交互:API
swagger号称世界上最流行的API框架,API文档与API定义同步更新,直接运行,支持多种语言。
在项目中使用swagger需要Springfox(2.x版本):
- swagger2
- swagger-ui
Spring boot集成swagger
导入相关依赖:
<dependency>
  <groupId>io.springfoxgroupId>
  <artifactId>springfox-swagger2artifactId>
  <version>3.0.0version>
dependency>
<dependency>
  <groupId>io.springfoxgroupId>
  <artifactId>springfox-swagger-uiartifactId>
  <version>3.0.0version>
dependency>
swagger3.0:
<dependency>
  <groupId>io.springfoxgroupId>
  <artifactId>springfox-boot-starterartifactId>
  <version>3.0.0version>
dependency>
编写controller:
@RestController
public class HelloController {
    @RequestMapping(value = "/hello")
    public String hello(){
        return "hello";
    }
}
编写application.yaml:
spring:
  application:
    name: spb-sw
server:
  port: 8001
# ===== 自定义swagger配置 ===== #
swagger:
  enable: true
  application-name: ${spring.application.name}
  application-version: 1.0
  application-description: springfox swagger 3.0
  try-host: http://localhost:${server.port}
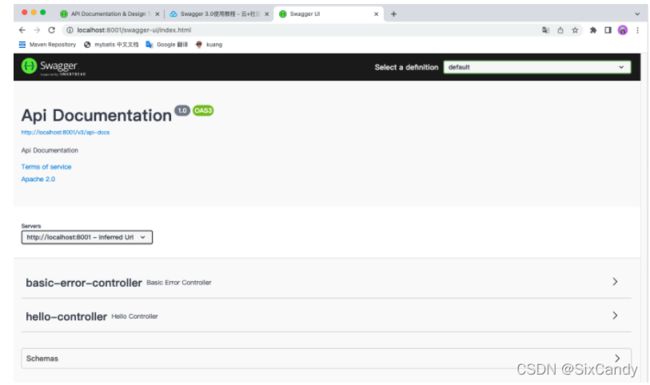
测试:
使用**@EnableOpenApi**注解,启用swagger配置:
@Configuration
@EnableOpenApi
public class SwaggerConfig {

}
访问地址:http://localhost:端口号/swagger-ui/index.html,(注意swagger2.x版本中访问的地址的为http://localhost:端口号/swagger-ui.html)
测试:
1.10.2 配置swagger信息
首先编写SwaggerProperties去获取application.yaml中swagger的配置信息:
package com.candy;

import org.springframework.boot.context.properties.ConfigurationProperties;
import org.springframework.stereotype.Component;

@Component
@ConfigurationProperties("swagger")
public class SwaggerProperties {
    /**
     * 是否开启swagger,生产环境一般关闭,所以这里定义一个变量
     */
    private Boolean enable;
    private String applicationName;
    private String applicationVersion;
    private String applicationDescription;
    /**
     * 接口调试地址
     */
    private String tryHost;

    public Boolean getEnable() {
        return enable;
    }
    public void setEnable(Boolean enable) {
        this.enable = enable;
    }
    public String getApplicationName() {
        return applicationName;
    }
    public void setApplicationName(String applicationName) {
        this.applicationName = applicationName;
    }
    public String getApplicationVersion() {
        return applicationVersion;
    }
    public void setApplicationVersion(String applicationVersion) {
        this.applicationVersion = applicationVersion;
    }
    public String getApplicationDescription() {
        return applicationDescription;
    }
    public void setApplicationDescription(String applicationDescription) {
        this.applicationDescription = applicationDescription;
    }
    public String getTryHost() {
        return tryHost;
    }
    public void setTryHost(String tryHost) {
        this.tryHost = tryHost;
    }
}
然后在写swaggerconfiguration:
package com.candy.config;
import com.candy.SwaggerProperties;
import io.swagger.models.auth.In;
import org.springframework.context.annotation.Bean;
import org.springframework.context.annotation.Configuration;
import springfox.documentation.builders.ApiInfoBuilder;
import springfox.documentation.builders.PathSelectors;
import springfox.documentation.builders.RequestHandlerSelectors;
import springfox.documentation.oas.annotations.EnableOpenApi;
import springfox.documentation.service.*;
import springfox.documentation.spi.DocumentationType;
import springfox.documentation.spi.service.contexts.SecurityContext;
import springfox.documentation.spring.web.plugins.Docket;
import java.util.*;

@Configuration
@EnableOpenApi
public class SwaggerConfiguration {
    private final SwaggerProperties swaggerProperties;

    public SwaggerConfiguration(SwaggerProperties swaggerProperties) {
        this.swaggerProperties = swaggerProperties;
    }
    @Bean
    public Docket createReatApi(){
        return new Docket(DocumentationType.OAS_30).pathMapping("/")
                //定义是否开启swagger
                .enable(swaggerProperties.getEnable())
                //将api的元信息设置为包含json ResourceListing响应中
                .apiInfo(apiInfo())
                //设置接口调试地址
                .host(swaggerProperties.getTryHost())
                //选择哪些接口作为swagger的doc发布
                .select()
                //配置要扫描接口的方式 any:全部 basePackage:指定包
                .apis(RequestHandlerSelectors.basePackage("com.candy"))
                //过滤路径
                .paths(PathSelectors.any())
                .build()
                //支持的通讯协议集合
                .protocols(newHashSet("https","http"))
                //授权信息设置,必要的header token等认证信息
                .securitySchemes(securitySchemes())
                //授权信息全局应用
                .securityContexts(securityContexts());


    }
    //api页面上半部分展示信息
    private ApiInfo apiInfo(){
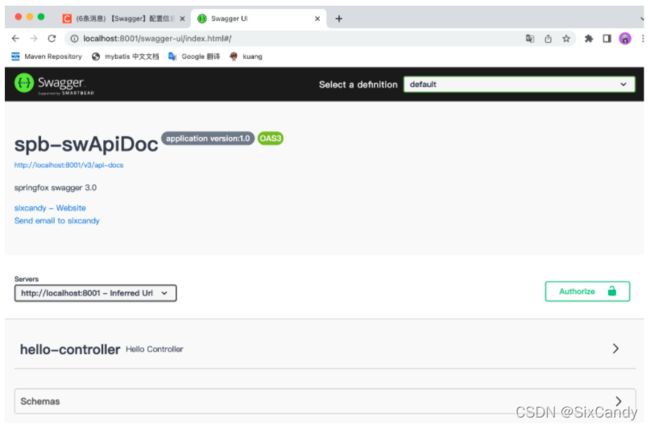
        return new ApiInfoBuilder().title(swaggerProperties.getApplicationName()+"ApiDoc")
                .description(swaggerProperties.getApplicationDescription())
                 //作者信息
                .contact(new Contact("sixcandy","null","[email protected]"))
                .version("application version:"+swaggerProperties.getApplicationVersion())
                .build();
    }
    private Set<String> newHashSet(String type1,String type2){
        Set<String> set = new HashSet<>();
        set.add(type1);
        set.add(type2);
        return set;
    }
    private List<SecurityScheme> securitySchemes(){
         ApiKey apiKey = new ApiKey("BASE_TOKEN","token", In.HEADER.toValue());
        return Collections.singletonList(apiKey);
    }
    private List<SecurityContext> securityContexts(){
        return Collections.singletonList(
                SecurityContext.builder()
                        .securityReferences(Collections.singletonList(new SecurityReference("BASE_TOKEN",new AuthorizationScope[]{new AuthorizationScope("global","")} )))
                        .build()
        );
    }
}
测试:
给api文档写注释:
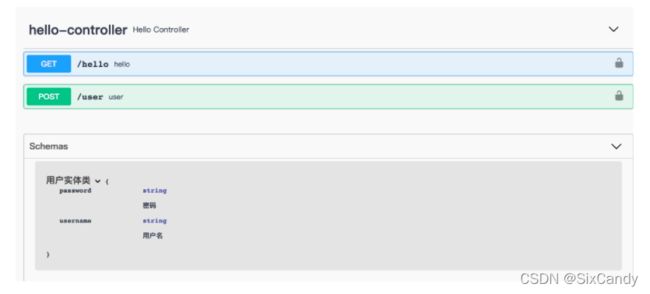
添加一个user类:
package com.candy.pojo;

import io.swagger.annotations.ApiModel;
import io.swagger.annotations.ApiModelProperty;

@ApiModel("用户实体类")
public class User {
    @ApiModelProperty("用户名")
    public String username;
    @ApiModelProperty("密码")
    public String password;
}
改造controller:
@RestController
public class HelloController {
    @GetMapping (value = "/hello")
    public String hello(){
        return "hello";
    }
    @PostMapping("/user")
    public User user(){
        return new User();
    }
}
测试:


