Spring入门(一):创建Spring项目
本篇博客作为Spring入门系列的第一篇博客,不会讲解什么是Spring以及Spring的发展史这些太理论的东西,主要讲解下如何使用IntelliJ IDEA创建Spring项目以及通过一个示例了解下Spring的简单使用。
1. 创建Spring项目
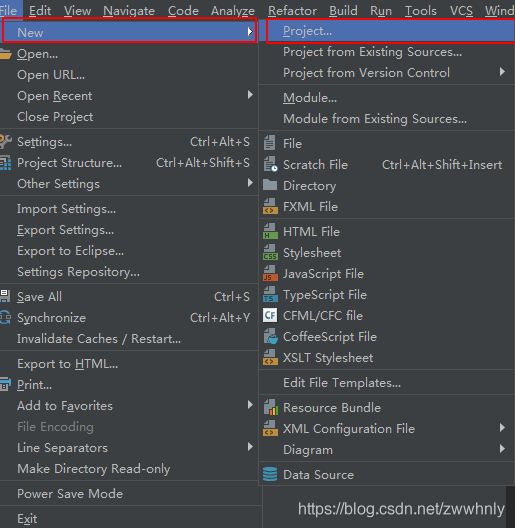
首先,按照下图所示打开“新建项目”弹出框:
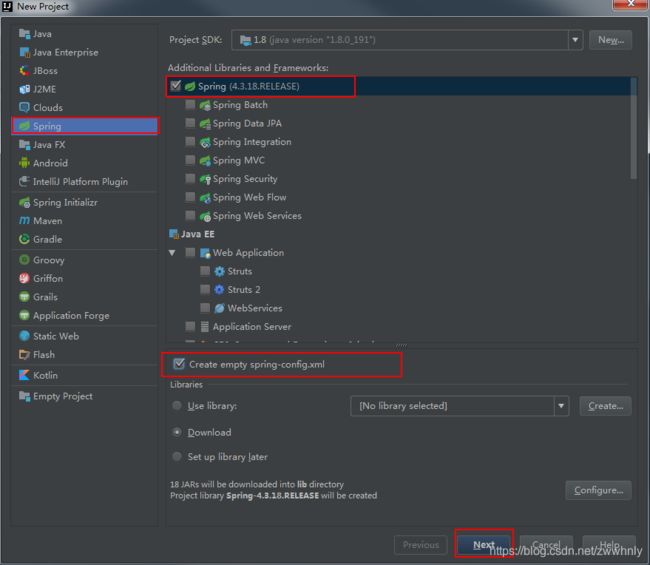
然后在左侧选择项目类型Spring:
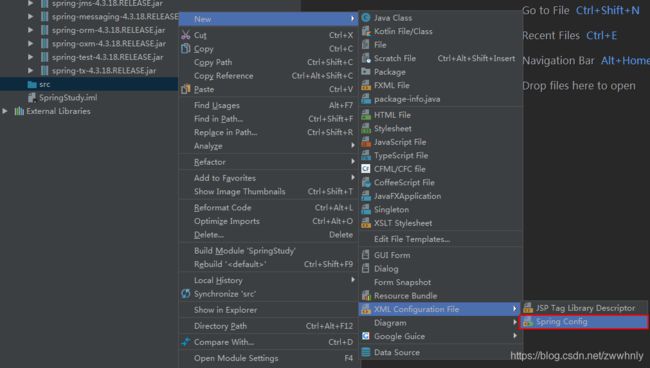
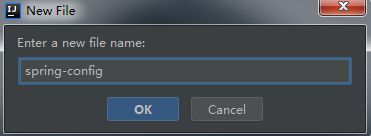
如果这里忘记了选择"Create empty spring-config.xml",也可以新建完项目再新建配置文件。
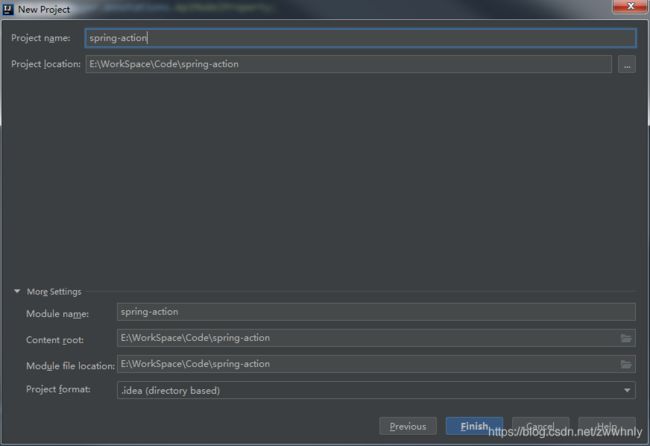
接着,确定好项目名称和保存路径,然后点击"Finish"按钮:
因为需要下载Spring依赖的包,因此需要加载一会。
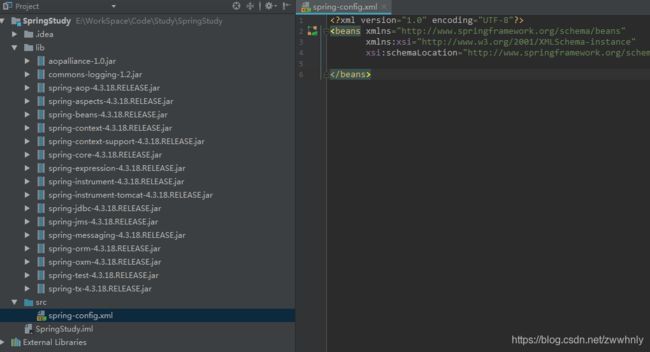
新建完的项目结构图如下所示:
2. Spring示例
新建一个Book类,定义两个字段bookName,author和一个实例方法printBookInfo()
public class Book {
    private String bookName;

    private String author;

    public String getBookName() {
        return bookName;
    }

    public void setBookName(String bookName) {
        this.bookName = bookName;
    }

    public String getAuthor() {
        return author;
    }

    public void setAuthor(String author) {
        this.author = author;
    }

    public void printBookInfo() {
        System.out.println("Book Name:" + this.bookName + ",Author:" + this.author);
    }
}
如果我们想要输出图书信息,按照传统的方式,需要以下几步:
- 创建Book类的实例对象
- 设置实例对象的bookName字段和author字段
- 调用实例对象的printBookInfo()方法
public class Main {
    public static void main(String[] args) {

        Book book = new Book();
        book.setBookName("平凡的世界");
        book.setAuthor("路遥");

        book.printBookInfo();
    }
}
运行结果:
Book Name:平凡的世界,Author:路遥
那么在Spring项目中,如何实现同样的调用呢?
首先,修改spring-config.xml,添加如下配置:
然后修改Main的方法为:
import org.springframework.context.ApplicationContext;
import org.springframework.context.support.ClassPathXmlApplicationContext;

public class Main {
    public static void main(String[] args) {

        ApplicationContext applicationContext = new ClassPathXmlApplicationContext("spring-config.xml");
        Book book = applicationContext.getBean("book", Book.class);
        book.printBookInfo();
    }
}
运行结果:
我们会发现,运行结果和传统方式一样,只是多了一些Spring的日志信息。
在上面的代码中,我们并未使用new运算符来创建Book类的实例,但是却可以得到Book类的实例,这就是Spring的强大之处,所有类的实例的创建都不需要应用程序自己创建,而是交给Spring容器来创建及管理。
3. Spring示例讲解
虽说实例的创建交给Spring容器来创建及管理,但是在上述的代码中,什么时候创建了Book类的实例并对字段赋值了呢?
为验证这个疑问,我们修改下Book类。
public class Book {
    private String bookName;

    private String author;

    public Book(){
        System.out.println("This is Book constructor.");
    }

    public String getBookName() {
        return bookName;
    }

    public void setBookName(String bookName) {
        System.out.println("This is Book setBookName().");
        this.bookName = bookName;
    }

    public String getAuthor() {
        return author;
    }

    public void setAuthor(String author) {
        System.out.println("This is Book setAuthor().");
        this.author = author;
    }

    public void printBookInfo() {
        System.out.println("Book Name:" + this.bookName + ",Author:" + this.author);
    }
}
再添加一个Author类:
public class Author {
    private String name;

    private int age;

    public Author() {
        System.out.println("This is Author constructor.");
    }

    public String getName() {
        return name;
    }

    public void setName(String name) {
        System.out.println("This is Author setName().");
        this.name = name;
    }

    public int getAge() {
        return age;
    }

    public void setAge(int age) {
        System.out.println("This is Author setAge().");
        this.age = age;
    }

    public void printAuthorInfo() {
        System.out.println("Name:" + this.name + ",Age:" + this.age);
    }
}
然后修改下spring-config.xml文件。
最后,我们修改下Main类的代码来Debug下,看下代码的执行顺序。
import org.springframework.context.ApplicationContext;
import org.springframework.context.support.ClassPathXmlApplicationContext;

public class Main {
    public static void main(String[] args) {

        ApplicationContext applicationContext = new ClassPathXmlApplicationContext("spring-config.xml");

        Book book = applicationContext.getBean("book", Book.class);
        book.printBookInfo();

        Author author = applicationContext.getBean("author", Author.class);
        author.printAuthorInfo();
    }
}
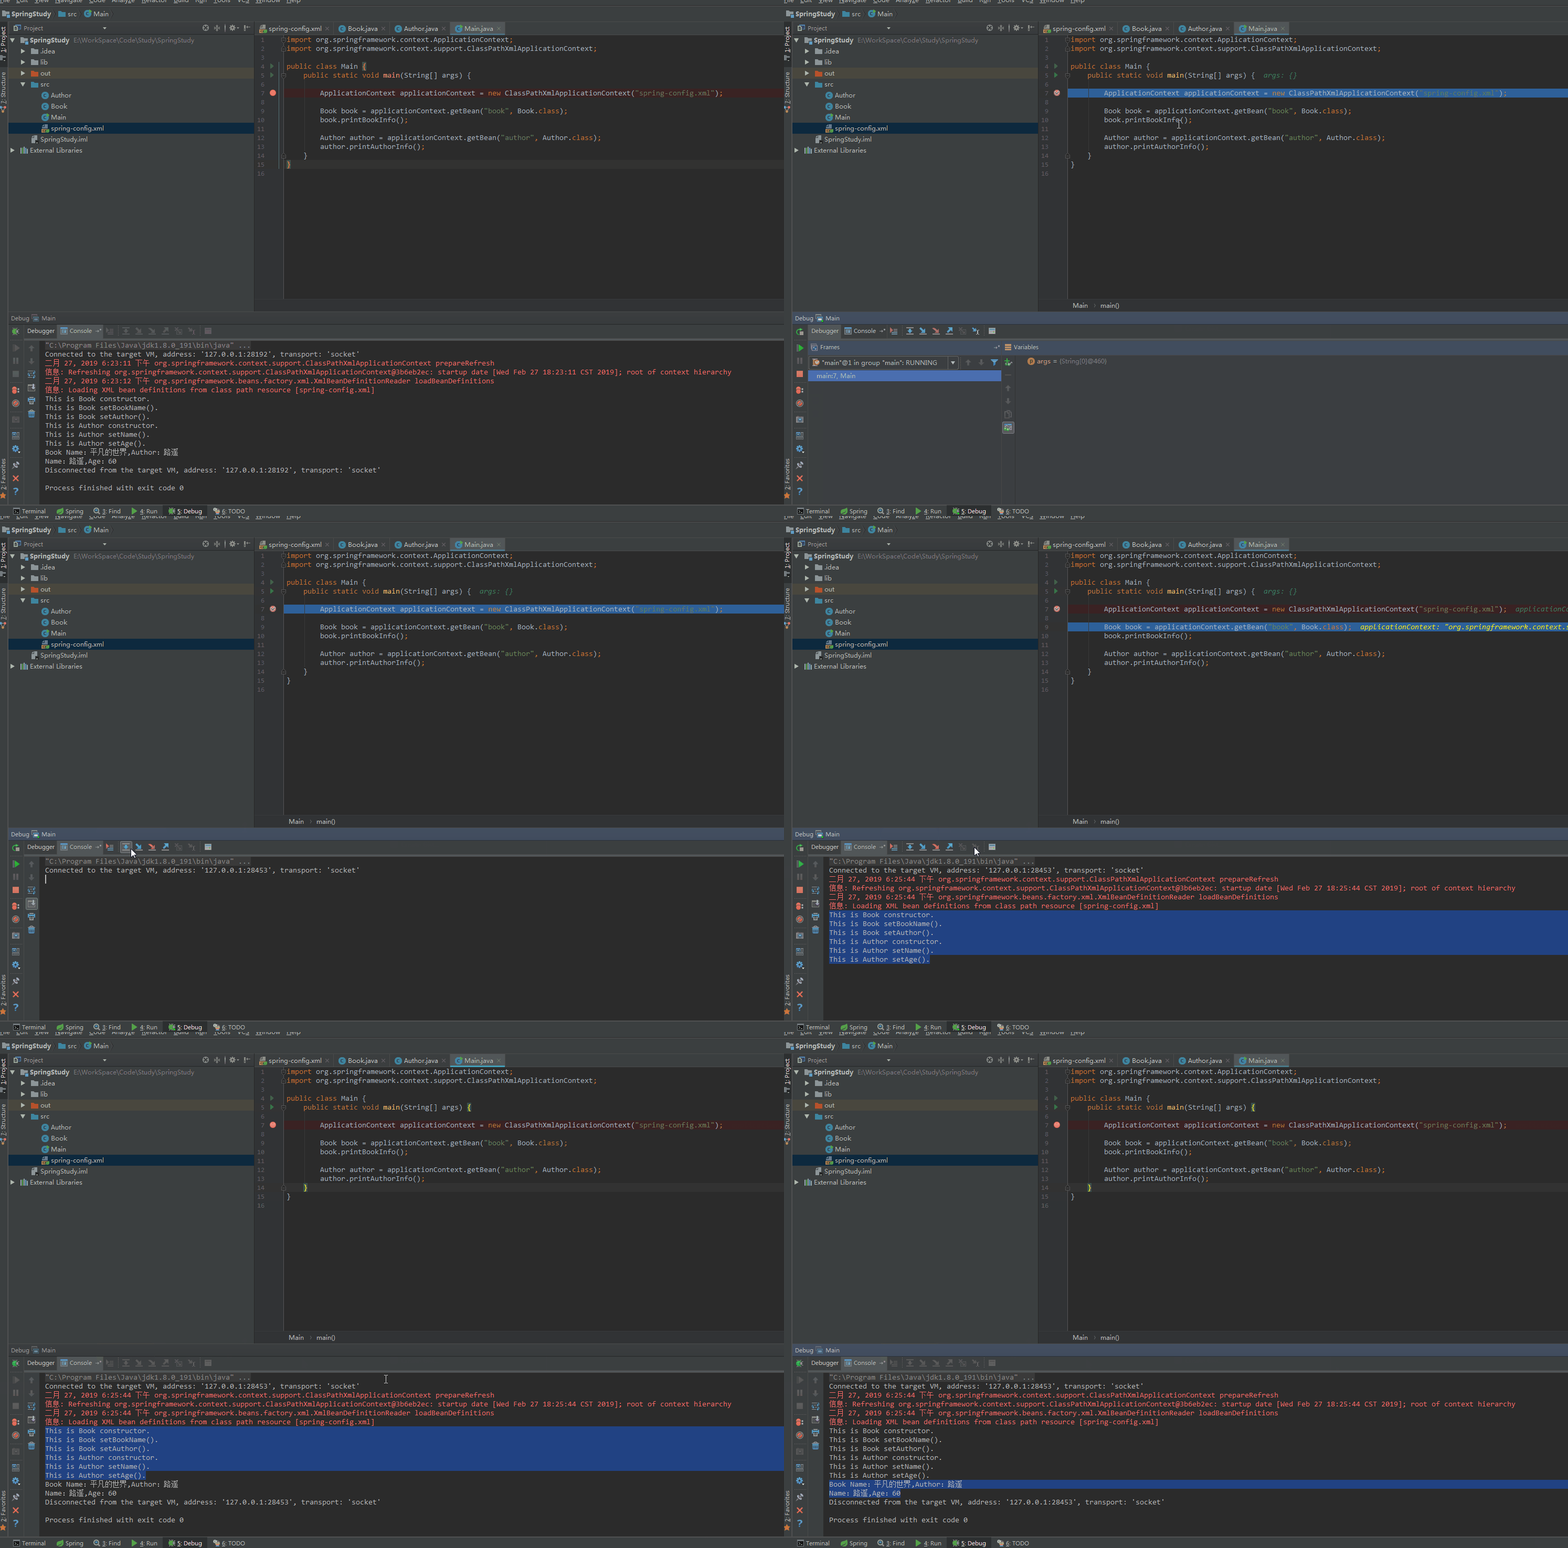
为更直观的展示,请看如下的Gif图。
从图中,我们可以看出,在执行完 ApplicationContext applicationContext = new ClassPathXmlApplicationContext("spring-config.xml");后,控制台先输出了以下内容:
This is Book constructor.
This is Book setBookName().
This is Book setAuthor().
This is Author constructor.
This is Author setName().
This is Author setAge().
也就是这句代码执行完后,Book类和Author类的实例已经被创建并且字段已经被赋值,接下来的代码只是从Spring容器中获取实例而已。
4. 注意事项
获取Bean时,第一个参数beanName要与spring-config.xml定义的bean id保持一致,比如我们在spring-config.xml中定义的是book,如果在获取时写的是Book,就会报错。
import org.springframework.context.ApplicationContext;
import org.springframework.context.support.ClassPathXmlApplicationContext;

public class Main {
    public static void main(String[] args) {

        ApplicationContext applicationContext = new ClassPathXmlApplicationContext("spring-config.xml");

        // 错误的beanName
        Book book = applicationContext.getBean("Book", Book.class);
        book.printBookInfo();
    }
}
报错信息如下所示:
5. 源码及参考
源码地址:https://github.com/zwwhnly/spring-action.git,欢迎下载。
【Spring】IntelliJ IDEA搭建Spring环境
idea中Spring项目创建以及实现一个小的IoC案
原创不易,如果觉得文章能学到东西的话,欢迎点个赞、评个论、关个注,这是我坚持写作的最大动力。
如果有兴趣,欢迎添加我的微信:**zwwhnly**,等你来聊技术、职场、工作等话题(PS:我是一名奋斗在上海的程序员)。
