Vue-cli 脚手架搭建项目
文章目录
- 01 什么是vue-cli
- 02 快速创建项目
-
- 2.1 命令行创建
- 2.2 图形化界面创建
01 什么是vue-cli
Vue CLI 是一个基于 Vue.js 进行快速开发的完整系统,提供:
- 通过 @vue/cli 实现的交互式的项目脚手架。
- 通过 @vue/cli + @vue/cli-service-global 实现的零配置原型开发。
- 一个运行时依赖 (@vue/cli-service),这个依赖:
(1)可升级;
(2)基于 webpack 构建,并带有合理的默认配置;
(3)可以通过项目内的配置文件进行配置;
(4)可以通过插件进行扩展。 - 一个丰富的官方插件集合,集成了前端生态中最好的工具。
- 一套完全图形化的创建和管理 Vue.js 项目的用户界面。
02 快速创建项目
2.1 命令行创建
(1)如果你还没有安装 VueCLI,请执行下面的命令安装或是升级:
npm install --global @vue/cli
(2)在命令行中输入以下命令创建 Vue 项目:
vue create 项目名
等待一会后,框中显示如下
Vue CLI v4.5.9
┌──────────────────────────────────────────┐
│                                          │
│   New version available 4.5.9 → 4.5.11   │
│     Run npm i -g @vue/cli to update!     │
│                                          │
└──────────────────────────────────────────┘

? Please pick a preset: (Use arrow keys)

  Default ([Vue 2] babel, eslint)
  Default (Vue 3 Preview) ([Vue 3] babel, eslint)
> Manually select features
Default:默认勾选 babel、eslint,回车之后直接进入装包;
Manually:自定义勾选特性配置,选择完毕之后,才会进入装包;
建议选择Manually:手动选择特性,支持更多自定义选项。
(3)检查你的项目需要的功能
? Check the features needed for your project:
>(*) Choose Vue version
 (*) Babel
 ( ) TypeScript
 ( ) Progressive Web App (PWA) Support
 (*) Router
 (*) Vuex
 (*) CSS Pre-processors
 (*) Linter / Formatter
 ( ) Unit Testing
 ( ) E2E Testing
注:按空格键选择,a键全部选择,i键反转选择。
Babel:es6 转 es5
Router:路由
Vuex:数据容器,存储共享数据
CSS Pre-processors:CSS 预处理器,后面会提示你选择 less、sass、stylus 等
Linter / Formatter:代码格式校验
(4)选择想要启动项目的Vue.js版本
? Choose a version of Vue.js that you want to start the project with (Use arrow keys)
> 2.x
  3.x (Preview)
(5)使用历史模式为路由器?(需要正确的服务器设置,以便在生产中进行索引回退)(Y/n)
? Use history mode for router? (Requires proper server setup for index fallback in production) (Y/n)
vue-router有两种模式,hash模式和history模式。
- 它们的直观区别是:hash模式url带#号,history模式不带#号。所以如果要考虑url的规范就使用history模式,因为它没有#号,是个正常的url适合推广宣传。
- 功能也有区别,例如开发app时分享页面,把这个页面分享到第三方的app里,有的app里面url是不允许带有#号的,所以要将#号去除就要使用history模式。
- 不过history模式在访问二级页面的时候,做刷新操作会出现404错误,需要和后端人配合去配置一下apache或是nginx的url重定向,重定向到你的首页路由上。
- history模式改变url的方式会导致浏览器向服务器发送请求,而hash值变化不会导致浏览器向服务器发出请求,并且 hash 改变会触发 hashchange 事件,浏览器的进后退也能对其进行控制。
- hash的传参是基于 url 的,如果要传递复杂的数据,会有体积的限制,而 history 模式不仅可以在url里放参数,还可以将数据存放在一个特定的对象中。
这里依自己的情况进行选择,我一般选择“n”,即默认hash模式。
(6)选择一个CSS预处理器(默认支持PostCSS, Autoprefixer和CSS模块)
? Pick a CSS pre-processor (PostCSS, Autoprefixer and CSS Modules are supported by default):
  Sass/SCSS (with dart-sass)
  Sass/SCSS (with node-sass)
> Less
  Stylus
此处看自己或项目的需求,我一般习惯使用less。
(7)选择校验工具
? Pick a linter / formatter config:
  ESLint with error prevention only
  ESLint + Airbnb config
> ESLint + Standard config
  ESLint + Prettier
这里选择 ESLint + Standard config。
(8)选择在什么时机下触发代码格式校验
? Pick additional lint features:
 (*) Lint on save
>(*) Lint and fix on commit
Lint on save:每当保存文件的时候校验
Lint and fix on commit:每当执行 git commit 提交的时候校验
这里建议两个都选上,更加严谨。
(9)你喜欢把Babel, ESLint等的配置放在哪里?
? Where do you prefer placing config for Babel, ESLint, etc.? (Use arrow keys)
> In dedicated config files
  In package.json
In dedicated config files:分别保存到单独的配置文件
In package.json:保存到 package.json 文件中
建议选择In dedicated config files,即保存到单独的配置文件,这样方便我们做自定义配置。
(10)是否将这次的涉资保存为未来项目的预设?
? Save this as a preset for future projects? (y/N)
若需要将刚才选择的一系列配置保存起来,或想要它帮你记住上面的一系列选择,以便下次直接重用的话可以选择“y”。
此处根据自己需要输入 y 或者 n,我一般选择“n”,即不需要。
(11)回车后,向导配置结束,开始装包。安装包的时间可能较长,需要耐心等待…
✨  Creating project in C:\Users\Lyh\Desktop\demo.
�  Initializing git repository...
⚙️  Installing CLI plugins. This might take a while...

······等一会后

⚓  Running completion hooks...

�  Generating README.md...

�  Successfully created project demo.
�  Get started with the following commands:

 $ cd 项目名
 $ npm run serve
(12)安装结束,命令提示你项目创建成功,按照命令行的提示在终端中分别输入
# 进入你的项目目录
cd 项目名

# 启动开发服务
npm run serve
2.2 图形化界面创建
通过 vue ui 命令以图形化界面创建和管理项目
vue ui
上述命令会打开一个浏览器窗口,并以图形化界面将你引导至项目创建的流程。
打开图形化界面需要等待一会,直到命令行出现下面的信息:
C:\Users\***\Desktop>vue ui
�  Starting GUI...
�  Ready on http://localhost:8000
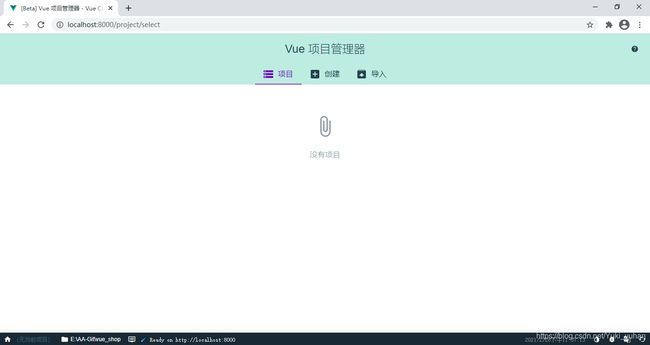
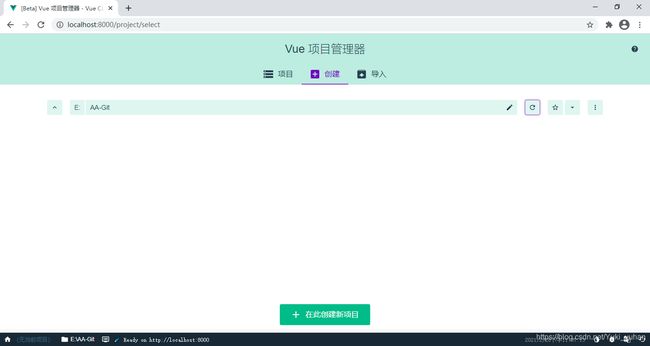
然后浏览器会弹出下面的页面

点击在此创建项目,而后跟随图形界面的提示和指示进行选择和配置,其实基本步骤选择和命令行差不多,后面有机会再进行细节描述。

欢迎大家交流探讨!