肝了两宿才收集的17个超炫酷的 CSS 动画加载与进度条特效,绝对值得收藏!!!
文章目录
- 一、圆形加载动画
- 二、上下跳动的圆球加载动画
- 三、3D立体加载动画
- 四、饼图加载动画
- 五、多色圆点波动效果的加载动画
- 六、制作顺时针放大的圆圈加载动画
- 七、制作小圆圈轮流放大的加载动画
- 八、制作竖条加载动画
- 九、制作水波扩散效果加载动画
- 十、制作逆时针逐渐放大多点加载动画
- 十一、制作形状变化的加载动画
- 十二、实现动态前进的阴影进度条
- 十三、椭圆形进度条加载
- 十四、彩色进度条加载效果
- 十五、环形加载动画
- 十六、制作斑马线样式的进度条
- 十七、程序加载页面
一、圆形加载动画
1、实例描述:浏览网页时,难免会有网页加载慢的情况,当网页长时间未加载完毕时,可以显示一些动画效果,以避免网页长时间空白。本实例实现的是圆形加载动画,当页面加载完成时,页面中的弧形会一直在页面中转动,具体运行效果如下图所示: 代码实现: 1、实例描述:本实例实现上下跳动的圆球加载,打开页面后,如下图所示,页面中的小圆球按照排列顺序,位于偶数个小球先往下坠落,然后奇数个小球向上跳跃,奇偶数小球循环上下跳跃。 代码实现: 1、实例描述:你见没见过3D立体式的加载动画效果呢?如下图所示,使用CSS中的transform过渡属性即可实现。你可以把立方体想象成有6个平面,那么,每个平面都可以使用 1、实例描述:本实例实现的是饼状加载动画,打开页面,可看到一个蓝色的圆形上面有一层半透明的圆弧,并且圆弧形的角度逐渐增大,直至完全覆盖蓝色圆形后,半透明圆弧的角度再度从零开始增加。具体运行效果如下图所示: 1、实例描述:本实例实现的是多点加载动画,动画开始播放时,小圆点依次向上平移然后恢复原位,同时个圆点依次被染成粉色再恢复原色,并且下方展示圆点阴影,具体效果如下图所示: css 代码如下: 1、实例描述:本实例主要实现各圆圈按顺时针放大的加载动画。打开页面后,可看到页面中含有5个蓝色小圆圈,每个小圆圈按顺时针依次逐渐放大,并且圆圈的颜色有浅变深,具体效果如下图所示: 1、实例描述:本实例实现的是小圆圈轮流放大的加载动画,打开页面后,可看到三个小圆圈逐个放大后再逐渐缩小,具体运行效果下图所示: 1、实例描述:本实例实现竖条加载动画,打开页面如下图所示,页面中有五根竖条,动画播放时,以中间竖条为对称轴,两侧的动画一致,都是逐渐边长再缩短。 1、实例描述:本实例实现的是水波扩散状的加载动画,打开本实例,可看到同心圆像水波一样逐渐放大,并且圆圈颜色逐渐由深变浅,如下图所示,打开本实例可看到页面中呈现水波扩散状的加载动画。 1、实例描述:本实例实现的按逆时针顺序逐渐放大的多点加载动画,打开页面后,页面中的圆点呈圆形排列,然后各圆点按逆时针顺序依次变小,颜色变浅,最后回复原来大小和颜色。具体运行效果如下图所示。 1、实例描述:本实例实现的是形状变化的加载动画,打开本页面可看到页面中的初始形状为正方形,并且正方形上下跳动,随后便一次改变形状为三角形、菱形。五角星形以及五边形,改变形状的同时,其背景颜色也在绿色和粉色间交替显示。如下图所示: 代码实现: 1、实例描述:本实例主要实现动态前进向前的阴影进度条效果,打开页面时,可看到进度条中蓝色部分逐渐填充白色部分,同时白色阴影也逐渐向右移动。具体运行效果如下图所示: 1、实例描述:本实例实现椭圆形的进度条加载,打开本实例后,可看到页面中是一个灰色的椭圆,随着蓝色进度条填充灰色,右侧数字从0%开始增加,如下图所示,当右侧数字变为100%时,蓝色进度条将填充整个灰色部分。 要实现animation动画,在定义关键帧以后,还需要使用动画属性来执行关键帧的变化。CSS为animation动画提供的动画属性机器含义如下表所示: 代码实现: 1、实例描述:本实例实现的是彩色进度条加载,打开本实例,可看到页面分别有四个彩色进度条分别向右填充,加载动画结束后,进度条以及进度条后方的彩色小圆点停留在动画结束的位置。具体效果如下图所示: 1、实例描述:我们在上网时,时常会遇到网页加载慢等情况,这时有的人就会测试自己电脑的网速以寻找网页加载慢的原因,测试网速时,就会出现一个加载动画,本实例将实现这样的一个加载动画,打开本实例,可看到组成圆环的长条的颜色按顺时针方向逐渐有浅变深。具体效果如下图所示: 1、实例描述:本实例实现的是斑马线样式进度条,打开本实例。可看到黄色的斑纹逐渐填充圆角矩形,如下图所示,当圆角矩形被黄色斑纹完全填充时,表示网页加载完成。 1、实例描述:在进入一些游戏网站的时候,通常会先进入一个程序加载页面,等待几秒钟后才能进入程序。本实例将制作一个程序加载的页面,运行结果如下图所示:

2、技术要点:本实例主要结合使用css3中的边框属性和动画属性实现圆形加载动画。为border: border-color border-style border-width
//border-color:设置边框颜色。
//border-style:设置边框样式。
//border-width:设置边框宽度。
需要说明的是,上面三个属性值可以在一行里设置,也可单独设置,例如,单独设置边框颜色的语法为
border-color:color
当然若以上三个属性在一行里设置时,表示设置标签的四条边框的样式相同,
同样,我们可以单独设置某一条边框的样式,例如,单独设置上边框的样式,其语法为:
Border-top: border-color border-style border-width
<html lang="en">
<head>
	<meta charset="UTF-8">
	<title>圆形加载动画title>
	<style>
		.box {
		    text-align: center;
		    width: 300px;
		    height: 200px;
		    margin: 20px auto;
		}
		.box>span {
		    animation: loader 1000ms infinite linear;
		    border-radius: 100%;
		    border: 6px solid #2dbb55;
		    border-left-color: transparent;
		    color: transparent;
		    display: inline-block;
		    line-height: 1.2;
		    width: 50px;
		    height: 50px;
		}
		@keyframes loader {
		    0% {  transform: rotate(0deg);  }
		    100% {transform: rotate(360deg);}
		}
	style>
head>
<body>
	<div class="box"><span>span>div>
body>
html>
二、上下跳动的圆球加载动画

2、技术要点:本实例需要通过border-radius将每一个border-radius: length;
//length是指定用于定义圆形半径或椭圆的长轴,不允许为负值,其值也可用百分比表示。
<html lang="en">
<head>
	<meta charset="UTF-8">
	<title>上下跳动的圆球加载动画title>
	<style>
		.cont{
		    width: 270px;
		    margin: 50px auto;
		    text-align: center;
		}
		.cont>div{                              /*设置小圆圈的样式*/
		    width: 15px;
		    height: 15px;
		    float: left;
		    margin: 0px 10px;
		    background: #dd0000;
		    border-radius: 100%;
		    animation: anim 1s  infinite normal ease;
		}
		.cont>:nth-child(2n){             /*设置奇数个小圆圈的动画延迟*/
    		animation-delay: 0.5s;
		}

		@keyframes anim {                    /*定义动画*/
		    0% {  transform: scale(0.4); }
		    25% { transform: translateY(30px);  }
		    50% {transform: scale(1.1);    }
		    75% { transform: translateY(-30px);  }
		    100% {
		        transform: translateY(0);
		        transform: scale(0.75);
		    }
		}
	style>
head>
<body>
	<div class="cont">
	    <div>div>
	    <div>div>
	    <div>div>
	    <div>div>
	    <div>div>
	    <div>div>
	    <div>div>
	div>
body>
html>
三、3D立体加载动画
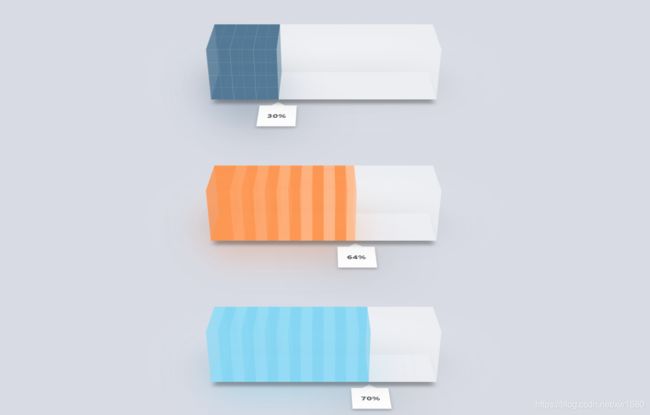
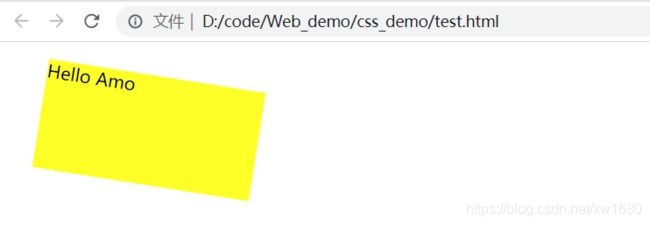
2、技术要点:本实例主要用到了CSS中transform过渡属性。Transform属性允许元素进行二维或三维空间坐标的变换。使用该属性后,可以进行旋转(rotate)、平移(translate)、缩放(scale)和倾斜(skew)的变换。下面列举一个简单例子,代码如下:
<html lang="en">
<head>
    <meta charset="UTF-8">
    <title>简单示例title>
    <style>
        div {
            margin:30px;
            width:200px;
            height:100px;
            background-color:yellow;
            /* 对div旋转9° */
            transform:rotate(9deg);
        }
    style>
head>
<body>
    <div>Hello Amodiv>
body>
html>
<html>
<head>
	<meta charset="UTF-8" />
	<meta http-equiv="X-UA-Compatible" content="IE=edge">
	<meta name="viewport" content="width=device-width, initial-scale=1">
	<title>CSS3 3D加载动画 | css3 立体loadingtitle>
	<link rel="stylesheet" type="text/css" href="css/demo.css" />
	<link rel="stylesheet" type="text/css" href="css/component.css" />
	<link rel="stylesheet" type="text/css" href="css/custom-bars.css" />

	<style>
		.bar .bar-face.face-position.roof {
			transform: translateZ(1em);
			transition-delay: 2s;
		}
		.bar .bar-face.face-position.back {
			transform: rotateX(-90deg) rotateY(0deg) translateZ(-1em);
			transition-delay: 1s;
		}
		.bar .bar-face.face-position.left {
			width: 1em;
			transform: rotateX(-90deg) rotateY(-90deg) translateX(-0.5em) translateZ(0.5em);
			transition-delay: 1.5s;
		}
		.bar .bar-face.face-position.right {
			left: auto;
			right: -.5em;
			width: 1em;
			transform: rotateX(-90deg) rotateY(90deg) translateX(0.5em);
			transition-delay: 0.5s;
		}
		.bar .bar-face.face-position.front {
			transform: rotateX(-90deg);
			transition-delay: 0s;
		}
	style>

head>
<body>
	<div class="container">
		<header class="codrops-header">
			<h1>CSS3 3D加载动画h1>
		header>
		<section class="content">
			<article class="flexy-grid">
				<div class="flexy-column">
					<div class="progress-factor flexy-item">
						<div class="progress-bar">
							<div class="bar has-rotation has-colors navy ruler" role="progressbar" aria-valuenow="30" aria-valuemin="0" aria-valuemax="100" id="bar-0_0">
								<div class="tooltip white">div>
								<div class="bar-face face-position roof percentage">div>
								<div class="bar-face face-position back percentage">div>
								<div class="bar-face face-position floor percentage volume-lights">div>
								<div class="bar-face face-position left">div>
								<div class="bar-face face-position right">div>
								<div class="bar-face face-position front percentage volume-lights shine">div>
							div>
						div>
					div>
				div>
				<div class="flexy-column">
					<div class="progress-factor flexy-item">
						<div class="progress-bar">
							<div class="bar has-rotation has-colors orange ruler-2" role="progressbar" aria-valuenow="64" aria-valuemin="0" aria-valuemax="100">
								<div class="tooltip white">div>
								<div class="bar-face face-position roof percentage">div>
								<div class="bar-face face-position back percentage">div>
								<div class="bar-face face-position floor percentage volume-lights">div>
								<div class="bar-face face-position left">div>
								<div class="bar-face face-position right">div>
								<div class="bar-face face-position front percentage volume-lights shine">div>
							div>
						div>
					div>
				div>
				<div class="flexy-column">
					<div class="progress-factor flexy-item">
						<div class="progress-bar">
							<div class="bar has-rotation has-colors cyan ruler-3" role="progressbar" aria-valuenow="70" aria-valuemin="0" aria-valuemax="100">
								<div class="tooltip white">div>
								<div class="bar-face face-position roof percentage">div>
								<div class="bar-face face-position back percentage">div>
								<div class="bar-face face-position floor percentage volume-lights">div>
								<div class="bar-face face-position left">div>
								<div class="bar-face face-position right">div>
								<div class="bar-face face-position front percentage volume-lights shine">div>
							div>
						div>
					div>
				div>
			article>
		section>
	div>

	<script src="js/jquery-3.4.1.min.js">script>
	<script type="text/javascript" charset="utf-8">
		$(".progress-bar .bar").hover(function(){
			$(this).find('.front').toggleClass('shine');
		});
	script>
body>
html>
四、饼图加载动画
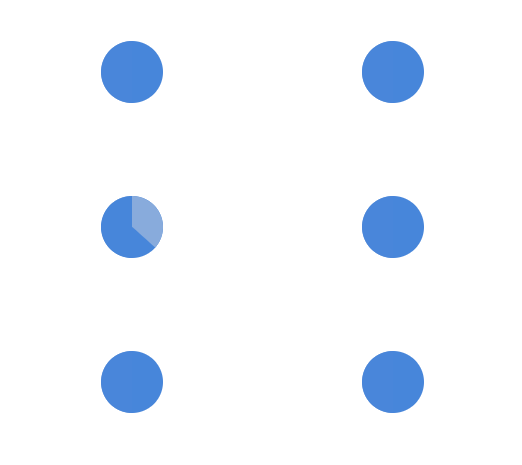
2、技术要点:本实例中需要设置一个深蓝色的背景,然后在深蓝色背景上添加两个半圆并设置其背景为浅蓝色,当浅蓝色旋转至左侧时,设置右侧深蓝色背景显示,同理,浅蓝色旋转至右侧时,设置左侧的深蓝色背景隐藏。代码实现:
<html lang="en">
<head>
	<meta charset="UTF-8">
	<title>饼图加载动画title>
	<style>
		.box{
		    position: relative;
		    width: 50px;
		    height: 50px;
		    margin: 50px auto;
		    border-radius: 40px;
		    overflow: hidden;
		    background-color: #4b86db;
		}
		.rot, .right, .left {
		    position: absolute;
		    width: 50%;
		    height: 100%;
		}
		.rot {                             /*旋转的圆形样式*/
		    border-radius: 50px 0 0 50px;
		    background-color: #89abdd;
		    transform-origin: right center;
		    animation: spin 800ms 1 linear forwards;
		    left: 0;
		    top: 0;
		}

		.right {                             /*右侧半圆*/
		    border-radius: 0 50px 50px 0;
		    background-color: #89abdd;
		    animation: hide 800ms steps(1, end) 1 forwards;
		   	left: 50%;
		    top: 0;
		    opacity: 1;
		}

		.left {                               /*左侧半圆*/
		    border-radius: 50px 0 0 50px;
		    background-color: #4b86db;
		    animation: show 800ms steps(1, end) 1 forwards;
		    left: 0;
		    top: 0;
		    opacity: 0;
		}

		@keyframes spin {                       /*旋转的动画*/
		    0% {transform: rotate(360deg); }
		    100% {transform: rotate(0deg); }
		}

		@keyframes hide {
		    0% { opacity: 1; }
		    50%, 100% { opacity: 0; }
		}

		@keyframes show {
		    0% {  opacity: 0; }
		    50%, 100% { opacity: 1; }
		}
	style>
head>
<body>
	<div class="box">
	    <div class="rot">div>
	    <div class="right">div>
	    <div class="left">div>
	div>
body>
html>
五、多色圆点波动效果的加载动画

2、技术要点:实现本实例时,先设置个圆点的位置以及背景色,并且为其添加动画,在动画中改变圆点的透明度,背景颜色以及竖直方向平移等属性,最后为个圆点设置动画延迟。代码实现:
<html lang="zh">
<head>
    <meta charset="UTF-8">
    <title>多色圆点波动效果的加载动画title>
    <link rel="stylesheet" type="text/css" href="css/style.css">

head>
<body>

<div class="box">
    <span>span>
    <span>span>
    <span>span>
    <span>span>
    <span>span>
div>
body>
html>
@charset "utf-8";
/* CSS Document */

.box {
    position: relative;
    width: 100px;
    height: 50px;
    margin: 50px auto;
}

.box span {
    position: absolute;
    width: 20px;
    height: 20px;
    background: #3498db;
    opacity: 0.5;
    border-radius: 100%;
    animation: anim 1s infinite ease-in-out;
}

.box > :nth-child(2) {
    left: 20px;
    animation-delay: 0.2s;
}

.box > :nth-child(3) {
    left: 40px;
    animation-delay: 0.4s;
}

.box > :nth-child(4) {
    left: 60px;
    animation-delay: 0.6s;
}

.box > :nth-child(5) {
    left: 80px;
    animation-delay: 0.8s;
}

@keyframes anim {
    0% {
        opacity: 0.3;
        transform: translateY(0px);
    }
    50% {
        opacity: 1;
        transform: translateY(-10px);
        background: #f9cdff;
    }
    100% {
        opacity: 0.3;
        transform: translateY(0px);
    }
}
六、制作顺时针放大的圆圈加载动画

2、技术要点:实现本实例的关键在于在动画中设置个圆点的缩放以及透明度,然后依次设置个圆点的动画延迟,另外,为了保证动画的美观,各圆点的位置设置也很重要。代码实现:
<html lang="en">
<head>
	<meta charset="UTF-8">
	<title>制作顺时针放大的圆圈加载动画title>
	<style>
		.ball {
		    width: 60px;
		    height: 60px;
		    margin: 50px auto;
		    position: relative;
		}

		.ball> div {                     /*设置圆圈样式*/
		    position: absolute;
		    background-color: #279fcf;
		    width: 15px;
		    height: 15px;
		    border-radius: 100%;
		    margin: 2px;
		    animation: ball infinite both 1s;
		}

		.ball> div:nth-child(1) {                 /*设置各圆点的位置以及动画延迟时间*/
		    top:-15px;
		    left:0px;
		}

		.ball > div:nth-child(2) {
		    top:-4px;
		    left: 16px;
		    animation-delay: 0.17s;
		}
		/*此处省略雷同代码*/
		.ball > div:nth-child(3) {
		    top:17px;
		    left: 15px;
		    animation-delay: 0.34s;
		}

		.ball > div:nth-child(4) {
		    top:18px;
		    left: -8px;
		    animation-delay: 0.51s;
		}

		.ball > div:nth-child(5) {
		    top:0px;
		    left: -13px;
		    animation-delay: 0.68s;
		}

		@keyframes ball {
		    0% {
		        -webkit-transform: scale(1);
		        transform: scale(1);
		    }

		    50% {
		        -webkit-transform: scale(0.5);
		        transform: scale(0.5);
		        opacity: 0.7;
		    }

		    100% {
		        -webkit-transform: scale(1);
		        transform: scale(1);
		        opacity: 1;
		    }
		}
	style>
head>
<body>
	<div class="ball">
	    <div>div>
	    <div>div>
	    <div>div>
	    <div>div>
	    <div>div>
	div>
body>
html>
七、制作小圆圈轮流放大的加载动画
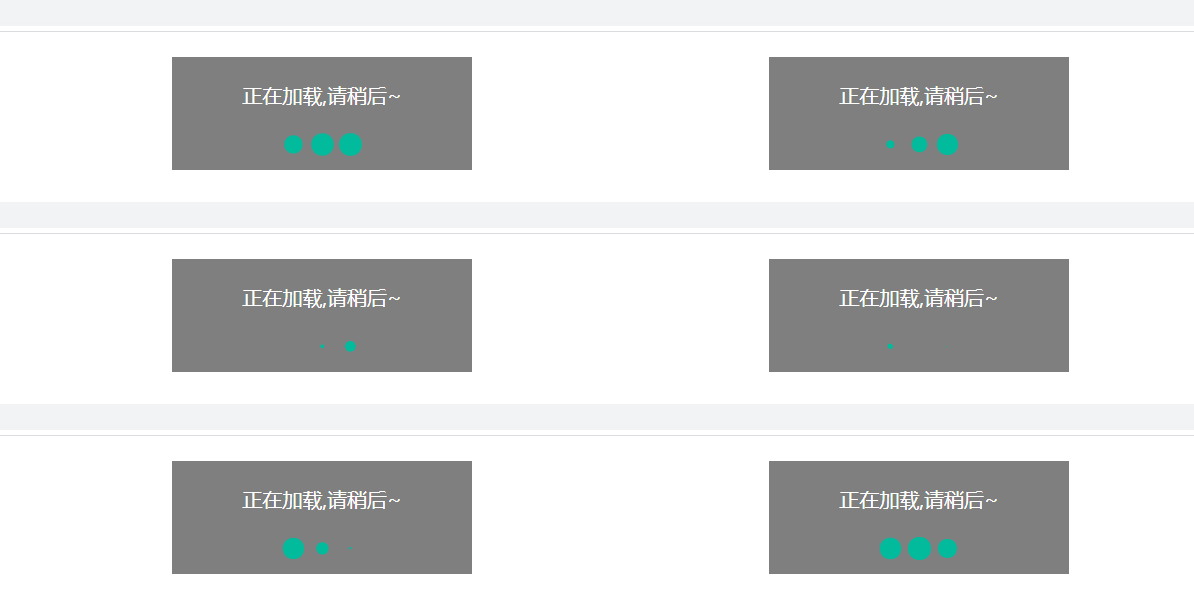
2、技术要点:实现本实例的关键在于在动画中设置各圆点的缩放,然后通过为各源泉设置各圆点的动画延迟实现小圆圈依次放大和缩小的动画。代码实现:
<html lang="en">
<head>
	<meta charset="UTF-8">
	<title>制作小圆圈轮流放大的加载动画title>
	<style>
/*css document*/
* { /*清除页面中默认的内外边距*/
    padding: 0;
    margin: 0;
}

.ball { /*设置动画盒子的整体样式*/
    width: 240px; /*设置整体大小*/
    height: 90px;
    text-align: center; /*设置对齐方式*/
    color: #fff; /*设置文字颜色*/
    background: rgba(0, 0, 0, 0.5); /*设置背景颜色*/
    margin: 20px auto;
}

.ball > p { /*设置加载的提示文字的样式*/
    padding: 20px 0;
}

.ball > div { /*设置动画中三个小球的样式*/
    width: 18px; /*设置大小*/
    height: 18px;
    background: #1abc9c; /*设置背景颜色*/
    border-radius: 100%; /*设置圆角边框*/
    display: inline-block; /*设置其显示方式*/
    animation: move 1.4s infinite ease-in-out both; /*添加动画*/
}

.ball .ball1 { /*设置第一个小球的动画延迟*/
    animation-delay: 0.16s;
}

.ball .ball2 { /*设置第二个小球的动画延迟*/
    animation-delay: 0.32s;
}

.ball .ball3 { /*设置第二个小球的动画延迟*/
    animation-delay: 0.48s;
}

@keyframes move { /*创建动画*/
    0% { transform: scale(0) }
    40% { transform: scale(1.0) }
    100% { transform: scale(0) }
}

	style>
head>
<body>
	<div class="cont">
	    <div class="ball">
	        <p>正在加载,请稍后~p>
	        <div class="ball1">div>
	        <div class="ball2">div>
	        <div class="ball3">div>
	    div>
	div>
body>
html>
八、制作竖条加载动画

2、技术要点:本实例实现依然在动画中设置竖向的缩放实现每一根竖条的长短变化,然后设置各竖条的动画延迟。其中,第1个和第5个竖条的动画延迟一致,第2个和第4个竖条的动画延迟一致。代码实现如下:
<html lang="en">
<head>
	<meta charset="UTF-8">
	<title>制作竖条加载动画title>
	<style>
		.animbox {
		    margin: 50px auto;
		    width: 200px;
		    text-align: center;
		}
		/*设置各竖条的共有样式*/
		.animbox > div {
		    background-color: #279fcf;
		    width: 4px;
		    height: 35px;
		    border-radius: 2px;
		    margin: 2px;
		    animation-fill-mode: both;
		    display: inline-block;
		    animation: anim 0.9s 0s infinite cubic-bezier(.11, .49, .38, .78);
		}
		/*设置动画延迟*/
		.animbox > :nth-child(2), .animbox > :nth-child(4) {
		    animation-delay: 0.25s !important;
		}

		.animbox > :nth-child(1), .animbox > :nth-child(5) {
		    animation-delay: 0.5s !important;
		}
		/*定义动画*/
		@keyframes anim {
		    0% {  transform: scaley(1); }
		    80% {  transform: scaley(0.3); }
		    90% {  transform: scaley(1);   }
		}
	style>
head>
<body>
	<div class="animbox">
	    <div>div>
	    <div>div>
	    <div>div>
	    <div>div>
	    <div>div>
	div>
body>
html>
九、制作水波扩散效果加载动画

2、技术要点:本实例中圆圈的放大以及颜色变化通过CSS3中的transform以及opacity实现,然后通过动画属性animation圆圈逐渐放大。代码实现:
<html lang="en">
<head>
	<meta charset="UTF-8">
	<title>制作水波扩散效果加载动画title>
	<style>
		.ball{
		    width: 100px;
		    height: 100px;
		    margin: 50px auto;
		    position: relative;
		    transform: translateY(-30px);
		}

		.ball> div {          /*设置水波纹的样式*/
		    background-color: #279fcf;
		    border-radius: 100%;
		    margin: 2px;
		    position: absolute;
		    left: 15px;
		    top: 15px;
		    opacity: 0;
		    width: 60px;
		    height: 60px;
		    animation: anim 1s 0s linear infinite both;
		}
		.ball > div:nth-child(2) {        /*设置动画延迟*/
		    animation-delay: 0.2s;
		}
		/*此处省略设置第三个和第四个圆圈的动画延迟的代码*/
		.ball> div:nth-child(3) {
		    animation-delay: 0.4s;
		}

		.ball > div:nth-child(4) {
		    animation-delay: 0.6s;
		}

		@keyframes anim {
		    0% {transform: scale(0);
		        opacity: 0; }
		    5% {opacity: 1; }
		    100% {transform: scale(1);
		           opacity: 0; }
		}
	style>
head>
<body>
	<div class="ball">
	    <div>div>
	    <div>div>
	    <div>div>
	    <div>div>
	div>
body>
html>
十、制作逆时针逐渐放大多点加载动画

2、技术要点:实现本实例需要在动画中改变圆圈的大小和透明度,然后逐个设置个圆圈的位置以及动画延迟即可。代码实现:
<html lang="en">
<head>
	<meta charset="UTF-8">
	<title>制作逆时针逐渐放大的多点加载动画title>
	<style>
		.ball {
		    width: 100px;
		    position: relative;
		    margin: 50px auto;
		}

		.ball > div {
		    background-color: #279fcf;
		    width: 15px;
		    height: 15px;
		    border-radius: 100%;
		    margin: 2px;
		    animation-fill-mode: both;
		    position: absolute;
		}

		/*设置各圆圈的位置以及动画*/
		.ball > div:nth-child(1) {
		    top: 25px;
		    left: 0;
		    animation: loading 1s 0s infinite linear;
		}
		/*此处省略为其余7个圆形设置位置以及动画的代码*/
		.ball > div:nth-child(2) {
		    top: 17px;
		    left: 17px;
		    animation: loading 1s 0.12s infinite linear;
		}

		.ball > div:nth-child(3) {
		    top: 0;
		    left: 25px;
		    animation: loading 1s 0.24s infinite linear;
		}

		.ball > div:nth-child(4) {
		    top: -17px;
		    left: 17px;
		    animation: loading 1s 0.36s infinite linear;
		}

		.ball > div:nth-child(5) {
		    top: -25px;
		    left: 0;
		    animation: loading 1s 0.48s infinite linear;
		}

		.ball > div:nth-child(6) {
		    top: -17px;
		    left: -17px;
		    animation: loading 1s 0.6s infinite linear;
		}

		.ball > div:nth-child(7) {
		    top: 0;
		    left: -25px;
		    animation: loading 1s 0.72s infinite linear;
		}

		.ball > div:nth-child(8) {
		    top: 17px;
		    left: -17px;
		    animation: loading 1s 0.84s infinite linear;
		}

		@keyframes loading {
		    50% {
		        opacity: 0.3;
		        transform: scale(0.4);
		    }

		    100% {
		        opacity: 1;
		        transform: scale(1);
		    }
		}
	style>
head>
<body>
	<div class="ball">
        <div>div>
        <div>div>
        <div>div>
        <div>div>
        <div>div>
        <div>div>
        <div>div>
        <div>div>
    div>
body>
html>
十一、制作形状变化的加载动画

2、技术要点:本实例中主要通过css中的clip-path属性实现形状的的改变。clip-path属性用于自定义裁剪路径。具体使用方法如下:clip-path:clip-source |
<html lang="en">
<head>
	<meta charset="UTF-8">
	<title>制作形状变化的加载动画title>
	<script type="text/javascript" src="js/jquery-3.4.1.min.js">script>
	<style>
		#cont {
		    width: 40px;
		    height: 40px;
		    margin: 200px auto;
		    background-color: #f59490;
		    animation: 1s move infinite ease-in-out alternate;
		}
		.shape0 {
		    clip-path: polygon(50% 0%, 100% 38%, 82% 100%, 18% 100%, 0% 38%);
		}
		.shape1 {
		    clip-path: polygon(50% 0%, 0% 100%, 100% 100%);
		}
		.shape2 {
		    clip-path: polygon(50% 0%, 100% 50%, 50% 100%, 0% 50%);
		}
		.shape3 {
		    clip-path: polygon(50% 0%, 61% 35%, 98% 35%, 68% 57%, 79% 91%, 50% 70%, 21% 91%, 32% 57%, 2% 35%, 39% 35%);
		}
		@keyframes move {
		    0% {
		        margin-top: 200px;
		    }
		    50% {
		        margin-top: 150px;
		    }
		    100% {
		        margin-top: 200px;
		    }
		}
	style>
head>
<body>
<div id="cont">div>
<script type="text/javascript">
    var i = 0;

    function changeShape() {
        $("#cont").removeClass();
        i++;
        if (i >= 4) {
            i = 0;
        }
        $("#cont").addClass("shape" + i);
        console.log($("#cont").attr("class"))
    }

    function changeColor() {
        if (i % 2 == 0) {
            $("#cont").css("background-color", "rgb(0,255,127)")
        }
        if (i % 2 == 1) {
            $("#cont").css("background-color", "rgb(245,148,144)")
        }
    }

    setInterval("changeShape()", 1000);
    setInterval("changeColor()", 500);
script>
body>
html>
十二、实现动态前进的阴影进度条

2、技术要点:实现本实例时,通过css动画实现白色阴影前进动画,然后使用JavaScript脚本实现右侧百分比数字显示,以及蓝色进度条逐渐填充的效果。代码实现:
<html lang="en">
<head>
	<meta charset="UTF-8">
	<title>实现动态前进的阴影进度条title>
	<style>
		section {
		    width: 420px;
		    margin: 50px auto;
		    text-align: center;
		}

		div {
		    position: relative;
		}

		.bar {
		    position: absolute;
		    top: -14px;
		    left: 154px;
		    width: 30px;
		    height: 16px;
		    background-image: linear-gradient(-45deg, transparent, rgba(255, 255, 255, 0.8), transparent);
		    animation: shadow 2s 5 normal linear forwards;

		}

		@keyframes shadow {
		    0% {
		        left: 154px;
		    }
		    100% {
		        left: 313px
		    }
		}
	style>
head>
<body>
<section>
    <div><span>完成百分比:span>
        <progress id="p" max=100>progress>
        <span id="span">0%span>
        <p class="bar">p>div>
section>
<script type="text/javascript">
	var progressBar = document.getElementById('p');
	setInterval("button_onclick()", 50)
	var i = 0;
	function button_onclick() {
	    if (i < 100) {
	        i++;
	        progressBar.value = i;
	        document.getElementById('span').innerHTML = i + "%";
	    }
	}
script>
body>
html>
十三、椭圆形进度条加载
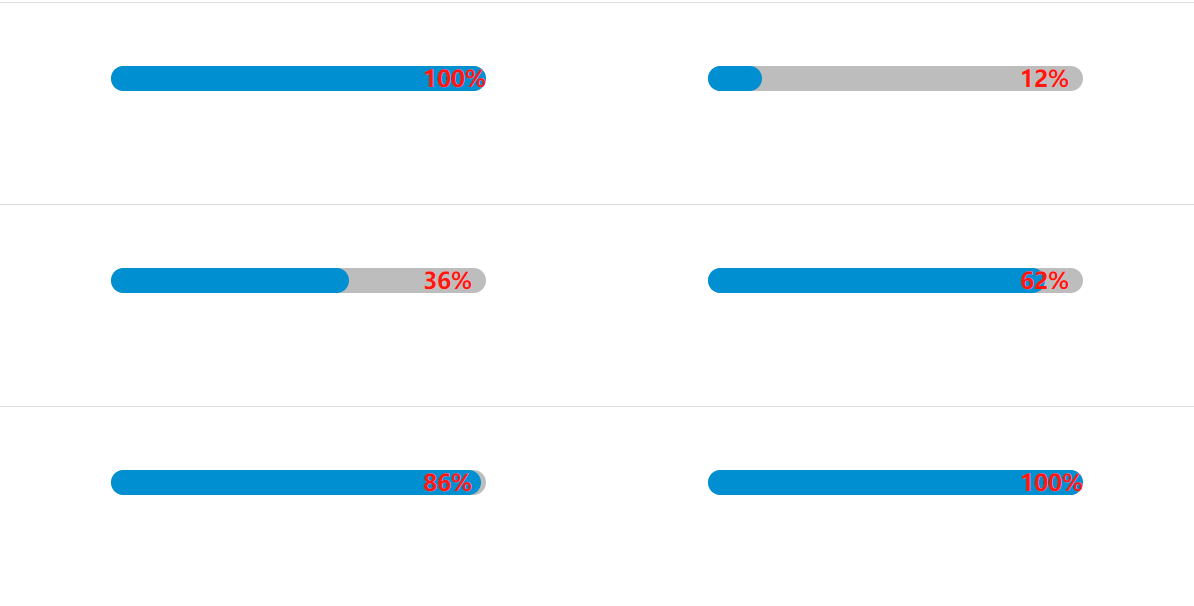
2、技术要点:本实例通过CSS3动画实现进度条加载的效果。CSS3动画使用步骤如下:@keyframes animationName {
属性
属性值
含义
animation
复合属性,以下属性的综合
指定对象所应用的动画特效
animation-name
name
指定对象所应用动画的名称
animation-duration
time+单位s(秒)
指定对象动画的持续时间
animation-timing-function
linear、ease、ease-in等6个可选值
指定对象动画的过渡类型
animation-delay
time+单位s(秒)
指定对象动画的延迟时间
animation-iteration-count
number或infinite(无限循环)
指定对象动画的循环次数
animation-direction
normal(默认值,表示正常方向)或alternate(表示正向与反向交替)
指定对象动画在循环中是否反向运动
animation-play-state
running(默认值,表示运动)或paused(表示暂停)
指定对象动画的状态
animation-fill-mode
none:表示不设置动画之外的状态;
forwards:表示设置对象状态为动画结束时的状态
backwards:表示设置对象状态为动画开始时的状态
both:表示设置对象状态为动画开始或结束时的状态指定对象动画时间之外的状态
<html lang="en">
<head>
	<meta charset="UTF-8">
	<title>椭圆形进度条加载title>
	<style>
		.cont {
		    margin: 50px auto;
		}

		.cont, p {
		    width: 300px;
		    height: 20px;
		    border-radius: 10px;
		    position: relative;
		    background-color: rgba(189, 189, 189, 1);
		}

		#bar {
		    background-color: #0e90d2;
		    width: 0;
		    animation: prog 1 5s ease forwards;
		}
		/*进度提示数字展示*/
		#txt {
		    position: absolute;
		    left: 250px;
		    width: 50px;
		    font: bold 18px/20px "";
		    color: #f00;
		}
		/*蓝色逐渐向右填充动画*/
		@keyframes prog {
		    0% {
		        width: 0px;
		    }
		    100% {
		        width: 300px;
		    }
		}
	style>
head>
<body>
<div class="cont">
    <p id="bar"><span id="txt">0%span>p>
div>
<script type="text/javascript">
	window.onload=function(){
	    var i = 0;
	    var txt = document.getElementById("txt");
	    var ds = setInterval(function(){
	        i++;
	        txt.innerHTML = i + "%";
	        // console.log(i)
	        if (i == 100) {
	            clearInterval(ds)
	        }
	    }, 50)
	}
script>
body>
html>
十四、彩色进度条加载效果

2、技术要点:本实例通过CSS3动画实现滚动条各色滚动条加载效果以及滚动条末端小圆圈的移动效果。代码实现:
<html lang="en">
<head>
	<meta charset="UTF-8">
	<title>彩色进度条加载效果title>
	<style>
		.demo{
		    width: 800px;
		    margin: 50px auto;
		}
		label{
		    width: 820px;
		    height: 20px;
		    display: block;

		}
		label>*{
		    display: block;
		    float: left;
		}
		label>span{
		    width: 100px;
		    line-height: 37px;
		    text-align: center;
		}
		.bar{
		    width: 700px;
		    height: 5px;
		    background: #acacac;
		}
		.pro1,.pro2,.pro3,.pro4{
		    display: block;
		    width: 0;
		    height: 5px;
		    position: relative;
		}
		/*每一个进度后面添加小圆点*/
		.pro1:after,.pro2:after,.pro3:after,.pro4:after{
		    content: "";
		    width: 3px;
		    height: 3px;
		    background:  #fff;
		    border-radius: 100%;
		    position: absolute;
		    top:-4px;
		    left: 0px;
		}
		/*填充的进度条*/
		.pro1{
		    background: #1abc9c;
		    animation: bar1 2s ease 1 normal forwards;
		}
		/*进度条后面的圆点*/
		.pro1:after{
		    border: 5px solid #1abc9c;
		    animation: cir1 2s ease 1 normal forwards;
		}
		/*实现其他进度条样式以及动画代码与此类似,故省略*/
		.pro2{
		    background: #7fff00;
		    animation: bar2 1s ease 1 normal forwards;
		}
		.pro2:after{
		    border: 5px solid #7fff00;
		    animation: cir2 1s ease 1 normal forwards;
		}
		.pro3{
		    background: #e38d13;
		    animation: bar3 1.5s ease 1 normal forwards;
		}
		.pro3:after{
		    border: 5px solid #e38d13;
		    animation: cir3 1.5s ease 1 normal forwards;
		}
		 .pro4{
		    background: #ee6666;
		     animation: bar4 2.5s ease 1 normal forwards;
		}
		.pro4:after{
		    border: 5px solid  #ee6666;
		    animation: cir4 2.5s ease 1 normal forwards;
		}
		/*进度条后面圆点移动动画*/
		@keyframes cir1 {
		    0%{left:0px}
		    100%{left:600px}
		}
		/*进度条填充动画*/
		@keyframes bar1 {
		    0%{  width: 0px;  }
		    100%{ width: 600px; }
		}
		@keyframes cir2 {
		    0%{left:0px}
		    100%{left:450px}
		}
		@keyframes bar2 {
		    0%{
		        width: 0px;
		    }
		    100%{
		        width: 450px;
		    }
		}
		@keyframes cir3 {
		    0%{left:0px}
		    100%{left:500px}
		}
		@keyframes bar3 {
		    0%{
		        width: 0px;
		    }
		    100%{
		        width: 500px;
		    }
		}
		@keyframes cir4 {
		    0%{left:0px}
		    100%{left:670px}
		}
		@keyframes bar4 {
		    0%{
		        width: 0px;
		    }
		    100%{
		        width: 670px;
		    }
		}

	style>
head>
<body>
<div class="demo">
    <label><span>Amospan><p class="bar"><span class="pro1">span>p>label>
    <label><span>Jerryspan><p class="bar"><span class="pro2">span>p>label>
    <label><span>Paulspan><p class="bar"><span class="pro3">span>p>label>
    <label><span>Jasonspan><p class="bar"><span class="pro4">span>p>label>
div>
body>
html>
十五、环形加载动画

2、技术要点:本实例的通过添加了12个
<html lang="en">
<head>
	<meta charset="UTF-8">
	<title>环形加载动画title>
	<style>
		/*css document*/
		* {
		    margin: 0;
		    padding: 0;
		}


		body {
		    background: #ffefce;
		}


		.cont {
		    width: 100px;
		    height: 100px;
		    position: relative;
		    margin: 100px auto;
		}
		.line div {
		    position: absolute;
		    left: 0;
		    top: 0;
		    width: 4px;
		    height: 100px;
		}


		.line div:before, .line div:after {
		    content: '';
		    display: block;
		    height: 50%;
		    background: #009cda;
		    border-radius: 5px;
		}

		/*设置组成环形加载的竖条的旋转角度*/
		.line div:nth-child(2) {
		    transform: rotate(15deg);
		}


		.line div:nth-child(3) {
		    transform: rotate(30deg);
		}


		.line div:nth-child(4) {
		    transform: rotate(45deg);
		}


		.line div:nth-child(5) {
		    transform: rotate(60deg);
		}

		.line div:nth-child(6) {
		    transform: rotate(75deg);
		}
		.line div:nth-child(7) {
		    transform: rotate(90deg);
		}


		.line div:nth-child(8) {
		    transform: rotate(105deg);
		}


		.line div:nth-child(9) {
		    transform: rotate(120deg);
		}


		.line div:nth-child(10) {
		    transform: rotate(135deg);
		}

		.line div:nth-child(11) {
		    transform: rotate(150deg);
		}
		.line div:nth-child(12) {
		    transform: rotate(165deg);
		}

		.circle {
		    position: absolute;
		    left: -15%;
		    top: 35%;
		    width: 50px;
		    height: 50px;
		    margin: -9px 0 0 -9px;
		    background: #ffefce;
		    border-radius: 100%;
		}

		/*定义动画*/
		@keyframes load {
		    0% {
		        opacity: 0;
		    }
		    100% {
		        opacity: 1;
		    }
		}
		/*设置动画以及动画延迟 */
		.line div:nth-child(1):before {
		    animation: load 1.2s linear 0s infinite;
		}
		/*依次从第一个div的:before至最后一个div的:before的动画延迟为每个增加0.05s,此处省略雷同代码*/
		.line div:nth-child(2):before {
		    animation: load 1.2s linear 0.05s infinite;
		}

		.line div:nth-child(3):before {
		    animation: load 1.2s linear 0.1s infinite;
		}

		.line div:nth-child(4):before {
		    animation: load 1.2s linear 0.15s infinite;
		}

		.line div:nth-child(5):before {
		    animation: load 1.2s linear 0.2s infinite;
		}

		.line div:nth-child(6):before {
		    animation: load 1.2s linear 0.25s infinite;
		}

		.line div:nth-child(7):before {
		    animation: load 1.2s linear 0.3s infinite;
		}

		.line div:nth-child(8):before {
		    animation: load 1.2s linear 0.35s infinite;
		}

		.line div:nth-child(9):before {
		    animation: load 1.2s linear 0.4s infinite;
		}

		.line div:nth-child(10):before {
		    animation: load 1.2s linear 0.45s infinite;
		}

		.line div:nth-child(11):before {
		    animation: load 1.2s linear 0.5s infinite;
		}

		.line div:nth-child(12):before {
		    animation: load 1.2s linear 0.55s infinite;
		}

		.line div:nth-child(1):after {
		    animation: load 1.2s linear 0.6s infinite;
		}
		/*依次从第一个div的:after至最后一个div的:after的动画延迟为每个增加0.05s,此处省略雷同代码*/
		.line div:nth-child(2):after {
		    animation: load 1.2s linear 0.65s infinite;
		}

		.line div:nth-child(3):after {
		    animation: load 1.2s linear 0.7s infinite;
		}

		.line div:nth-child(4):after {
		    animation: load 1.2s linear 0.75s infinite;
		}

		.line div:nth-child(5):after {
		    animation: load 1.2s linear 0.8s infinite;
		}

		.line div:nth-child(6):after {
		    animation: load 1.2s linear 0.85s infinite;
		}

		.line div:nth-child(7):after {
		    animation: load 1.2s linear 0.9s infinite;
		}

		.line div:nth-child(8):after {
		    animation: load 1.2s linear 0.95s infinite;
		}

		.line div:nth-child(9):after {
		    animation: load 1.2s linear 1.0s infinite;
		}

		.line div:nth-child(10):after {
		    animation: load 1.2s linear 1.05s infinite;
		}

		.line div:nth-child(11):after {
		    animation: load 1.2s linear 1.1s infinite;
		}

		.line div:nth-child(12):after {
		    animation: load 1.2s linear 1.15s infinite;
		}
	style>
head>
<body>
<div class="cont">
  <div class="line">
    <div>div>
    <div>div>
    <div>div>
    <div>div>
    <div>div>
    <div>div>
    <div>div>
    <div>div>
    <div>div>
    <div>div>
    <div>div>
    <div>div>
  div>
  <div class="circle">div>
div>
body>
html>
十六、制作斑马线样式的进度条

2、技术要点:本实例的关键在于设置滚动条中的波浪特效,实现该特效时,通过css3中的背景图片background-image属性实现其波浪图片,然后在动画中改变其背景以实现移动的波浪特效进度条。代码实现:
<html lang="en">
<head>
	<meta charset="UTF-8">
	<title>制作斑马线样式的进度条title>
	<style>
		.anim {
		    position: absolute;
		    top: 0;
		    left: -100px;
		    width: 480px;
		    height: 30px;
		    background-size: 30px 30px;
		    /*添加条纹背景*/
		    background-image: linear-gradient(-45deg, transparent 15px, transparent 8px, #ffe45c 9px, #ffe45c 20px, transparent 21px, transparent 36px, #ffe45c 37px);
		    animation: load 5s 1 linear forwards;
		}
		.cont {
		    width: 480px;
		    height: 30px;
		    position: relative;
		    background-color: #ee6666;
		    border-radius: 5px;
		    overflow: hidden;
		}
		@keyframes load {
		    0% { width: 0; }
		    100% { width: 680px;  }
		}
	style>
head>
<body>
<div class="cont">
    <div class="anim">div>
div>
body>
html>
十七、程序加载页面

2、技术要点:本实例主要是用
代码实现:
<html>
<head>
<title>程序加载页面title>
<meta http-equiv="Content-Type" content="text/html; charset=utf-8">
head>
<body style="background:black">
<div id="div1" style="position:absolute;width:322px;height:14px;border:1px #707888 solid;overflow:hidden">
	<div style="position:absolute;top:-1px;left:0" id="pimg">
	div>
div>
<div id="div2" style="position:absolute;top:30px;left:120px;font-size:9pt;color:#f4f4f4">
正在加载中......
div>
<script type="text/javascript">
s=new Array("#050626","#0a0b44","#0f1165","#1a1d95","#1c1fa7","#1c20c8","#060cff");
//s=new Array("#333333","#555555","#777777","#999999","#AAAAAA","#CCCCCC","#EEEEEE");
div1.style.top=Math.floor((document.body.clientHeight-14)/2)+"px";
div1.style.left=Math.floor((document.body.clientWidth-322)/2)+"px";
div2.style.top=parseInt(div1.offsetTop)+20+"px";
div2.style.left=parseInt(div1.offsetLeft)+120+"px";
function Larrange(){
	pimg.innerHTML="";
	for(i=0;i<9;i++){
		pimg.innerHTML+="+s[i]+";margin:1\">";
	}
}
function Rarrange(){
	pimg.innerHTML="";
	for(i=9;i>-1;i--){
		pimg.innerHTML+="+s[i]+";margin:1\">";
	}
}
var is=0;size=0;
function move(){
	if(pimg.offsetLeft<350&&is==0){
		if(size==0){Larrange();size=1;}
		pimg.style.left=pimg.offsetLeft+3+"px";
		setTimeout("move()",1);
		return;
	}
	is=1;
	if(pimg.offsetLeft>-200&&is==1){
		if(size==1){Rarrange();size=0;}
		pimg.style.left=pimg.offsetLeft-3+"px";
		setTimeout("move()",1);
		return;
	}
	is=0;
	move();
}
function flashs(){
	if(div2.style.color=="#ffffff"){
		div2.style.color="#707888";
		setTimeout('flashs()',500);
	}
	else{
		div2.style.color="#ffffff";
		setTimeout('flashs()',500);
	}
}
Larrange();
flashs();
move();
script>
body>
html>
