深度学习-unet-多类别分割
2020-08-23 记录
2020-08-20在实验室的台式机将深度学习环境配置完成。
2020-08-21 准备多类别分割的python库,调试代码。主要在import自己的模块时有一些问题。
2020-08-22 继续调试代码,开始训练。
2020-08-23 进行predict,和记录结果。
疑问:loss值这里应该怎么去获得,并画图呢???
训练
model.py和unet文件夹下的import有一些修改,主要在from unet import unet,这个from后面的要不要加.
train.py有个修改:230行main函数里
if __name__ == '__main__':
    __spec__ = "ModuleSpec(name='builtins', loader=)"
    #报错 AttributeError: module '__main__' has no attribute '__spec__'。 查询后加入上面的__spec__这行 2020-08-22 mxl加
一共训练了59个epoch,大约用时7个小时。设置的epoch数为100,在第59个运行结束,参数保存后,control+C强行终止。(不知道是不是这样kill训练过程???)
模型全部保存在F:\MXL\DeepLearning\unet-nested-multiple-classification-master\data\checkpoints
预测
使用了不同的训练参数去预测,代码和结果如下:
- 使用作者提供的预训练模型参数epoch_10.pth
(pytorch_py37) F:\MXL\DeepLearning\unet-nested-multiple-classification-master>python inference.py -m ./data/checkpoints/epoch_10.pth -i ./data/test/input -o ./data/test/output
5it [00:00,  5.10it/s]
结果为F:\MXL\DeepLearning\unet-nested-multiple-classification-master\data\test\output_pretrained_model\1582708143405。

2. 使用自己2020-08-22训练的模型参数epoch_MXL10.pth
三张图片输出
(pytorch_py37) F:\MXL\DeepLearning\unet-nested-multiple-classification-master>python inference.py -m ./data/checkpoints/epoch_MXL10.pth -i ./data/test/input -o ./data/test/output
5it [00:00,  5.09it/s]
- 使用自己2020-08-22训练的模型参数epoch_MXL1.pth
使用第一次epoch的模型参数,下面的半个圆肯定是因为那部分的像素分类分错了,标签分类错误,导致显示的这样的效果。但是将二者合并起来,就看起来是完整的。
(pytorch_py37) F:\MXL\DeepLearning\unet-nested-multiple-classification-master>python inference.py -m ./data/checkpoints/epoch_MXL1.pth -i ./data/test/input -o ./data/test/output
5it [00:01,  3.69it/s]
- 使用自己2020-08-22训练的模型参数epoch_MXL59.pth
(pytorch_py37) F:\MXL\DeepLearning\unet-nested-multiple-classification-master>python inference.py -m ./data/checkpoints/epoch_MXL59.pth -i ./data/test/input -o ./data/test/output
5it [00:01,  3.74it/s]



使用训练59次的模型参数去预测,因为在第10次的模型就已经在这个数据集上预测的很好了。所以怎么判断过拟合?需要通过loss或者accuracy?(继续学习ing)
- 使用自己2020-08-22训练的模型参数epoch_MXL10.pth.
带颜色的,只有一张图片输出
(pytorch_py37) F:\MXL\DeepLearning\unet-nested-multiple-classification-master>python inference_color.py -m ./data/checkpoints/epoch_MXL10.pth -i ./data/test/input -o ./data/test/output
0it [00:00, ?it/s]1582708143405.png
1it [00:00,  4.20it/s]1582708143461.png
2it [00:00,  4.52it/s]1582708143505.png
3it [00:00,  4.79it/s]1582708143540.png
4it [00:00,  5.00it/s]1582708143552.png
5it [00:00,  5.22it/s]

6. 使用自己2020-08-22训练的模型参数epoch_MXL1.pth.
(pytorch_py37) F:\MXL\DeepLearning\unet-nested-multiple-classification-master>python inference_color.py -m ./data/checkpoints/epoch_MXL1.pth -i ./data/test/input -o ./data/test/output_epoch_MXL1_color
0it [00:00, ?it/s]1582708143405.png
1it [00:00,  4.13it/s]1582708143461.png
2it [00:00,  4.42it/s]1582708143505.png
3it [00:00,  4.62it/s]1582708143540.png
4it [00:00,  4.77it/s]1582708143552.png
5it [00:01,  4.96it/s]
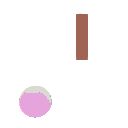
这里可以看到上面黑白的缺陷在哪里了。最好是在Matlab或python中看一下具体这个灰色的部分,label是多少。

这些同理。

同理。

- 使用自己“画图”创建的图去预测
(pytorch_py37) F:\MXL\DeepLearning\unet-nested-multiple-classification-master>python inference.py -m ./data/checkpoints/epoch_MXL10.pth -i ./data/test/input_create -o ./data/test/output
0it [00:01, ?it/s]
Traceback (most recent call last):
  File "inference.py", line 107, in <module>
    device=device)
  File "inference.py", line 38, in inference_one
    output = net(img)
  File "C:\Users\A\anaconda3\envs\pytorch_py37\lib\site-packages\torch\nn\modules\module.py", line 722, in _call_impl
    result = self.forward(*input, **kwargs)
  File "F:\MXL\DeepLearning\unet-nested-multiple-classification-master\unet\model.py", line 96, in forward
    x1_1 = self.conv1_1(torch.cat([x1_0, self.up(x2_0)], 1))
RuntimeError: Sizes of tensors must match except in dimension 1. Got 281 and 280 in dimension 2 (The offending index is 1)
报错了,应该是输入图片的维度不匹配。先在自己的mac上,使用预训练模型试一下。
训练过程可视化
训练结束后,才看到有这么个东西,但是具体怎么用还没搞懂,需要学习一下。
(pytorch_py37) F:\MXL\DeepLearning\unet-nested-multiple-classification-master>tensorboard --logdir=runs
TensorFlow installation not found - running with reduced feature set.
Serving TensorBoard on localhost; to expose to the network, use a proxy or pass --bind_all
TensorBoard 2.3.0 at http://localhost:6006/ (Press CTRL+C to quit)
源代码参考以下文章,撒花感谢(✪ω✪)
参考:https://blog.csdn.net/lnformat/article/details/104613447
https://github.com/zonasw/unet-nested-multiple-classification#inference
2020-08-23 下午更新
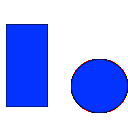
形状规则的新图片
之前的测试数据都是原作者给的test数据集,若将此训练结果应用在新的数据集上,如下:
首先生成数据是使用mac电脑的“预览”工具,对之前的一张图片,全选删除,然后再“显示-显示工具”去画出形状。
(如果是Windows,应该使用画图即可。)
需注意两点:
- 图片的大小尺寸必须符合要求,此处是(128,128,3)。可以在python中img.shape看,或者Matlab导入图像看。

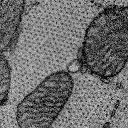
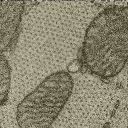
像这里的I1就不符合。I4是作者提供的test数据集,中间两个是自己生成的。
所以如果是不符合尺寸要求的,这里尝试了裁剪操作。
若是在ipython里面直接操作,直接切片处理。代码如下:
import cv2
I = cv2.imread('xxx/xxx.png')
I.shape
# 直接切片处理
cropped = I[0:128,0:128,:]
#保存
cv2.imwrite(cropped, 'xxx/xxx.png')
- 若是mac直接“预览”生成的图像,背景是(0,0,0),即黑色。若直接采用这样的图去做预测,预测出来的图也是全黑的。
所以,对图像的背景像素进行了一个替换,此处是在Matlab中做的,也是由于之前导入图像看pixel值和看图像矩阵和类型。
代码位于:/Users/verona/Desktop/unet/unet-nested-multiple-classification-master/data/test/input_create/change_pixel.mlx
(以下这段代码是对图像像素遍历,修改像素值)
(CSDN的代码块好像不支持Matlab?所以这里暂且用bash代码块的格式)
%对读入图像进行像素的遍历
for i=1:1:128
    for j=1:1:128
        for k=1:1:3
            if(I3(i,j,k)==0)
                I3(i,j,k)=255;
            end
        end
    end
end
参考:https://blog.csdn.net/qq_39217683/article/details/88849155
修改图像大小,修改背景像素值后,进行预测:
(opencv_py36) VeronadeMacBook-Pro:unet-nested-multiple-classification-master verona$ python inference.py -m ./data/checkpoints/epoch_10.pth -i ./data/test/input_my -o ./data/test/output_create
1it [00:00,  3.22it/s]
上面这段代码的图片输入输出,以后用的时候是需要修改的。
输出为:
输出文件夹中综合了几个输出。
cropped文件夹就是没改背景之前的输出,所以是一片黑色。
3和2_new的输出都是正常的。


以2_new为例,是上面三个输出。
网上下载的形状不规则图片
第一步:先导入Matlab查看了图像的尺寸大小,显示图像,data cursor查看背景是否是255。
第二步:在ipython 中对图像进行裁剪,裁剪后输出保存图像。
手图:
In [1]: import cv2

In [2]: I1 = cv2.imread('down_1.png')

In [3]: I1.shape
Out[3]: (355, 470, 3)

In [4]: crop_1 = I1[50:178, 100:228,0]

In [5]: crop_1.shape
Out[5]: (128, 128)

In [6]: crop_1 = I1[50:178, 100:228,:]

In [7]: crop_1.shape
Out[7]: (128, 128, 3)

In [9]: cv2.imwrite('crop_1.png',crop_1)
Out[9]: True
动物图:
In [10]: I1 = cv2.imread('down_2.png')

In [11]: I1.shape
Out[11]: (987, 991, 3)

In [12]: crop_1 = I1[50:178, 100:228,:]

In [13]: crop_1.shape
Out[13]: (128, 128, 3)

In [14]: cv2.imwrite('crop_2.png',crop_1)
Out[14]: True
然后裁剪后的原图为下图,也是作为inference.py的输入。


然后进行预测:
(opencv_py36) VeronadeMacBook-Pro:unet-nested-multiple-classification-master verona$ python inference.py -m ./data/checkpoints/epoch_10.pth -i ./data/test/put -o ./data/test/output_create
2it [00:00,  3.46it/s]
(opencv_py36) VeronadeMacBook-Pro:unet-nested-multiple-classification-master verona$ python inference_color.py -m ./data/checkpoints/epoch_10.pth -i ./data/test/put -o ./data/test/output_create_color
0it [00:00, ?it/s]crop_2.png
1it [00:00,  3.18it/s]crop_1.png
2it [00:00,  3.20it/s]
输出为
/Users/verona/Desktop/unet/unet-nested-multiple-classification-master/data/test/output_create_color/crop_1/crop_1.png


看一下这是几个label。


