Ubuntu SLAM 环境配置 for 视觉SLAM(包含 ROS CUDA OPENCV 等)
Ubuntu SLAM 环境配置 for 视觉SLAM
- 准备 Ubuntu 系统(建议)
-
- 在虚拟机中安装 Ubuntu 系统
- 调整系统分辨率
- 换源
- 安装 Visual Studio Code
- gcc,g++ 安装
- CMake 安装
- Eigen 安装
- Git & Vim 安装
- Pangolin 安装
- Sophus 安装(非模板类)
- OpenCV 安装(带 CUDA)
- Ceres 安装
- g2o 安装
- ROS 安装(Melodic or Noetic)
-
- Melodic for Ubuntu18
- Noetic for Ubuntu20
- gtsam 4.0 安装
- ORB-SLAM2
前排提示:在操作 Linux 或修改其配置时,经常会不小心造成一些不可逆的错误,建议养成在每次修改配置之前拍摄快照的习惯。
准备 Ubuntu 系统(建议)
在虚拟机中安装 Ubuntu 系统
建议完整安装而不是简易安装或最小安装以减少后续的麻烦。
调整系统分辨率
如果你的 Ubuntu 系统不是完整安装,可能没有 VMware Tools,或者因为其他的一些原因,系统分辨率无法自适应宿主机窗口的大小,这时候需要自己手动调整。
在终端输入 xrandr 运行,查看可用的分辨率:
xrandr
之后将系统调整到一个合适的分辨率:
xrandr -s 1920x1200
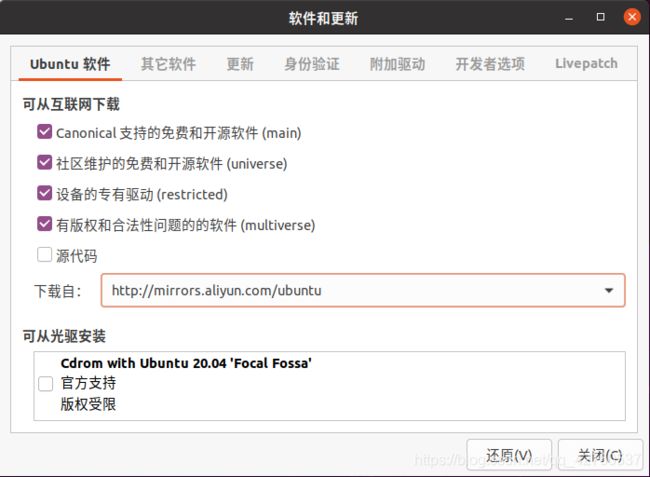
换源
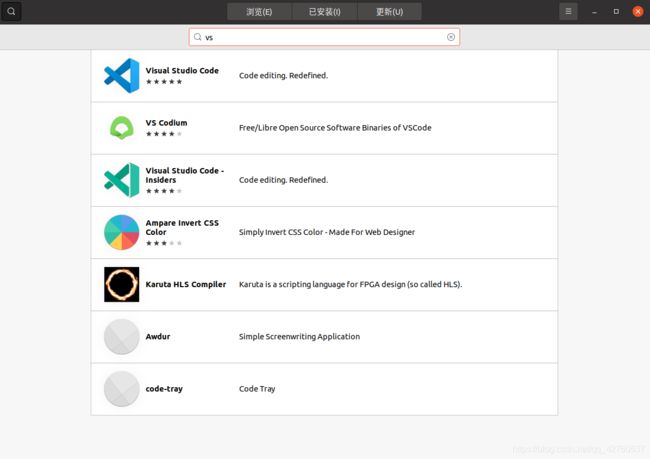
安装 Visual Studio Code

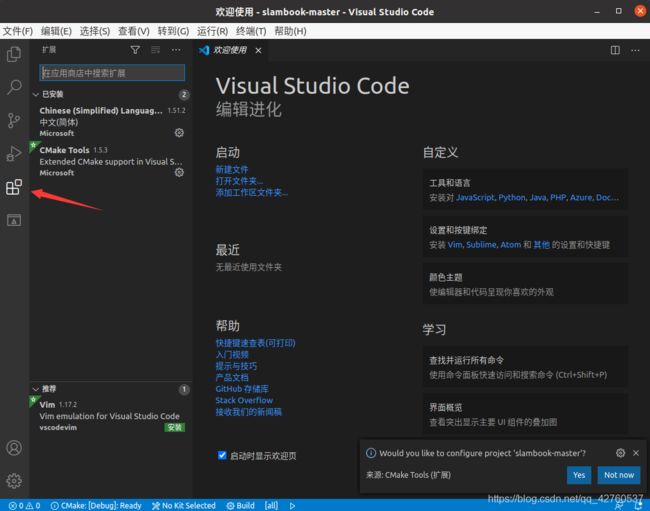
为 Visual Studio Code 安装一些必要的插件。
gcc,g++ 安装
sudo apt upgrade
sudo apt update
sudo apt install build-essential
---------------------------------------
如果上述方法提示缺少依赖,可以尝试:
sudo apt install aptitude
sudo aptitude install build-essential
build-essential 中将包含 gcc, g++, make 的安装,使用
gcc --version
验证是否安装成功。
CMake 安装
sudo apt install cmake
sudo apt upgrade cmake
Eigen 安装
sudo apt install libeigen3-dev
Git & Vim 安装
sudo apt install git vim
Pangolin 安装
sudo apt install libglew-dev
git clone https://github.com/stevenlovegrove/Pangolin.git
cd Pangolin
mkdir build
cd build
cmake ..
make
sudo make install
Sophus 安装(非模板类)
git clone https://github.com/strasdat/Sophus.git
cd Sophus
git checkout a621ff # 安装非模板类
mkdir build
cd build
cmake ..
make
sudo make install
如果发生如下报错:
so2.cpp:33:26: error: lvalue required as left operand of assignment
		   33 |   unit_complex_.real() = 1.;
		      |                          ^~
so2.cpp:34:26: error: lvalue required as left operand of assignment
		   34 |   unit_complex_.imag() = 0.;
		      |                          ^~
通过将 Sophus/sophus/so2.cpp 第32,33行的
unit_complex_.real() = 1.;
unit_complex_.imag() = 0.;
改为
unit_complex_.real(1.);
unit_complex_.imag(0.);
解决
OpenCV 安装(带 CUDA)
首先安装依赖,如果一次运行下列命令没有成功,那么可以逐个分别安装下面这几个依赖,来看看是谁的问题。部分依赖可能在发生了版本更新后失效,不过没关系,这些依赖并不全都是必须的,当然,尽可能多地安装总有好处。
sudo apt install linux-generic #虚拟机需要安装这个
sudo apt install libopencv-dev checkinstall yasm ffmpeg
在链接中选择自己的配置,并按照下方链接中提示完成 CUDA 11 的安装
https://developer.nvidia.com/cuda-downloads
or
https://developer.nvidia.cn/cuda-downloads
下面是几个例子:
如果你是基于 x86_64 的 ubuntu 18 系统,可以直接运行
wget https://developer.download.nvidia.com/compute/cuda/11.4.2/local_installers/cuda_11.4.2_470.57.02_linux.run
sudo sh cuda_11.4.2_470.57.02_linux.run
如果你是基于 x86_64 的 ubuntu 20 系统,可以直接运行
wget https://developer.download.nvidia.com/compute/cuda/11.4.2/local_installers/cuda_11.4.2_470.57.02_linux.run
sudo sh cuda_11.4.2_470.57.02_linux.run
完成安装之后记得 重启
sudo add-apt-repository "deb http://security.ubuntu.com/ubuntu xenial-security main"
sudo apt update
sudo apt install python3-numpy python3-pip python3-dev
sudo apt install libgtk2.0-dev libvtk7-dev libjpeg-dev libtiff-dev libopenexr-dev libtbb-dev libjasper1 libjasper-dev frei0r-plugins
到 https://opencv.org/releases/ 下载 OpenCV 3 版本的源码,并解压到你指定的某个目录。进入解压后得到的目录进行后续操作或者像之前那样使用git:
git clone https://github.com/opencv/opencv.git
cd opencv
mkdir build
cd build
cmake -D CMAKE_BUILD_TYPE=RELEASE -D CMAKE_INSTALL_PREFIX=/usr/local -D WITH_TBB=ON -D BUILD_NEW_PYTHON_SUPPORT=ON -D WITH_V4L=ON -D INSTALL_C_EXAMPLES=ON -D INSTALL_PYTHON_EXAMPLES=ON -D BUILD_EXAMPLES=ON -D WITH_QT=ON -D WITH_OPENGL=ON -D ENABLE_FAST_MATH=1 -D CUDA_FAST_MATH=1 -D WITH_CUBLAS=1 ..
make
sudo make install
这个过程会比较慢,如果你的CPU够强,那么可以将 make 替换为 make -j4 来调用多个线程进行编译(-j 后边的参数就是使用的线程数量)
Ceres 安装
sudo apt install libgoogle-glog-dev
sudo apt install libatlas-base-dev
sudo apt install libsuitesparse-dev
------------------------------------------------------------
git clone https://ceres-solver.googlesource.com/ceres-solver
or
git clone https://gitee.com/mirrors/ceres-solver.git
------------------------------------------------------------
cd ceres-solver
mkdir build
cd build
cmake ..
make
sudo make install
git下载的时候可能无法连接,这时候需要在网站中手动下载最新版Ceres并解压,解压之后安装方法在前面已经使用很多次了,这里不在赘述。
g2o 安装
git clone https://codechina.csdn.net/mirrors/rainerkuemmerle/g2o.git
cd g2o
mkdir build
cd build
cmake ..
make
sudo make install
ROS 安装(Melodic or Noetic)
Melodic for Ubuntu18
配置ROS软件源
sudo sh -c 'echo "deb http://packages.ros.org/ros/ubuntu $(lsb_release -sc) main" > /etc/apt/sources.list.d/ros-latest.list'
配置密钥
sudo apt-key adv --keyserver 'hkp://keyserver.ubuntu.com:80' --recv-key C1CF6E31E6BADE8868B172B4F42ED6FBAB17C654
安装 melodic
sudo apt update
sudo apt install ros-melodic-desktop-full
初始化rosdep
sudo gedit /etc/hosts
199.232.28.133 raw.githubusercontent.com
151.101.228.133 raw.github.com
sudo rosdep init
rosdep update
用户环境设置
echo "source /opt/ros/melodic/setup.bash" >> ~/.bashrc
source ~/.bashrc
安装包编译依赖
sudo apt install python-rosdep python-rosinstall python-rosinstall-generator python-wstool
验证安装
rosversion -d
Noetic for Ubuntu20
配置ROS软件源
sudo sh -c 'echo “deb http://packages.ros.org/ros/ubuntu $(lsb_release -sc) main” > /etc/apt/sources.list.d/ros-latest.list’
配置密钥
sudo apt-key adv --keyserver ‘hkp://keyserver.ubuntu.com:80’ --recv-key C1CF6E31E6BADE8868B172B4F42ED6FBAB17C654
安装 Noetic
sudo apt update
sudo apt install ros-noetic-desktop-full
用户环境设置
echo “source /opt/ros/noetic/setup.bash” >> ~/.bashrc
source ~/.bashrc
gtsam 4.0 安装
git clone https://bitbucket.org/gtborg/gtsam.git
cd gtsam
mkdir build
cd build
cmake ..
make check
sudo make install
ORB-SLAM2
代码:https://github.com/raulmur/ORB_SLAM2
git clone https://github.com/raulmur/ORB_SLAM2.git
继续更新中……
在system.cc
traking.cc
中增加#include
将orbextractor.h中的#include "opencv/cv.h"改为
#include
#include
#include
cv::COLOR_BGR2GRAY
cvmat
解决 Ubuntu Softwares 商店打不开
sudo apt install ubuntu-software
sudo snap remove snap-store  //删除snap商店
sudo apt purge snapd

