Yolo v5 VOC 数据集训练 + 预测
https://github.com/ultralytics/yolov5/archive/refs/heads/develop.zip
1. 数据集准备
VOC 转 Yolo
脚本 放置在 与 voc 同目录下
运行 py 脚本1 ->生成 train.txt、val.txt、test.txt、trainval.txt
import os
import random


trainval_percent = 0.1
train_percent = 0.9
xmlfilepath = 'voc/Annotations'
txtsavepath = 'voc/ImageSets'
total_xml = os.listdir(xmlfilepath)

num = len(total_xml)
list = range(num)
tv = int(num * trainval_percent)
tr = int(tv * train_percent)
trainval = random.sample(list, tv)
train = random.sample(trainval, tr)

ftrainval = open('voc/ImageSets/trainval.txt', 'w')
ftest = open('voc/ImageSets/test.txt', 'w')
ftrain = open('voc/ImageSets/train.txt', 'w')
fval = open('voc/ImageSets/val.txt', 'w')

for i in list:
    name = total_xml[i][:-4] + '\n'
    if i in trainval:
        ftrainval.write(name)
        if i in train:
            ftrain.write(name)
        else:
            fval.write(name)
    else:
        ftest.write(name)

ftrainval.close()
ftrain.close()
fval.close()
ftest.close()
py 脚本 2 -> 生成 images 图片文件夹 以及 labels 文件夹
# xml解析包
import xml.etree.ElementTree as ET
import pickle,shutil
import os
from os import listdir, getcwd
from os.path import join

sets = ['train', 'test', 'val']
classes = ["topleft","topright","right","left"]  # 类别要一致

# 进行归一化操作
def convert(size, box): # size:(原图w,原图h) , box:(xmin,xmax,ymin,ymax)
    dw = 1./size[0]     # 1/w
    dh = 1./size[1]     # 1/h
    x = (box[0] + box[1])/2.0   # 物体在图中的中心点x坐标
    y = (box[2] + box[3])/2.0   # 物体在图中的中心点y坐标
    w = box[1] - box[0]         # 物体实际像素宽度
    h = box[3] - box[2]         # 物体实际像素高度
    x = x*dw    # 物体中心点x的坐标比(相当于 x/原图w)
    w = w*dw    # 物体宽度的宽度比(相当于 w/原图w)
    y = y*dh    # 物体中心点y的坐标比(相当于 y/原图h)
    h = h*dh    # 物体宽度的宽度比(相当于 h/原图h)
    return (x, y, w, h)    # 返回 相对于原图的物体中心点的x坐标比,y坐标比,宽度比,高度比,取值范围[0-1]


def convert_annotation(image_id):
    in_file = open('./Annotations/%s.xml' % (image_id), encoding='utf-8')
    out_file = open('./labels/%s.txt' % (image_id), 'w', encoding='utf-8')
    # 解析xml文件
    tree = ET.parse(in_file)
    # 获得对应的键值对
    root = tree.getroot()
    # 获得图片的尺寸大小
    size = root.find('size')
    # 如果xml内的标记为空,增加判断条件
    if size != None:
        # 获得宽
        w = int(size.find('width').text)
        # 获得高
        h = int(size.find('height').text)
        # 遍历目标obj
        for obj in root.iter('object'):
            # 获得difficult ??
            difficult = obj.find('difficult').text
            # 获得类别 =string 类型
            cls = obj.find('name').text
            # 如果类别不是对应在我们预定好的class文件中,或difficult==1则跳过
            if cls not in classes or int(difficult) == 1:
                continue
            # 通过类别名称找到id
            cls_id = classes.index(cls)
            # 找到bndbox 对象
            xmlbox = obj.find('bndbox')
            # 获取对应的bndbox的数组 = ['xmin','xmax','ymin','ymax']
            b = (float(xmlbox.find('xmin').text), float(xmlbox.find('xmax').text), float(xmlbox.find('ymin').text),
                 float(xmlbox.find('ymax').text))
            # 带入进行归一化操作
            # w = 宽, h = 高, b= bndbox的数组 = ['xmin','xmax','ymin','ymax']
            bb = convert((w, h), b)
            # bb 对应的是归一化后的(x,y,w,h)
            # 生成 calss x y w h 在label文件中
            out_file.write(str(cls_id) + " " + " ".join([str(a) for a in bb]) + '\n')
for image_set in sets:
    if not os.path.exists('./labels/'):
        os.makedirs('./labels/')
    if not os.path.exists('./images/'):
        os.makedirs('./images/')
    image_ids = open('./ImageSets/%s.txt' % (image_set)).read().strip().split()
    list_file = open('./%s.txt' % (image_set), 'w')
    for image_id in image_ids:
        shutil.copyfile('./JPEGImages/%s.png' % (image_id),'./images/%s.png' % (image_id))
        list_file.write('./images/%s.png\n' % (image_id))
        convert_annotation(image_id)
    list_file.close()
运行 脚本1、 2 即可完成转换
2. 修改 配置文件
在 data 下 创建 一个 名为 mytrain.yaml 并且添加如下代码:
train: B:/Smart_Campus/Smart_/yolov5_develop/voc/train.txt  # 目录
test: B:/Smart_Campus/Smart_/yolov5_develop/voc/test.txt  # 目录
val: B:/Smart_Campus/Smart_/yolov5_develop/voc/val.txt  # 目录

# number of classes  类别个数
nc: 4

# class names 类别信息
names: ['topleft', 'topright', 'left', 'right']
在打开 models 文件夹 新建 名为 my_yolov5.yaml
类别换成自己的类别个数。
# parameters
nc: 4  # 类别个数
depth_multiple: 0.67  # 缩放系数
width_multiple: 0.75  # 通道倍增

# anchors
anchors:
  - [10,13, 16,30, 33,23]  # P3/8
  - [30,61, 62,45, 59,119]  # P4/16
  - [116,90, 156,198, 373,326]  # P5/32

# YOLOv5 backbone
backbone:
  # [from, number, module, args]
  [[-1, 1, Focus, [64, 3]],  # 0-P1/2
   [-1, 1, Conv, [128, 3, 2]],  # 1-P2/4
   [-1, 3, C3, [128]],
   [-1, 1, Conv, [256, 3, 2]],  # 3-P3/8
   [-1, 9, C3, [256]],
   [-1, 1, Conv, [512, 3, 2]],  # 5-P4/16
   [-1, 9, C3, [512]],
   [-1, 1, Conv, [1024, 3, 2]],  # 7-P5/32
   [-1, 1, SPP, [1024, [5, 9, 13]]],
   [-1, 3, C3, [1024, False]],  # 9
  ]

# YOLOv5 head
head:
  [[-1, 1, Conv, [512, 1, 1]],
   [-1, 1, nn.Upsample, [None, 2, 'nearest']],
   [[-1, 6], 1, Concat, [1]],  # cat backbone P4
   [-1, 3, C3, [512, False]],  # 13

   [-1, 1, Conv, [256, 1, 1]],
   [-1, 1, nn.Upsample, [None, 2, 'nearest']],
   [[-1, 4], 1, Concat, [1]],  # cat backbone P3
   [-1, 3, C3, [256, False]],  # 17 (P3/8-small)

   [-1, 1, Conv, [256, 3, 2]],
   [[-1, 14], 1, Concat, [1]],  # cat head P4
   [-1, 3, C3, [512, False]],  # 20 (P4/16-medium)

   [-1, 1, Conv, [512, 3, 2]],
   [[-1, 10], 1, Concat, [1]],  # cat head P5
   [-1, 3, C3, [1024, False]],  # 23 (P5/32-large)

   [[17, 20, 23], 1, Detect, [nc, anchors]],  # Detect(P3, P4, P5)
  ]
3. 执行如下命令进行训练
参数:
- data 下的配置文件
- models下的网络结构配置文件
- 预训练权重文件
- 批次
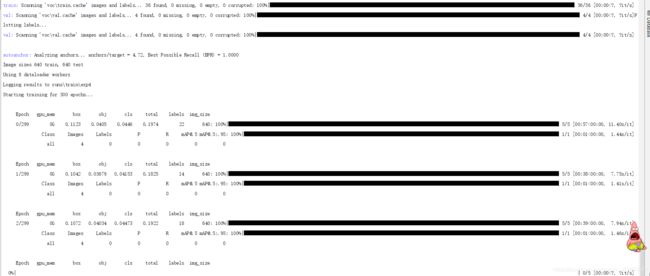
python train.py --data coco.yaml --cfg yolov5s.yaml --weights '' --batch-size 64
报错解决:
RuntimeError: [enforce fail at ..\c10\core\CPUAllocator.cpp:75] data. DefaultCPUAllocator:
not enough memory: you tried to allocate 19660800 bytes. Buy new RAM!
内存溢出: 修改batch-size
