yolov5部署2——onnx->ncnn
yolov5部署2——onnx->ncnn
一,ncnn环境搭建
1.电脑需要先安装如下几个库:g++、cmake、protobuf、opencv
protobuf安装:
$ sudo apt-get install autoconf automake libtool curl make g++ unzip
$ git clone https://github.com/google/protobuf.git
$ cd protobuf
$ git submodule update --init --recursive
$ ./autogen.sh
$ ./configure
$ make
$ make check
$ sudo make install
$ sudo ldconfig # refresh shared library cache.

protoc --version#查看版本
2.编译ncnn
git clone https://github.com/Tencent/ncnn.git
cd ncnn
mkdir build && cd build
cmake ..
make
make install
3.安装问题记录
问题1:
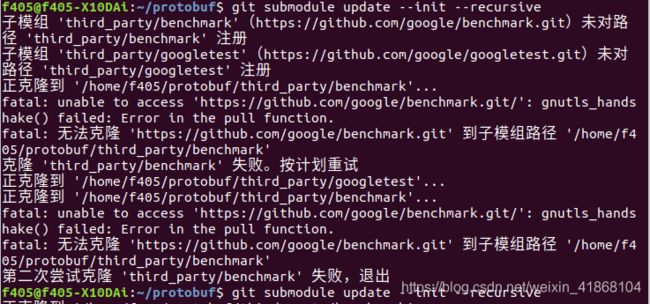
git submodule update --init --recursive时
出现第二次尝试克隆 ‘third_party/benchmark’ 失败,退出

解决方法:进入一下“无法克隆”后的那个链接,只要能打开,就可以下载,否则只能多试几次
问题2:
输入sudo ldconfig时出现:
/sbin/ldconfig.real: /usr/local/cuda-10.1/targets/x86_64-linux/lib/libcudnn.so.7 不是符号链接
解决方法:
sudo ldconfig -v
sudo ln -sf /usr/local/cuda-10.1/targets/x86_64-linux/lib/libcudnn.so.7.6.5 /usr/local/cuda-10.1/targets/x86_64-linux/lib/libcudnn.so.7
二,onnx转换为ncnn
onnx转ncnn只需要在ncnn/build/tools/onnx/路径下输入:
./onnx2ncnn model.onnx model.param model.bin
将model.onnx文件修改为自己的就行。

没有其他东西出现就是成功了!
遇到的问题:Unsupported slice step !
原因:yolov5的切片操作没法通过,需要修改程序。
解决方法:需要修改yolov5的代码
修改1:export.py中640修改小一点,看你的显卡决定
parser.add_argument('--img-size', nargs='+', type=int, default=[416, 416], help='image size')
修改2:export.py中设置为true,本身是的话就不用改动了。
model.model[-1].export = True # set Detect() layer export=True
修改3:common.py下的Focus 去除slice数组操作,精度有损失
class Focus(nn.Module):
 # Focus wh information into c-space
 def __init__(self, c1, c2, k=1, s=1, p=None, g=1, act=True):  # ch_in, ch_out, kernel, stride, padding, groups
     super(Focus, self).__init__()
     self.conv = Conv(c1 * 4, c2, k, s, p, g, act)

 def forward(self, x):  # x(b,c,w,h) -> y(b,4c,w/2,h/2)
    return self.conv(torch.cat([x,x,x,x],1))
    # return self.conv(torch.cat([x[..., ::2, ::2], x[..., 1::2, ::2], x[..., ::2, 1::2], x[..., 1::2, 1::2]], 1))
修改4:export.py中导出版本号修改成11,去除class分类,用output
torch.onnx.export(model, img, f, verbose=False, opset_version=11, input_names=['images'],
 output_names=['output'])
接下来就是从新跑一遍程序,生成新的模型文件了。
