Python软件设计基础 第二节 人脸比对和人脸识别
一、捕获摄像头
点击“q”键退出页面
import numpy as np
import cv2

cap=cv2.VideoCapture(0)
while(True):
    ret,frame=cap.read()
    gray=cv2.cvtColor(frame,cv2.COLOR_BGR2GRAY)

    cv2.imshow('frame', gray)
    if cv2.waitKey(1)&0xFF==ord('q'):
        break

cap.release()
cv2.destroyAllWindows()
二、基于OpenCV的人脸检测(找人脸)
cv2.CascadeClassifier?

import cv2
import matplotlib.pyplot as plt
import os


def detect(filename):
    face_cascade=cv2.CascadeClassifier(
        'C:/users/hp/anaconda3/Lib/site-packages/cv2/data/haarcascade_frontalface_default.xml')
    img=cv2.imread(filename)
    gray=cv2.cvtColor(img, cv2.COLOR_BGR2GRAY)

    faces=face_cascade.detectMultiScale(gray, 1.3, 5)
    print(len(faces))
    for (x, y, w, h) in faces:
        img=cv2.rectangle(img, (x, y), (x+w, y+h), (255, 0, 0), 2)
        plt.imshow(img)
        plt.axis('off')  #去掉坐标轴
        plt.show()

detect("lhr.jpg")
三、基于FR的人脸检测和人脸对齐(找人脸,并绘制人脸轮廓)
import face_recognition
import cv2
import matplotlib.pyplot as plt

image = face_recognition.load_image_file(r"lhr.jpg")
face_landmarks_list = face_recognition.face_landmarks(image)
print("I found {} face(s) in this photograph.".format(len(face_landmarks_list)))

for face_parts in face_landmarks_list:
    for point in face_parts.values() :
        for i in point:
            img=cv2.circle(image,i,2,(255,0,0),10)
plt.imshow(img)
plt.axis('off')
plt.show()
import face_recognition as fr
import cv2
import matplotlib. pyplot as plt

image=fr. load_image_file(r"lhr.jpg")
faces=fr.face_locations(image,model='cnn')
facescount=len(faces)
print(facescount)
org=cv2.imread(r"lhr.jpg")
for (top, right, bottom,left) in faces:

    img=cv2.rectangle(image,(left,top), (right, bottom), (255,0,0), 2)
    plt.imshow(img)
    plt.axis('off')
    plt.show()
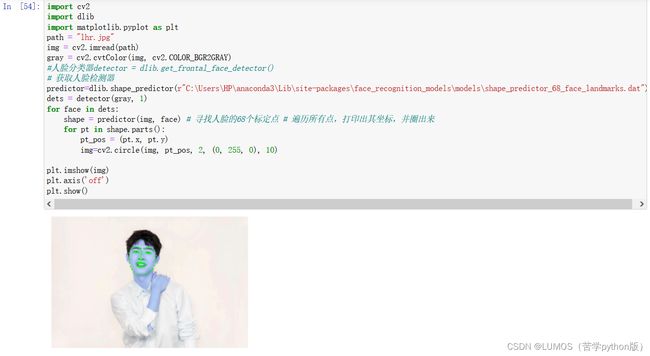
四、5/68点人脸对齐
import cv2
import dlib
import matplotlib.pyplot as plt
path = "lhr.jpg"
img = cv2.imread(path)
gray = cv2.cvtColor(img, cv2.COLOR_BGR2GRAY)
#人脸分类器
detector = dlib.get_frontal_face_detector()
# 获取人脸检测器
predictor=dlib.shape_predictor(r"C:\Users\HP\anaconda3\Lib\site-packages\face_recognition_models\models\shape_predictor_5_face_landmarks.dat")# 寻找人脸的5个标定点,更改数字即可更改点的个数
dets = detector(gray, 1)
for face in dets:
    shape = predictor(img, face)
# 遍历所有点,打印出其坐标,并圈出来
    for pt in shape.parts():
        pt_pos = (pt.x, pt.y)
        img=cv2.circle(img, pt_pos, 2, (0, 255, 0), 10)

plt.imshow(img)
plt.axis('off')
plt.show()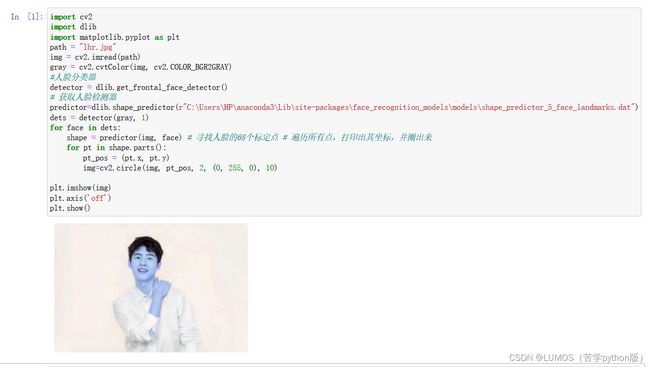
五、捕获摄像头68点人脸对齐
import numpy as np
import cv2
import dlib
#ESC退出
cap = cv2.VideoCapture(0)
predictor_path ='C:/Users/HP/anaconda3/Lib/site-packages/face_recognition_models/models/shape_predictor_5_face_landmarks.dat'
predictor = dlib.shape_predictor(predictor_path)
detector = dlib.get_frontal_face_detector()
while True:
    _, frame = cap.read()
    dets = detector(frame, 1)
    if len(dets) != 0:
        for i in range(len(dets)):
            shape = predictor(frame, dets[0])
            for p in shape.parts():
                cv2.circle(frame, (p.x, p.y), 3, (0, 0, 0), -1)
            cv2.imshow('video', frame)
            if cv2.waitKey(1) & 0xFF == 27:
                break
cap.release()
cv2.destroyAllWindows()