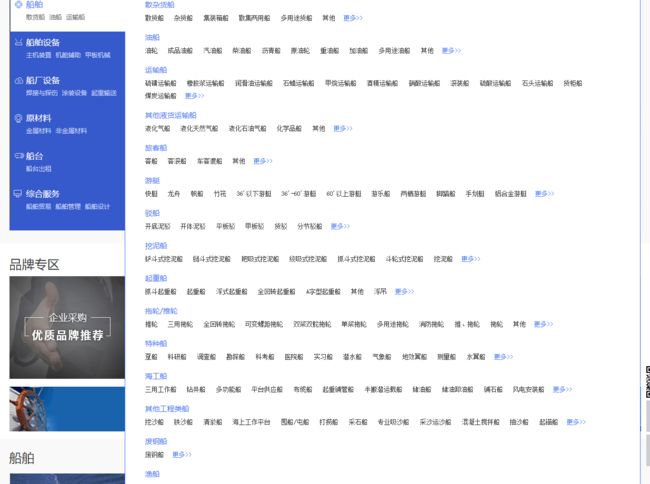
1.图片数据集收集 共 16种
- 集装箱船 container ship
- 散货船 bulker
- 油船 tanker
- 游轮 / 客轮 / 邮轮 passenger liner
- 渔船 fishing boat
- 滚装船 Ro/Ro ship
- 引航船 pilot boat
- LNG船 LNG ship
- LPG船 LPG ship
- 公务船 / 执法船 official ship
- 渡轮 ferry
- 拖船 tug
- 帆船 sailing boat
- 工程船 engineering ship
- 驳船 / 内河船 /江船 / 干货船 / 内陆船 river boat
- 游艇 / 快艇 speedboat
- 木船 wooden boat
首先考虑从相关机构获取优质的数据集 其次爬虫收集(整理图片 删除过小、过大、不符合类别或者损坏的图片)
http://www.shipspotting.com/gallery/photo.php?lid=2987189
标注标签 container ship,bulker,tanker,passenger liner,fishing boat,Ro/Ro ship,pilot boat,LNG ship,LPG ship,official ship,ferry,tug,sailing boat,engineering ship,river boat,speedboat,wooden boat
classes = ["container ship","bulker","tanker","passenger liner","fishing boat","Ro/Ro ship","pilot boat","LNG ship","LPG ship","official ship","ferry,tug","sailing boat","engineering ship","river boat","speedboat","wooden boat"]
obj.names 和 names.list
container ship
bulker
tanker
passenger liner
fishing boat
Ro/Ro ship
pilot boat
LNG ship
LPG ship
official ship
ferry
tug
sailing boat
engineering ship
river boat
speedboat
wooden boat
收集的所有图片首先需要用脚本重命名排序
import os

ROOT_DIR = os.path.abspath("./")
img_path = os.path.join(ROOT_DIR, "/home/joe/Desktop/manoverboard")  #这里要改路径
imglist = os.listdir(img_path)
#print(filelist)
i = 0
for img in imglist:
    i+=1
    if img.endswith('.jpg'):
        print(img)
        src = os.path.join(os.path.abspath(img_path), img)
        dst = os.path.join(os.path.abspath(img_path), 'man_overboard_' + str(i)+'.jpg') #根据自己的需要重新命名,可以把'E_' + img改成你想要的名字
        os.rename(src, dst)
2.图片标注
我使用的是精灵标注助手,标注完之后使用pascal-voc格式进行输出
输入格式如下
"1.0" ?>ship BulkShip3.jpg /home/joe/Desktop/aaa/ship/BulkShip3.jpg Unknown 4288 2848 3 0 <object>bulkship Unspecified 0 0 object> 278 930 4278 2190
3.标注的xml转换成yolo需要的txt格式
1.将已经标注好的所有xml放进annotation文件夹里面 摆放关系如图
2.运行xml_to_txt.py labels中会得到 yolo所需要的txt格式文件
下面是xml_to_txt.py 代码 注意上面代码中classes = ["containership", "bulkship"] 需要改成你自己训练的标注名集合 (
import xml.etree.ElementTree as ET
import pickle
import os
from os import listdir, getcwd
from os.path import join

classes = ["containership", "bulkship"]


def convert(size, box):
    dw = 1./size[0]
    dh = 1./size[1]
    x = (box[0] + box[1])/2.0
    y = (box[2] + box[3])/2.0
    w = box[1] - box[0]
    h = box[3] - box[2]
    x = x*dw
    w = w*dw
    y = y*dh
    h = h*dh
    return (x,y,w,h)

def convert_annotation(path,image_id):
    in_file = open(os.path.join(path+r'/annotation/%s.xml'%(image_id)))  #input
    out_file = open(os.path.join(path+r'/labels/%s.txt'%(image_id)), 'w')    #output
    tree=ET.parse(in_file)     #get xml tree
    root = tree.getroot()      #get root
    size = root.find('size')
    w = int(size.find('width').text)    #width of image
    h = int(size.find('height').text)

    for obj in root.iter('object'):   #find every object
        difficult = obj.find('difficult').text   #find difficult
        ship_name = obj.find('name').text
        if ship_name not in classes or int(difficult) == 1:
            continue

        class_num = classes.index(ship_name)
        xmlbox = obj.find('bndbox')  #get boundbox

        b = (float(xmlbox.find('xmin').text), float(xmlbox.find('xmax').text), float(xmlbox.find('ymin').text), float(xmlbox.find('ymax').text))
        bb = convert((w,h), b)
        out_file.write(str(class_num) + " " + " ".join([str(a) for a in bb]) + '\n') #


path=os.getcwd()

os.walk(path)

filenames=os.listdir(os.path.join(path+'/annotation'))

isExists=os.path.exists(os.path.join(path+r'/labels/'))

if not isExists:
    os.mkdir(os.path.join(path+r'/labels/'))

for filename in filenames:

    print(filename)
    image_id=filename.split(".")[0]
    convert_annotation(path,image_id)
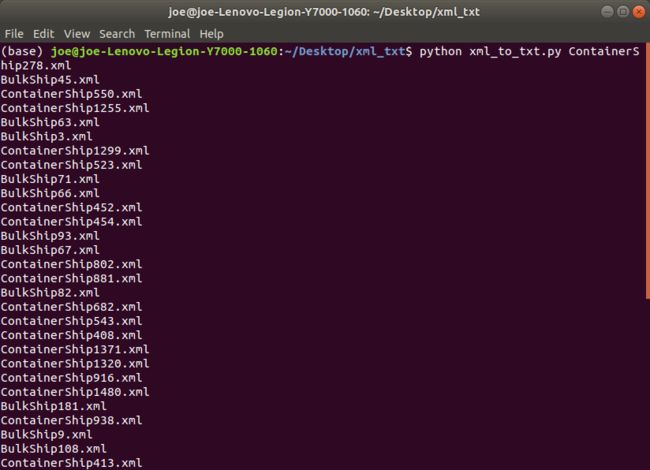
运行脚本如图
相应的txt文件
txt内容格式如下
1 0.53125 0.547752808988764 0.9328358208955224 0.44241573033707865
1代表 第二位 bulkship ( classes = ["containership", "bulkship"] )
其余四个浮点数标示 标记框 中心坐标和 框宽度和长度(具体含义自己百度)
4 暗网整合
1.下载暗网
git clone https://github.com/pjreddie/darknet.git
cd darknet
make clean
make -j4
把所有的txt格式的标注文件放进
/darknet/data/labels
所有的待图片数据集放进
/darknet/data/images
运行process.py 自动划分 训练集和测试集
# modified 2018.9.16

import glob, os

# Current directory
current_dir = os.path.dirname(os.path.abspath(__file__))

# Directory where the data will reside, relative to 'darknet.exe'
path_data = 'images/'

# Percentage of images to be used for the test set
percentage_test = 20;

# Create and/or truncate train.txt and test.txt
file_train = open(path_data + '/train.txt', 'w')
file_test = open(path_data + '/test.txt', 'w')

# Populate train.txt and test.txt
counter = 1
index_test = round(100 / percentage_test)
for pathAndFilename in glob.iglob(os.path.join(path_data, "*.jpg")):
    title, ext = os.path.splitext(os.path.basename(pathAndFilename))
    if counter == index_test:
        counter = 1
        file_test.write("data/" + path_data + title + '.jpg' + "\n")
    else:
        file_train.write("data/" + path_data + title + '.jpg' + "\n")
        counter = counter + 1

print("ok")
运行完毕会得到两个文件
文件内容类似如下
data/images/ContainerShip786.jpg
data/images/BulkShip93.jpg
data/images/ContainerShip1255.jpg
data/images/BulkShip108.jpg
data/images/ContainerShip916.jpg
data/images/ContainerShip426.jpg
data/images/ContainerShip1371.jpg
data/images/ContainerShip1122.jpg
data/images/BulkShip71.jpg
data/images/BulkShip12.jpg
...
然后新建两个txt文件 obj.names 和 names.list 前者放 /darknet/data/images/ 下 后者放 /darknet/data/
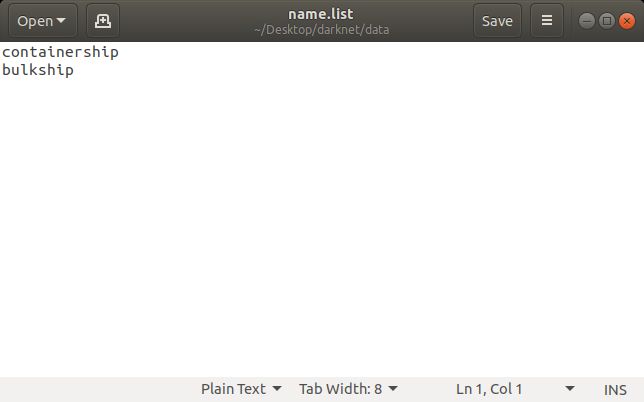
内容参考 你要训练的种类(标注的种类) classes = ["containership", "bulkship"]
格式如下 严格按照 xml_to_txt.py中classes 顺序
然后在/darknet/cfg中新增obj.data
classes= 2   # 你训练的种类
train = data/images/train.txt  # 训练集
valid = data/images/test.txt   # 测试集
labels = data/images/obj.names  #按行摆放的标注的种类名称
backup = backup/    # 每100次迭代存放一次权重的位置
上面可以根据你自己的具体情况修改
2.下载预训练权重
这个主要是卷积部分的预训练权重,使用这个权重可以节省训练时间,直接输入这个命令下载,或者去darknet官网上下载都是可以的。
wget https://pjreddie.com/media/files/darknet53.conv.74   # 这个是yolov3的预训练权重
wget https://pjreddie.com/media/files/darknet19_448.conv.23  # 这个是yolov2的预训练权重
以上任选其一
对于权重文件的命名,比如darknet19_448.conv.23,指这个权重文件预先使用darknet19 448x448训练得到,这个darknet19网络有19个卷积层。文件名末尾的conv.23 表示作为待训练网络的预训练权重文件,这个待训练网络的卷积层有23个,而yolov2-voc.cfg中正好有23个卷积层。文件名中的448表示输入的size,通常width=height,这里就说明输入的width=height=448。
yolov3使用预训练权重文件darknet53.conv.74,这个权重文件本身是使用darknet53 448x448 的配置文件训练得到,这个配置文件中有53个卷积层,而darknet53.conv.74作为yolov3-voc.cfg的预训练权重,文件名末尾的conv.74预示着yolov3-voc.cfg中应该有74个卷积层,而事实上,yolov3-voc.cfg中有75的卷积层,这说明,上述说法并不准确,仅仅作为一个大体上的对应
如果你想选择yolov2进行训练
复制 /darknet/cfg/ 中 yolov2-voc.cfg 重命名为 yolo-obj.cfg 并根据自己配置 按照注释 提示 修改内容
[net]
# Testing
#batch=1
#subdivisions=1
# Training
batch=64        # 显存大 可设置128
subdivisions=8  # 显存小 就设32 或 64
height=416
width=416
channels=3
momentum=0.9
decay=0.0005
angle=0
saturation = 1.5
exposure = 1.5
hue=.1

learning_rate=0.001
burn_in=1000
max_batches = 80200
policy=steps
steps=40000,60000
scales=.1,.1

[convolutional]
batch_normalize=1
filters=32
size=3
stride=1
pad=1
activation=leaky

[maxpool]
size=2
stride=2

[convolutional]
batch_normalize=1
filters=64
size=3
stride=1
pad=1
activation=leaky

[maxpool]
size=2
stride=2

[convolutional]
batch_normalize=1
filters=128
size=3
stride=1
pad=1
activation=leaky

[convolutional]
batch_normalize=1
filters=64
size=1
stride=1
pad=1
activation=leaky

[convolutional]
batch_normalize=1
filters=128
size=3
stride=1
pad=1
activation=leaky

[maxpool]
size=2
stride=2

[convolutional]
batch_normalize=1
filters=256
size=3
stride=1
pad=1
activation=leaky

[convolutional]
batch_normalize=1
filters=128
size=1
stride=1
pad=1
activation=leaky

[convolutional]
batch_normalize=1
filters=256
size=3
stride=1
pad=1
activation=leaky

[maxpool]
size=2
stride=2

[convolutional]
batch_normalize=1
filters=512
size=3
stride=1
pad=1
activation=leaky

[convolutional]
batch_normalize=1
filters=256
size=1
stride=1
pad=1
activation=leaky

[convolutional]
batch_normalize=1
filters=512
size=3
stride=1
pad=1
activation=leaky

[convolutional]
batch_normalize=1
filters=256
size=1
stride=1
pad=1
activation=leaky

[convolutional]
batch_normalize=1
filters=512
size=3
stride=1
pad=1
activation=leaky

[maxpool]
size=2
stride=2

[convolutional]
batch_normalize=1
filters=1024
size=3
stride=1
pad=1
activation=leaky

[convolutional]
batch_normalize=1
filters=512
size=1
stride=1
pad=1
activation=leaky

[convolutional]
batch_normalize=1
filters=1024
size=3
stride=1
pad=1
activation=leaky

[convolutional]
batch_normalize=1
filters=512
size=1
stride=1
pad=1
activation=leaky

[convolutional]
batch_normalize=1
filters=1024
size=3
stride=1
pad=1
activation=leaky


#######

[convolutional]
batch_normalize=1
size=3
stride=1
pad=1
filters=1024
activation=leaky

[convolutional]
batch_normalize=1
size=3
stride=1
pad=1
filters=1024
activation=leaky

[route]
layers=-9

[convolutional]
batch_normalize=1
size=1
stride=1
pad=1
filters=64
activation=leaky

[reorg]
stride=2

[route]
layers=-1,-4

[convolutional]
batch_normalize=1
size=3
stride=1
pad=1
filters=1024
activation=leaky

[convolutional]
size=1
stride=1
pad=1
filters=35   # filters = (coords +1 +classes)*5 我这里classes=2 filters =35
activation=linear


[region]
anchors =  1.3221, 1.73145, 3.19275, 4.00944, 5.05587, 8.09892, 9.47112, 4.84053, 11.2364, 10.0071
bias_match=1
classes=2   # 最后分类的类别数量
coords=4
num=5
softmax=1
jitter=.3
rescore=1

object_scale=5
noobject_scale=1
class_scale=1
coord_scale=1

absolute=1
thresh = .6
random=1  # 配置好 可开启 不好设置为0
如果你想选择yolov3进行训练
复制 /darknet/cfg/ 中 yolov3-voc.cfg 重命名为 yolo-obj.cfg 并根据自己配置 按照注释 提示 修改内容
[net]
# Testing
# batch=1
# subdivisions=1
# Training
batch=64  # 显存大建议改为128
subdivisions=16  # 显存大改为8 显存小改为32 或者 64
width=416
height=416
channels=3
momentum=0.9
decay=0.0005
angle=0
saturation = 1.5
exposure = 1.5
hue=.1

learning_rate=0.001
burn_in=1000
max_batches = 50200
policy=steps
steps=40000,45000
scales=.1,.1


[convolutional]
batch_normalize=1
filters=32
size=3
stride=1
pad=1
activation=leaky

# Downsample

[convolutional]
batch_normalize=1
filters=64
size=3
stride=2
pad=1
activation=leaky

[convolutional]
batch_normalize=1
filters=32
size=1
stride=1
pad=1
activation=leaky

[convolutional]
batch_normalize=1
filters=64
size=3
stride=1
pad=1
activation=leaky

[shortcut]
from=-3
activation=linear

# Downsample

[convolutional]
batch_normalize=1
filters=128
size=3
stride=2
pad=1
activation=leaky

[convolutional]
batch_normalize=1
filters=64
size=1
stride=1
pad=1
activation=leaky

[convolutional]
batch_normalize=1
filters=128
size=3
stride=1
pad=1
activation=leaky

[shortcut]
from=-3
activation=linear

[convolutional]
batch_normalize=1
filters=64
size=1
stride=1
pad=1
activation=leaky

[convolutional]
batch_normalize=1
filters=128
size=3
stride=1
pad=1
activation=leaky

[shortcut]
from=-3
activation=linear

# Downsample

[convolutional]
batch_normalize=1
filters=256
size=3
stride=2
pad=1
activation=leaky

[convolutional]
batch_normalize=1
filters=128
size=1
stride=1
pad=1
activation=leaky

[convolutional]
batch_normalize=1
filters=256
size=3
stride=1
pad=1
activation=leaky

[shortcut]
from=-3
activation=linear

[convolutional]
batch_normalize=1
filters=128
size=1
stride=1
pad=1
activation=leaky

[convolutional]
batch_normalize=1
filters=256
size=3
stride=1
pad=1
activation=leaky

[shortcut]
from=-3
activation=linear

[convolutional]
batch_normalize=1
filters=128
size=1
stride=1
pad=1
activation=leaky

[convolutional]
batch_normalize=1
filters=256
size=3
stride=1
pad=1
activation=leaky

[shortcut]
from=-3
activation=linear

[convolutional]
batch_normalize=1
filters=128
size=1
stride=1
pad=1
activation=leaky

[convolutional]
batch_normalize=1
filters=256
size=3
stride=1
pad=1
activation=leaky

[shortcut]
from=-3
activation=linear


[convolutional]
batch_normalize=1
filters=128
size=1
stride=1
pad=1
activation=leaky

[convolutional]
batch_normalize=1
filters=256
size=3
stride=1
pad=1
activation=leaky

[shortcut]
from=-3
activation=linear

[convolutional]
batch_normalize=1
filters=128
size=1
stride=1
pad=1
activation=leaky

[convolutional]
batch_normalize=1
filters=256
size=3
stride=1
pad=1
activation=leaky

[shortcut]
from=-3
activation=linear

[convolutional]
batch_normalize=1
filters=128
size=1
stride=1
pad=1
activation=leaky

[convolutional]
batch_normalize=1
filters=256
size=3
stride=1
pad=1
activation=leaky

[shortcut]
from=-3
activation=linear

[convolutional]
batch_normalize=1
filters=128
size=1
stride=1
pad=1
activation=leaky

[convolutional]
batch_normalize=1
filters=256
size=3
stride=1
pad=1
activation=leaky

[shortcut]
from=-3
activation=linear

# Downsample

[convolutional]
batch_normalize=1
filters=512
size=3
stride=2
pad=1
activation=leaky

[convolutional]
batch_normalize=1
filters=256
size=1
stride=1
pad=1
activation=leaky

[convolutional]
batch_normalize=1
filters=512
size=3
stride=1
pad=1
activation=leaky

[shortcut]
from=-3
activation=linear


[convolutional]
batch_normalize=1
filters=256
size=1
stride=1
pad=1
activation=leaky

[convolutional]
batch_normalize=1
filters=512
size=3
stride=1
pad=1
activation=leaky

[shortcut]
from=-3
activation=linear


[convolutional]
batch_normalize=1
filters=256
size=1
stride=1
pad=1
activation=leaky

[convolutional]
batch_normalize=1
filters=512
size=3
stride=1
pad=1
activation=leaky

[shortcut]
from=-3
activation=linear


[convolutional]
batch_normalize=1
filters=256
size=1
stride=1
pad=1
activation=leaky

[convolutional]
batch_normalize=1
filters=512
size=3
stride=1
pad=1
activation=leaky

[shortcut]
from=-3
activation=linear

[convolutional]
batch_normalize=1
filters=256
size=1
stride=1
pad=1
activation=leaky

[convolutional]
batch_normalize=1
filters=512
size=3
stride=1
pad=1
activation=leaky

[shortcut]
from=-3
activation=linear


[convolutional]
batch_normalize=1
filters=256
size=1
stride=1
pad=1
activation=leaky

[convolutional]
batch_normalize=1
filters=512
size=3
stride=1
pad=1
activation=leaky

[shortcut]
from=-3
activation=linear


[convolutional]
batch_normalize=1
filters=256
size=1
stride=1
pad=1
activation=leaky

[convolutional]
batch_normalize=1
filters=512
size=3
stride=1
pad=1
activation=leaky

[shortcut]
from=-3
activation=linear

[convolutional]
batch_normalize=1
filters=256
size=1
stride=1
pad=1
activation=leaky

[convolutional]
batch_normalize=1
filters=512
size=3
stride=1
pad=1
activation=leaky

[shortcut]
from=-3
activation=linear

# Downsample

[convolutional]
batch_normalize=1
filters=1024
size=3
stride=2
pad=1
activation=leaky

[convolutional]
batch_normalize=1
filters=512
size=1
stride=1
pad=1
activation=leaky

[convolutional]
batch_normalize=1
filters=1024
size=3
stride=1
pad=1
activation=leaky

[shortcut]
from=-3
activation=linear

[convolutional]
batch_normalize=1
filters=512
size=1
stride=1
pad=1
activation=leaky

[convolutional]
batch_normalize=1
filters=1024
size=3
stride=1
pad=1
activation=leaky

[shortcut]
from=-3
activation=linear

[convolutional]
batch_normalize=1
filters=512
size=1
stride=1
pad=1
activation=leaky

[convolutional]
batch_normalize=1
filters=1024
size=3
stride=1
pad=1
activation=leaky

[shortcut]
from=-3
activation=linear

[convolutional]
batch_normalize=1
filters=512
size=1
stride=1
pad=1
activation=leaky

[convolutional]
batch_normalize=1
filters=1024
size=3
stride=1
pad=1
activation=leaky

[shortcut]
from=-3
activation=linear

######################

[convolutional]
batch_normalize=1
filters=512
size=1
stride=1
pad=1
activation=leaky

[convolutional]
batch_normalize=1
size=3
stride=1
pad=1
filters=1024
activation=leaky

[convolutional]
batch_normalize=1
filters=512
size=1
stride=1
pad=1
activation=leaky

[convolutional]
batch_normalize=1
size=3
stride=1
pad=1
filters=1024
activation=leaky

[convolutional]
batch_normalize=1
filters=512
size=1
stride=1
pad=1
activation=leaky

[convolutional]
batch_normalize=1
size=3
stride=1
pad=1
filters=1024
activation=leaky

[convolutional]
size=1
stride=1
pad=1
filters=21 # filters=3*(classes+5)
activation=linear

[yolo]
mask = 6,7,8
anchors = 10,13,  16,30,  33,23,  30,61,  62,45,  59,119,  116,90,  156,198,  373,326
classes=2 # 修改类别数
num=9
jitter=.3
ignore_thresh = .5
truth_thresh = 1
random=1

[route]
layers = -4

[convolutional]
batch_normalize=1
filters=256
size=1
stride=1
pad=1
activation=leaky

[upsample]
stride=2

[route]
layers = -1, 61


[convolutional]
batch_normalize=1
filters=256
size=1
stride=1
pad=1
activation=leaky

[convolutional]
batch_normalize=1
size=3
stride=1
pad=1
filters=512
activation=leaky

[convolutional]
batch_normalize=1
filters=256
size=1
stride=1
pad=1
activation=leaky

[convolutional]
batch_normalize=1
size=3
stride=1
pad=1
filters=512
activation=leaky

[convolutional]
batch_normalize=1
filters=256
size=1
stride=1
pad=1
activation=leaky

[convolutional]
batch_normalize=1
size=3
stride=1
pad=1
filters=512
activation=leaky

[convolutional]
size=1
stride=1
pad=1
filters=21 # filters =3*(classes+5)
activation=linear

[yolo]
mask = 3,4,5
anchors = 10,13,  16,30,  33,23,  30,61,  62,45,  59,119,  116,90,  156,198,  373,326
classes=2 #修改类别
num=9
jitter=.3
ignore_thresh = .5
truth_thresh = 1
random=1

[route]
layers = -4

[convolutional]
batch_normalize=1
filters=128
size=1
stride=1
pad=1
activation=leaky

[upsample]
stride=2

[route]
layers = -1, 36


[convolutional]
batch_normalize=1
filters=128
size=1
stride=1
pad=1
activation=leaky

[convolutional]
batch_normalize=1
size=3
stride=1
pad=1
filters=256
activation=leaky

[convolutional]
batch_normalize=1
filters=128
size=1
stride=1
pad=1
activation=leaky

[convolutional]
batch_normalize=1
size=3
stride=1
pad=1
filters=256
activation=leaky

[convolutional]
batch_normalize=1
filters=128
size=1
stride=1
pad=1
activation=leaky

[convolutional]
batch_normalize=1
size=3
stride=1
pad=1
filters=256
activation=leaky

[convolutional]
size=1
stride=1
pad=1
filters=21 #这里注意修改filters = 3*(classes+5)
activation=linear

[yolo]
mask = 0,1,2
anchors = 10,13,  16,30,  33,23,  30,61,  62,45,  59,119,  116,90,  156,198,  373,326
classes= 2 # 修改类别数
num=9
jitter=.3
ignore_thresh = .5
truth_thresh = 1
random=1  # 显存小改为0
#这个文件的最下面有3个YOLO层,这三个地方的classes做相应修改
#每个YOLO层的上一层的convolutional层(activation=linear)的filters也要修改
5 配置Makefile 如果你的训练指令报错 对半是这里的路径设置问题
按照注释提示 修改内容
GPU=1 #启用gpu训练
CUDNN=1 #启动深度学习加速库
OPENCV=1 # 涉及视频会用到
OPENMP=0
DEBUG=0
ARCH= -gencode arch=compute_61,code=sm_61 \ #这里根据你的显卡去英伟达官网查询算力,不是主流型号会报错
-gencode arch=compute_30,code=sm_30 \
-gencode arch=compute_35,code=sm_35 \
-gencode arch=compute_50,code=[sm_50,compute_50] \
-gencode arch=compute_52,code=[sm_52,compute_52]
# -gencode arch=compute_20,code=[sm_20,sm_21] \ This one is deprecated?
# This is what I use, uncomment if you know your arch and want to specify
# ARCH= -gencode arch=compute_52,code=compute_52
VPATH=./src/:./examples
SLIB=libdarknet.so
ALIB=libdarknet.a
EXEC=darknet
OBJDIR=./obj/
CC=gcc
CPP=g++
NVCC=/usr/local/cuda/bin/nvcc #这里需要格局你自己的目录修改
AR=ar
ARFLAGS=rcs
OPTS=-Ofast
LDFLAGS= -lm -pthread
COMMON= -Iinclude/ -Isrc/
CFLAGS=-Wall -Wno-unused-result -Wno-unknown-pragmas -Wfatal-errors -fPIC
ifeq ($(OPENMP), 1)
CFLAGS+= -fopenmp
endif
ifeq ($(DEBUG), 1)
OPTS=-O0 -g
endif
CFLAGS+=$(OPTS)
ifeq ($(OPENCV), 1)
COMMON+= -DOPENCV
CFLAGS+= -DOPENCV
LDFLAGS+= `pkg-config --libs opencv` -lstdc++
COMMON+= `pkg-config --cflags opencv`
endif
ifeq ($(GPU), 1)
COMMON+= -DGPU -I/usr/local/cuda/include/ #这里需要根据你自己的目录修改
CFLAGS+= -DGPU
LDFLAGS+= -L/usr/local/cuda/lib64 -lcuda -lcudart -lcublas -lcurand
endif
ifeq ($(CUDNN), 1)
COMMON+= -DCUDNN
CFLAGS+= -DCUDNN
LDFLAGS+= -lcudnn
endif
OBJ=gemm.o utils.o cuda.o deconvolutional_layer.o convolutional_layer.o list.o image.o activations.o im2col.o col2im.o blas.o crop_layer.o dropout_layer.o maxpool_layer.o softmax_layer.o data.o matrix.o network.o connected_layer.o cost_layer.o parser.o option_list.o detection_layer.o route_layer.o upsample_layer.o box.o normalization_layer.o avgpool_layer.o layer.o local_layer.o shortcut_layer.o logistic_layer.o activation_layer.o rnn_layer.o gru_layer.o crnn_layer.o demo.o batchnorm_layer.o region_layer.o reorg_layer.o tree.o lstm_layer.o l2norm_layer.o yolo_layer.o iseg_layer.o image_opencv.o
EXECOBJA=captcha.o lsd.o super.o art.o tag.o cifar.o go.o rnn.o segmenter.o regressor.o classifier.o coco.o yolo.o detector.o nightmare.o instance-segmenter.o darknet.o
ifeq ($(GPU), 1)
LDFLAGS+= -lstdc++
OBJ+=convolutional_kernels.o deconvolutional_kernels.o activation_kernels.o im2col_kernels.o col2im_kernels.o blas_kernels.o crop_layer_kernels.o dropout_layer_kernels.o maxpool_layer_kernels.o avgpool_layer_kernels.o
endif
EXECOBJ = $(addprefix $(OBJDIR), $(EXECOBJA))
OBJS = $(addprefix $(OBJDIR), $(OBJ))
DEPS = $(wildcard src/*.h) Makefile include/darknet.h
all: obj backup results $(SLIB) $(ALIB) $(EXEC)
#all: obj results $(SLIB) $(ALIB) $(EXEC)
$(EXEC): $(EXECOBJ) $(ALIB)
$(CC) $(COMMON) $(CFLAGS) $^ -o $@ $(LDFLAGS) $(ALIB)
$(ALIB): $(OBJS)
$(AR) $(ARFLAGS) $@ $^
$(SLIB): $(OBJS)
$(CC) $(CFLAGS) -shared $^ -o $@ $(LDFLAGS)
$(OBJDIR)%.o: %.cpp $(DEPS)
$(CPP) $(COMMON) $(CFLAGS) -c $< -o $@
$(OBJDIR)%.o: %.c $(DEPS)
$(CC) $(COMMON) $(CFLAGS) -c $< -o $@
$(OBJDIR)%.o: %.cu $(DEPS)
$(NVCC) $(ARCH) $(COMMON) --compiler-options "$(CFLAGS)" -c $< -o $@
obj:
mkdir -p obj
backup:
mkdir -p backup
results:
mkdir -p results
.PHONY: clean
clean:
rm -rf $(OBJS) $(SLIB) $(ALIB) $(EXEC) $(EXECOBJ) $(OBJDIR)/*
重新编译
make clean
make -j4
6训练
从头开始训练yolov2
./darknet detector train cfg/obj.data cfg/yolo-obj.cfg -gpu 0 | tee train_yolov2.log
从头开始训练yolov3
./darknet detector train cfg/obj.data cfg/yolo-obj.cfg -gpu 0 | tee train_yolov3.log
yolo2训练
sudo ./darknet detector train cfg/obj.data cfg/yolo-obj.cfg darknet19_448.conv.23 | tee train_log.txt
yolo3训练
sudo ./darknet detector train cfg/obj.data cfg/yolo-obj.cfg darknet53.conv.74 | tee train_log.txt
301: 16.295858, 16.295858 avg, 0.000008 rate, 10.941730 seconds, 38528 images
当训练在1-300轮次batch时 avg 会有比较奇怪的从小到大 从大到小的波动 学习率一直显示为0.00000 obj指数一直变小 这是正常的
基本到 600轮次batch后 avg就稳定下来了 obj也会持续变大 不会有那么大的波动差
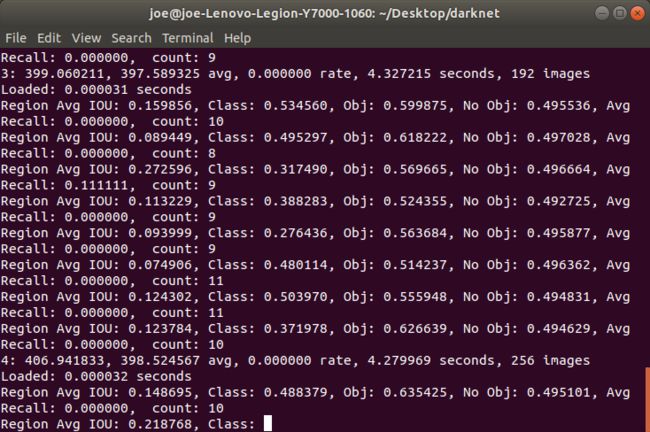
train_log.txt 具体内容
yolo-obj
Learning Rate: 0.001, Momentum: 0.9, Decay: 0.0005
Resizing
448
Loaded: 0.000084 seconds
Region Avg IOU: 0.273236, Class: 0.716368, Obj: 0.073429, No Obj: 0.067388, Avg Recall: 0.150000,  count: 20
Region Avg IOU: 0.395972, Class: 0.734176, Obj: 0.050639, No Obj: 0.068308, Avg Recall: 0.250000,  count: 16
Region Avg IOU: 0.394466, Class: 0.677938, Obj: 0.096069, No Obj: 0.067604, Avg Recall: 0.277778,  count: 18
Region Avg IOU: 0.416266, Class: 0.798727, Obj: 0.096811, No Obj: 0.068009, Avg Recall: 0.437500,  count: 16
Region Avg IOU: 0.361493, Class: 0.763716, Obj: 0.070804, No Obj: 0.066288, Avg Recall: 0.200000,  count: 20
Region Avg IOU: 0.312386, Class: 0.757353, Obj: 0.072949, No Obj: 0.068248, Avg Recall: 0.176471,  count: 17
Region Avg IOU: 0.330621, Class: 0.851843, Obj: 0.070021, No Obj: 0.068439, Avg Recall: 0.176471,  count: 17
Region Avg IOU: 0.396027, Class: 0.800401, Obj: 0.084401, No Obj: 0.069101, Avg Recall: 0.263158,  count: 19
301: 16.295858, 16.295858 avg, 0.000008 rate, 10.941730 seconds, 38528 images
Loaded: 0.000081 seconds
Region Avg IOU: 0.282148, Class: 0.755940, Obj: 0.070540, No Obj: 0.068515, Avg Recall: 0.105263,  count: 19
Region Avg IOU: 0.404829, Class: 0.793486, Obj: 0.047658, No Obj: 0.066596, Avg Recall: 0.250000,  count: 20
Region Avg IOU: 0.309016, Class: 0.747407, Obj: 0.061627, No Obj: 0.067818, Avg Recall: 0.052632,  count: 19
Region Avg IOU: 0.424261, Class: 0.772658, Obj: 0.055741, No Obj: 0.067594, Avg Recall: 0.263158,  count: 19
Region Avg IOU: 0.322425, Class: 0.808590, Obj: 0.059483, No Obj: 0.066167, Avg Recall: 0.181818,  count: 22
Region Avg IOU: 0.281908, Class: 0.866286, Obj: 0.062606, No Obj: 0.068122, Avg Recall: 0.050000,  count: 20
Region Avg IOU: 0.305956, Class: 0.721932, Obj: 0.075627, No Obj: 0.068412, Avg Recall: 0.157895,  count: 19
Region Avg IOU: 0.379466, Class: 0.756583, Obj: 0.064010, No Obj: 0.068196, Avg Recall: 0.444444,  count: 18
302: 16.976120, 16.363884 avg, 0.000008 rate, 11.815446 seconds, 38656 images
Loaded: 0.000090 seconds
class: 标注物体的分类准确率,越大越好,期望值是1.
obj: 越大越好,期望值为1.
no obj:越小越好,期望值为0.
Avg Recall 召回率,召回率=检测出的正样本/实际的正样本
count: 正样本数目.
输出的batch轮次参数中
302: 16.976120, 16.363884 avg, 0.000008 rate, 11.815446 seconds, 38656 images
302: 指示当前训练的迭代次数
16.976120: 是总体的Loss(损失)
16.363884 avg : 是当前平均Loss,这个数值应该越低越好,一般来说,一旦这个数值低于0.060730 avg就可以终止训练了。
0.000008 rate: 代表当前的学习率,是在.cfg文件中定义的(不同时期学习率不一样)
11.815446 seconds: 表示当前批次训练花费的总时间。
38656 images: 这一行最后的这个数值是1*64的大小,表示到目前为止,参与训练的图片的总量。
参考 自 https://blog.csdn.net/tanmx219/article/details/82906707
https://blog.csdn.net/csdn_zhishui/article/details/85389168
1.cfg文件里的batch就是batch_size,subdivisions只是在显存不足的情况下把batch分批放入训练。 ?现在怀疑batch_size = batch/subdivisions。昨天跑的一个训练如果batch = batch_size的话那大约有80个epoch,但还是明显欠拟合,loss很高。所以还在疑惑???
2.epoch = max_batches/(images/bach) —— 暂时理解应该是这样?
3.max_batches = max_iterations
4.训练的时候batch在小于1000次时每100次保存模型,大于1000后每10000次保存一次模型。可以通过修改/examples/detector.c中的train_detector函数来自己决定多少张图保存一次模型。
5.假设steps = 10000 , scale = .1 ,那意思就是迭代到10000次时学习率衰减10倍。如果调整max_baches的大小,需要同时调整steps,而scale可以自己决定修不修改。
6.训练的时候若数据集小目标较少,106层会大概率输出nan,这是数据集的问题。如果数据集没有问题,可以通过调大batch或者调小learning_rate来解决。(yolo的训练调参略烦)
7.github上暂时还没有发现在pytorch框架下较好用的训练代码,尝试着跑了两个,效果不好,所以还是使用darknet来进行训练。
8.使用voc_label.py输出的是绝对路径。
9.训练的时候用 ./darknet detector train cfg/voc.data cfg/yolov3-voc.cfg darknet53.conv.74 2>1 | tee person_train.txt 保存训练内容
10.由于数据集的问题没有小目标,尝试使用三个数据集一起训练但大幅输出nan,表示训练很糟糕。所以在原有第一个数据集训练最后保存的模型的基础上,进行后续训练。也就是把预训练权重换成自己的xxx.weights,训练的输出暂时看起来较为正常,等训练完成了看结果好坏。(同时需要调整cfg文件的max_batches,比如第一次训练完保存的是100000次,生成了final.weights,那么接下去训练就需要把cfg调大超过10w次,不然会直接保存。)


