ubuntu18.04 + tensorflow1.14 + CUDA10.0 安装指南
1. tensorflow与CUDA
tensorflow与cuda 对应关系
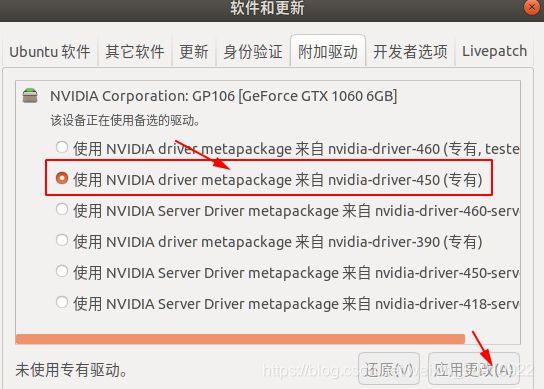
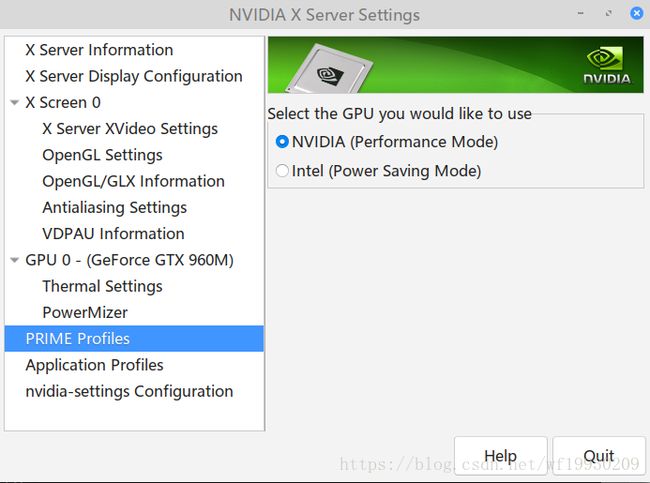
2. ubuntu18.4安装显卡驱动
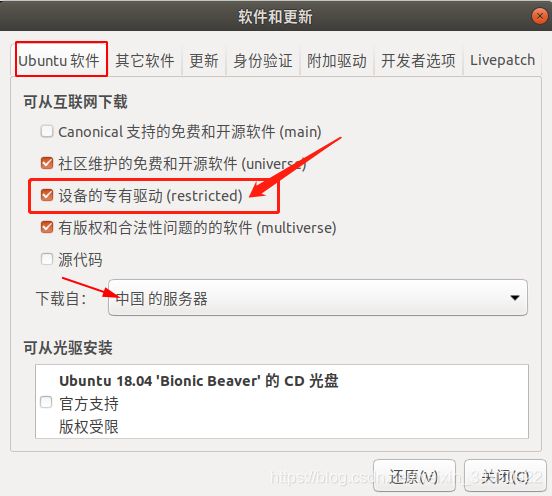
根据网上的编译安装,我的电脑还是无法进入系统桌面,因此只能使用图形化界面安装:
3. CUDA安装
1.GPU版本的tensorflow 1.14版本也需要CUDA 10.0版本
下载地址:https://developer.nvidia.com/cuda-toolkit-archive
版本选择: https://developer.nvidia.com/cuda-downloads
2.安装以下命令安装
1. Run `sudo sh cuda_10.0.130_410.48_linux.run`
2. Follow the command-line prompts
Logging to /tmp/cuda_install_3739.log
Using more to view the EULA.
End User License Agreement
--------------------------


Preface
-------

The Software License Agreement in Chapter 1 and the Supplement
in Chapter 2 contain license terms and conditions that govern
the use of NVIDIA software. By accepting this agreement, you
agree to comply with all the terms and conditions applicable
to the product(s) included herein.


NVIDIA Driver


Description

This package contains the operating system driver and
fundamental system software components for NVIDIA GPUs.
Do you accept the previously read EULA?
accept/decline/quit: accept

Install NVIDIA Accelerated Graphics Driver for Linux-x86_64 410.48?
(y)es/(n)o/(q)uit: n

Install the CUDA 10.0 Toolkit?
(y)es/(n)o/(q)uit: y

Enter Toolkit Location
 [ default is /usr/local/cuda-10.0 ]:

Do you want to install a symbolic link at /usr/local/cuda?
(y)es/(n)o/(q)uit: y

Install the CUDA 10.0 Samples?
(y)es/(n)o/(q)uit: y

Enter CUDA Samples Location
 [ default is /home/kuiper ]:

Installing the CUDA Toolkit in /usr/local/cuda-10.0 ...
Missing recommended library: libGLU.so
Missing recommended library: libX11.so
Missing recommended library: libXi.so
Missing recommended library: libXmu.so
Missing recommended library: libGL.so

Installing the CUDA Samples in /home/kuiper ...
Copying samples to /home/kuiper/NVIDIA_CUDA-10.0_Samples now...
Finished copying samples.

===========
= Summary =
===========

Driver:   Not Selected
Toolkit:  Installed in /usr/local/cuda-10.0
Samples:  Installed in /home/kuiper, but missing recommended libraries

Please make sure that
 -   PATH includes /usr/local/cuda-10.0/bin
 -   LD_LIBRARY_PATH includes /usr/local/cuda-10.0/lib64, or, add /usr/local/cuda-10.0/lib64 to /etc/ld.so.conf and run ldconfig as root

To uninstall the CUDA Toolkit, run the uninstall script in /usr/local/cuda-10.0/bin

Please see CUDA_Installation_Guide_Linux.pdf in /usr/local/cuda-10.0/doc/pdf for detailed information on setting up CUDA.

***WARNING: Incomplete installation! This installation did not install the CUDA Driver. A driver of version at least 384.00 is required for CUDA 10.0 functionality to work.
To install the driver using this installer, run the following command, replacing <CudaInstaller> with the name of this run file:
    sudo <CudaInstaller>.run -silent -driver

Logfile is /tmp/cuda_install_3739.log
将cuda路径加入系统路径就可以了
写入~/.bashrc里面
export PATH="/usr/local/cuda-10.0/bin:$PATH"
export LD_LIBRARY_PATH="/usr/local/cuda-10.0/lib64:$LD_LIBRARY_PATH"
source ~/.bashrc
使用nvcc -V检查cuda版本
4. cuDNN安装
cuDNN是NVIDIA专为Deep Learning应用开发的支持库。如果安装Tensorflow 1.14.0,下载v7.4版本的cuDNN。
下载地址:https://developer.nvidia.com/rdp/cudnn-download
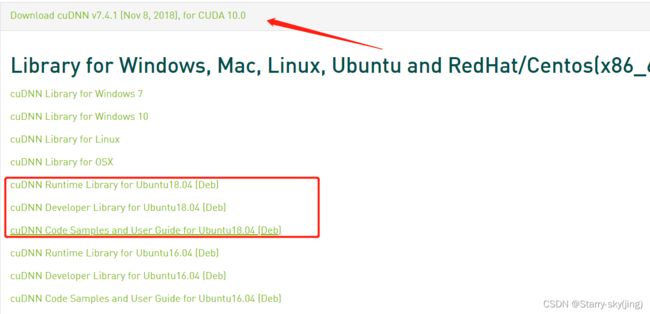
安装CUDNN7.4安装顺序:
sudo dpkg -i libcudnn7_7.4.1.5-1+cuda10.0_amd64.deb
sudo dpkg -i libcudnn7-dev7_7.4.1.5-1+cuda10.0_amd64.deb
sudo dpkg -i libcudnn7-doc_7_7.4.1.5-1+cuda10.0_amd64.deb
把此文件复制到/usr/local/cuda/include文件夹下面,并修改权限:
sudo cp /usr/include/cudnn.h /usr/local/cuda/include
sudo chmod a+x /usr/local/cuda/include/cudnn.h
检测是否安装成功:cat /usr/local/cuda/include/cudnn.h | grep CUDNN_MAJOR -A 2
cat cudnn.h | grep CUDNN_MAJOR -A 2
#define CUDNN_MAJOR 7
#define CUDNN_MINOR 4
#define CUDNN_PATCHLEVEL 1
--
#define CUDNN_VERSION (CUDNN_MAJOR * 1000 + CUDNN_MINOR * 100 + CUDNN_PATCHLEVEL)

#include "driver_types.h"
重启: reboot
安装tensorflow-gpu:pip install tensorflow-gpu==1.14.0 -i https://pypi.doubanio.com/simple/
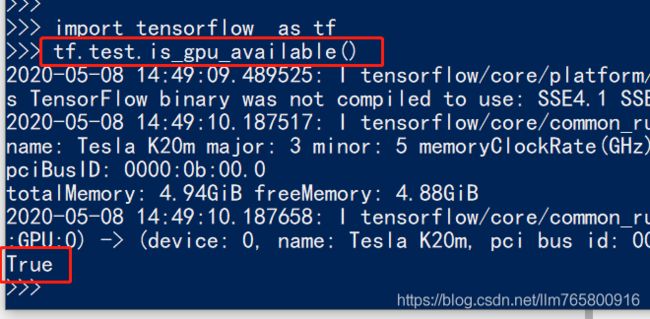
测试:
import tensorflow as tf
tf.test.is_gpu_available()
5. 切换CUDA版本
在安装了多个cuda后,可以在/usr/local/目录下查看自己安装的cuda版本
/usr/local$ ls
bin        cuda       cuda-11.0  feiqiu  include       lib  Postman  sbin   src
clash-  cuda-10.0  etc        games   jdk1.8.0_271  man  pycharm  share  sunlogin
使用stat命令查看当前cuda软链接指向哪个cuda版本。这里指向的是10.0
$ stat cuda
  文件:cuda -> /usr/local/cuda-10.0
  大小:20        	块:0          IO 块:4096   符号链接
设备:10301h/66305d	Inode:1847017     硬链接:1
权限:(0777/lrwxrwxrwx)  Uid:(    0/    root)   Gid:(    0/    root)
最近访问:2022-06-12 18:42:31.635617362 +0800
最近更改:2022-06-12 18:37:39.129775205 +0800
最近改动:2022-06-12 18:37:39.129775205 +0800
创建时间:-
要使用其他版本的cuda,如cuda11.0,需要重新建立软链接即可。(保持链接名称为cuda,与bashrc配置文件中保持一致)
sudo rm -rf cuda
sudo ln -s /usr/local/cuda-10.0 /usr/local/cuda
