项目部署-部署springboot项目并使用Nginx置域名
使用maven打jar包
- pom.xml 使用jar包方式打包
<groupId>com.summergroupId>
<artifactId>gkartifactId>
<version>0.0.1-SNAPSHOTversion>
<packaging>jarpackaging>
- 配置资源过滤:
<build>
        <plugins>
            <plugin>
                <groupId>org.springframework.bootgroupId>
                <artifactId>spring-boot-maven-pluginartifactId>
            plugin>
        plugins>
        <resources>

            <resource>
                <directory>src/main/javadirectory>
                <includes>
                    <include>**/*.xmlinclude>
                includes>
            resource>


            <resource>
                <directory>src/main/resourcesdirectory>
            resource>
        resources>
        <pluginManagement>
            <plugins>
                <plugin>
                    <artifactId>maven-resources-pluginartifactId>
                    <configuration>
                        <encoding>utf-8encoding>
                        <useDefaultDelimiters>trueuseDefaultDelimiters>
                        <nonFilteredFileExtensions>
                            <nonFilteredFileExtension>woffnonFilteredFileExtension>
                            <nonFilteredFileExtension>woff2nonFilteredFileExtension>
                            <nonFilteredFileExtension>eotnonFilteredFileExtension>
                            <nonFilteredFileExtension>ttfnonFilteredFileExtension>
                            <nonFilteredFileExtension>svgnonFilteredFileExtension>
                        nonFilteredFileExtensions>
                    configuration>
                plugin>
            plugins>
        pluginManagement>
    build>
- 使用IDEA的maven工具进行 clear 和 package

先 clear 再 package 出现BUILD SUCCESS就是打包成功了。
Building jar 是jar包的路径

- 我们进入cmd使用指令运行我们的jar包,检查是否能成功访问。
java -jar gk-0.0.1-SNAPSHOT.jar
页面访问成功!

拿到jar包访问成功我们第一阶段完成。
服务器环境准备 准备jdk,Nginx,MySQL
-
建议小白安装宝塔
Centos安装命令:
yum install -y wget && wget -O install.sh http://download.bt.cn/install/install_6.0.sh && sh install.sh -
使用宝塔安装tomcat8(tomcat8会自带jdk8的环境)
-
安装Nginx(待会配置域名)
-
安装MySQL(服务使用线上数据库,当然你在打jar包之前就要配置好数据库了)
运行jar包
- 将jar包上传到服务器上(哪里都行,你能找到就好)
- 使用命令云jar包
使用项目中默认的端口号
nohup java -jar yqjk-0.0.1-SNAPSHOT.jar
补充:
使用自定义的端口号
nohup java -jar yqjk-0.0.1-SNAPSHOT.jar --server.port=7788
最普遍的方法:
java -jar gk-0.0.1-SNAPSHOT.jar(启动java项目命令)
--server.port=8870 (设置端口号)
>gk.txt(设置日志输出位置)
&(项目后台运行)
- 如果想查看运行日志就可以使用如下的命令
nohup java -jar yqjk-0.0.1-SNAPSHOT.jar >temp.txt &
查看运行日志
cat temp.txt
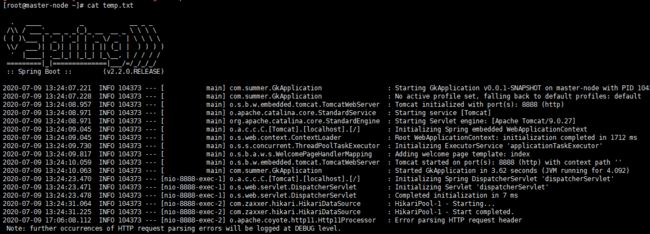
这样我们就可以使用 IP地址+端口号来访问我们的服务啦!!!
如何关闭服务?
- 查看进程号
netstat -anp|grep 8888

补充:
查看java项目的进程号
ps -ef|grep java
- 杀死进程
kill -s 9 104373
配置域名
-
阿里或腾讯云里面把域名解析到服务器上
-
打开宝塔的Nginx
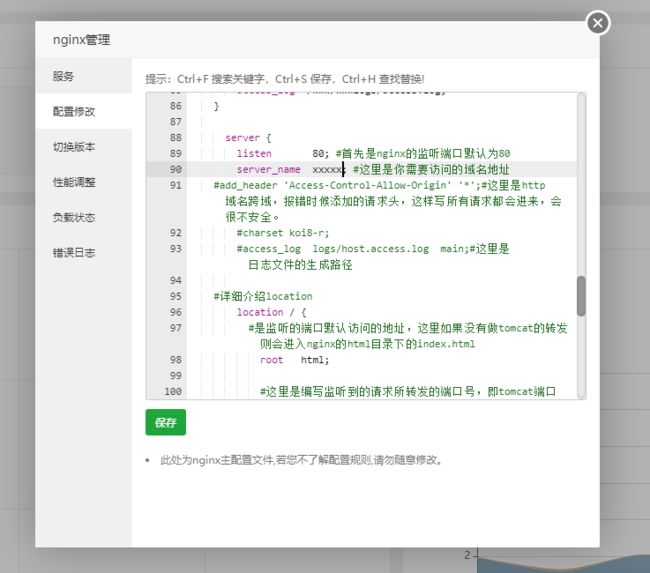
3.在Nginx的配置文件里面再加入一个server
主要修改如下几个参数:
- server_name :域名
- proxy_pass http://localhost:8888 要转发到的端口(这个端口号就是你springboot项目里面配置的端口号)
 server {
        listen       80; #首先是nginx的监听端口默认为80
        server_name  xxxxx; #这里是你需要访问的域名地址
		#add_header 'Access-Control-Allow-Origin' '*';#这里是http 域名跨域,报错时候添加的请求头,这样写所有请求都会进来,会很不安全。
        #charset koi8-r;
        #access_log  logs/host.access.log  main;#这里是 日志文件的生成路径

		#详细介绍location
        location / {
        	#是监听的端口默认访问的地址,这里如果没有做tomcat的转发则会进入nginx的html目录下的index.html
            root   html;

            #这里是编写监听到的请求所转发的端口号,即tomcat端口
			proxy_pass http://localhost:8888;
            #Proxy Settings;
            #proxy_redirect off;
            #proxy_set_header Host $host;
            #proxy_set_header X-Real-IP $remote_addr;
            #proxy_set_header X-Forwarded-For $proxy_add_x_forwarded_for;

			#设置nginx 的默认显示页
            index  index.html index.htm;

			#设置http请求的请求头,使其在跨域访问上不会被浏览器阻止。ps:这里设置我发现没有用,后来还是在ajax过滤器中添加的 请求头,如果大家有知道这里怎么修改的,请留言大家一起学习。
			add_header 'Access-Control-Allow-Origin' '*';
			add_header 'Access-Control-Allow-Methods' 'GET, POST, OPTIONS';
			add_header 'Access-Control-Allow-Headers' 'DNT,X-CustomHeader,Keep-Alive,User-Agent,X-Requested-With,If-Modified-Since,Cache-Control,Content-Type';
        }

        #error_page  404              /404.html;

        # redirect server error pages to the static page /50x.html
        #
        error_page   500 502 503 504  /50x.html;
        location = /50x.html {
            root   html;
        }
    }
这样咱就可使用域名访问我们的服务啦
问题:
- 使用thymeleaf摸版引擎的th:replace在服务器上面出现的一种报错。

Whitelabel Error Page
This application has no explicit mapping for /error, so you are seeing this as a fallback.
Fri Jul 10 14:09:04 CST 2020
There was an unexpected error (type=Internal Server Error, status=500).
Error resolving template [/commons/public], template might not exist or might not be accessible by any of the configured Template Resolvers (template: “public/public-hot-news” - line 10, col 10)
在window系统下没问题。部署到linux下面出现这个问题
需要注意配置
spring.thymeleaf.prefix=classpath:/templates/
这里已经有斜线了 引入模板的时候不需要再加了
错误写法!!!!
<head th:replace="/common/head::head">head>
正确写法!!!
<head th:replace="common/head::head">head>
common为目录templates下面的