【云原生】k8s 管理平台 rancher
文章目录
-
- 一、概述
- 二、Rancher 架构
- 三、安装 Rancher
-
- 1)安装Helm
- 2)安装ingress-controller
- 3)为 Rancher 创建命名空间
- 4)选择 SSL 配置
- 5)安装 cert-manager
- 6)通过 Helm 安装 Rancher
- 2)添加 Helm Chart 仓库
- 7)Rancher web
- 四、Harbor 对接 Rancher
-
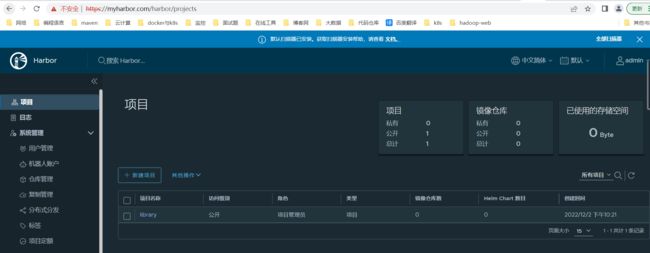
- 1)安装 Harbor
-
- 1、配置hosts
- 2、创建stl证书
- 3、开始安装 nfs-provisioner
- 4、开始安装 Harbor
-
- 【1】创建 Namespace
- 【2】创建证书秘钥
- 【3】添加 Chart 库
- 【4】通过helm安装harbor
- 3)安装helm-push插件
- 4)helm 增加harbor 源
- 5)helm-push 示例
- 6)在Rancher关联Harbor
- 7)通过Rancher安装、更新、卸载应用
一、概述
前面我们编排了很多chart包,需要一个管理平台来管理,所以这里介绍一款非常简洁和实用的管理平台Rancher;Rancher 是一个 Kubernetes 管理工具,Rancher 基于 Kubernetes 添加了新的功能,包括统一所有集群的身份验证和 RBAC,让系统管理员从一个位置控制全部集群的访问。
Rancher 的作用:
- Rancher 可以创建来自 Kubernetes 托管服务提供商的集群,创建节点并安装 Kubernetes,或者导入在任何地方运行的现有 Kubernetes 集群。
- Rancher 可以为集群和资源提供更精细的监控和告警,将日志发送到外部提供商,并通过应用商店(Application Catalog)直接集成 Helm。
- Rancher 可以与外部CI/CD 系统 对接。没有的话,你也可以使用 Rancher 提供的 Fleet 自动部署和升级工作负载。
- 可以通过Rancher 安装、卸载、升级应用。
官方文档:https://docs.ranchermanager.rancher.io/zh/
GitHub:https://github.com/rancher/rancher-docs
二、Rancher 架构
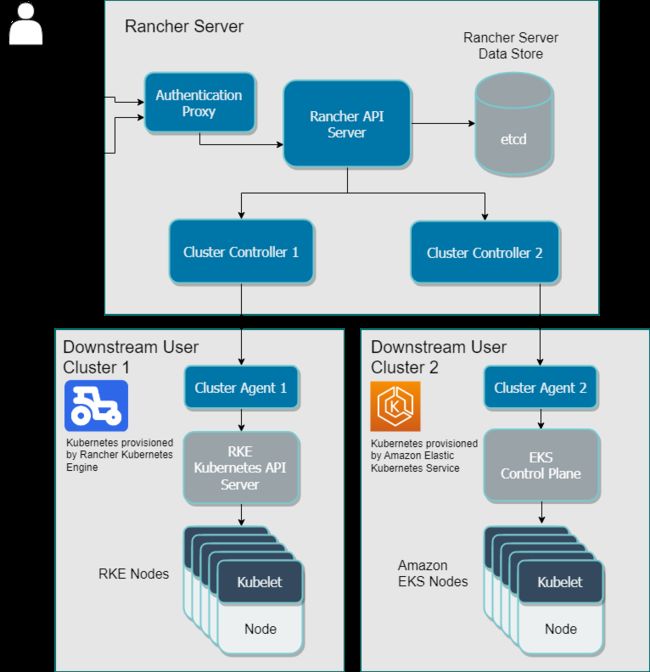
大多数 Rancher 2.x 软件均运行在 Rancher Server 上。Rancher Server 包括用于管理整个 Rancher 部署的所有软件组件。下图展示了 Rancher 2.x 的上层架构。
三、安装 Rancher
这里使用helm部署将Rancher 部署在k8s上,k8s环境部署可以参考我这篇文章:【云原生】无VIP稳定性和可扩展性更强的k8s高可用方案讲解与实战操作
1)安装Helm
关于Helm介绍与部署可以参考我以下几篇文章:
- 【云原生】Helm 架构和基础语法详解
- 【云原生】Helm 常用命令(chart 安装、升级、回滚、卸载等操作)
# 下载包
wget https://get.helm.sh/helm-v3.9.4-linux-amd64.tar.gz
# 解压压缩包
tar -xf helm-v3.9.4-linux-amd64.tar.gz
# 制作软连接
ln -s /opt/helm/linux-amd64/helm /usr/local/bin/helm
# 验证
helm version
helm help
2)安装ingress-controller
# 可以先把镜像下载,再安装
docker pull registry.cn-hangzhou.aliyuncs.com/google_containers/nginx-ingress-controller:v1.2.0
docker pull registry.cn-hangzhou.aliyuncs.com/google_containers/kube-webhook-certgen:v1.1.1

wget https://raw.githubusercontent.com/kubernetes/ingress-nginx/controller-v1.2.0/deploy/static/provider/cloud/deploy.yaml
# 修改镜像地址
sed -i '[email protected]/ingress-nginx/controller:v1.2.0\(.*\)@registry.cn-hangzhou.aliyuncs.com/google_containers/nginx-ingress-controller:v1.2.0@' deploy.yaml
sed -i '[email protected]/ingress-nginx/kube-webhook-certgen:v1.1.1\(.*\)[email protected]/google_containers/kube-webhook-certgen:v1.1.1@' deploy.yaml

###还需要修改两地方
#1、kind: 类型修改成DaemonSet,replicas: 注销掉,因为DaemonSet模式会每个节点运行一个pod
#2、在添加一条: hostnetwork:true
#3、把LoadBalancer修改成NodePort
#4、在--validating-webhook-key下面添加- --watch-ingress-without-class=true
#5、设置master节点可调度
kubectl taint nodes k8s-master-168-0-113 node-role.kubernetes.io/control-plane:NoSchedule-
kubectl taint nodes k8s-master2-168-0-116 node-role.kubernetes.io/control-plane:NoSchedule-

kubectl apply -f deploy.yaml
3)为 Rancher 创建命名空间
kubectl create namespace cattle-system
4)选择 SSL 配置
Rancher Management Server 默认需要 SSL/TLS 配置来保证访问的安全性。
你可以从以下三种证书来源中选择一种,用于在 Rancher Server 中终止 TLS:
- Rancher 生成的 TLS 证书:要求你在集群中安装 cert-manager。Rancher 使用 cert-manager 签发并维护证书。Rancher 会生成自己的 CA 证书,并使用该 CA 签署证书。然后 cert-manager负责管理该证书。
- Let’s Encrypt:Let’s Encrypt 选项也需要使用 cert-manager。但是,在这种情况下,cert-manager 与 Let’s Encrypt 的特殊颁发者相结合,该颁发者执行获取 Let’s Encrypt 颁发的证书所需的所有操作(包括请求和验证)。此配置使用 HTTP 验证(HTTP-01),因此负载均衡器必须具有可以从互联网访问的公共 DNS 记录。
- 你已有的证书:使用已有的 CA 颁发的公有或私有证书。Rancher 将使用该证书来保护 WebSocket 和 HTTPS 流量。在这种情况下,你必须上传名称分别为 tls.crt 和 tls.key的 PEM 格式的证书以及相关的密钥。如果你使用私有 CA,则还必须上传该 CA 证书。这是由于你的节点可能不信任此私有 CA。Rancher 将获取该 CA 证书,并从中生成一个校验和,各种 Rancher 组件将使用该校验和来验证其与 Rancher 的连接。
5)安装 cert-manager
# 下载
wget https://github.com/cert-manager/cert-manager/releases/download/v1.7.1/cert-manager.crds.yaml

# 安装
kubectl apply -f cert-manager.crds.yaml

# 查看
kubectl get pods --namespace cert-manager
6)通过 Helm 安装 Rancher
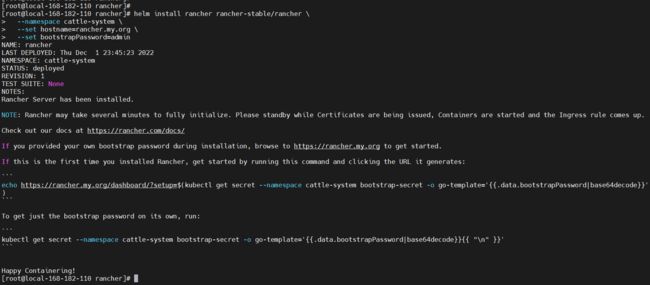
helm install rancher rancher-stable/rancher \
  --namespace cattle-system \
  --set hostname=rancher.my.org \
  --set bootstrapPassword=admin
NAME: rancher
LAST DEPLOYED: Thu Dec  1 23:45:23 2022
NAMESPACE: cattle-system
STATUS: deployed
REVISION: 1
TEST SUITE: None
NOTES:
Rancher Server has been installed.

NOTE: Rancher may take several minutes to fully initialize. Please standby while Certificates are being issued, Containers are started and the Ingress rule comes up.

Check out our docs at https://rancher.com/docs/

If you provided your own bootstrap password during installation, browse to https://rancher.my.org to get started.

If this is the first time you installed Rancher, get started by running this command and clicking the URL it generates:
echo https://rancher.my.org/dashboard/?setup=$(kubectl get secret --namespace cattle-system bootstrap-secret -o go-template=‘{{.data.bootstrapPassword|base64decode}}’)
To get just the bootstrap password on its own, run:
kubectl get secret --namespace cattle-system bootstrap-secret -o go-template=‘{{.data.bootstrapPassword|base64decode}}{{ “\n” }}’
Happy Containering!
等待 Rancher 运行:
kubectl -n cattle-system rollout status deploy/rancher
Waiting for deployment "rancher" rollout to finish: 0 of 3 updated replicas are available...
deployment "rancher" successfully rolled out

kubectl get pods  -n cattle-system -owide
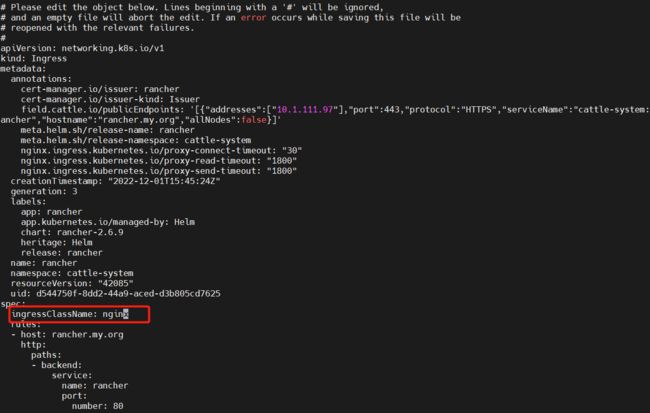
【温馨提示】有些版本是需要指定
ingressClassName,这里我安装的这个版本就需要,要不然访问web报404,而且还没有ADDRESS。
kubectl edit ingress rancher -n cattle-system
2)添加 Helm Chart 仓库
### 1. 添加 Helm Chart 仓库
helm repo add rancher-stable https://releases.rancher.com/server-charts/stable
7)Rancher web
如果上面的域名没有解析,可以加hosts
192.168.182.110 rancher.my.org
获取web地址
echo https://rancher.my.org/dashboard/?setup=$(kubectl get secret --namespace cattle-system bootstrap-secret -o go-template='{{.data.bootstrapPassword|base64decode}}')

# 获取登录密码
kubectl get secret --namespace cattle-system bootstrap-secret -o go-template='{{.data.bootstrapPassword|base64decode}}{{ "\n" }}'
web地址:https://rancher.my.org
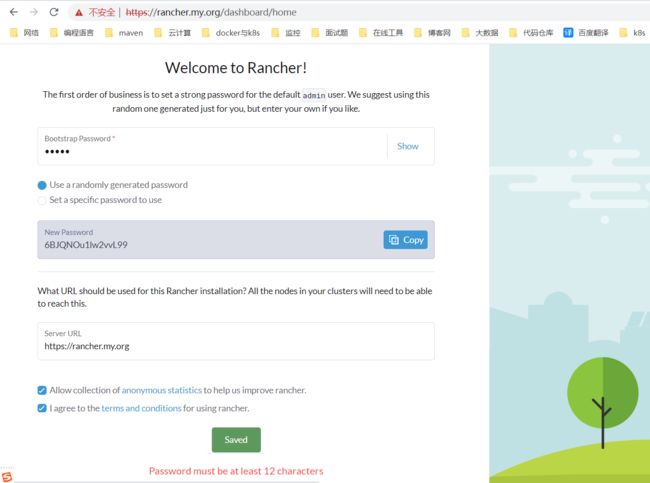
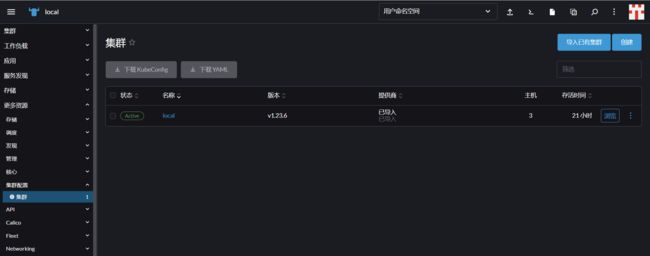
如果安装在k8s上会自动获取k8s信息,当然也可以当入已其它已存在的k8s集群。
四、Harbor 对接 Rancher
1)安装 Harbor
1、配置hosts
192.168.192.110 myharbor.com
2、创建stl证书
# 生成 CA 证书私钥
openssl genrsa -out ca.key 4096
# 生成 CA 证书
openssl req -x509 -new -nodes -sha512 -days 3650 \
 -subj "/C=CN/ST=Guangdong/L=Shenzhen/O=harbor/OU=harbor/CN=myharbor.com" \
 -key ca.key \
 -out ca.crt
# 创建域名证书,生成私钥
openssl genrsa -out myharbor.com.key 4096
# 生成证书签名请求 CSR
openssl req -sha512 -new \
    -subj "/C=CN/ST=Guangdong/L=Shenzhen/O=harbor/OU=harbor/CN=myharbor.com" \
    -key myharbor.com.key \
    -out myharbor.com.csr
# 生成 x509 v3 扩展
cat > v3.ext <<-EOF
authorityKeyIdentifier=keyid,issuer
basicConstraints=CA:FALSE
keyUsage = digitalSignature, nonRepudiation, keyEncipherment, dataEncipherment
extendedKeyUsage = serverAuth
subjectAltName = @alt_names

[alt_names]
DNS.1=myharbor.com
DNS.2=*.myharbor.com
DNS.3=hostname
EOF
#创建 Harbor 访问证书
openssl x509 -req -sha512 -days 3650 \
    -extfile v3.ext \
    -CA ca.crt -CAkey ca.key -CAcreateserial \
    -in myharbor.com.csr \
    -out myharbor.com.crt
3、开始安装 nfs-provisioner
# 添加chart源
helm repo add nfs-subdir-external-provisioner https://kubernetes-sigs.github.io/nfs-subdir-external-provisioner/

# 开始安装
helm install nfs-subdir-external-provisioner nfs-subdir-external-provisioner/nfs-subdir-external-provisioner \
  --namespace=nfs-provisioner \
  --create-namespace \
  --set image.repository=willdockerhub/nfs-subdir-external-provisioner \
  --set image.tag=v4.0.2 \
  --set replicaCount=2 \
  --set storageClass.name=nfs-client \
  --set storageClass.defaultClass=true \
  --set nfs.server=192.168.182.110 \
  --set nfs.path=/opt/nfsdata
查看
kubectl get pods,deploy,sc -n nfs-provisioner
4、开始安装 Harbor
【1】创建 Namespace
kubectl create ns harbor
【2】创建证书秘钥
kubectl create secret tls myharbor.com --key myharbor.com.key --cert myharbor.com.crt -n harbor
kubectl get secret myharbor.com -n harbor
【3】添加 Chart 库
helm repo add harbor https://helm.goharbor.io
【4】通过helm安装harbor
helm install myharbor --namespace harbor harbor/harbor \
  --set expose.ingress.hosts.core=myharbor.com \
  --set expose.ingress.hosts.notary=notary.myharbor.com \
  --set-string expose.ingress.annotations.'nginx\.org/client-max-body-size'="1024m" \
  --set expose.tls.secretName=myharbor.com \
  --set persistence.persistentVolumeClaim.registry.storageClass=nfs-client \
  --set persistence.persistentVolumeClaim.jobservice.storageClass=nfs-client \
  --set persistence.persistentVolumeClaim.database.storageClass=nfs-client \
  --set persistence.persistentVolumeClaim.redis.storageClass=nfs-client \
  --set persistence.persistentVolumeClaim.trivy.storageClass=nfs-client \
  --set persistence.persistentVolumeClaim.chartmuseum.storageClass=nfs-client \
  --set persistence.enabled=true \
  --set externalURL=https://myharbor.com \
  --set harborAdminPassword=Harbor12345
这里稍等一段时间在查看资源状态
kubectl get ingress,svc,pods,pvc -n harbor
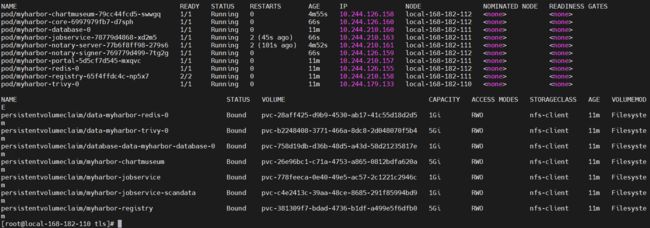
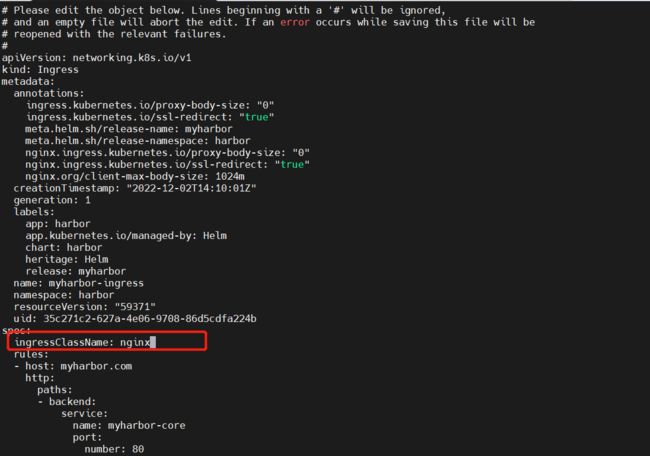
这里ingress也是没有Address,而且访问也是404,还是跟上面一样的处理,在ingress中添加如下:
ingressClassName: nginx
修改
kubectl edit ingress myharbor-ingress -n harbor
kubectl edit ingress myharbor-ingress-notary -n harbor
3)安装helm-push插件
GitHub地址:https://github.com/chartmuseum/helm-push
mkdir -p /root/.local/share/helm/plugins/helm-push

wget https://github.com/chartmuseum/helm-push/releases/download/v0.10.3/helm-push_0.10.3_linux_amd64.tar.gz

tar zxvf helm-push_0.10.3_linux_amd64.tar.gz -C /root/.local/share/helm/plugins/helm-push

# 查看插件
helm plugin list
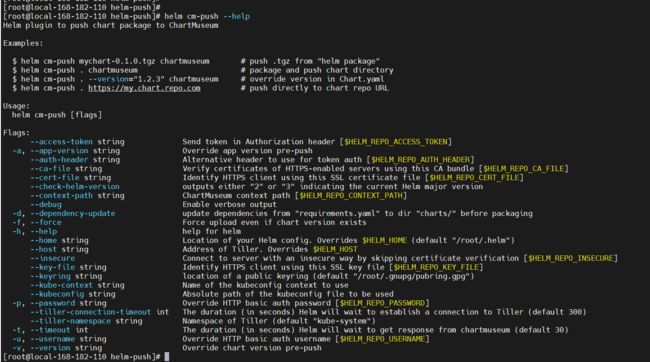
helm cm-push --help
4)helm 增加harbor 源
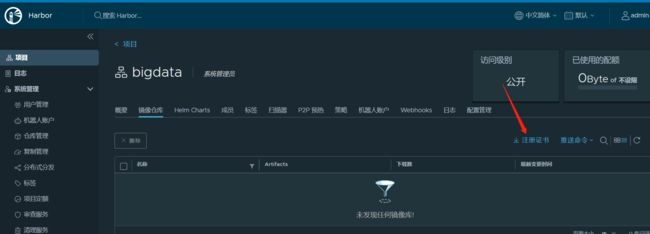
# chartrepo,固定参数,bigdata自定义项目
helm repo add local-harbor --username=admin --password=Harbor12345 https://myharbor.com/chartrepo/bigdata/ --ca-file /opt/k8s/helm-push/ca.crt
5)helm-push 示例
helm repo add my-repo https://charts.bitnami.com/bitnami
helm pull my-repo/redis
tar -xf redis-17.3.13.tgz
helm install my-redis ./redis
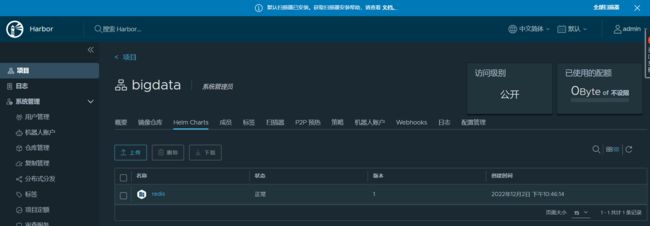
推送harbor
# 推送,接【目录】
helm cm-push ./redis local-harbor --ca-file /opt/k8s/helm-push/ca.crt

# 推送,接【压缩包】
helm cm-push redis-17.3.13.tgz local-harbor --ca-file /opt/k8s/helm-push/ca.crt

# 推送,指定版本,--version
helm cm-push ./redis --version="17.3.13" local-harbor --ca-file /opt/k8s/helm-push/ca.crt

# 强制推送,--force
helm cm-push --force redis-17.3.13.tgz local-harbor
6)在Rancher关联Harbor
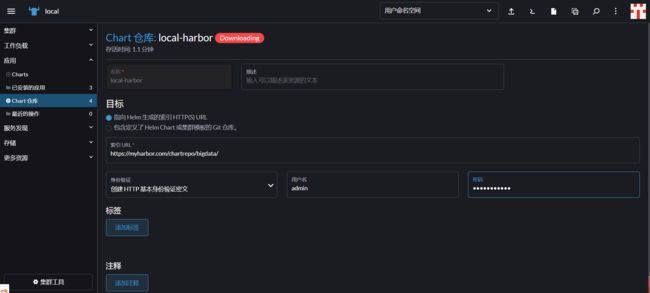
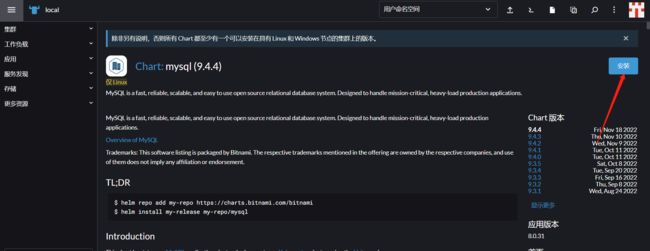
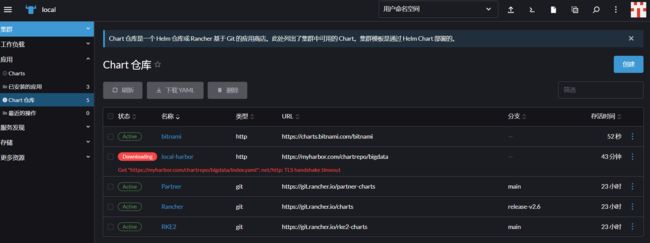
因为我这里证书是不可信的,所以是异常的,所以这里添加一个bitnami测试验证。
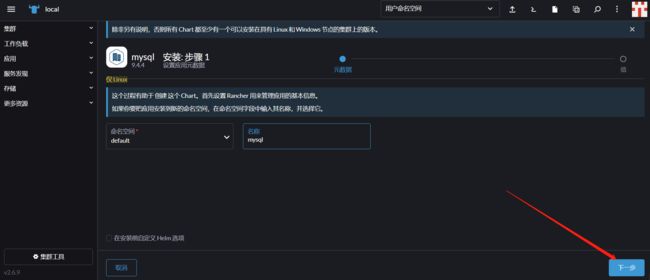
7)通过Rancher安装、更新、卸载应用
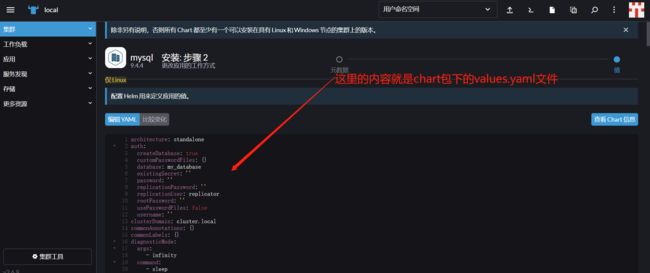
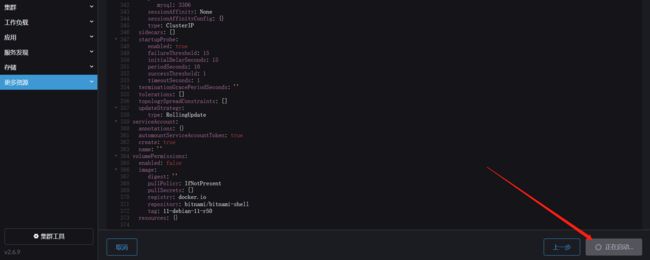
安装、更新,卸载非常简单,这里就不过多的讲解了,有任何疑问欢迎给我留言,k8s 管理平台 rancher 简单的介绍和简单使用就先到这里了,后续会持续更新【云原生+大数据】相关的文章,请小伙伴耐心等待~

