轻松搭建web网站架构服务
学习目标:
搭建lnmp网站架构,实现负载均衡、高可用,以及https,并通过NFS优化数据存储。
| 服务器 | IP地址 |
|---|---|
| web1 | 192.168.2.137 |
| web2 | 192.168.2.136 |
| mysql | 192.168.2.133 |
| PHP | 192.168.2.130 |
| lb(keepalived)1 | 192.168.2.135 |
| lb(keepalived)2 | 192.168.2.128 |
| NFS | 192.168.2.3 |
搭建lnmp
提示:实验环境,关闭防火墙,企业环境需要设置安全策略,Nginx及各种服务版本和安装方式不一样,配置步骤相同,但是配置文件略有差异!
步骤:
一、 搭建环境
启动三台虚拟机:关闭防火墙、setenforce;确定IP地址,网卡类型(以一台nat为例),保障可以互相ping通

注意:查看有没有已安装的软件,以Nginx为例,必须卸载干净
卸载源码安装的Nginx:
先卸载程序:

再删除链接文件:

二、 web1:安装Nginx服务
1、配置yum源:

添加以下内容,保存退出:
[nginx-stable]
name=nginx stable repo
baseurl=http://nginx.org/packages/centos/7/$basearch/
gpgcheck=0
enabled=1
2、清理缓存,安装

3、搭建wordpress
上传wordpress源码包
复制wordpress安装包,到虚拟机/,解压并赋权
unzip wordpress-4.9.4-zh_CN.zip
chmod -R 777 /wordpress
创建虚拟主机配置文件
先将默认文件重命名,防止影响配置。
cd /etc/nginx/conf.d/
mv default.conf default.conf.bak
编辑blog网站配置文件
vim /etc/nginx/conf.d/blog.conf
添加以下内容,保存退出
server {
        listen 80;
        server_name blog.benet.com;
        root /wordpress;
        index index.php index.html;

        location ~ \.php$ {
        root /wordpress;
        fastcgi_pass 192.168.2.130:9000;
        fastcgi_index index.php;
        fastcgi_param SCRIPT_FILENAME $document_root$fastcgi_script_name;
        include fastcgi_params;
        }
}
检查语法:

提示:location附加有不合法内容。php$之间空格删掉,解决问题。

启动Nginx服务:systemctl start nginx
注意:腾讯云服务器以yum安装的nginx/1.20.1,网页根目录在,/usr/share/nginx/html,把WordPress解压到此,其余一样

编辑zh网站配置文件:
vim /etc/nginx/conf.d/zh.conf
添加以下内容,保存退出
server {
        listen 80;
        server_name zh.benet.com;
        root /zh;
        index index.php index.html;

        location ~ \.php$ {
        root /zh;
        fastcgi_pass 192.168.2.130:9000;
        fastcgi_index index.php;
        fastcgi_param SCRIPT_FILENAME $document_root$fastcgi_script_name;
        include fastcgi_params;
        }
}
重启服务
4、安装zh
1)方法同上。上传或下载wecenter源码包
注意:这个软件包解压是零散的所以先创建目录
mkdir /zh
cd /zh
解压
unzip WeCenter_3-3-4.zip
设置权限
chmod -R 777 /zh
2)复制wecenter安装包,到php虚拟机/zh目录下,赋权
cd /zh
unzip wecenter_3-3-4.zip
chmod -R 777 /zh
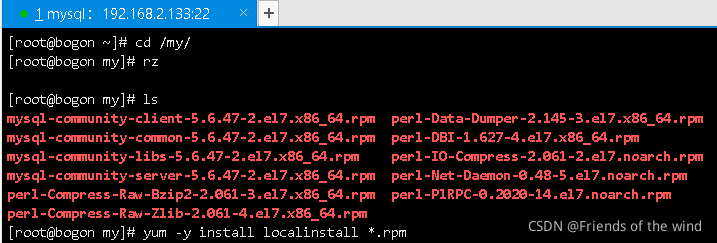
三、 mysql服务器:安装mysql(必须保证没有已安装的mysql或mariadb,以上传下载好的rpm包,本地安装的方式为例,此方法好处是不用配置yum源)
启动mysql:systemctl start mysqld
为blog网站设置账户及授权
登录数据库:mysql(没有密码的情况下可以这样登录)
创建数据库:create database blog;
创建远程管理用户:grant all on blog.* to lisi@’%’ identified by ‘123.com’;
为zh网站设置账户及授权
登录数据库:mysql(没有密码的情况下可以这样登录)
创建数据库:create database zh;
创建远程管理用户:grant all on zh.* to wangwu@’%’ identified by ‘123.com’;
4、 PHP服务器:安装PHP
下载epel源
rpm -Uvh https://dl.fedoraproject.org/pub/epel/epel-release-latest-7.noarch.rpm
rpm -Uvh https://mirror.webtatic.com/yum/el7/webtatic-release.rpm
执行安装命令
yum -y install php72w php72w-cli php72w-common php72w-devel \
php72w-embedded php72w-gd php72w-mbstring php72w-pdo \
php72w-xml php72w-fpm php72w-mysqlnd php72w-opcache
在web1复制wordpress目录到php的根目录
scp -rp /wordpress 192.168.2.130:/
在web1复制zh目录到php的根目录
修改php服务器的配置文件
vim /etc/php-fpm.d/www.conf
定位并修改为:
listen = 192.168.2.130:9000
listen.allowed_clients = 192.168.2.137,192.168.2.136
保存退出
重启php:systemctl restart php-fpm
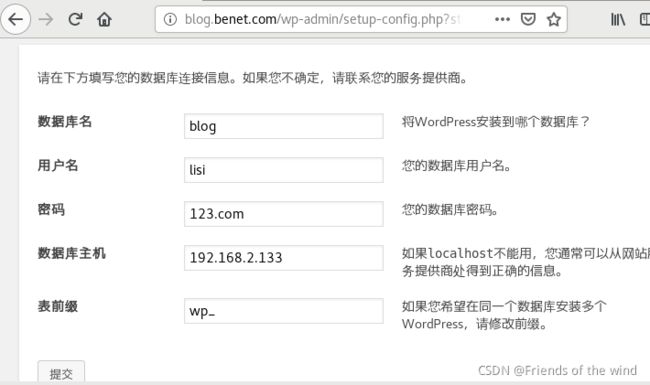
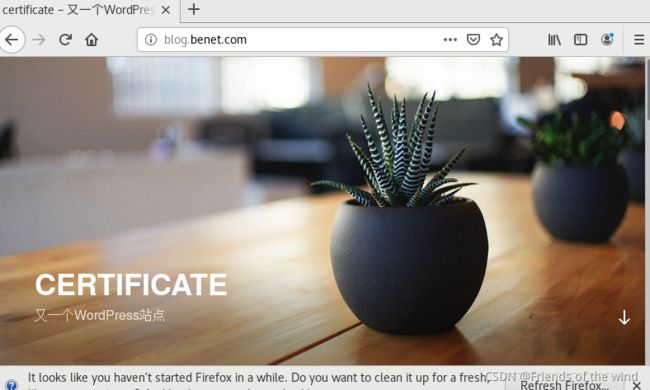
四、任意找一台虚拟机通过域名访问blog,安装并配置
以在web2安装为例:
修改hosts文件:
![]()
填写参数:注意分布式安装mysql地址不能使用默认的localhost,要改成真实IP
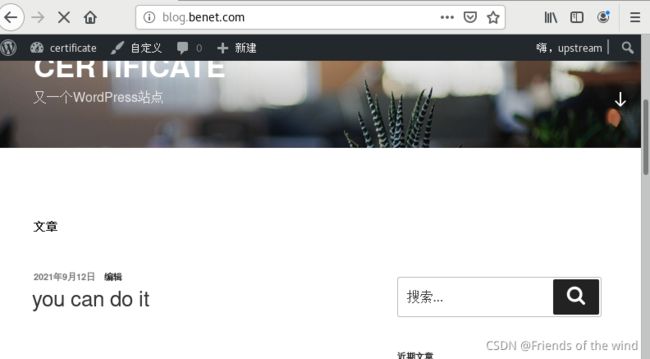
搭建成功可以访问到首页即可!
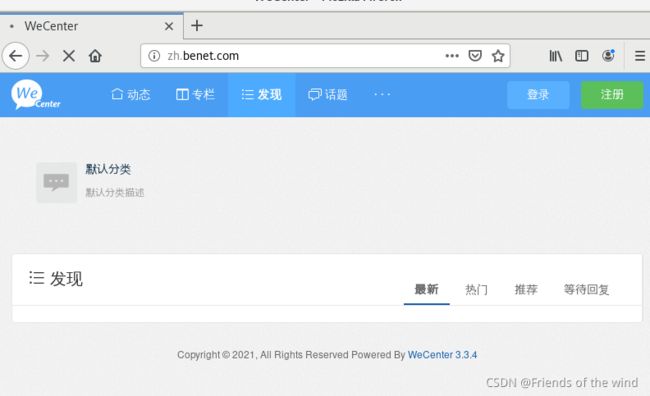
搭建zh

搭建成功如下图:
负载均衡
提示:前提和前面一样
lb1:
配置web2节点服务器(web2安装Nginx省略)
1)在web1归档压缩wordpress和zh目录,复制到web2根目录解压
cd /
tar zcf blog_zh.tar.gz /wordpress /zh/
拷贝到web2
scp blog_zh.tar.gz 192.168.2.136:/
2)复制web1的nginx配置文件到web2
scp -rp /etc/nginx/conf.d/* 192.168.2.136:/etc/nginx/conf.d/
3)web2操作
解压:

启动nginx服务
systemctl start nginx
验证web2:
修改hosts文件:随便找台可以连通的局域网虚拟机,填写web2的IP
![]()
通过域名访问:blog和zh都没问题
cd /etc/nginx/conf.d/
删除默认配置文件
rm -f default.conf
编辑文件,保存退出
vim /etc/nginx/nginx_params
proxy_set_header Host $http_host;
proxy_set_header X-Real-IP $remote_addr;
proxy_set_header X-Forwarded-For $proxy_add_x_forwarded_for;

proxy_connect_timeout 30;
proxy_send_timeout 60;
proxy_read_timeout 60;

proxy_buffering on;
proxy_buffer_size 32k;
proxy_buffers 4 128k;
创建lb配置文件,
vim /etc/nginx/conf.d/lb1.conf
添加:
upstream web_cluster {
        server 192.168.2.137:80;
        server 192.168.2.136:80;
}

server {
        listen 80;
        server_name blog.benet.com;

        location / {
                proxy_pass http://web_cluster;
                include nginx_params;
        }
}

server {
        listen 80;
        server_name zh.benet.com;

        location / {
                proxy_pass http://web_cluster;
                include nginx_params;
        }
}
lb2:先别急着配置,验证一下lb1是否配置成功
修改lb2hosts文件:

验证:可以访问两个站点即可
配置lb2:
拷贝lb1的文件进行修改即可!注意:远程拷贝,加选项-rp
scp -rp 192.168.2.135:/etc/nginx/nginx_params /etc/nginx/
![]()
修改文件名:
cd /etc/nginx/conf.d/
mv lb1.conf lb2.conf
启动服务:systemctl start nginx
nfs
配置NFS服务器:先修改hosts文件,验证上步是否成功,lb2是否可用。
配置:
1、 配置yum源,安装
yum -y install nfs-utils rpcbind
2、创建挂载点
mkdir -p /nfs/{blog,zh}
3、 发布共享目录
vim /etc/exports
添加:
/nfs/blog 192.168.2.0/24(rw,sync,no_root_squash)
/nfs/zh 192.168.2.0/24(rw,sync,no_root_squash)
4、重启nfs服务
systemctl restart rpcbind
systemctl restart nfs
5、把wordpress的内容目录挂载到nfs
cd /wordpress
cp -rp wp-content/ wp-contentbak
mount -t nfs 192.168.1.116:/nfs/blog wp-content
cp -rp wp-contentbak/* wp-content/
6、设置永久挂载
vim /etc/fstab
添加:
192.168.1.116:/nfs/log /wordpress/wp-content nfs defaults 0 0
高可用
1)安装keepalived(两台都装)
yum -y install keepalived
(2)配置keepalived
主服务器:lb1
vim /etc/keepalived/keepalived.conf
修改为:
! Configuration File for keepalived

global_defs {
   notification_email {
     [email protected]
     [email protected]
     [email protected]
   }
   notification_email_from [email protected]
   smtp_server 192.168.200.1
   smtp_connect_timeout 30
   router_id lb1   //需要修改
   vrrp_skip_check_adv_addr
   vrrp_strict
   vrrp_garp_interval 0
   vrrp_gna_interval 0
}

vrrp_instance VI_1 {
    state MASTER
    interface ens33  //需要修改
    virtual_router_id 51
    priority 100
    advert_int 1
    authentication {
        auth_type PASS
        auth_pass 1111
    }
    virtual_ipaddress {
        192.168.2.254
    }
}
保存退出
启动服务:systemctl start keepalived
备服务器:lb2
vim /etc/keepalived/keepalived.conf
修改为:
global_defs {
   router_id lb2			#路由id号,和主服务器必须不同
}

vrrp_instance VI_1 {
    state BACKUP			#状态:BACKUP备   MASTER主
    interface ens33
    virtual_router_id 51
    priority 99				#优先级:备比主要小
    advert_int 1
    authentication {
        auth_type PASS
        auth_pass 1111
    }
    virtual_ipaddress {
        192.168.2.254		#虚拟路由ip,公共ip
    }
}
保存退出
启动服务:systemctl start keepalived
验证:两台keepalived都正常情况,漂移地址在优先级高的lb1

解决nginx故障造成群集无法工作
编辑nginx监控脚本
vim /sh/check_nginx_proxy.sh
#!/bin/bash
killall -0 nginx
if [ $? -ne 0 ];then
systemctl stop keepalived
fi
保存退出
chmod a+x /sh/check_nginx_proxy.sh
添加脚本追踪模块到keepalived配置文件
vim /etc/keepalived/keepalived.conf
global_defs {
router_id lb1
}
vrrp_script check_nginx_proxy {
script “/sh/check_nginx_proxy.sh”
interval 2
weight 5
}
vrrp_instance VI_1 {
state MASTER
interface ens33
virtual_router_id 51
priority 100
advert_int 1
authentication {
auth_type PASS
auth_pass 1111
}
virtual_ipaddress {
192.168.1.254
}
track_script {
check_nginx_proxy
}
}
保存退出
重启服务:systemctl restart keepalived
或者,将脚本放到计划任务里
![]()
验证:关闭Nginx,keepalived自动关闭
systemctl stop nginx

配置https
创建密钥见上期文章。
修改Nginx1的配置文件:
vim /etc/nginx/conf.d/blog.conf
        listen 443 ssl;
        server_name blog.benet.com;
	ssl_certificate ssl_key/server.crt;
	ssl_certificate_key ssl_key/server.key;
	root /wordpress;
	index index.php index.html;

        location ~ \.php$ {
        root /wordpress;
        fastcgi_pass 192.168.2.130:9000;
        fastcgi_index index.php;
        fastcgi_param SCRIPT_FILENAME $document_root$fastcgi_script_name;
        include fastcgi_params;
        }
}

server {
	listen 80;
	server_name blog.benet.com;
	rewrite .* https://$server_name$1 redirect;
}
vim /etc/nginx/conf.d/zh.conf
server {
        listen 443 ssl;
        server_name zh.benet.com;
	ssl_certificate ssl_key/server.crt;
	ssl_certificate_key ssl_key/server.key;
        root /zh;
        index index.php index.html;

        location ~ \.php$ {
        root /zh;
        fastcgi_pass 192.168.2.130:9000;
        fastcgi_index index.php;
        fastcgi_param SCRIPT_FILENAME $document_root$fastcgi_script_name;
        include fastcgi_params;
        }
}

server {
	listen 80;
	server_name zh.benet.com;
	rewrite .* https://$server_name$1 redirect;
}
验证:打开客户端,hosts文件修改成漂移地址192.168.2.254,http访问自动跳转https即可
