SpringCloud Config 分布式配置中心
分步式系统面临配置问题:
微服务意味着要将单体应用中的业务拆分成一个个子服务,每个服务的粒度相对较小,因此系统中会出现大量的服务。由于每个服务都需要必要的配置信息才能运行,所以一套集中式的、动态的配置管理设施是必不可少的。
SpringCloud提供了ConfigServer来解决这个问题,我们每一个微服务自己带着一个application.yml,上百个配置文件的管理......

是什么
SpringCloud Config为微服务架构中的微服务提供集中化的外部配置支持,配置服务器为各个不同微服务应用的所有环境提供了一个中心化的外部配置。
怎么玩
SpringCloud Config分为服务端和客户端两部分。
服务端也称为分布式配置中心,它是一个独立的微服务应用,用来连接配置服务器并为客户端提供获取配置信息,加密/解密信息等访问接口
客户端则是通过指定的配置中心来管理应用资源,以及与业务相关的配置内容,并在启动的时候从配置中心获取和加载配置信息配置服务器默认采用git来存储配置信息,这样就有助于对环境配置进行版本管理,并且可以通过git客户端工具来方便的管理和访问配置内容。
Spring Cloud Config https://cloud.spring.io/spring-cloud-static/spring-cloud-config/2.2.1.RELEASE/reference/html/
概述:
集中管理配置文件,不同环境不同配置,动态化的配置更新,分环境部署比如dev/test/prod/beta/release运行期间动态调整配置,不再需要在每个服务部署的机器上编写配置文件,服务会向配置中心统一拉取,配置自己的信息当配置发生变动时,服务不需要重启即可感知到配置的变化并应用新的配置,将配置信息以REST接口的形式暴露,post、curl访问刷新均可......
GitHub整合配置:
由于SpringCloud Config默认使用Git来存储配置文件(也有其它方式,比如支持SVN和本地文件),但最推荐的还是Git,而且使用的是http/https访问的形式。
第一步:
用你自己的账号在GitHub上新建一个名为springcloud-config

第二步创建yml:

可以获取你需要的路径:

本地硬盘目录上新建git仓库并clone:
1、I:\44\SpringCloud
2、git clone [email protected]:zzyybs/springcloud-config.git

Config服务端配置与测试
新建Module模块:cloud-config-center-3344
1.1、pom.xml配置文件
        cloud2022
        com.atguigu.springcloud.HystrixDashboardMain9001
        1.0-SNAPSHOT

    4.0.0

    cloud-config-center-3344


        8
        8


            org.springframework.cloud
            spring-cloud-config-server


            org.springframework.cloud
            spring-cloud-starter-netflix-eureka-client


            org.springframework.boot
            spring-boot-starter-web


            org.springframework.boot
            spring-boot-starter-actuator


            org.springframework.boot
            spring-boot-devtools
            runtime
            true


            org.projectlombok
            lombok
            true


            org.springframework.boot
            spring-boot-starter-test
            test
1.2、添加YAML配置文件
server:
  port: 3344

spring:
  application:
    name: cloud-config-center #注册进Eureka服务器的微服务名
  cloud:
    config:
      server:
        git:
          uri: https://github.com/13450148480/sprincloud-config.git #GitHub上面的git仓库名字
          username: 13450148480
          password: aaa20011213
          skip-ssl-validation: true
          ####搜索目录
          search-paths:
            - springcloud-config
      ####读取分支
      label: main

#服务注册到eureka地址
eureka:
  client:
    register-With-eureka: true
    fetch-registry: true
    service-url:
      defaultZone: http://localhost:7001/eureka
1.3、添加服务中心启动类
@SpringBootApplication
@EnableConfigServer
public class ConfigCenterMain3344 {
    public static void main(String[] args) {
        SpringApplication.run(ConfigCenterMain3344.class, args);
    }
}
1.4、启动项目测试
- 启动模块cloud-eureka-server7001
-
启动本模块3344
测试连接:http://config-3344.com:3344/main/config-dev.yml

上图所示测试成功
Config客户端配置与测试
新建Module模块:cloud-config-client-3355
1.1、pom.xml配置文件
        mscloud
        com.atguigu.springcloud
        1.0-SNAPSHOT

    4.0.0

    cloud-config-client-3355


            org.springframework.cloud
            spring-cloud-starter-config


            org.springframework.cloud
            spring-cloud-starter-netflix-eureka-client


            org.springframework.boot
            spring-boot-starter-web


            org.springframework.boot
            spring-boot-starter-actuator


            org.springframework.boot
            spring-boot-devtools
            runtime
            true


            org.projectlombok
            lombok
            true


            org.springframework.boot
            spring-boot-starter-test
            test
bootstrap.yml介绍:
applicaiton.yml是用户级的资源配置项
bootstrap.yml是系统级的,优先级更加高
Spring Cloud会创建一个“Bootstrap Context”,作为Spring应用的`Application Context`的父上下文。初始化的时候,`Bootstrap Context`负责从外部源加载配置属性并解析配置。这两个上下文共享一个从外部获取的`Environment`。
`Bootstrap`属性有高优先级,默认情况下,它们不会被本地配置覆盖。 `Bootstrap context`和`Application Context`有着不同的约定,所以新增了一个`bootstrap.yml`文件,保证`Bootstrap Context`和`Application Context`配置的分离。
要将Client模块下的application.yml文件改为bootstrap.yml,这是很关键的,
因为bootstrap.yml是比application.yml先加载的。bootstrap.yml优先级高于application.yml
1.2、添加YAML配置文件

server:
  port: 3355

spring:
  application:
    name: config-client
  cloud:
    #Config客户端配置
    config:
      label: master #分支名称
      name: config #配置文件名称
      profile: dev #读取后缀名称   上述3个综合:master分支上config-dev.yml的配置文件被读取http://config-3344.com:3344/master/config-dev.yml
      uri: http://localhost:3344 #配置中心地址k

#服务注册到eureka地址
eureka:
  client:
    service-url:
      defaultZone: http://localhost:7001/eureka
1.3添加服务中心启动类
@EnableEurekaClient
@SpringBootApplication
public class ConfigClientMain3355
{
    public static void main(String[] args)
    {
        SpringApplication.run(ConfigClientMain3355.class,args);
    }
}
1.4、创建基本的业务接口
@RestController
@RefreshScope
public class ConfigClientController {

    @Value("${config.info}")
    private String configInfo;

    @GetMapping("/configInfo")
    public String getConfigInfo()

    {
        return configInfo;
    }
}
1.5、启动项目测试
测试连接:http://localhost:3355/configInfo
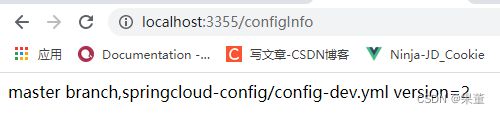
上图测试结果
Config客户端之动态刷新
避免每次更新配置都要重启客户端微服务3355
修改cloud-config-client-3355模块
1.1、pom.xml配置文件加入
    org.springframework.boot
    spring-boot-starter-actuator
1.2、YAML配置文件加入
# 暴露监控端点
management:
  endpoints:
    web:
      exposure:
        include: "*"
1.3、修改业务类
@RestController
@RefreshScope
public class ConfigClientController
{
    @Value("${config.info}")
    private String configInfo;

    @GetMapping("/configInfo")
    public String getConfigInfo() {
        return configInfo;
    }
}
1.4、需要运维人发送Post请求刷新3355
curl -X POST "http://localhost:3355/actuator/refresh"
1.5、启动项目测试
http://localhost:3355/configInfo