TensorRT 8+Ubuntu20.04安装
1、下载TensorRT库
链接:https://developer.nvidia.com/nvidia-tensorrt-8x-download
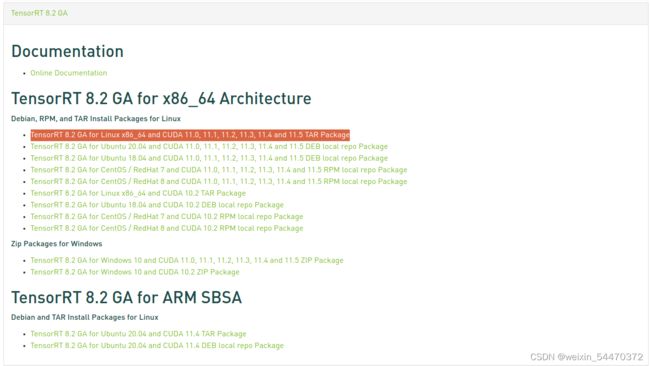
本次下载:TensorRT 8.2 GA for Linux x86_64 and CUDA 11.0, 11.1, 11.2, 11.3, 11.4 and 11.5 TAR Package
下载获得的压缩包文件名:TensorRT-8.2.1.8.Linux.x86_64-gnu.cuda-11.4.cudnn8.2.tar.gz
2、解压缩
(1)选择在opt中解压缩(其他位置也可以)
先移动至/opt文件夹内
sudo cp TensorRT-8.2.1.8.Linux.x86_64-gnu.cuda-11.4.cudnn8.2.tar.gz /opt解压缩(因为是在/opt内,所以需要sudo,其他位置不需要)
sudo tar -zxvf TensorRT-8.2.1.8.Linux.x86_64-gnu.cuda-11.4.cudnn8.2.tar.gz解压缩后通过ls查看opt文件夹,可以发现有一个TensorRT-8.2.1.8文件夹
/opt$ ls
google  TensorRT-8.2.1.8  TensorRT-8.2.1.8.Linux.x86_64-gnu.cuda-11.4.cudnn8.2.tar.gz
3、添加环境变量
添加TensorRT的lib路径,首先
gedit ~/.bashrc将lib路径添加进~/.bsashrc,路径需要根据自身情况进行调整,我的如下:
export LD_LIBRARY_PATH=/opt/TensorRT-8.2.1.8/lib:$LD_LIBRARY_PATH使其生效
source ~/.bashrc4、pip安装对应的TensorRT库
一定要使用pip本地安装tar附带的whl包
查看TensorRT-8.2.1.8文件夹内部
/opt/TensorRT-8.2.1.8$ ls
bin   doc           include  onnx_graphsurgeon  samples  TensorRT-Release-Notes.pdf
data  graphsurgeon  lib      python             targets  uff
切换到python目录
cd python查看python文件夹内部
/opt/TensorRT-8.2.1.8/python$ ls
tensorrt-8.2.1.8-cp36-none-linux_x86_64.whl  tensorrt-8.2.1.8-cp38-none-linux_x86_64.whl
tensorrt-8.2.1.8-cp37-none-linux_x86_64.whl  tensorrt-8.2.1.8-cp39-none-linux_x86_64.whl
有4个对应不同python版本的whl文件
进入需要的conda环境中
conda activate py36pip安装对应的TensorRT库,环境是python3.6.7,故选择cp36的whl文件
pip3 install tensorrt-8.2.1.8-cp36-none-linux_x86_64.whl见到successfully installed即安装成功
/opt/TensorRT-8.2.1.8/python$ pip3 install tensorrt-8.2.1.8-cp36-none-linux_x86_64.whl
Processing ./tensorrt-8.2.1.8-cp36-none-linux_x86_64.whl
Installing collected packages: tensorrt
Successfully installed tensorrt-8.2.1.8
5、测试
进入python环境尝试import
/opt/TensorRT-8.2.1.8/python$ python
Python 3.6.7 | packaged by conda-forge | (default, Mar  4 2020, 16:55:12)
[GCC 7.3.0] on linux
Type "help", "copyright", "credits" or "license" for more information.
>>> import tensorrt
没有报错,即python接口没有问题
参考:
TensorRT 8.2.1.8 安装笔记(超全超详细)|Docker 快速搭建 TensorRT 环境 - 知乎
