带着问题阅读Vue-router源码并从0到1实现迷你版vue-router
概览
- router执行流程概览
- 插件是怎么安装到vue的
- 为啥router-view能显示内容
- 怎么监听路由的变化
- 监听到了路由变化之后怎么渲染对应的组件
- 动手打造一个迷你版vue-router
-
- simple-vue-router 代码
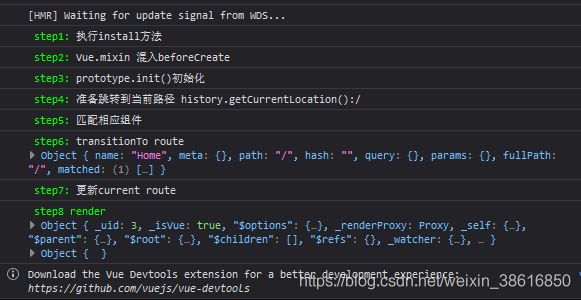
router执行流程概览
这里的流程是个大概的过程 为了方便理解 忽略细节
下图是初始化时的过程
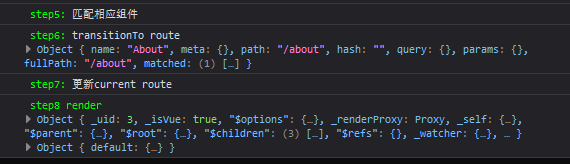
切换组件时
插件是怎么安装到vue的
Vue.use实际上是执行了插件内部的install方法,vue的生态都是如此。
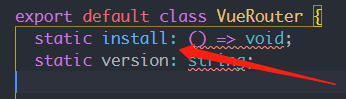
vue-router对象上的静态方法
install 执行了一个混入 在vue上定义了xxx一堆变量
劫持了_route 让这个变量变成了响应式 (router-view组件会访问到)
Vue.util.defineReactive(this, '_route', this._router.history.current) 这就是updateRoute 为什么可以render的原因
  Vue.mixin({
    beforeCreate () {
      if (isDef(this.$options.router)) {
        this._routerRoot = this //指向了vue的实例
        this._router = this.$options.router //指向了VueRouter的实例
        this._router.init(this)
        Vue.util.defineReactive(this, '_route', this._router.history.current)
      } else {
        this._routerRoot = (this.$parent && this.$parent._routerRoot) || this
      }
      registerInstance(this, this)
    },
    destroyed () {
      registerInstance(this)
    }
  })
在vue原型上绑定了 两个只读的属性 方便在全局能够访问到 (能用这两个变量的原因)
  Object.defineProperty(Vue.prototype, '$router', {
    get () { return this._routerRoot._router }
  })

  Object.defineProperty(Vue.prototype, '$route', {
    get () { return this._routerRoot._route }
  })
在vue上注册了两个组件 这就是自带的路由组件router-view 和 router-link
 Vue.component('RouterView', View)
 Vue.component('RouterLink', Link)
为啥router-view能显示内容
router-view里面 有一大堆东西都是在keep alive相关,除此之外

最后实际上 router-view就是一个渲染的容器 利用createElement这个函数生成vnode
// @returns {VNode}
createElement(
// {String | Object | Function}
// 一个 HTML 标签名、组件选项对象,或者
// resolve 了上述任何一种的一个 async 函数。必填项。
'div',
// {Object}
// 一个与模板中 attribute 对应的数据对象。可选。
{
// (详情见下一节)
},
// {String | Array}
// 子级虚拟节点 (VNodes),由 `createElement()` 构建而成,
// 也可以使用字符串来生成“文本虚拟节点”。可选。
[
'先写一些文字',
createElement('h1', '一则头条'),
createElement(MyComponent, {
props: {
someProp: 'foobar'
}
})
]
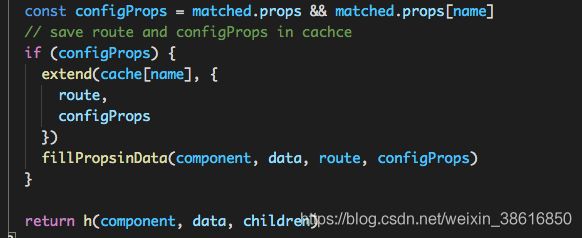
)
备注:下面代码是加上去的 源码是h()

怎么监听路由的变化
源码中三个简单工厂 对应着三种路由方式
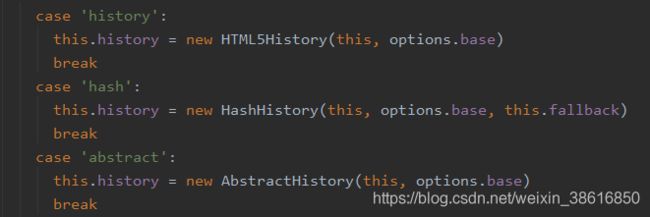
看最熟悉的hashHistory() (其他两个也是)继承自History
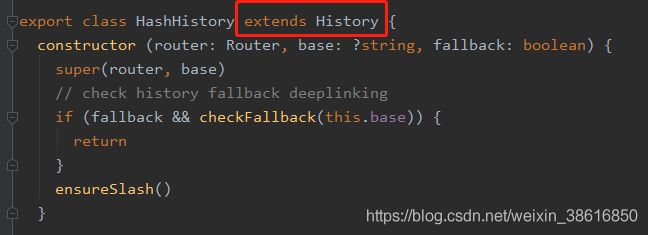
查看构造函数 其中传入的base 就是我们传入的基础路径 “/”
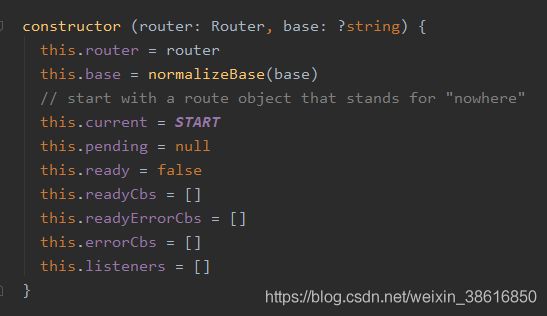
其中的 this.current是START

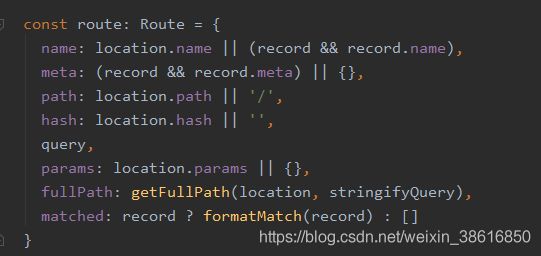
从这里我们可以看到route的结构
在history基类中没有找到 监听的方法。去找hashHistory可以找到
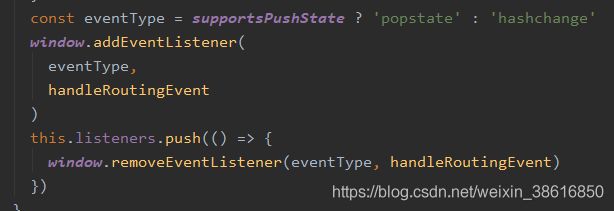
如果popstate可用就监听popstate 如果不可用 就监听hashchange
以下是mdn上对于这两个事件的描述
- popstate
当活动历史记录条目更改时,将触发popstate事件。如果被激活的历史记录条目是通过对history.pushState()的调用创建的,或者受到对history.replaceState()的调用的影响,popstate事件的state属性包含历史条目的状态对象的副本。
需要注意的是调用history.pushState()或history.replaceState()不会触发popstate事件。只有在做出浏览器动作时,才会触发该事件,如用户点击浏览器的回退按钮(或者在Javascript代码中调用history.back()或者history.forward()方法)
不同的浏览器在加载页面时处理popstate事件的形式存在差异。页面加载时Chrome和Safari通常会触发(emit )popstate事件,但Firefox则不会。
- hashchange
当URL的片段标识符更改时,将触发hashchange事件 (跟在#符号后面的URL部分,包括#符号)
监听到了路由变化之后怎么渲染对应的组件
监听触发的函数
    const handleRoutingEvent = () => {
      const current = this.current
      if (!ensureSlash()) {
        return
      }
      this.transitionTo(getHash(), route => {
        if (supportsScroll) {
          handleScroll(this.router, route, current, true)
        }
        if (!supportsPushState) {
          replaceHash(route.fullPath)
        }
      })
    }
ensureSlash 确保/
就是如果你输入了 xxxx#home 会自动去访问xxx#/home
getHash 就是获得hash
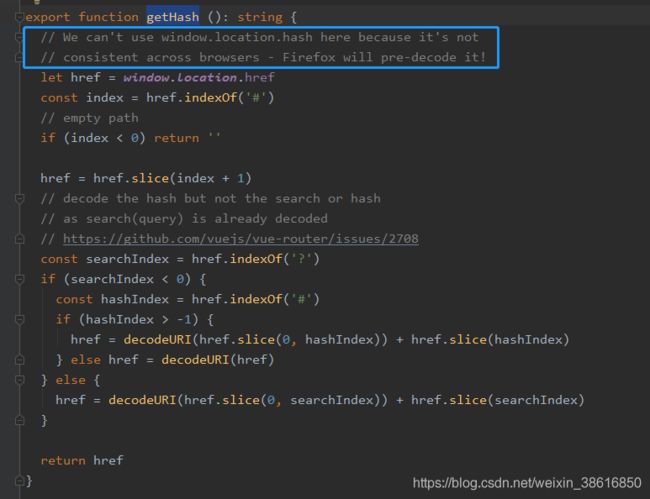
这里 源码中有个细节
我们不能直接使用
window.location.hash去拿因为火狐会预先decode
this.transitionTo : 关键似乎在这个方法上 这个方法继承自 History
  transitionTo (
    location: RawLocation,
    onComplete?: Function,
    onAbort?: Function
  ) {
    const route = this.router.match(location, this.current)
    this.confirmTransition(
      route,
      () => {
        const prev = this.current
        this.updateRoute(route)
        onComplete && onComplete(route)
        this.ensureURL()
        this.router.afterHooks.forEach(hook => {
          hook && hook(route, prev)
        })

        // fire ready cbs once
        if (!this.ready) {
          this.ready = true
          this.readyCbs.forEach(cb => {
            cb(route)
          })
        }
      },
      err => {
        if (onAbort) {
          onAbort(err)
        }
        if (err && !this.ready) {
          this.ready = true
          this.readyErrorCbs.forEach(cb => {
            cb(err)
          })
        }
      }
    )
  }
这个方法有两个比较重要的地方
const route = this.router.match(location, this.current) - 用来匹配路由 找出对应组件
this.updateRoute(route) - 更新路由 触发响应(忘记了可以看下开头) 从而触发渲染组件
match过程可以简单理解成 一个routerMap 去找里面的key一样
updateRoute看源码 非常容易理解
History.prototype.updateRoute = function updateRoute (route) {
  this.current = route;
  console.log('%c step7:','color:lime','更新current route')
  this.cb && this.cb(route);
};
到这里其实整个过程就已经完成了(这里没有讲到钩子函数,keep alive,页面滚动 )
动手打造一个迷你版vue-router
最终实现的效果

import Vue from 'vue'
import VueRouter from '../simple-vue-router/index'
import Home from '../views/Home.vue'
import About from '../views/About.vue'
Vue.use(VueRouter)
  const routes = [
  {
    path: '/',
    name: 'Home',
    component: Home
  },
  {
    path: '/about',
    name: 'About',
    component: About
  }
]

const router = new VueRouter({
  routes
})

export default router
simple-vue-router 代码
这个代码比较简单 就不做说明了
let _Vue;

export default class SimpleVueRouter {

    static install(Vue) {

        _Vue = Vue;

        Vue.mixin({
            beforeCreate() {
                if (this.$options.router) {
                    this._routerRoot = this;
                    this._router = this.$options.router;
                    this._router.init();
                }
            }
        })

        //只能读 不能改
        Object.defineProperty(Vue.prototype, '$router', {
            get() {
                return this._routerRoot._router
            }
        })

        //只能读 不能改
        Object.defineProperty(Vue.prototype, '$route', {
            get() {
                return this._routerRoot._route
            }
        })

    }

    constructor(options) {
        this.$options = options;
        this.app = new _Vue({
            data: {
                current: '/'
            }
        });
        this.mode = options.mode || 'hash';
        this.routes = options.routes;
        this.routerMap = {};
    }

    init() {
        this.setUpListener()
        this.createRouterMap()
        _Vue.component('RouterView', {
            render: h => {
                const component = this.routerMap[this.app.current].component;
                return h(component)
            }
        })
        _Vue.component('RouterLink', {
            props: {
                to: String,
            },
            render(h){
                return h('a', {
                    attrs: {
                        href: "#" + this.to
                    }
                }, [this.$slots.default])
            },
        })
    }

    setUpListener() {
        window.addEventListener('hashchange', (e) => {
            this.onhashchange()
        })
    }

    createRouterMap() {
        this.$options.routes.forEach(item => {
            this.routerMap[item.path] = item;
        })
    }

    onhashchange() {
        console.log(window.location.hash)
        const hash = window.location.hash.slice(1) || '/'
        this.app.current = hash
    }
}