小白入门ROS -机器人仿真(1)
ROS机器人仿真
- 1.机器人URDF模型优化
- 2.ArbotiX+rviz功能仿真
- ★3.Gazebo物理仿真环境搭建
1.机器人URDF模型优化

xacro模型文件(URDF模型的进化版本)

(1)精简模型代码
- 创建宏定义
- 文件包含
(2)提供可编程接
- 常量
- 变量
- 数学计算
- 条件语句
常量定义
常量定义:
<xacro:property name="M_PI" value="3.14159"/>

常量使用
<origin xyz="0 0 0" rpy="${M_PI/2} 0 0"/>
示例:
常量定义:

    <xacro:property name="M_PI" value="3.1415926"/>
    <xacro:property name="base_mass"   value="20" />
    <xacro:property name="base_radius" value="0.20"/>
    <xacro:property name="base_length" value="0.16"/>

    <xacro:property name="wheel_mass"   value="2" />
    <xacro:property name="wheel_radius" value="0.06"/>
    <xacro:property name="wheel_length" value="0.025"/>
    <xacro:property name="wheel_joint_y" value="0.19"/>
    <xacro:property name="wheel_joint_z" value="0.05"/>

    <xacro:property name="caster_mass"    value="0.5" />
    <xacro:property name="caster_radius"  value="0.015"/>
    <xacro:property name="caster_joint_x" value="0.18"/>

常量使用:
<joint name="base_footprint_joint" type="fixed">
            <origin xyz="0 0 ${base_length/2 + caster_radius*2}" rpy="0 0 0" />
            <parent link="base_footprint"/>
            <child link="base_link" />
        joint>

        <link name="base_link">
            <visual>
                <origin xyz=" 0 0 0" rpy="0 0 0" />
                <geometry>
                    <cylinder length="${base_length}" radius="${base_radius}"/>
                geometry>
                <material name="yellow" />
            visual>
            <collision>
                <origin xyz=" 0 0 0" rpy="0 0 0" />
                <geometry>
                    <cylinder length="${base_length}" radius="${base_radius}"/>
                geometry>
            collision>
            <cylinder_inertial_matrix  m="${base_mass}" r="${base_radius}" h="${base_length}" />
        link>
数学计算

宏定义

文件包含

模型显示

2.ArbotiX+rviz功能仿真

(1)安装ArbotiX
melodic:
sudo apt-get install ros-melodic-arbotix-*
(2)配置ArbotiX控制器
step1:创建launch文件
# arbotix_mbot_with_camera_xacro.launch

<launch>
	<arg name="model" default="$(find xacro)/xacro --inorder '$(find mbot_description)/urdf/xacro/mbot_with_camera.xacro'" />
	<arg name="gui" default="false" />

	<param name="robot_description" command="$(arg model)" />


	<param name="use_gui" value="$(arg gui)"/>

	<node name="arbotix" pkg="arbotix_python" type="arbotix_driver" output="screen">
        <rosparam file="$(find mbot_description)/config/fake_mbot_arbotix.yaml" command="load" />
        <param name="sim" value="true"/>
    node>


	<node name="joint_state_publisher" pkg="joint_state_publisher" type="joint_state_publisher" />


	<node name="robot_state_publisher" pkg="robot_state_publisher" type="robot_state_publisher" />


	<node name="rviz" pkg="rviz" type="rviz" args="-d $(find mbot_description)/config/mbot_arbotix.rviz" required="true" />

launch>
step2:创建配置文件
# fake_mbot_arbotix.yaml

controllers: {
   base_controller: {
       type: diff_controller,
       base_frame_id: base_footprint,
       base_width: 0.26,
       ticks_meter: 4100,
       Kp: 12,
       Kd: 12,
       Ki: 0,
       Ko: 50,
       accel_limit: 1.0
    }
}
step3:启动仿真器
roslaunch mbot_description arbotix_mbot_with_camera_xacro.launch

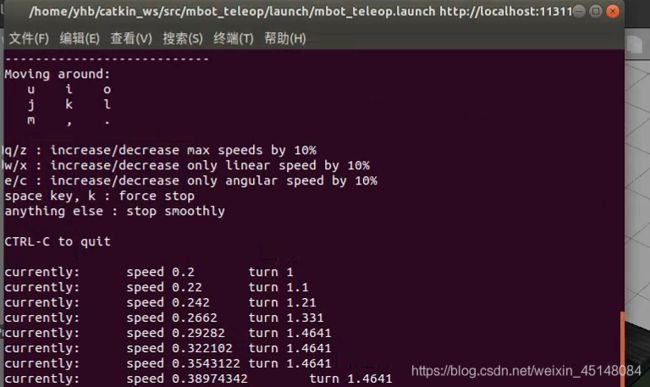
step4:启动键盘控制
roslaunch mbot_teleop mbot_teleop.launch


★3.Gazebo物理仿真环境搭建
(1)ros_control


(2)仿真步骤
- 1.配置机器人模型
step1:为link添加惯性参数 和 碰撞属性
<xacro:macro name="cylinder_inertial_matrix" params="m r h">
<inertial>
<mass value="${m}" />

step2:为link添加gazebo标签
        <gazebo reference="${prefix}_wheel_link">
            <material>Gazebo/Graymaterial>
        gazebo>


        <gazebo reference="${prefix}_caster_link">
            <material>Gazebo/Blackmaterial>
        gazebo>


        <gazebo reference="base_footprint">
            <turnGravityOff>falseturnGravityOff>
        gazebo>


        <gazebo reference="base_link">
            <material>Gazebo/Bluematerial>
        gazebo>
step3:为joint添加传动装置 (transmission标签)
        <transmission name="${prefix}_wheel_joint_trans">
            <type>transmission_interface/SimpleTransmissiontype>
            <joint name="${prefix}_wheel_joint" >
                <hardwareInterface>hardware_interface/VelocityJointInterfacehardwareInterface>
            joint>
            <actuator name="${prefix}_wheel_joint_motor">
                <hardwareInterface>hardware_interface/VelocityJointInterfacehardwareInterface>
                <mechanicalReduction>1mechanicalReduction>
            actuator>
        transmission>
step4:添加gazebo控制器插件

        <gazebo>
            <plugin name="differential_drive_controller"
                    filename="libgazebo_ros_diff_drive.so">
                <rosDebugLevel>DebugrosDebugLevel>
                <publishWheelTF>truepublishWheelTF>
                <robotNamespace>/robotNamespace>
                <publishTf>1publishTf>
                <publishWheelJointState>truepublishWheelJointState>
                <alwaysOn>truealwaysOn>
                <updateRate>100.0updateRate>
                <legacyMode>truelegacyMode>
                <leftJoint>left_wheel_jointleftJoint>
                <rightJoint>right_wheel_jointrightJoint>
                <wheelSeparation>${wheel_joint_y*2}wheelSeparation>
                <wheelDiameter>${2*wheel_radius}wheelDiameter>
                <broadcastTF>1broadcastTF>
                <wheelTorque>30wheelTorque>
                <wheelAcceleration>1.8wheelAcceleration>
                <commandTopic>cmd_velcommandTopic>
                <odometryFrame>odomodometryFrame>
                <odometryTopic>odomodometryTopic>
                <robotBaseFrame>base_footprintrobotBaseFrame>
            plugin>
        gazebo>
- 2.★创建仿真环境
在gazebo中加载机器人模型:
view_mbot_gazebo_empty_world.launch
# 模板一定要会套用 #

<launch>


    <arg name="paused" default="false"/>
    <arg name="use_sim_time" default="true"/>
    <arg name="gui" default="true"/>
    <arg name="headless" default="false"/>
    <arg name="debug" default="false"/>


    <include file="$(find gazebo_ros)/launch/empty_world.launch">
        <arg name="debug" value="$(arg debug)" />
        <arg name="gui" value="$(arg gui)" />
        <arg name="paused" value="$(arg paused)"/>
        <arg name="use_sim_time" value="$(arg use_sim_time)"/>
        <arg name="headless" value="$(arg headless)"/>
    include>


    <param name="robot_description" command="$(find xacro)/xacro --inorder '$(find mbot_description)/urdf/xacro/gazebo/mbot_gazebo.xacro'" />


    <node name="joint_state_publisher" pkg="joint_state_publisher" type="joint_state_publisher" >node>


    <node name="robot_state_publisher" pkg="robot_state_publisher" type="robot_state_publisher"  output="screen" >
        <param name="publish_frequency" type="double" value="50.0" />
    node>


    <node name="urdf_spawner" pkg="gazebo_ros" type="spawn_model" respawn="false" output="screen"
          args="-urdf -model mrobot -param robot_description"/>

launch>

- 3.开始仿真
roslaunch mbot_gazebo view_mbot_gazebo_empty_world.launch


下载
创建仿真环境的两种方法
- 方法一:直接添加环境模型
- 方法二:使用Building Editor


roslaunch mbot_gazebo view_mbot_gazebo_play_ground.launch

rostopic list

roslaunch mbot_teleop mbot_teleop.launch
查询机器人位置:
rostopic echo /odom
